DIY mirror frame adds a touch of elegance to any room. Discover 30 DIY mirror frame ideas for every style and budget. Whether you prefer a painted finish, want to try a decoupage technique, or wish to embellish with flair, there’s something for every style and budget.
But what should you do if common issues arise during your project? Troubleshooting problems like paint not adhering, uneven decoupage, or loose embellishments can save your DIY mirror frame. And don’t forget to maintain your masterpiece with regular cleaning and periodic check-ups.
Ready to dive into the world of DIY mirror frames? Let’s explore maintenance tips, FAQs, and creative ideas together.
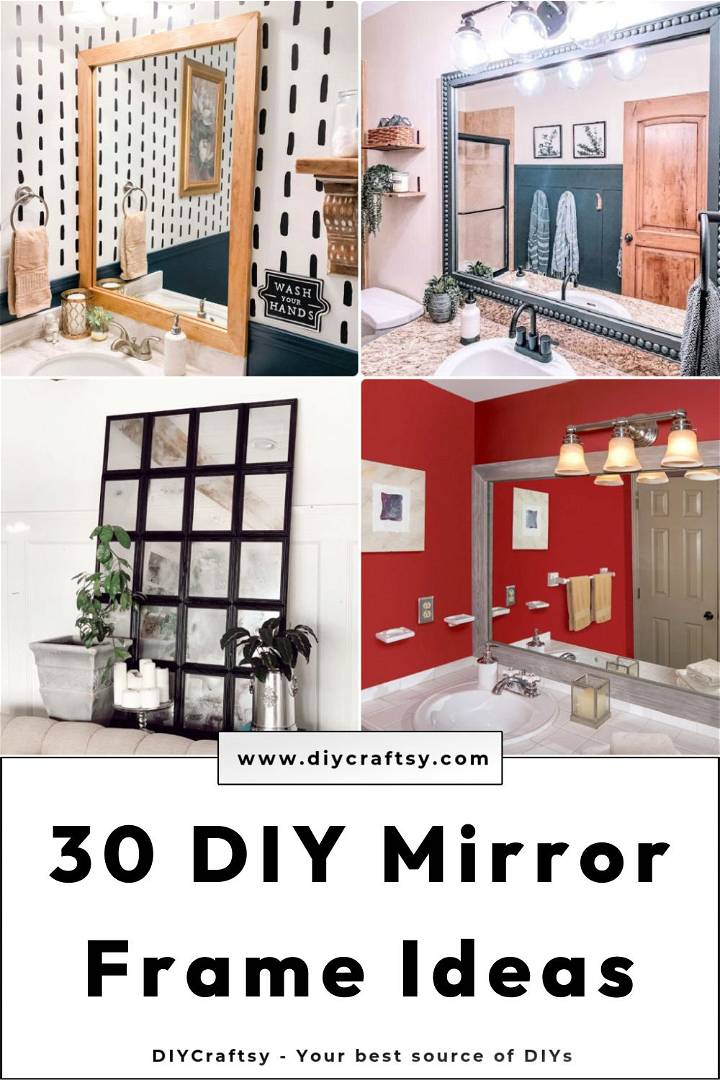
How to Make a Mirror Frame – Step by Step Guide
Making a custom mirror frame for your home doesn’t have to be a daunting task. With just a few tools, some patience, and a little creativity, you can transform a plain mirror into a stylish addition to any room. Follow this step-by-step guide to easily make a custom mirror frame that fits your space and taste perfectly.
What You’ll Need
- Tape measure
- Screwdriver
- Drill and drill bits
- Marking pencil
- Adhesive (e.g., Fuse it by Liquid Nails, but other brands like Gorilla Glue also work)
- Four 2.5-inch flat corner braces
- Black spray paint (a hammered texture type is recommended for a rustic look)
- 1-by-4 pressure-treated lumber
- Miter saw
- Sandpaper (220 grit and a heavier grit)
- Clean towel or air gun
- Wood stain (of your choice)
- Lint-free cloth or an old, clean, lint-free t-shirt for staining
- Protective plastic or newspapers for work area
- Optional: Lock washers for additional mirror support
Instructions
- Measure Your Mirror: Start by measuring your mirror horizontally and vertically. Add an extra inch to each side to decide the length of wood you’ll need.
- Prepare Your Wood: Buy 1-by-4 pressure-treated lumber according to your measurements. If you’re unable to cut the wood yourself, most hardware stores will make cuts for you. Use a miter saw to cut a 45-degree angle on both ends of each piece of wood; these angles will form the corners of your frame.
- Sand the Wood: Before staining, sand all surfaces of your wood with 220-grit sandpaper, moving to a heavier grit if you encounter rough patches or imperfections. Remember to sand the edges and ends as well.
- Stain the Wood: Wipe the wood clean of any sawdust before applying stain. Use a lint-free cloth and apply the stain in the direction of the wood grain. Apply as many coats as needed to achieve your desired color, allowing it to dry thoroughly between coats.
- Prepare the Corner Braces: While the wood is drying, prepare your flat corner braces by painting them with black spray paint. This will give them a rustic look that complements your frame. Remember to also paint the screw ends but not the threads.
- Assemble the Frame: Once the stained wood is dry, arrange the pieces on a flat surface to form your frame, ensuring the corners match up correctly. Then, move to a well-ventilated area or garage for the assembly.
- Attach the Frame to the Mirror: Apply the adhesive in a wave pattern about 2/3 of the width of the wood, avoiding the very edge to prevent it from being seen in the mirror reflection. Begin with the bottom piece, then secure the sides and top, applying pressure until the glue sets. Switching to a quick-set adhesive like Fuse it can speed up this process significantly.
- Secure the Frame with Braces: Once the glue has dried sufficiently, attach the flat corner braces to each corner of the frame using the pre-drilled holes and provided screws for extra stability.
- Final Touches: Check the entire frame for any missed spots or edges that may need additional staining or touch-ups.
Your custom mirror frame is now complete and ready to enhance the aesthetic of your space!
Video Tutorial
For a step-by-step video tutorial on how to easily make a custom mirror frame, watch this YouTube video.
It pairs well with this written guide, enriching your understanding of the process with visual explanations that make following along a breeze.
This guide aims to demystify the process of making a custom mirror frame, making it accessible for DIY enthusiasts of any skill level.
Customization Ideas for Your DIY Mirror Frame
Making a DIY mirror frame is not just about functionality; it’s also an opportunity to express your personal style and add a unique touch to your home decor. Here are some creative ideas to inspire your project:
Paint It Up
- Bold Colors: Make a statement with a frame in a bold color that contrasts with your wall. Think bright reds, deep blues, or even a vibrant yellow.
- Soft Pastels: For a more subdued look, opt for pastels. Soft pinks, baby blues, and mint greens can make a calming atmosphere.
- Metallics: Add some glamour with metallic paints. Gold, silver, or copper can bring a luxurious feel to any room.
Decoupage Delight
- Patterned Paper: Use patterned paper to cover your frame. From floral to geometric designs, the possibilities are endless.
- Fabric: Wrap your frame in fabric for a textured look. Choose a pattern that complements your room’s decor.
- Maps: For a travel-themed room, cover your frame with old maps. It’s both stylish and personal.
Embellish and Adorn
- Beads and Sequins: Glue on beads or sequins for a bit of sparkle. This works especially well for a frame in a girl’s bedroom or a festive space.
- Shells and Stones: For a beachy vibe, decorate your frame with shells or pebbles. It’s a great way to remember a special trip to the shore.
- Nature’s Touch: Pressed flowers or leaves can give your frame an organic, natural look. This is perfect for a country-style home or a nature lover’s retreat.
By using these ideas, you can turn a mirror into art that shows your style and improves your space. Just have fun and let your creativity shine!
Troubleshooting Common Issues with DIY Mirror Frames
When crafting a DIY mirror frame, you might encounter a few hiccups along the way. Here’s how to tackle some common issues:
Problem: Paint Not Adhering
Solution: Ensure the frame is clean and sanded before painting. Use a primer suitable for the frame’s material.
Problem: Uneven Decoupage
Solution: Apply the glue evenly and smooth out the paper or fabric to prevent air bubbles.
Problem: Loose Embellishments
Solution: Use a strong adhesive and allow it to cure fully. For heavier items, consider additional support like wire or nails.
Maintenance Tips for Your DIY Mirror Frame
To keep your mirror frame looking its best, follow these simple maintenance tips:
Regular Cleaning
- Dusting: Gently dust the frame with a soft cloth to avoid scratching the surface.
- Glass Care: Use a glass cleaner and a lint-free cloth for the mirror to avoid streaks.
Periodic Check-ups
- Inspect: Look for any signs of wear or damage periodically and address them promptly.
- Tighten: If your frame has any fittings or attachments, make sure they are tight and secure.
By following these tips, your DIY mirror frame will stay beautiful and durable. Patience and attention to detail are essential.
FAQs About DIY Mirror Frames
When embarking on a DIY mirror frame project, you may have several questions. Here are answers to some of the most commonly asked questions to help you get started:
What materials do I need for a DIY mirror frame?
You’ll need the mirror itself, materials for the frame (like wood, metal, or plastic), adhesive, paint or decorations, and tools for cutting and assembling.
How do I choose the right size for my mirror frame?
Measure the mirror and decide on the width of the frame. Add the width of the frame to the dimensions of the mirror to get the overall size.
Can I use reclaimed wood for my frame?
Absolutely! Reclaimed wood adds character and is an eco-friendly option. Just ensure it’s clean and free from pests.
What’s the best adhesive for attaching the frame to the mirror?
A strong, clear adhesive made for glass and the material of your frame is best. Epoxy or silicone-based adhesives are good choices.
How can I ensure my frame is securely attached to the wall?
Use appropriate wall anchors for the weight of your mirror, and ensure the frame has a sturdy backing to support the mirror.
Can I make a frame without any woodworking skills?
Yes, you can use pre-made frame pieces or alternative materials like foam board or molding that don’t require woodworking tools.
How do I protect the frame from moisture in the bathroom?
Seal the frame with a waterproof sealant and ensure there’s adequate ventilation in the bathroom to reduce humidity.
What are some eco-friendly materials I can use for my frame?
Bamboo, recycled plastic, or repurposed items from around your home can be great eco-friendly options.
How can I add lighting to my mirror frame?
LED strip lights can be attached to the back or the sides of the frame for a modern look and extra illumination.
What should I do if the frame starts to chip or peel?
Sand the affected area lightly and apply a fresh coat of paint or sealant to the frame to restore its appearance.
By remembering these FAQs, you’ll be ready to tackle your DIY mirror project with confidence and creativity. Enjoy the process and make something you’ll love.
30 DIY Mirror Frame Ideas for Every Style
Discover 30 DIY mirror frame ideas for every style, from rustic to modern. Learn how to personalize your mirrors with these creative projects.
1. How to Frame a Bathroom Mirror
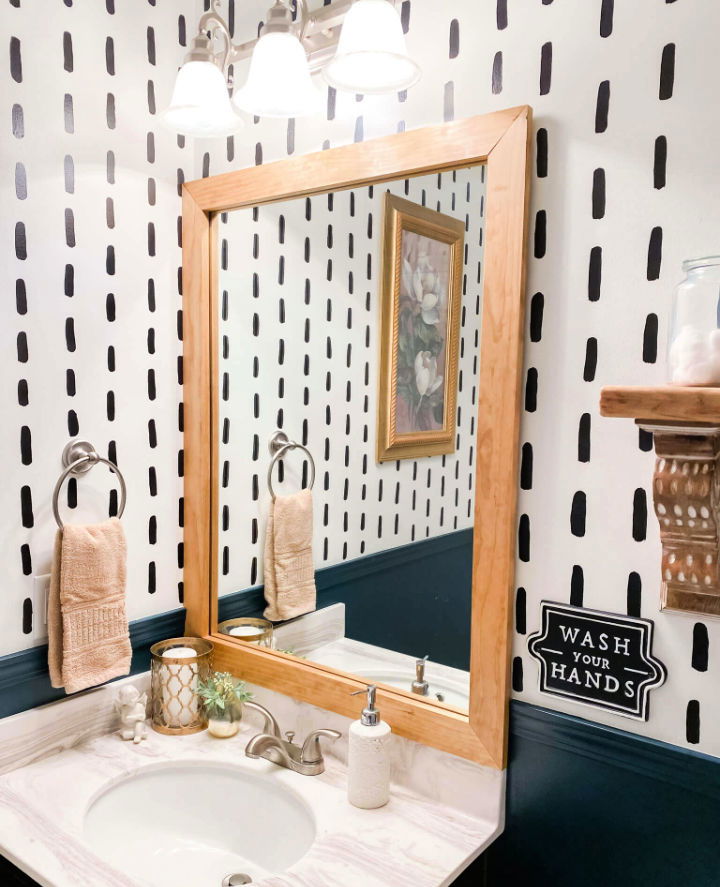
Add elegance to your bathroom with an easy DIY mirror frame. You can transform any builder-grade mirror into a bespoke masterpiece using simple materials like Loctite PL 530 Mirror adhesive, select pine boards, and creativity.
This straightforward project doesn’t just provide an aesthetic upgrade, but it also allows you to personalize your space at a minimal cost. Follow the uncomplicated instructions – build the frame, stain, seal, add adhesive, and place your mirror – and you’ll have a custom-framed mirror in no time.
Upgrade your bathroom and embrace your inner craftsman with this simple yet impactful DIY. Let the charm of your personality reflect in every corner of your home. ahostinghome
2. Rustic DIY Large Mirror Frame
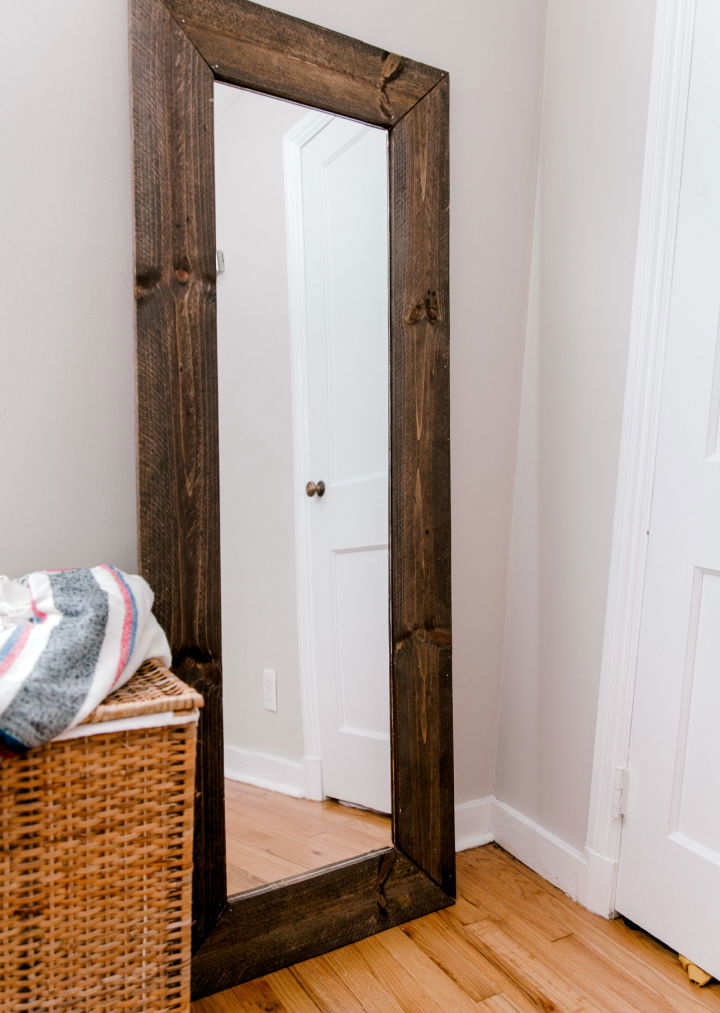
Explore the timeless charm of a DIY rustic mirror frame, a project that rejuvenates your interior with the warmth of wood. The transformation of an old mirror into a beautiful rustic piece is straightforward and affordable, turning discarded items into the cherished decor.
Essential materials include an old mirror, laminate underlayment, clear silicone, pressure-treated pine dog-ear fence pickets, and Minwax stain. Common tools like gloves, a miter saw, and a hammer complete your toolbox for this task.
The creation process involves careful measurements, cutting and aligning pickets, and securing them with wood glue. This project is simple, yet the outcome is a stunning home décor element. Enjoy the satisfaction of turning a $3 mirror into an invaluable piece of art that enhances your home’s rustic appeal! ifonlyapril
3. Farmhouse Style Mirror Frame on a Budget
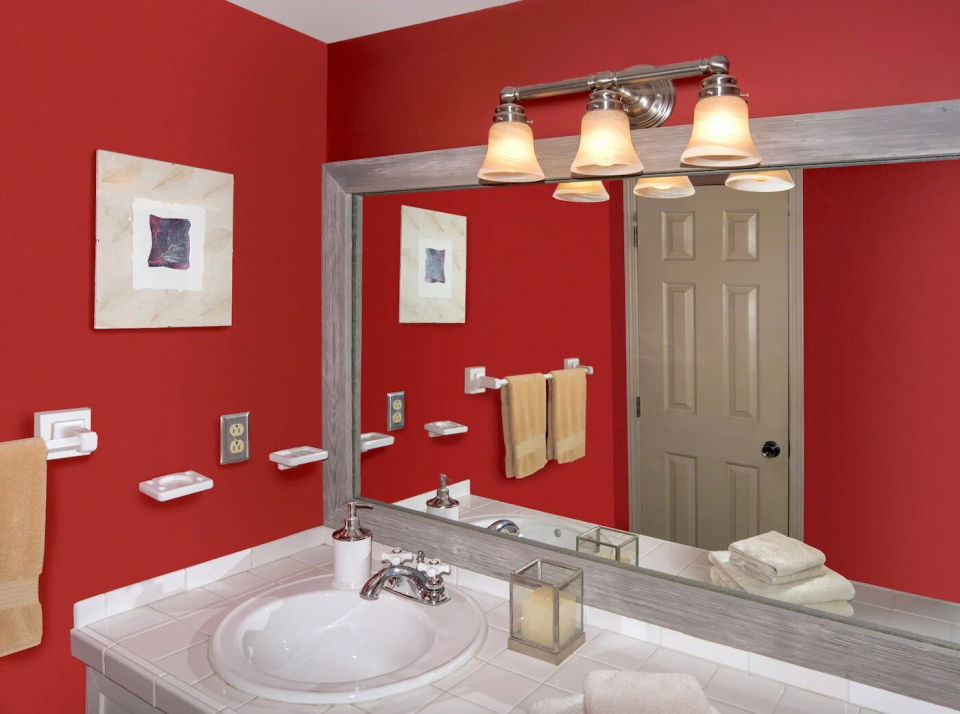
Personalize your mirrors with creative and budget-friendly DIY mirror frame ideas for every style. Bring a rustic appeal to your bathroom with a DIY farmhouse-style mirror frame. Elevate the look of an ordinary clip mirror with simple woodworking skills and a miter saw. This project is an inexpensive yet effective way to refresh your bathroom aesthetic for just $25!
The frame made of faux barnwood provides an authentic farmhouse look, and its easy assembly makes it the perfect woodworking project. It adds charm to the bathroom, and the removable frame allows you to switch styles. Don’t let boring bathroom mirrors hold you back; transform them with a personalized, farmhouse-style touch today. diycandy
4. Antiqued Panelled Mirror Frame Design
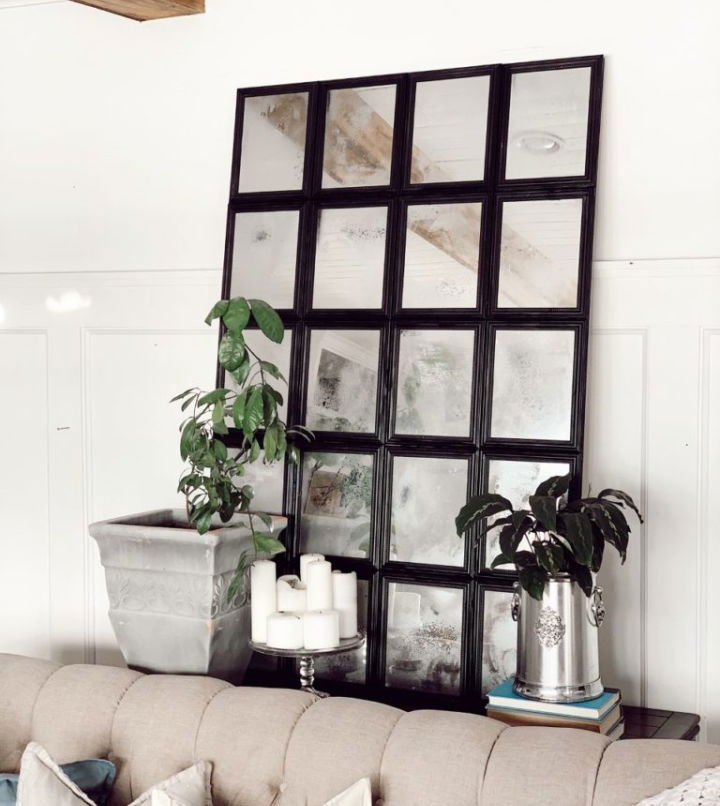
Discover the simple elegance of an antique mirror panel without the lofty price tag with this guide. For those yearning to incorporate a touch of old-world charm into their spaces, a DIY paneled antique mirror is an affordable, accessible, and engaging project. This endeavor costs around $30 and allows you to make an appealing, sturdy mirror panel that mirrors the grandeur of expensive alternatives.
This project involves transforming dollar store framed mirrors using various supplies such as heavy-duty glue, plywood, and spray paint. The final result is a stunning antique mirror that becomes a focal point in your space and expresses your creativity and resourcefulness.
It is a perfect project for an afternoon that offers a practical, budget-friendly alternative to expensive store-bought pieces while giving you a rewarding DIY experience. Enjoy the beauty of an antique mirror, lovingly crafted by your own hands, in your living space today. thislittleestate
5. Easy DIY Bathroom Mirror Frame
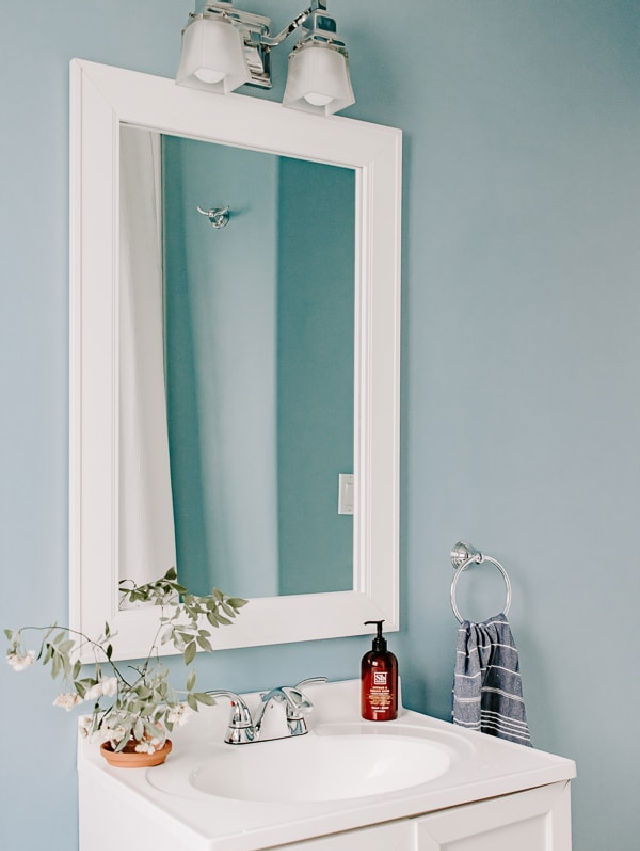
Spruce up your home’s aesthetic with a DIY bathroom mirror frame idea. Elevate the appeal of your bathroom, transforming a dull, builder-grade mirror into a stunning centerpiece with easy-to-use mirror kits. Frame My Mirror offers an array of custom-fit frames in various styles and colors, allowing you to find the one that perfectly matches your bathroom’s style.
The process is simple, requiring just a few measurements and a hammer. The frame assembles quickly and adheres securely to your mirror, bringing an immediate, dramatic change to your bathroom’s look. This project is worth considering if you aim for a quick, easy, cost-effective bathroom upgrade. decorhint
6. Make a Gold Parisian Mirror Frame
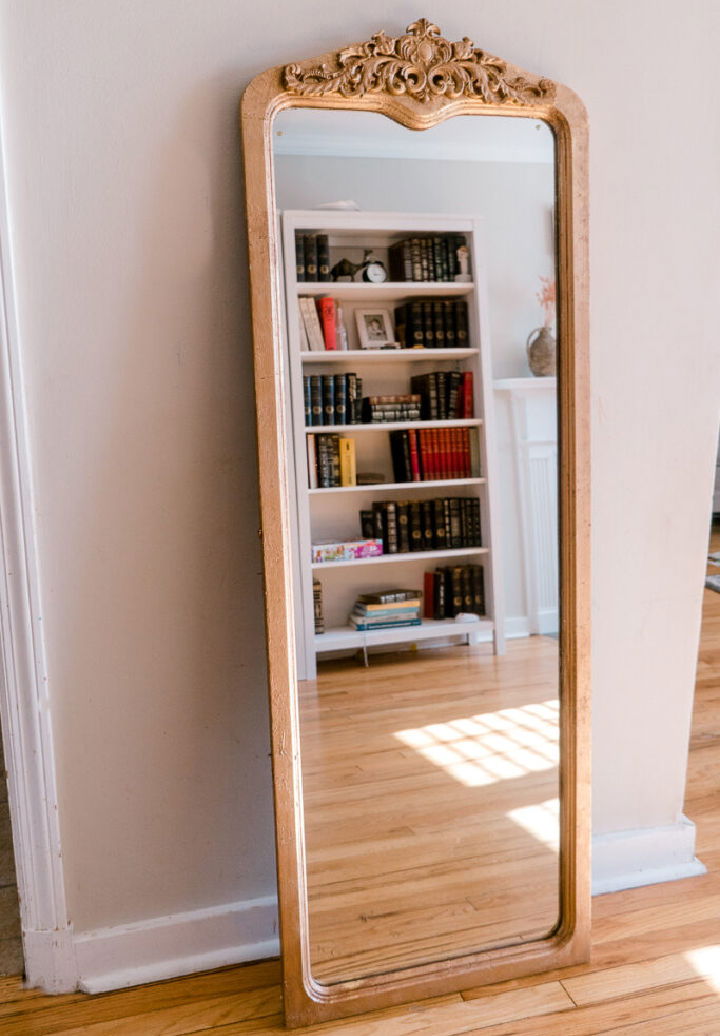
Unearth the inner artist in you with a DIY project that turns an average mirror into a stunning gold Parisian masterpiece. Starting with a thrifted, floor-sized mirror, this venture guides you through the transformation process. By learning the art of applying gold leaf sheets to wooden surfaces, you’ll rejuvenate a drab mirror frame into a splendid work of art.
You’ll also gain insights into selecting appropriate gold leaf imitations, using mod podge as an effective adhesive, and applying a protective layer to enhance longevity.
The outcome is an elegant and unique gold Parisian mirror frame, an exquisite décor piece that can amplify any room’s charm without burning a hole in your pocket. So why not salvage an old mirror and embark on this creative journey today? ifonlyapril
7. DIY Wood Framed Floor Mirror
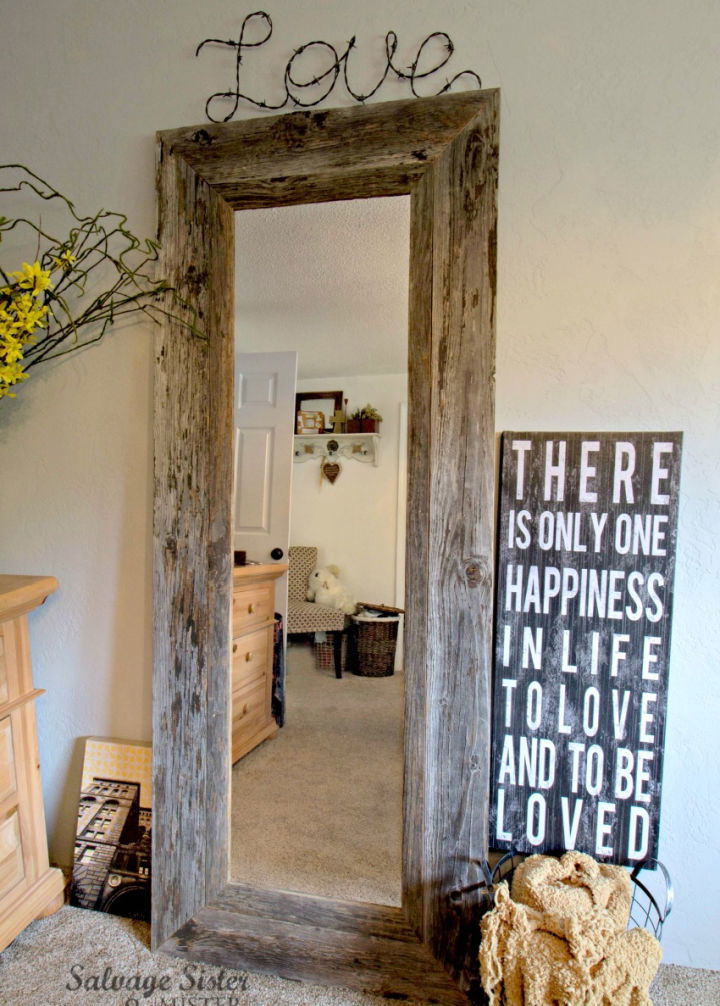
Looking for diy mirror frame ideas? Make a striking decor element with this DIY tutorial for a wood-framed floor mirror inspired by a pricey Pottery Barn piece. A salvaged Goodwill mirror is transformed into a captivating floor mirror with determination and some basic supplies. Every step of this project, from preparation to assembly, is well-guided and user-friendly.
The list of supplies includes a salvaged mirror, wood, screws of varying lengths, finished nails, wood glue, thin wire, and essential tools like a cordless drill, table saw, and hammer.
The step-by-step guide will direct you through the process, from removing the mirror’s original frame to constructing the new wood frame with beveled edges. The affordable project costs less than $50, resulting in a unique, statement-making decor piece. So, add a rustic charm to your living space with this wood-framed floor mirror. sisterandmister
8. Make Your Own Mirror Frame
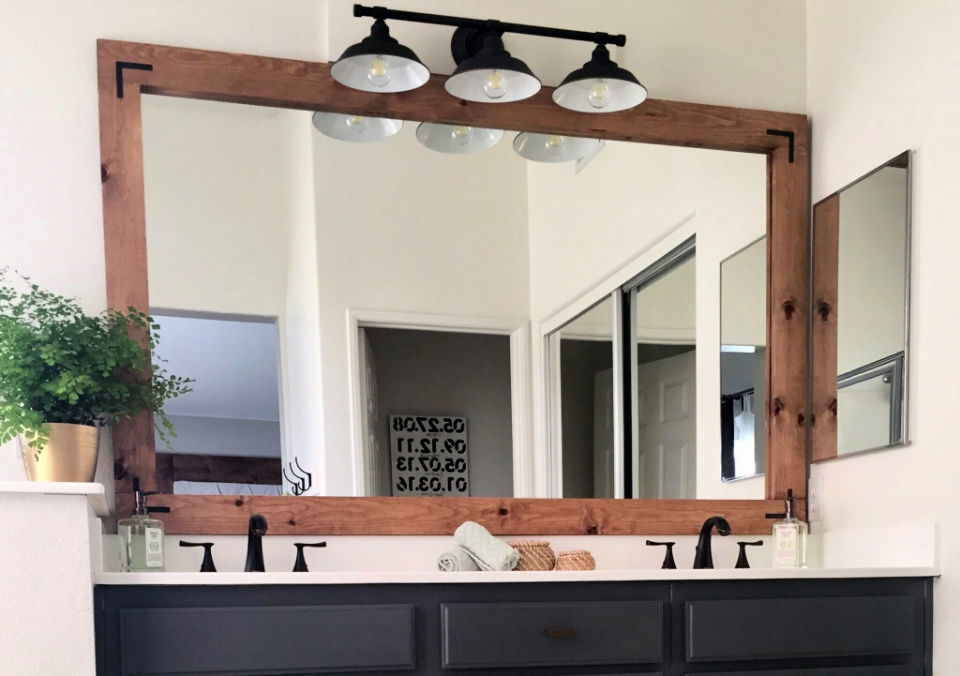
Try an easy yet effective solution to upgrade your bathroom mirror aesthetics – making a custom DIY mirror frame! This practical solution lets you avoid the hassle of replacing an existing mirror by transforming it into a beautiful piece that complements your bathroom decor. You can add character to your plain mirror using basic items such as 1×3 boards, liquid nails, a staple gun, and a wood stain.
Remember to choose the wood stain color that complements the overall design of your bathroom, or consider using a fun accent color to give your space a pop. Adding unique details, such as corner braces or decorative wood trim, enhances the finished look.
This low-cost project doesn’t take long to complete, offering instant gratification once you see the transformed mirror on your bathroom wall. Transform your old bathroom mirror into a stunning focal point with this mirror frame project, and let your creativity shine! domesticblonde
9. Organic Shaped Wooden Mirror Frame Ideas
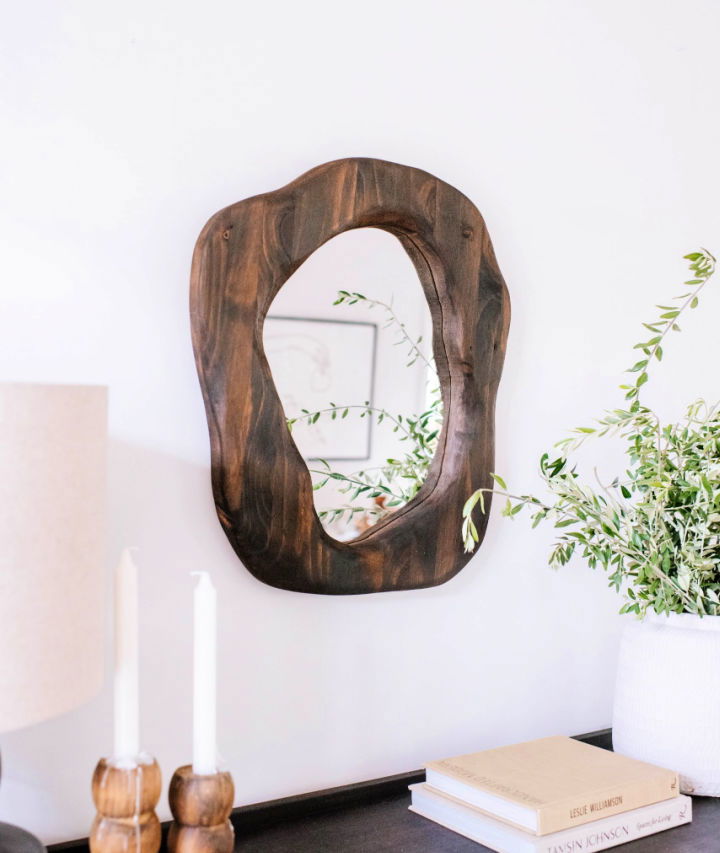
Pull out the aesthetic potential of wood by crafting your own DIY organic-shaped wooden mirror. It’s a refreshing home decor piece, manifesting the raw allure of timber with the sophistication of a mirror. To embark on this project, you’ll need a frameless mirror, timber floor wax, a timber panel, stain, drill, jigsaw, clamps, and some safety gear.
Start by sizing your mirror to match your timber piece, draw an organic shape onto the mirror and timber, then carve out the frame from the timber. Smoothen your wooden frame with a sander before applying a coat of stain for a rustic finish.
Attach your mirror to the frame using screws and small MDF rectangles. Use a piece of rope stapled to the back of the frame for hanging. This wooden mirror embodies personal creativity and adds a rustic charm to your interior spaces. collectivegen
10. How to Build a Frame Around a Mirror
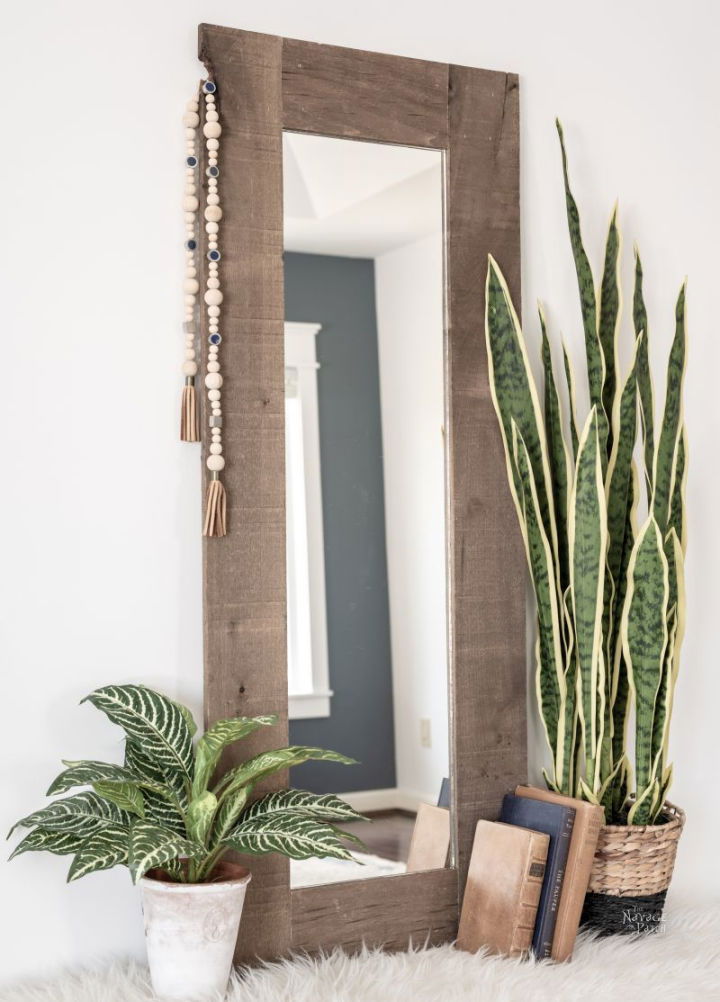
The ultimate guide to DIY mirror frame ideas for every room. Make a DIY rustic mirror frame with minimal effort and low costs, perfect for elevating the aesthetics of a bedroom, hallway, or entryway. Ideal for any teen’s room, this project can provide them with a full-length mirror to explore their budding identities, whether practicing dance moves or perfecting their style.
This rustic-framed mirror complements any wooden interior and is designed using rectangular mirrors stashed in the basement. All it takes is a simple assembly – glue the mirror to a thin hardboard and surround it with rustic wood panels.
You can use weathered wall boards or 1×4 pine lumber stained to your preferred color. Add style and charm to any room today with this easy-to-follow, budget-friendly rustic mirror frame project. thenavagepatch
11. Handmade Double Framed Mirror
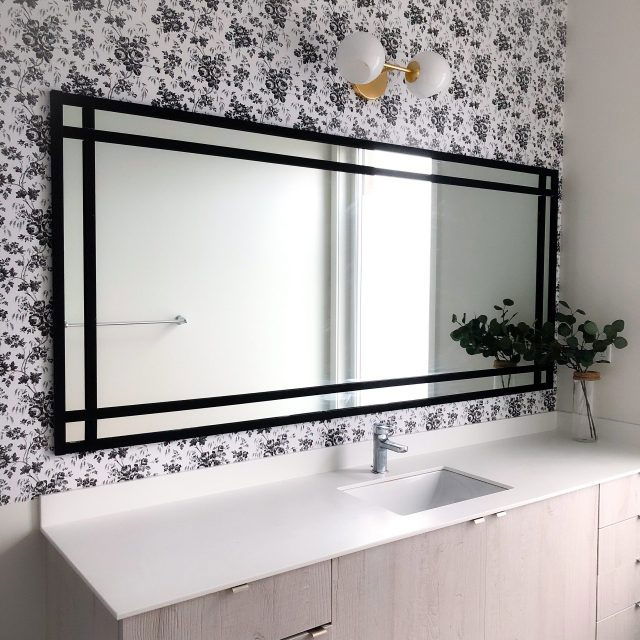
Transform your plain bathroom mirror into a chic centerpiece with this cost-effective DIY project. Learn to add a frame to your builder-grade mirror, enhancing the elegance and style of your bathroom. A well-framed mirror can make a significant difference to your decor, transitioning from basic to modern French chic.
The materials needed include a thin trim, liquid nail adhesive, paint, a miter saw, a level, and measuring tape. The method involves cutting the trim, painting it, applying adhesive, and aligning each piece carefully around the mirror.
You have the option to make an inside frame for added style. The best part? This project costs less than $60 and can be completed in a few hours. Elevate your bathroom style with a mirror that reflects your image, taste, and personality. hanashappyhome
12. Decoupage Mirror Frame for Beginners
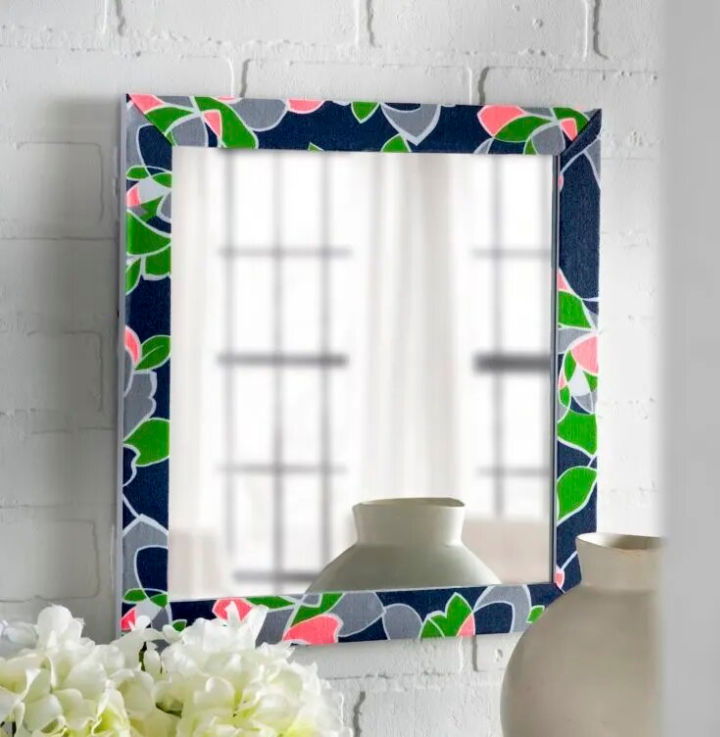
Get a touch of individuality to your living space with a DIY decoupage mirror project! By combining Mod Podge, a mirror with a wide edge, and a fabric of your choice, you can make a bespoke mirror frame. This craft requires simple brushing and cutting skills, making it perfect for those embarking on their first decoupage adventure.
Get started by preparing your chosen fabric, such as a pillowcase, with Mod Podge on a sheet of wax paper. This step is crucial in preventing the fabric from fraying. Once dry, cut the fabric into long, thin strips that fit over the mirror’s edge.
Next, affix the fabric to the frame using Mod Podge and let it dry. Once dry, flip the mirror over, trim any excess fabric with a craft knife, and your personalized decoupage mirror frame is ready! This project rejuvenates a dull mirror and adds a custom touch to your decor. Try this project today, and enjoy the fun of crafting with fabric! modpodgerocks
13. Do It Yourself Architrave Mirror Frame
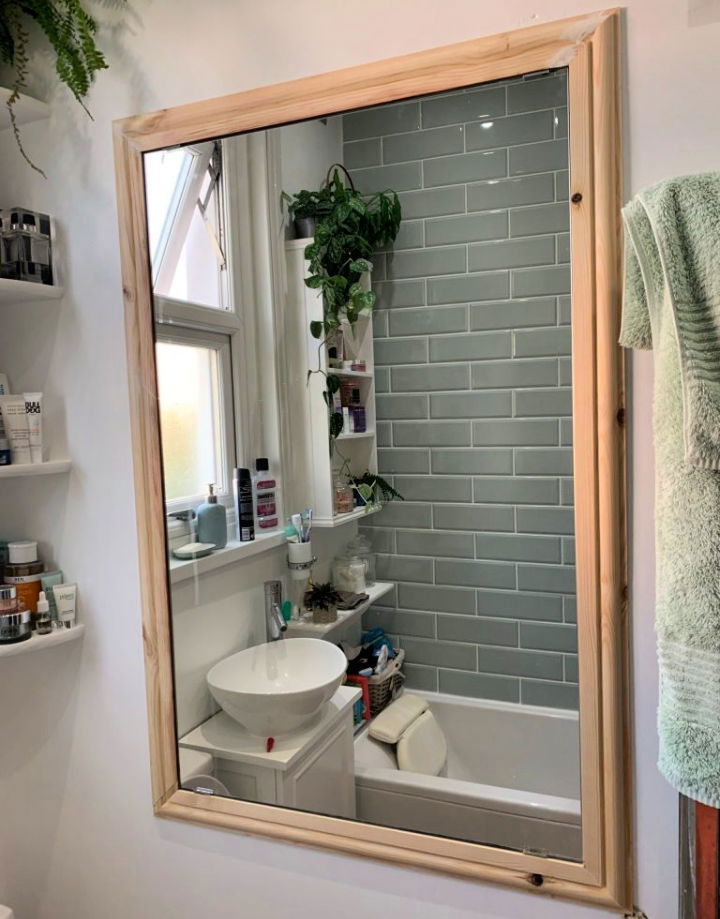
Add personality to your walls with these diy mirror frame ideas. Upraise your bathroom aesthetics without breaking the bank with this DIY guide on constructing an architrave mirror frame. Giving your mirror an elegant facelift, the tutorial provides an economical alternative to expensive ready-made mirror frames.
The approachable process employs simple supplies, including architrave, beading, and standard tools such as a miter box, saw, and No More Nails. You can give your mirror an upgraded look through careful measurements and precise cutting.
This guide also includes avoiding mistakes, ensuring you don’t waste time on easily preventable errors. For a fun afternoon project, this guide can help elevate your mirror and enhance your bathroom’s appeal. littleterracedhouse
14. Cheap DIY Stick Framed Round Mirror
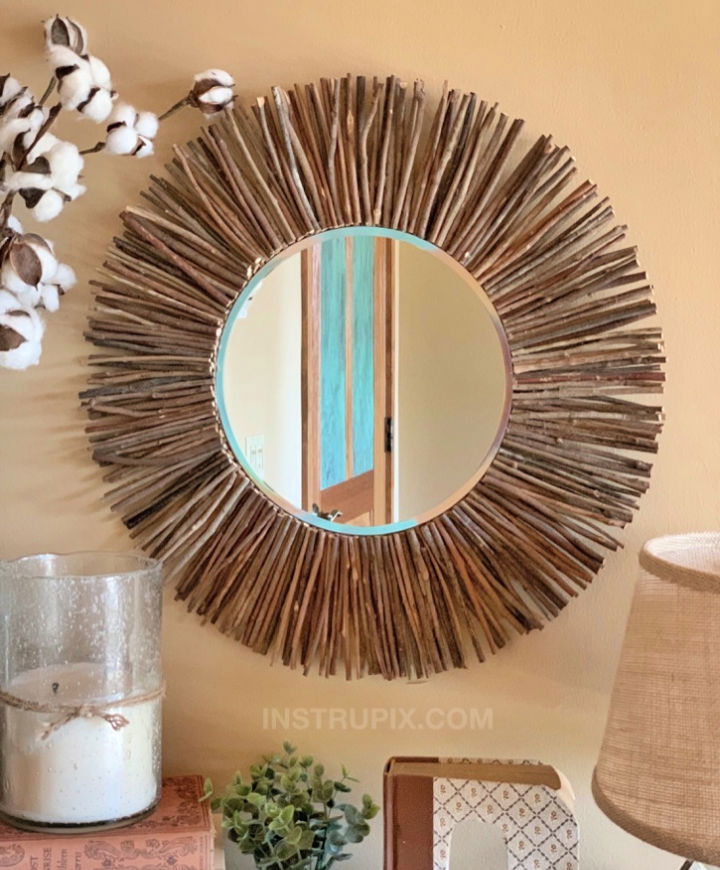
Transform plain mirrors into eye-catching focal points with these inspiring DIY mirror frame ideas and tips. Get rustic charm and modern aesthetics with this DIY framed mirror project. Using affordable supplies like a 10-inch round mirror plate, cardboard, hot glue, and a collection of sticks, this guide offers a creative approach to home decor.
The rustic touch of the sticks harmoniously blends with the sleekness of the mirror, making it a versatile piece for any room. With simple tools like a box cutter and pencil, you can shape your cardboard into a sturdy frame for your mirror and embellish it with an artistic arrangement of sticks.
Command strips provide an easy and secure solution if you prefer to hang your creation. Embrace this low-cost, innovative project and add a unique touch to your home interior. Enjoy crafting your mirror frame and reflect your style in every corner of your home! instrupix
15. Building a Cedar Framed Mirror
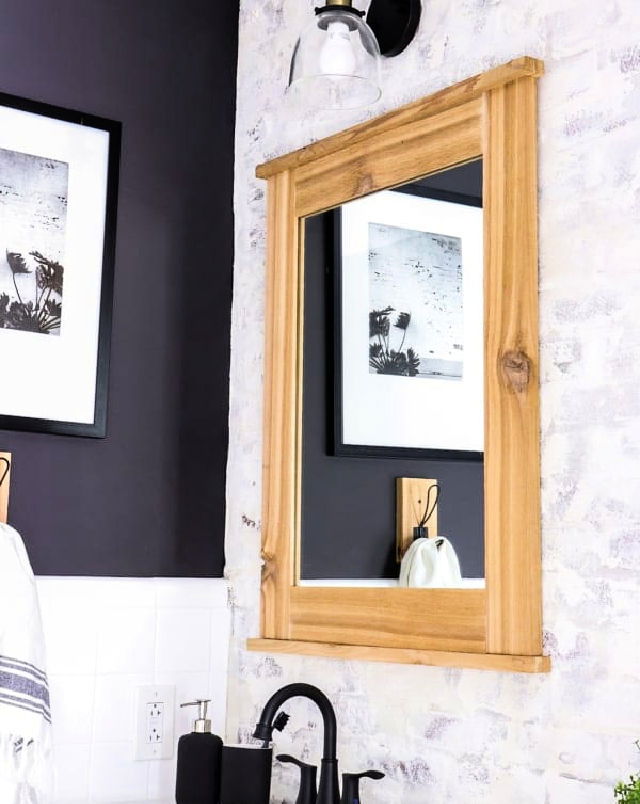
Learn how to make a DIY cedar framed mirror an ideal addition to any bathroom space. Infuse a touch of rustic elegance into your interiors with this DIY project, a splendid choice that marries practicality with aesthetic appeal.
Using accessible materials such as cedar wood, mirror glass, wood glue, and D-rings, embark on a crafting journey that could be the perfect solution for your bathroom decor. Follow this step-by-step guide that requires moderate skill to achieve a rewarding result within 3 hours.
You’ll learn how to cut mirror glass, build a cedar frame, and give it a unique farmhouse touch. By opting for this project, you add a personal touch to your bathroom, proving that sometimes, the best treasures aren’t always found in stores but are crafted at home. notinggrace
16. How to Make Your Own Mirror Frame
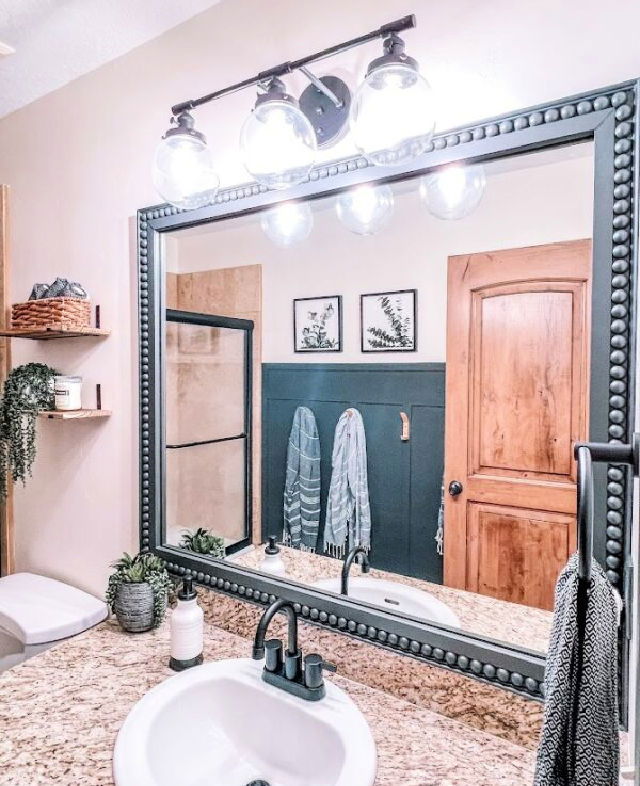
Turn your plain, builder-grade mirror into a stunning custom piece with this detailed DIY guide. It’s time to bid goodbye to bare, rectangular glass and welcome a stylish beaded frame. This simple project, achievable over a weekend, will revitalize your bathroom’s aesthetic, significantly enhancing its charm.
Utilizing inexpensive materials like primed MDF board, PVC lattice molding, composite bead molding, and half-wooden balls, you can build a unique, bespoke frame for under $50.
The resulting transformation of your space is striking, yet this project saves substantially compared to purchasing expensive, large mirrors. This guide provides a step-by-step approach, from measurements and cuts to gluing and painting. Let’s get creative and elevate your bathroom decor today! ourfauxfarmhouse
17. Modern DIY Mirror Frame for Under $30
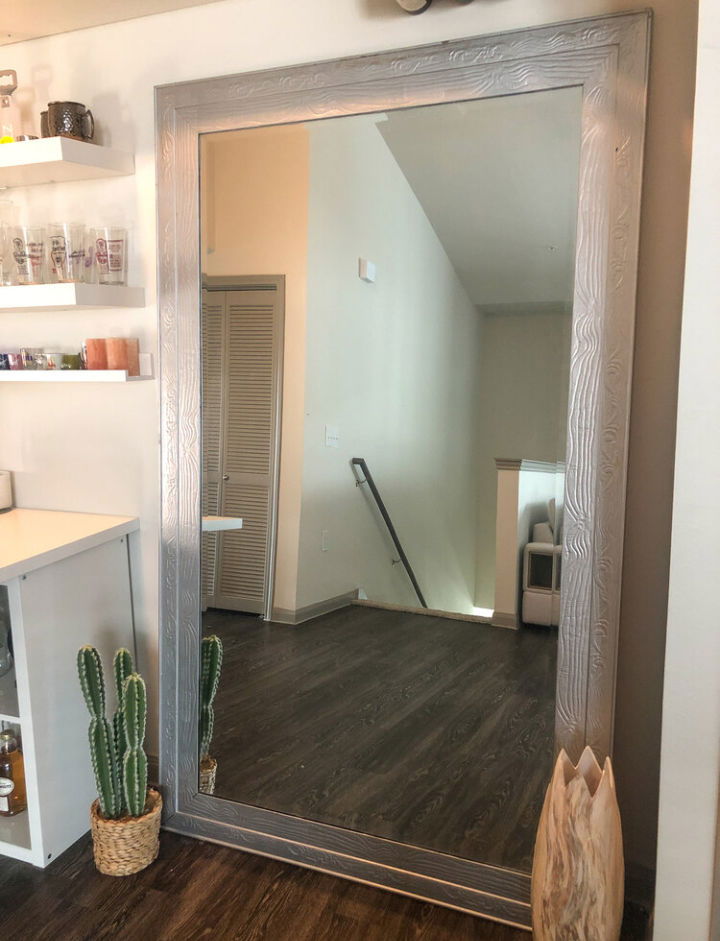
Elevate your space with a custom modern mirror frame that embodies your style. Reusing an oversized mirror, a DIY makeover can entirely transform it with just a few simple supplies like 2×4 lumber boards, a sheet of utility plywood, gorilla glue, screws, a drill, and wood stain.
Embark on this easy, cost-effective project requiring just under $30 and a bit of your time. This step-by-step guide provides a straightforward method to build a sleek frame and shares what not to do, based on a real-life experience.
Discover how to give your mirror an impressive, fresh look that fits your aesthetic and budget, and learn from the mistakes to avoid. Every detail, including the highs and lows of this journey, contributes to the final masterpiece – a beautifully reframed mirror that’s undeniably a stunner! kaylasimonehome
18. Homemade Oversized Mirror Frame
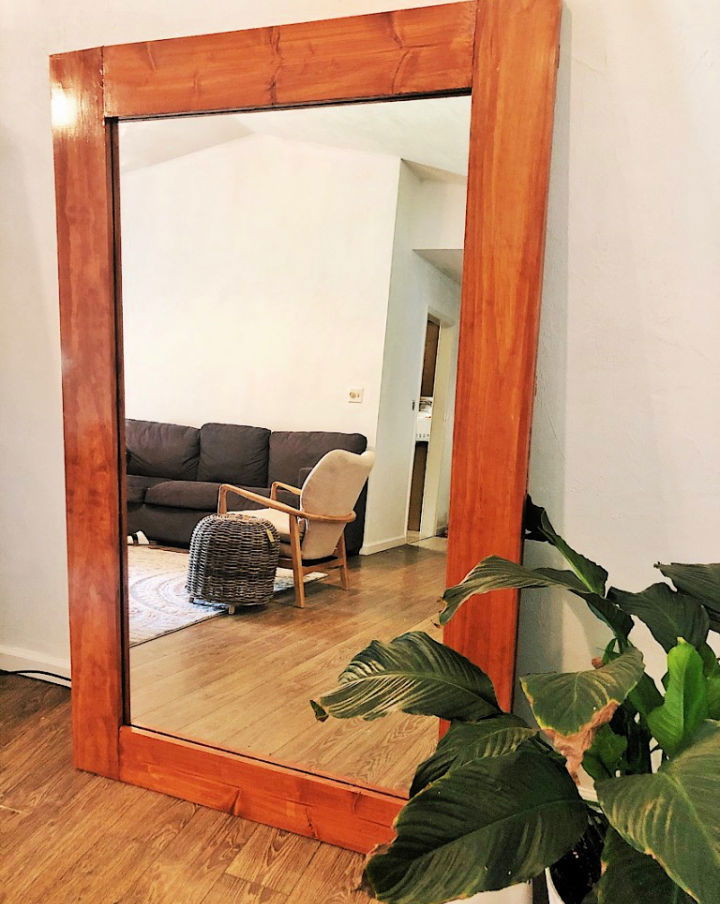
Learn how to make stunning diy mirror frames with these simple Ideas. Take on the journey of transforming a thrifted oversized mirror into an elegant piece of decor with a DIY mirror frame project. This post reveals the backstory of a $20 mirror found on Craigslist, its minor imperfections, and the author’s vision to make a frame that both conceals and elevates the mirror.
This affordable project uses tools like a kreg jig, circle saw, power drill, and materials like gorilla wood glue and varathane wood stain. The result? A great mirror that is not only aesthetically pleasing but also functional.
This project promises an engaging and fulfilling task that adds a personal tinge to your space and helps you pass the time creatively and productively. So, why wait? Start transforming your old mirror into a captivating centerpiece today! froplusfashion
19. DIY Wooden Mirror Frame for Entryway
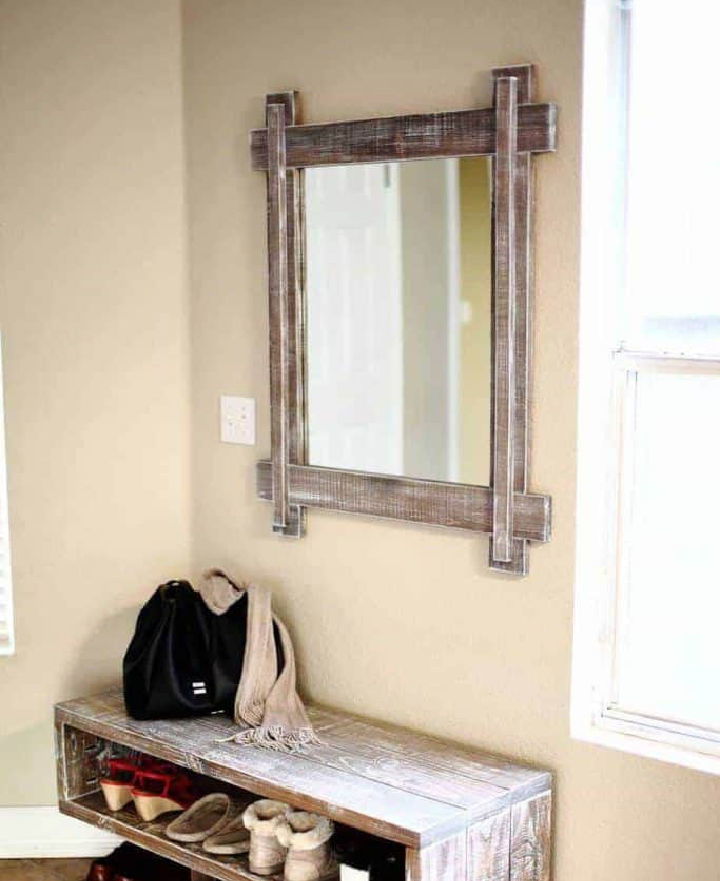
Improve your home’s aesthetic with a functional yet stylish DIY wooden mirror frame. An ideal complement to your shoe rack bench, this handcrafted mirror frame can be a unique and eye-catching addition to your entryway. You only require a few materials, such as a mirror, 1x4x6′ wood pieces, brad nails, wood screws, a pre-stain, Briarsmoke stain, wood glue, and a plumbing strap.
Following the detailed step-by-step guide, you’ll learn to make precise lap joint notches, cut a grove for the mirror, and properly stain and paint the wooden frame. Remember, the same stain and white wash effect on your shoe rack bench can also be used here to make a cohesive look.
This project is an engaging activity and a cost-effective way to enhance your home decor. Make your mirror frame today and experience the charm it adds to your space. thediyplan
20. Making a Mirror Frame Out of Wood
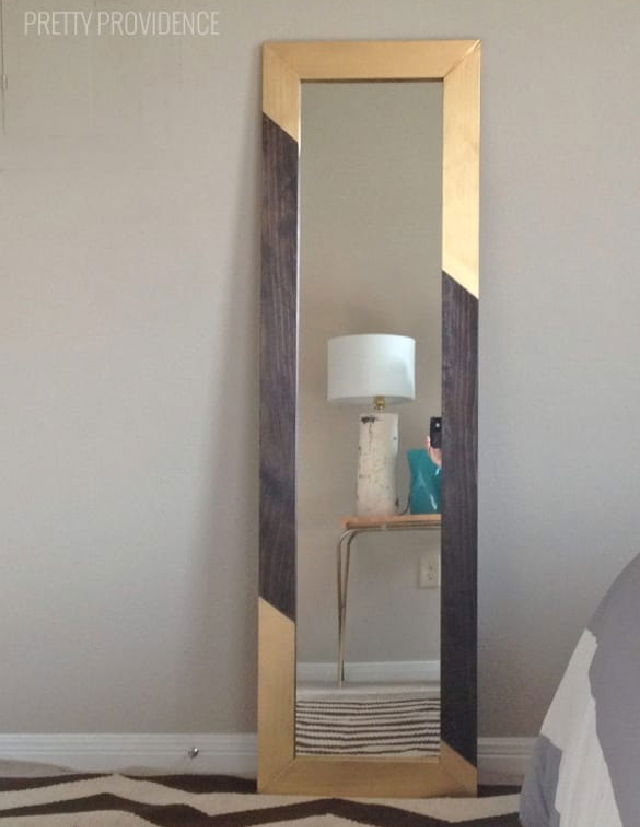
Revitalize your space with this do-it-yourself mirror frame project! The process involves repurposing an old, inexpensive mirror and transforming it into a classy decor piece with the help of 1×3 boards, a few readily available tools, and a touch of creativity. The process might not be speedy, especially for newcomers to the DIY realm, but it’s quite straightforward.
It begins with disassembling the mirror from its frame and measuring and cutting the boards. After gluing and stapling the pieces together, you’re ready to paint or stain your frame. Apply some gold spray paint for a finishing touch, and voila! You’ve got a custom-made, eye-catching mirror frame.
Not only will this project enhance your home decor, but it will also provide you with invaluable knowledge and hands-on experience. So, why wait? Add a dash of ingenuity to your living space today with this interesting and rewarding mirror frame project. prettyprovidence
21. Rustic DIY Wooden Mirror Frame
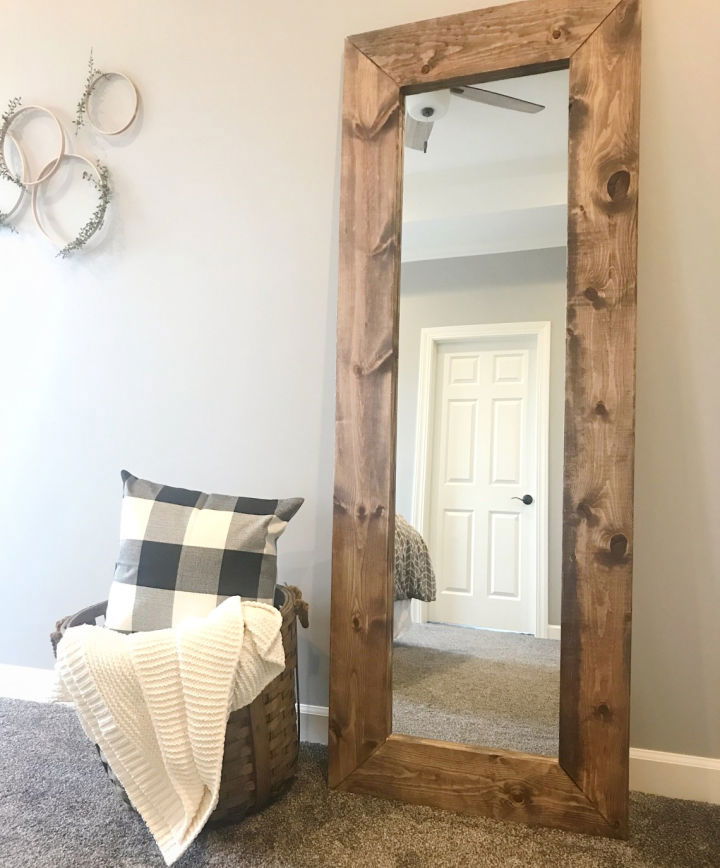
This rustic DIY wooden mirror frame will be a reminder of the magnificence found in nature for everyone who sees it. Make a stunning inclusion to your home decor by transforming your basic full-length mirror into a rustic beauty. With common board pine, a staple gun, a hammer, and a little patience, this project will bring character to any room. Start by carefully removing the existing frame from the mirror.
Then, measure and cut your boards at a 45-degree angle for a professional finish. After sanding the boards for a smooth finish, assemble your frame with Liquid Nails adhesive and let it dry for 24 hours.
Stain the frame in a shade that highlights the wood’s natural beauty, seal it with a polycrylic finish, and attach the mirror to the frame. This mirror frame offers an appealing aesthetic upgrade to a standard mirror and adds a touch of rustic charm to your home decor. theholtzhouse
22. How to Make a Mirror Frame
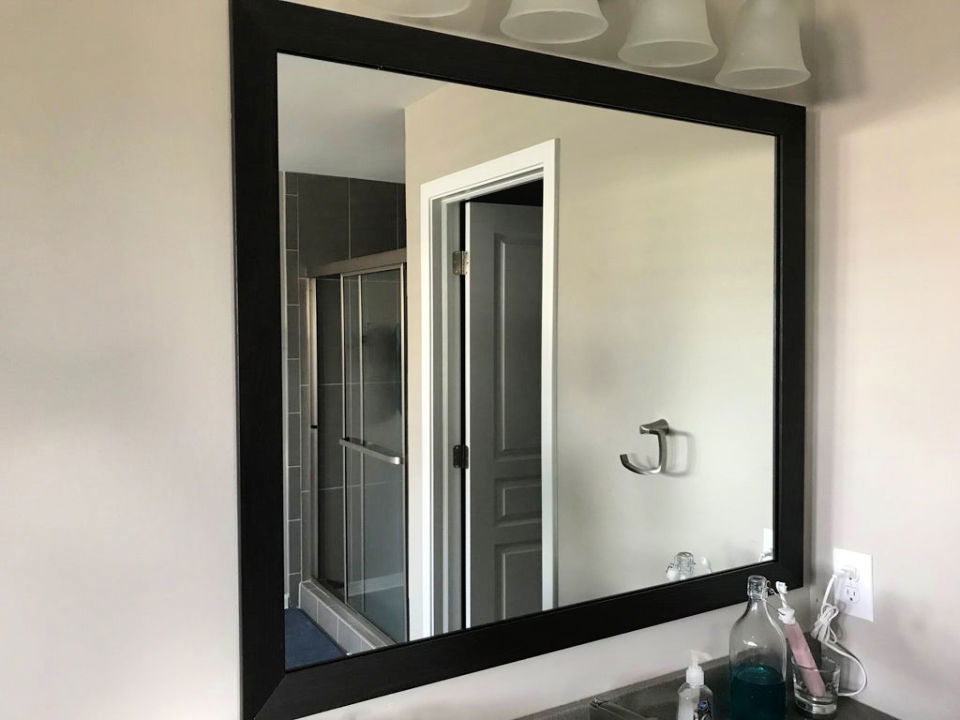
Uplift your interior decor on a budget with this effortless DIY mirror frame guide! Suitable for anyone, this cost-effective project can be done in just a few hours. Using inexpensive materials such as trim/molding of your choice, liquid nails on all surfaces, a caulk gun, a miter saw, a level, painter’s tape, and optionally a Dremel with a sanding attachment, you can transform a standard builder mirror into an eye-catching piece. The process involves:
- Measuring and cutting the molding.
- Preparing the space for mirror clamps.
- Attaching the frame with the help of liquid nails and painter’s tape.
This project demonstrates an easy way to upscale your mirror with minimal investment. Remember to keep a level on hand to ensure perfect alignment for your mirror frame! instructables
23. Build a Frame for a Wall Mirror
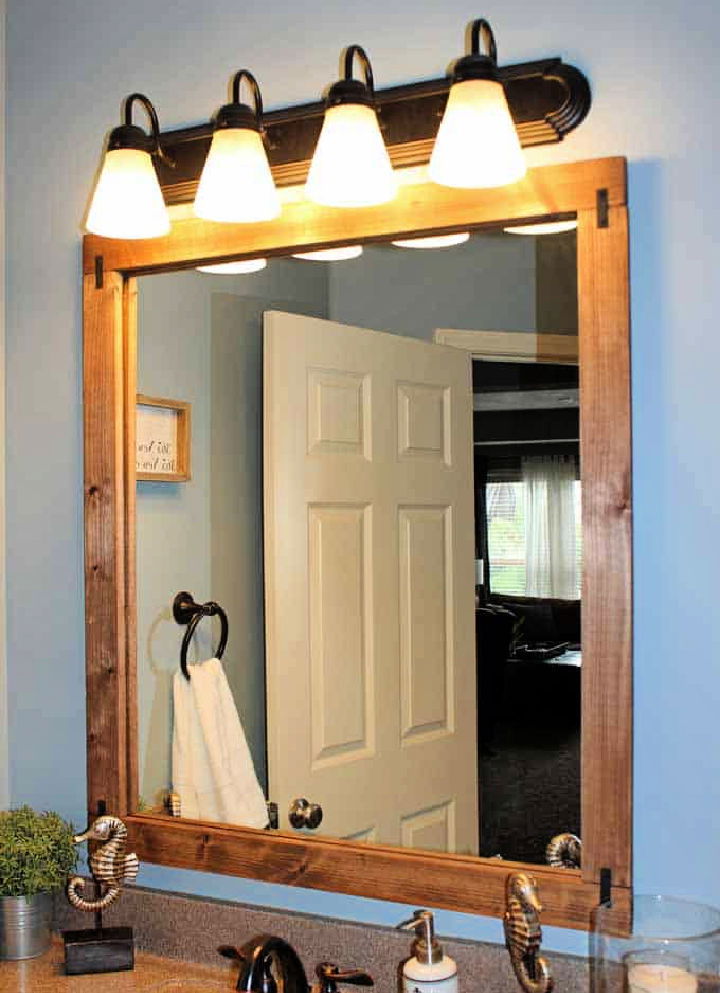
Heighten the look of your bathroom with a simple DIY project – framing your bathroom mirror. Breathe new life into your builder-grade mirror with just a few tools and materials, such as lumber, wood stain, wood glue, mending plates, D-ring hangers, and drywall anchors.
This easy tutorial will walk you through measuring your mirror for the frame, staining or painting the wood, assembling the frame, and securing it to your wall.
This project is an affordable yet effective way to revamp your space, adding a refined touch to even the simplest bathroom. Making a high-quality, finished look only takes ingenuity and elbow grease. loveourreallife
24. DIY Mirror Frame With Scalloped
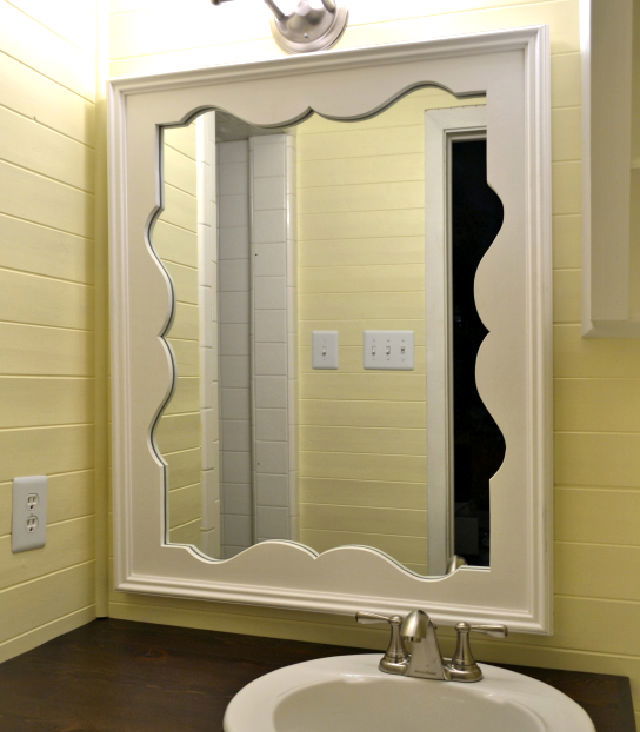
Breathe new life into your bathroom by adding a touch of elegance with a DIY mirror frame featuring a chic scalloped design. With a few easily sourced materials such as MDF, decorative molding, mirror mastic, and a simple jigsaw, you can make an exquisite, custom-made mirror that suits your space perfectly.
This project is not only a money-saving alternative, costing around $25 compared to a store-bought mirror that could cost you more than $300, but also a fantastic opportunity to exhibit your crafting skills.
Follow the eight-step guide, including precise cutting, designing, attaching, and painting, to make this stylish bathroom accessory. Opting for a DIY mirror is essential for a bathroom and showcases your creative flair. addicted2decor
25. How to Make a Picture Frame Mirror
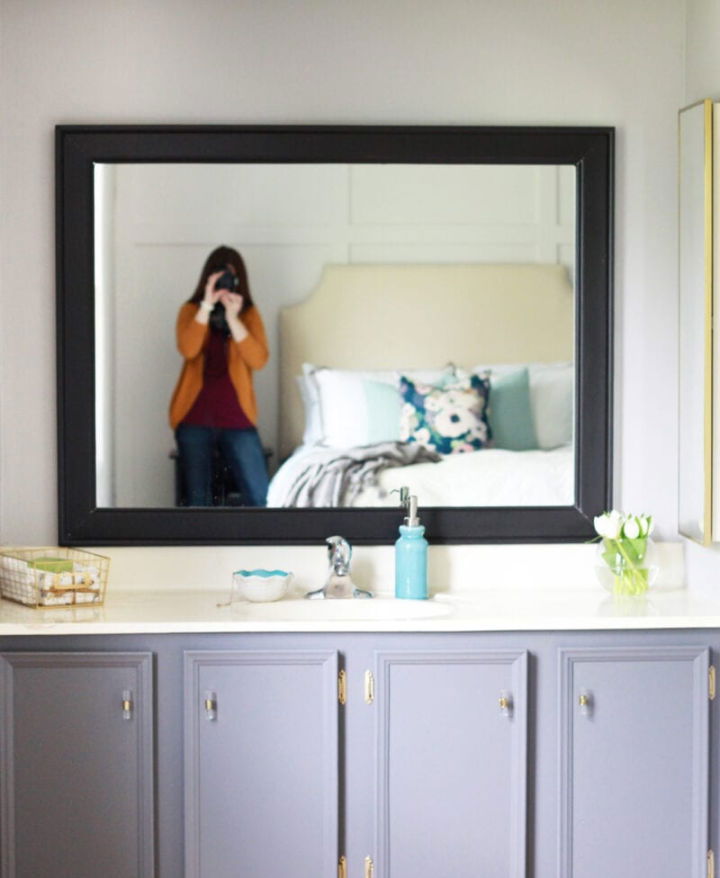
Frame your reflections and enhance your bathroom’s aesthetics with a simple, cost-effective, and impactful DIY picture frame mirror project. You can add elegance by framing your plain, builder-grade mirror using easy-to-find tools and supplies.
Follow this step-by-step guide starting with gathering your supplies, cutting the baseboards to the correct dimensions, assembling the frame, and finally painting and hanging the frame. If your mirror has clips, don’t worry – we include tips on how to make notches for them too.
Witness the transformation from a primary mirror to a framed mirror that elevates your bathroom’s style quotient. This framed mirror project makes a big difference in your bathroom’s ambiance and shows that a small touch can significantly impact. Happy crafting! justagirlandher
26. DIY Large Floor Mirror Frame Using Plywood
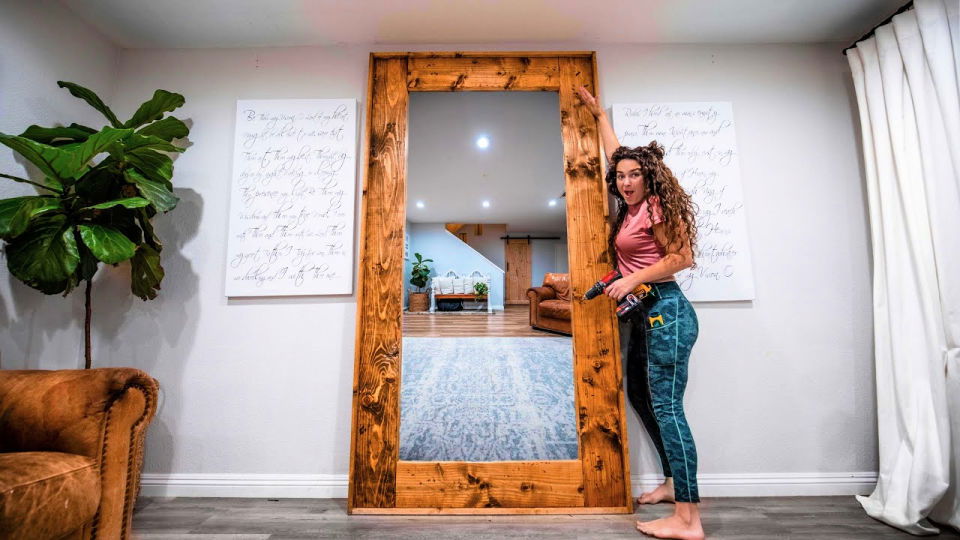
Try these DIY mirror frame ideas for every style and budget. Upgrade your living space with a one-of-a-kind, DIY large floor mirror frame crafted from plywood – for a professional look in no time! With easily accessible materials such as 2″ x8″ x8′ planks, 1″ x3″ x8′ planks, and a sheet of plywood, you can transform a simple mirror into an exquisite centerpiece.
Opt for a stain to enhance the natural wood grain and complete your masterpiece. You could even suspend your creation using a Z Bar Hanging System, adding a unique vertical aspect to your space.
This project showcases not just your crafting skills but also your taste for understated elegance. Inexpensive yet stylish, this wood mirror frame makes a great addition to any room. Embrace this easy tutorial and revamp your living area today!
27. Framing a Bathroom Mirror for Under $10
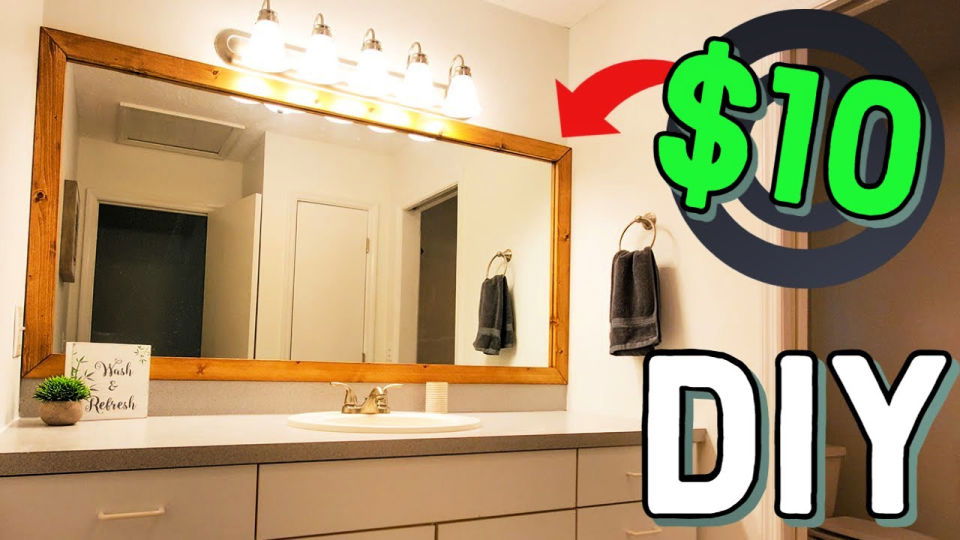
Revive your bathroom with the easiest and cheapest transformation ever – framing a DIY mirror! A mere investment of less than $10 can entirely change the vibe of your bathroom space. This versatile idea fits equally well in any bathroom, from plain ones to the most elegant master bath remodels.
The materials needed are pine wood, stain, mirror adhesive, or caulk, all of which come at a minimal cost. You can reframe mirrors in up to 20 bathrooms with one can of stain.
The process also requires a few tools, such as a miter saw, adhesive, framing triangle, and a cutting brush. So, for a cost-effective, impactful bathroom makeover, frame your mirror today! Enjoy this simple, creative, and cost-friendly process.
28. Custom Industrial Farmhouse Mirror Frame
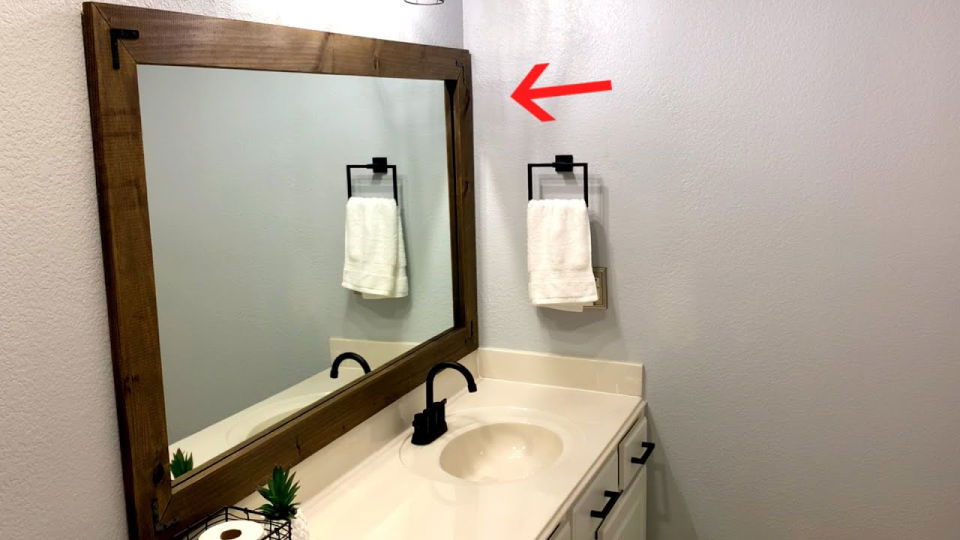
Introduce a rustic flair to your bathroom with a budget-friendly makeover using DIY techniques! This guide provides comprehensive instructions on transforming a dull space into an aesthetically pleasing retreat, utilizing easily sourced materials and tools.
From liquid nails fuze It adhesive to a handy toolkit to a selection of black square bathroom fixtures and various faux plants, your journey to a revamped bathroom starts with this project. The cost-effective approach allows for personalization, with you picking the materials and accessories that best suit your taste.
The process involves staining wood, fixing brackets, and adding accessories, among other tasks and guarantees an impressive result. Despite being budget-friendly, the project doesn’t compromise on quality or style. So turn up your sleeves and prepare to make your unique bathroom sanctuary!
29. Simple DIY Full-Length Mirror Frame
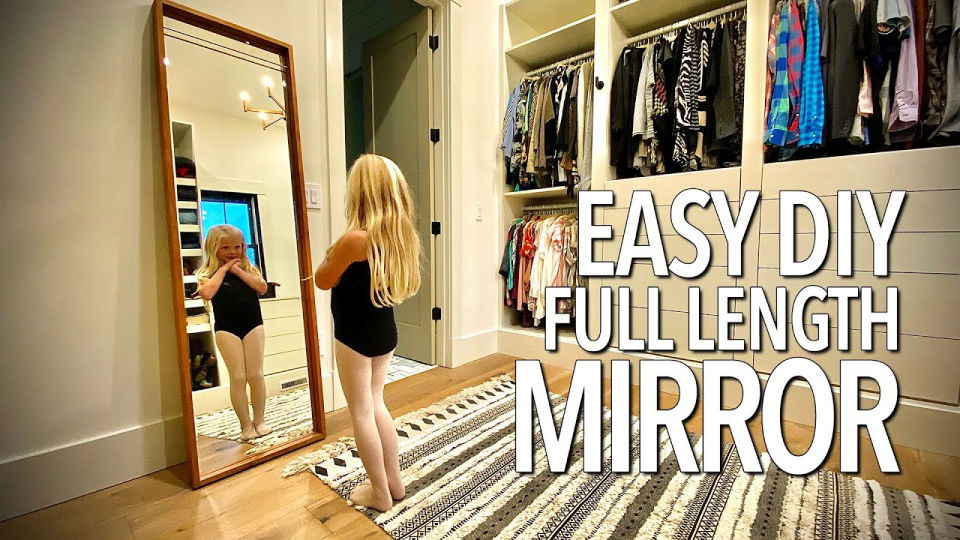
Give your mirrors a makeover with these amazing diy frame projects. Smarten your home decor with an impressive DIY full-length mirror, an attractive and functional addition perfect for any space. This tutorial will direct you through making a full-length mirror affordable with a cost-effective frameless mirror, plywood, and simple 1x3s. A handy tool list includes a Kreg Pocket Hole Jig, a miter saw, and more.
Not only does this mirror serve a useful purpose, but it also adds refinement to your home. The brass rod addition offers a practical touch, allowing the hanging of accessories.
With the help of DynaGrip Mirror adhesive and a well-planned assembly process, you can build this chic piece that will enhance any room’s aesthetic. Today, boost your DIY skills and revamp your home decor with this simple and valuable project!
30. Creative Ornate Mirror Frame
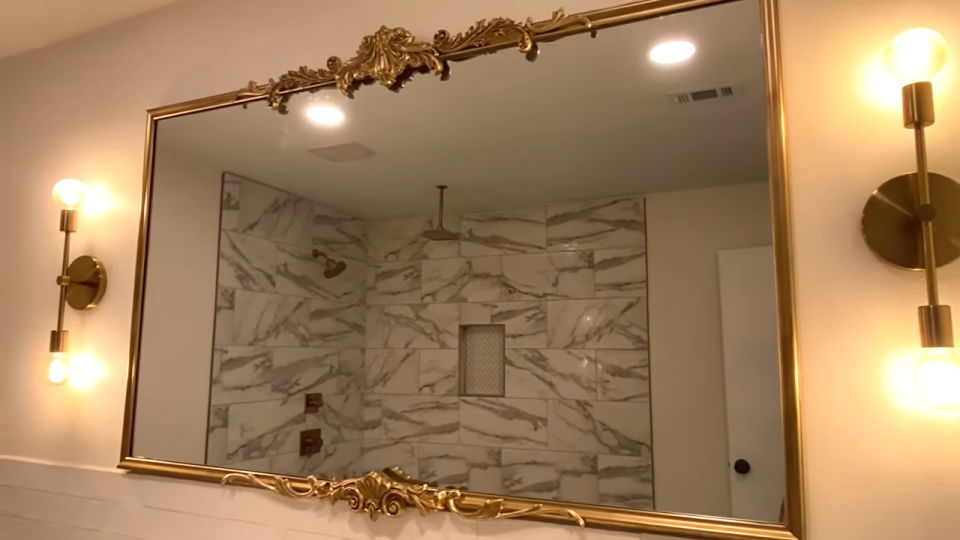
Discover DIY mirror frame ideas that effortlessly combine functionality and aesthetic appeal in your interior. Give your interior a dash of elegance with a DIY ornate baroque mirror frame! This project brings a sophisticated touch to any room, effectively concealing unsightly mirror clips with an affordable yet high-end-looking solution.
Suitable for a 60×36-inch mirror, you can craft this masterpiece with a total budget of just $118 – a fraction of what a similar-sized ornate mirror would cost! The materials required include trim molding, ornate molding, gold spray paint, and ‘antique gold’ acrylic paint, all easily accessible from local stores.
The guide offers tips on handling corners and little notches, ensuring the final product’s perfection. This project not only infuses style but also enables impressive savings. Spruce up your space with this easy-to-follow guide and witness the transformation!
Conclusion:
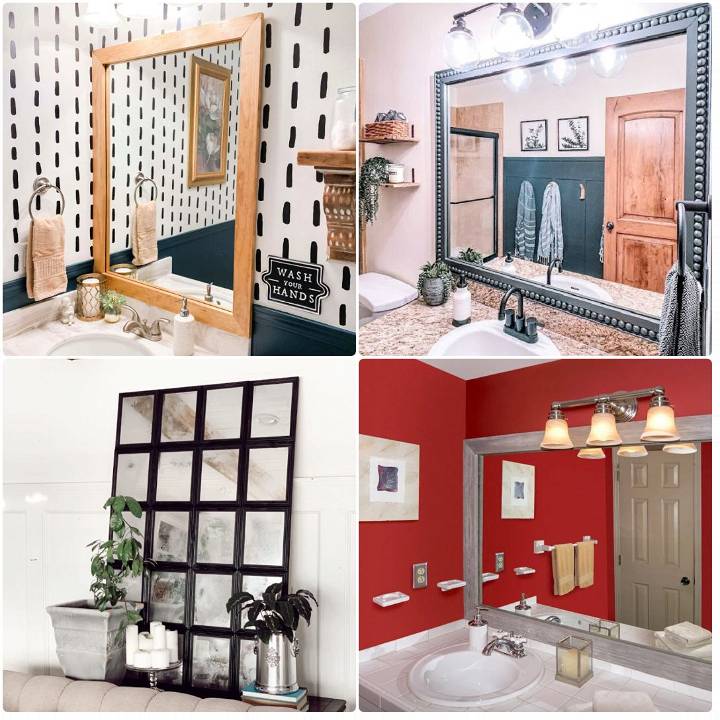
In conclusion, these 30 DIY mirror frame ideas offer a wide range of customization options to suit every style and budget. From painting and decoupage to embellishing and troubleshooting common issues, this comprehensive guide has you covered. By following maintenance tips and FAQs, you can make a stunning mirror frame that reflects your unique taste and personality. Start crafting your perfect mirror frame today!


