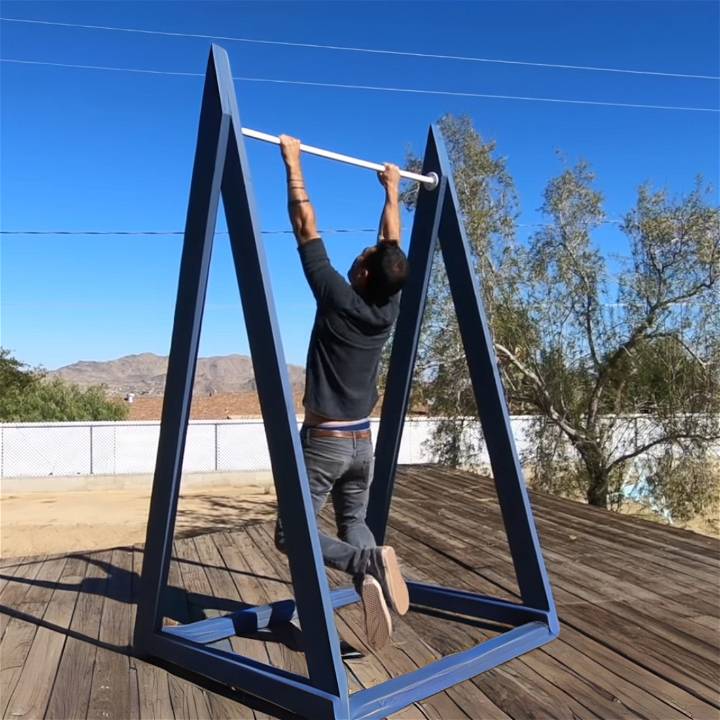
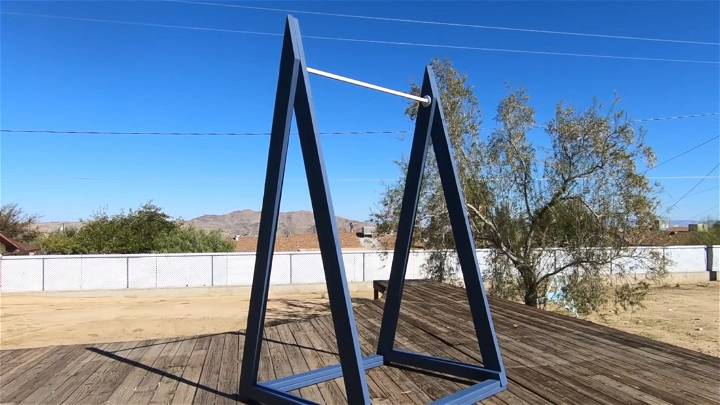
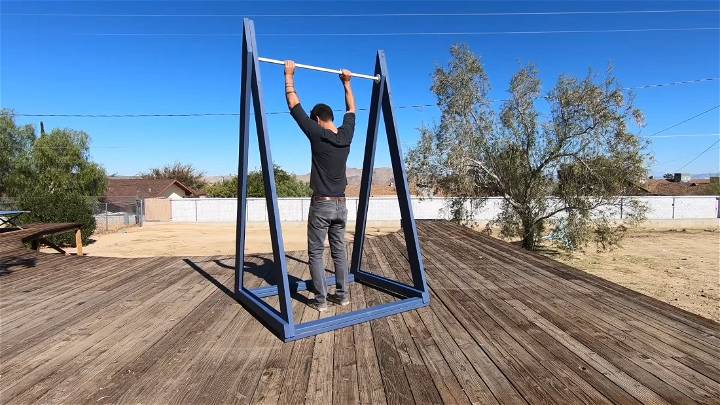
Making your own DIY pull-up bar for outdoor use adds a personal touch to your exercise regime, and it’s simpler than you might think. This guide is crafted to walk you through every step of the journey, from gathering materials to the final adjustments. Our approach is designed for clarity, ensuring each instruction is easy to follow and geared towards building a safe and durable pull-up bar. Whether your fitness goals include strength training or enhancing your endurance, this project is a great addition to any outdoor space.
As we dive into the benefits of pull-ups, you’ll see how this single piece of equipment can transform your full body workout, building muscle, and improving grip strength with remarkable versatility and convenience. By following our step-by-step instructions, not only will you make a functional piece of fitness equipment, but you’ll also empower yourself with the know-how to tackle future DIY projects.
Stay tuned as we guide you through this rewarding process, promising a fulfilling blend of craftsmanship and fitness prowess awaiting you in the sections ahead.

Benefits of Pull-Ups
Pull-ups are a fantastic exercise that can bring a multitude of benefits to your health and fitness. Here’s why they should be a part of your regular workout routine:
Full Body Workout
Pull-ups are a compound exercise, which means they work out multiple muscle groups at the same time. When you perform a pull-up, you’re not just working your arms. You’re also engaging your shoulders, back, and core, providing a full upper body workout.
Strength and Muscle Building
Pull-ups are a great way to build strength and muscle. They target some of the largest muscle groups in your upper body, including the latissimus dorsi (your back), biceps, and deltoids (your shoulders). Regularly performing pull-ups can help you develop a strong and toned upper body.
Improved Grip Strength
Pull-ups can significantly improve your grip strength. This is because you’re pulling up your entire body weight, which requires a strong grip. Improved grip strength can benefit you in other areas of your life as well, such as when carrying heavy objects.
Versatility
One of the great things about pull-ups is their versatility. By changing your grip (overhand, underhand, wide, narrow), you can target different muscle groups and add variety to your workout.
Convenience
Pull-ups can be done almost anywhere you have access to a bar. This makes them a convenient exercise that you can incorporate into your routine, even if you don’t have access to a gym.
How to Make a Pull-Up Bar – Step by Step Guide
Learn how to make a pull-up bar at home with this step-by-step guide. Build strength and improve your fitness with this DIY project.
What You Need:
- Eight-foot-long 2×6 lumber pieces
- Two-by-four lumber for the base
- 3/4 inch diameter, four feet long steel pipe
- Pipe flanges
- Circular saw
- Screws (2 1/2 inch and 3 inch long)
- Sharpie
- Sandpaper
- Paint (rust-inhibiting primer and exterior-grade)
- Drill
Step by Step Instructions
Learn how to build an outdoor pull-up bar with this DIY guide. Make your own chin-up bar with easy steps for a convenient at-home workout solution.
Step 1: Planning and Cutting the Frame
Begin by marking and cutting your eight-foot-long 2x6s to make a triangular frame. Measure four feet from opposite corners to form a perfect triangle, marking the excess with a Sharpie to trim off. Next, place a 2×4 across the center of this triangle to make additional lines that will guide you where to cut. Use a circular saw for precise cuts.
Step 2: Constructing the Base
Utilize 2x4s to form the base of your triangular frames. Align a 2×4 under a 2×6 and mark the angle to trim. Once cut, secure this piece to your frame with 2 1/2 inch long screws. For aesthetic consistency, trim the other side of the 2×4 as well. Repeat this step for the second frame, ensuring both are symmetrical.
Step 3: Preparing the Pull-Up Bar
Take the steel pipe and sand it down to remove any imperfections. Attach pipe flanges on both ends tightly. Measure the total length from one flange’s outer edge to the other. Cut two 2×4 pieces to this length for support and an additional two pieces six inches longer for the base.
Step 4: Assembling Support Structure
With your cut pieces, make a support structure for your bar. Measure and attach the shorter pieces on top of the longer pieces, three inches in from the edge, using 2 1/2 inch screws. Reinforce all joints with screws from both sides for added strength.
Step 5: Painting
Protect your pull-up bar with paint. Start with a rust-inhibiting primer on the steel, then apply an exterior-grade paint on both the wood and steel. This step is crucial for durability, especially if your pull-up bar will be exposed to the elements.
Step 6: Final Assembly
Switch to 3-inch-long deck screws for final assembly. Secure the bottom spacers to one of the A-frames, then place and fix the bar on top with screws. Carefully align the second A-frame on top and secure it firmly. Ensure the pull-up bar is level before adding additional support screws at various angles for maximum stability.
Step 7: Stability and Adjustments
If you plan on performing dynamic movements like muscle-ups, consider securing your structure to the ground for extra stability. However, the four-foot-wide base should provide ample support for standard pull-ups.
Video Tutorial
For a step-by-step video tutorial, watch this YouTube guide on building an outdoor pull-up bar.
Troubleshooting Guide
When it comes to DIY projects, it’s common to encounter a few hiccups along the way. Here’s a troubleshooting guide to help you address some potential issues you might face while assembling or using your DIY pull-up bar.
During Assembly
Problem: The pieces don’t fit together as expected.
Solution: Double-check the instructions and make sure you’re using the correct pieces. If the pieces still don’t fit, try sanding down the edges for a smoother fit.
After Assembly
Problem: The pull-up bar feels unstable.
Solution: Check all the connections and make sure they’re tight. If the bar is still unstable, it might be a problem with the wall or ceiling where it’s mounted. Make sure the surface is solid and can support the weight.
Problem: The pull-up bar is causing damage to the wall or door frame.
Solution: This could be due to the weight distribution. Consider adding some padding or a wider bracket to distribute the weight more evenly.
During Use
Problem: The pull-up bar is uncomfortable to use.
Solution: You might want to add some padding or grip tape to the bar. This can make it more comfortable to use and can also prevent blisters.
Problem: The pull-up bar is making a creaking noise.
Solution: This could be a sign that the bar is under too much stress. Check the weight limit and make sure you’re not exceeding it. If the noise continues, it might be a good idea to disassemble the bar and check for any signs of damage.

Advanced Modifications for Pull Up Bars
Enhancing your pull up bar can take your workouts to the next level. Here are some advanced modifications that can help you build muscle and strength, as well as add variety to your routine.
Commando Pull-Ups
Commando pull-ups are a great way to challenge your muscles from different angles. To perform this exercise:
- Grasp the bar with your hands facing each other in a narrow grip.
- As you pull up, move your head to the side of the bar to avoid hitting it.
- Alternate the side your head passes with each rep for balance.
L-Sit Pull-Ups
L-sit pull-ups engage your core and change the leverage of the exercise, increasing its difficulty.
- Keep your legs extended parallel to the ground throughout the motion.
- If this is too challenging, work on hanging leg raises and improving your hamstring flexibility first.
Eccentric and Isometric Pull-Ups
These variations focus on the lowering phase and holding the top position, which can build grip, arm, and back strength.
- For eccentric pull-ups, lower yourself slowly and controlled from the top of the bar.
- Isometric pull-ups involve holding yourself at the top of the pull-up for a set amount of time.
Pull-Up Progressions
If you’re working towards a specific type of pull-up, like the chest-to-bar, use a progression guide to build up to it gradually.
Pull-Up Workouts
Incorporate a variety of pull-up exercises into your routine to keep it fresh and challenging. Here’s a simple workout to get started:
- Standard pull-ups: 3 sets of as many reps as possible.
- Commando pull-ups: 2 sets of 5 reps on each side.
- L-Sit pull-ups: 3 sets of 3-5 reps.
- Eccentric pull-ups: 3 sets of 5 reps, with a 5-second lowering phase.
- Isometric pull-ups: 3 sets, holding for 10-20 seconds at the top.

FAQs About DIY Pull-up Bar
Discover everything you need to know about DIY pull-up bars in our comprehensive FAQs guide.
What materials do I need to build a DIY pull-up bar?
You’ll need a sturdy bar, brackets to hold the bar, screws or bolts to secure the brackets, and possibly additional materials depending on your specific design.
How do I assemble a DIY pull-up bar?
Start by securing the brackets to a solid surface like a wall or ceiling. Then, place the bar in the brackets and secure it with screws or bolts.
What safety precautions should I take when constructing and using a DIY pull-up bar?
Always wear protective gear when constructing the bar. Test the bar’s stability before each use, and never exceed its weight limit.
How do I maintain my DIY pull-up bar?
Regularly check the bar for any signs of wear and tear, and tighten any loose screws or bolts.
What should I do if I encounter problems while assembling or using my DIY pull-up bar?
If you encounter problems, it’s best to consult with a professional. They can help you troubleshoot the issue and ensure the bar is safe to use.
What are the benefits of doing pull-ups?
Pull-ups are a great upper-body workout. They strengthen your arms, back, and shoulders, and can also improve your grip strength.
What different pull-up variations can I do on my DIY pull-up bar?
There are many pull-up variations you can try, such as wide-grip, close-grip, and underhand pull-ups. Each targets different muscle groups.
Can I build a pull-up bar that fits in my doorway?
Yes, you can build a doorway pull-up bar. However, it’s important to ensure the doorway can support your weight.
How can I make my DIY pull-up bar more comfortable to use?
Adding padding or grip tape to the bar can make it more comfortable to use and prevent blisters.
What are the benefits of building a DIY pull-up bar instead of buying one?
Building your own pull-up bar can be more cost-effective than buying one. Plus, you can customize it to fit your specific needs and space.
Conclusion:
In conclusion, making your DIY pull-up bar for outdoor use is a rewarding project that can significantly enhance your fitness routine. With detailed guidance on everything from the benefits of pull-ups, including full-body workouts and strength building, to a comprehensive step-by-step guide and advanced modifications, this article ensures you have all the information needed to succeed.
Whether addressing common troubleshooting issues or exploring workout variations, the insights provided aim to support your journey toward achieving a versatile and convenient workout hub right in your backyard. So, grab your tools and start building your outdoor pull-up bar today for a healthier, stronger tomorrow.


