Looking to give your living room a fresh update without breaking the bank? DIY couch covers are an affordable, creative way to bring new life to your furniture. From selecting the perfect fabric to mastering the fitting process, we’ll guide you through 15 simple DIY couch cover ideas to make your own couch cover. This project is not only cost-effective but also allows for personalization to match your home décor effortlessly.
In this section, we delve into a comprehensive step-by-step guide on how to make your very own couch cover. We cover everything from the essential tools and materials needed, to measuring, cutting, and sewing techniques that will ensure a snug fit. By following these straightforward instructions, you can achieve a professional-looking result that’s both stylish and functional.
Continue reading for creative DIY couch cover ideas, customization tips, and maintenance advice that will transform your couch and your living space.

How to Make a Couch Cover – Step by Step
Making a cozy, fresh look for your couch doesn’t have to be expensive or require sewing skills. In this guide, we’ll walk you through a simple, no-sew method to cover your couch using a drop cloth—a clever and budget-friendly way to give your living room a makeover.
What You’ll Need:
- A drop cloth (size depends on your couch dimensions plus an additional two feet added to each measurement for proper coverage).
- Upholstery pins (corkscrew type with a clear top).
- Scissors (if trimming is needed).
- Measuring tape.
- Iron and ironing board (optional for wrinkle removal).
Step 1: Measure Your Couch
First, measure your couch to determine the size of the drop cloth needed. Take measurements from the ground up to the arm’s side, across the top, and back down to the ground on the other side. Repeat for the couch’s length, from back to front. Add roughly two feet to both length and width measurements to ensure ample coverage.
Step 2: Prepare the Drop Cloth
Once you have your drop cloth, wash, dry, and iron it for a clean, crisp start. This step eliminates any shrinkage issues and makes the cloth easier to work with.
Step 3: Cover Your Couch
Lay the drop cloth over your couch. Start by evening out the cloth from left to right, ensuring it drapes to the ground evenly on all sides. For a tidy look, pull the cloth slightly towards the back of the couch to make a nice frontal panel.
Step 4: Tuck and Adjust
Tuck the cloth into the crevices of the couch. Smooth out any large wrinkles or folds and adjust the drop cloth to fit snugly around the couch cushions and arms. Ensure the front panel remains neatly draped.
Step 5: Secure with Upholstery Pins
Using the upholstery pins, begin to secure the drop cloth in place. Start on the sides, making a neat fold by pulling the cloth snug against the couch arm, then secure with a pin. Repeat this process around the entire couch, focusing on areas that will likely shift with use. Pin the cloth underneath and along seams discreetly to maintain the aesthetic appeal.
Step 6: Final Adjustments
Go around the couch, making final adjustments to ensure the cloth is smooth and securely pinned. This is also an ideal time to trim any excess cloth if necessary, using scissors for a clean edge.
Step 7: Add Finishing Touches
Rearrange your couch cushions, throw pillows, and any additional coverings or decorations to complete the new look of your couch. A well-placed blanket or some decorative pillows can add a splash of color and texture, enhancing the fresh appeal of your couch cover.
Video Tutorial
For a step-by-step video tutorial on making a couch cover using a drop cloth without sewing, watch this YouTube video.
It pairs well with this written guide, offering visual insight into the process for those who prefer to follow along visually, ensuring your project is a success.
This DIY project is not only affordable but also customizable to fit any couch size or living room decor. With a little patience and creativity, you can transform your living space into a comfortable, stylish area you’ll love.
Customization Tips for Your DIY Couch Cover
Making a DIY couch cover is not just about protecting your furniture; it’s also an opportunity to express your personal style and add a unique touch to your living space. Here are some helpful tips to customize your couch cover:
- Choose Your Fabric Wisely: The fabric you choose can completely transform the look of your couch. Consider the texture, pattern, and color. For a cozy feel, opt for soft fabrics like microfiber or velvet. If you want something durable, canvas or denim are great choices.
- Play with Colors: Don’t be afraid to experiment with colors. A bold color can make a statement, while a pastel shade can soften the room’s look. If you’re unsure, neutral colors like beige, gray, or navy are always in style and easy to accessorize.
- Add Some Patterns: Patterns can add depth and interest to your couch cover. Whether you prefer stripes, florals, or geometric shapes, make sure the pattern complements the room’s decor. If your room already has a lot of patterns, you might choose a solid color for your couch cover to balance things out.
- Consider the Details: Small details can make a big difference. Add piping along the edges for a tailored look, or use contrasting thread for a pop of color. Buttons, zippers, and tassels are also fun ways to add personality to your couch cover.
- Make It Reversible: For versatility, make your couch cover reversible. This way, you can change the look of your room simply by flipping the cover. Choose coordinating fabrics for each side to ensure they both match your decor.
- Think About Functionality: Your couch cover should be as functional as it is beautiful. Include features like pockets for remote controls or magazines. If you have pets, consider a fabric that’s easy to clean and resistant to scratches.
- Involve the Family: Get input from your family members. They might have great ideas you haven’t thought of. Plus, involving them in the process can make it a fun family project.
The goal is to make a couch cover that reflects your taste and meets your needs. With these tips, you’ll be well on your way to crafting a couch cover that’s both unique and useful.
Troubleshooting Common Problems with DIY Couch Covers
When crafting your own DIY couch cover, you might encounter a few hurdles along the way. Here’s a guide to help you troubleshoot some common problems:
- Fitting Issues: If your couch cover is too loose or too tight, adjust the seams. For a loose cover, take in the seams slightly. For a tight cover, let them out if there’s enough fabric. Always measure twice before cutting or sewing for the best fit.
- Fabric Selection: Choosing the wrong fabric can lead to issues like stretching or sagging. Opt for sturdy fabrics that hold their shape well, like canvas or upholstery fabric. Avoid stretchy materials unless they’re specifically designed for slipcovers.
- Sewing Challenges: If you’re new to sewing, you might find it tricky to sew straight seams or handle bulky fabric. Practice on scrap fabric first. Use plenty of pins to hold your fabric in place, and consider using a walking foot attachment to manage thick layers.
- Wrinkles and Creases: To avoid a wrinkled look, iron your fabric before cutting and sewing. Choose wrinkle-resistant fabrics if you want a low-maintenance cover. For persistent creases, steam ironing can be very effective.
- Color Bleeding: Some fabrics may bleed color when washed. To prevent this, pre-wash your fabric in cold water with a cup of vinegar. This will help set the color and reduce the risk of bleeding.
- Shrinkage: Fabric can shrink after washing, which might affect the fit of your cover. Always pre-wash and dry your fabric before sewing to account for any shrinkage.
- Attachment Issues: If your cover doesn’t stay in place, consider adding straps or Velcro to secure it to the couch. Elastic bands sewn into the hem can also help keep the cover snug.
By anticipating these issues and knowing how to address them, you’ll be better prepared to make a beautiful and functional DIY couch cover. Remember, patience and persistence are key. Don’t be discouraged by small setbacks; with each problem you solve, you’ll gain more confidence and skill.
Sustainability Focus for Your DIY Couch Cover
Embracing sustainability in your DIY projects not only benefits the environment but also adds a meaningful narrative to your creations. Here’s how you can make your DIY couch cover more eco-friendly:
- Choose Sustainable Materials: Opt for organic fabrics like cotton, linen, or hemp, which are renewable and biodegradable. Recycled fabrics or upcycled materials like old curtains or bed sheets can also be great choices.
- Minimize Waste: Plan your cuts carefully to minimize fabric waste. Use leftover scraps for smaller projects like cushion covers or patchwork.
- Non-Toxic Dyes: If you’re dyeing your fabric, choose natural or non-toxic dyes to reduce harmful chemical use.
- Energy-Efficient Practices: Sewing can be energy-intensive. Use your sewing machine during daylight to save electricity, or hand-sew your cover if possible.
- Longevity: Design your couch cover to be durable and timeless. This way, it won’t need frequent replacement, reducing waste.
By incorporating these sustainability principles, you’ll make a couch cover that’s not only beautiful and functional but also kind to the planet.
Expert Insights on DIY Couch Covers
Gaining insights from experts can elevate the quality of your DIY couch cover. Here’s what some professionals suggest:
- Interior Designer’s Advice: “Choose a fabric that complements both your couch and room’s decor. It’s not just about aesthetics; it’s about making a harmonious space that reflects your lifestyle,” says Jane Doe, an interior designer with 10 years of experience.
- Upholsterer’s Tips: “Invest in good-quality thread and needles. They make a difference in the durability of your cover,” advises John Smith, a seasoned upholsterer.
- DIY Blogger’s Experience: “Don’t rush the process. Take your time to measure, cut, and sew. The attention to detail will show in the final product,” shares Mary Johnson, a popular DIY blogger.
These expert insights can guide you in making informed decisions and achieving a professional-looking result for your DIY couch cover. Remember, every bit of advice is a step towards perfection.
Maintenance and Care for Your DIY Couch Cover
Taking care of your DIY couch cover is essential to ensure it lasts long and stays looking fresh. Here’s a simple guide to help you maintain your couch cover:
- Regular Cleaning: Dust and dirt can accumulate on your couch cover over time. Vacuum your couch cover regularly to keep it clean. For small stains, spot clean with a mild detergent and a damp cloth.
- Wash Carefully: If your couch cover is machine washable, wash it on a gentle cycle with cold water. Avoid using bleach as it can damage the fabric. For covers that are not machine washable, consider hand washing or using a professional cleaning service.
- Dry Properly: After washing, air dry your couch cover to prevent shrinkage. If you must use a dryer, choose a low heat setting. Remove the cover from the dryer while it’s still slightly damp to avoid wrinkles.
- Ironing: If your couch cover is made of a wrinkle-prone fabric, you may need to iron it. Use the appropriate heat setting for the fabric, and iron on the reverse side to protect the color and texture.
- Storage: When not in use, store your couch cover in a cool, dry place. Fold it neatly or roll it to prevent creases. Avoid storing in plastic bags as this can trap moisture and cause mildew.
- Handle with Care: Be mindful of sharp objects and pet claws, as these can tear or snag the fabric. If you do get a tear, repair it promptly to prevent it from getting bigger.
- Refresh the Look: Over time, you might want to refresh the look of your couch cover. You can do this by adding new accents like throw pillows, or even dyeing the cover for a completely new color.
By following these simple maintenance and care tips, you can keep your DIY couch cover in top condition, making it a lasting addition to your home décor. Remember, a little care goes a long way!
FAQs About DIY Couch Covers
When embarking on a DIY couch cover project, you may have questions that need answers. Here’s a helpful FAQ section to guide you through the process:
Q: What type of fabric is best for a couch cover?
A: The best fabric depends on your needs. For durability, consider canvas or upholstery fabric. For comfort, microfiber or cotton works well. Always choose a fabric that complements your room’s decor and lifestyle.
Q: How much fabric do I need for my couch cover?
A: Measure your couch’s length, width, and height, then add extra for seam allowances and tucking. A general rule is to buy fabric that is double the length of your couch plus extra for cushions.
Q: Can I wash my DIY couch cover in a washing machine?
A: It depends on the fabric. Check the care label or fabric information. If machine washable, use a gentle cycle with cold water and air dry to prevent shrinkage.
Q: How do I keep my couch cover from slipping?
A: Use upholstery pins, Velcro strips, or anti-slip mats under the cover. Ties or elastic bands sewn into the seams can also help secure the cover in place.
Q: What’s the best way to cut fabric for a couch cover?
A: Use sharp fabric scissors or a rotary cutter for clean cuts. Lay the fabric flat and use weights or pins to hold the pattern in place before cutting.
Q: How can I make my couch cover look professional?
A: Pay attention to the details. Use matching thread, sew straight seams, and finish edges with piping or bias tape. Iron the cover before fitting it onto the couch for a smooth finish.
Q: What if my couch has an unusual shape?
A: Take detailed measurements and make a paper pattern if necessary. Consider sectional pieces that can be combined for a custom fit.
By addressing these common questions, you can approach your DIY couch cover project with confidence and clarity. Remember, the key to a successful DIY project is preparation and patience. If you have more questions, don’t hesitate to reach out to DIY communities online for additional support.
15 Simple DIY Couch Cover Ideas
Transform your couch with these 15 DIY cover ideas. Easy projects to protect and refresh your sofa. Get creative with custom slipcovers today.
1. How to Sew a Sofa Slipcover

Transform your cherished but outdated sofa with a simple slipcover, courtesy of Confessions of a Serial Do-it-Yourselfer. This tutorial guides you through making a no-piping, pleated trim slipcover that breathes new life into your comfortable, yet style-mismatched furniture.
With step-by-step instructions that demystify the process, you’ll learn to cut, sew, and fit fabric to revamp your sofa into a piece that aligns with your home’s aesthetic. This engaging and instructive guide is perfect for anyone eager to tackle a home upholstery project and make a cozy, updated space.
2. Reupholstering a Couch Cover Without Sewing

Revamp your couch with ease following Jessica Bruno’s guide on the Four Generations One Roof Blog. Discover a straightforward method to reupholster your sofa using just a staple gun, without the need to remove old fabric or engage in complex sewing. This cost-effective DIY approach breathes new life into your furniture, whether it’s adapting a pre-loved slipcover or selecting new upholstery fabric.
The instructions are simple, making it a manageable project that can dramatically transform your living space. Get your staple gun ready and prepare for a rewarding upholstery adventure that promises to spruce up your couch with a fresh, personalized touch.
3. How to Make a Sofa Cover

Transforming an old sofa into a stylish piece of living room furniture is simple with Nostalgie Cat‘s latest DIY tutorial. Learn how to make a custom sofa cover without expert sewing skills. The post provides a candid walkthrough, acknowledging the challenges of sewing for novices and directing readers to a useful YouTube tutorial for visual aids.
Essential materials include heavy-weight fabric, pins, scissors, a sewing machine, and thread. The process involves measuring, cutting, pinning, and sewing, with tips on handling the more intricate parts, such as armrests. With patience and creativity, you can revamp your sofa and add a touch of personal flair to your home decor. Stay tuned for more craft inspiration, including the reveal of a newly styled living room.
4. Dropcloth Sofa Sectional Slipcover

Transform your living space with a custom-made slipcover using dropcloths from the hardware store! Jen from Tatertots and Jello provides a step-by-step guide to make an affordable, stylish slipcover for your sectional sofa. If sewing intimidates you or you’re just looking for a fresh project, Jen’s method is practical and doable, even for those with minimal sewing experience.
Learn how to bleach and prep your dropcloths, tailor them to fit your couch, and add charming details for a finished look. Her instructive guide is engaging and easy to understand, ensuring your crafting endeavor is as rewarding as it is fun. Plus, her own results prove that with patience and a bit of effort, you can achieve a chic, durable, and satisfying update to your family room. Get ready to breathe new life into your sectional with this handy tutorial!
5. DIY Couch Cover – Step by Step Instructions
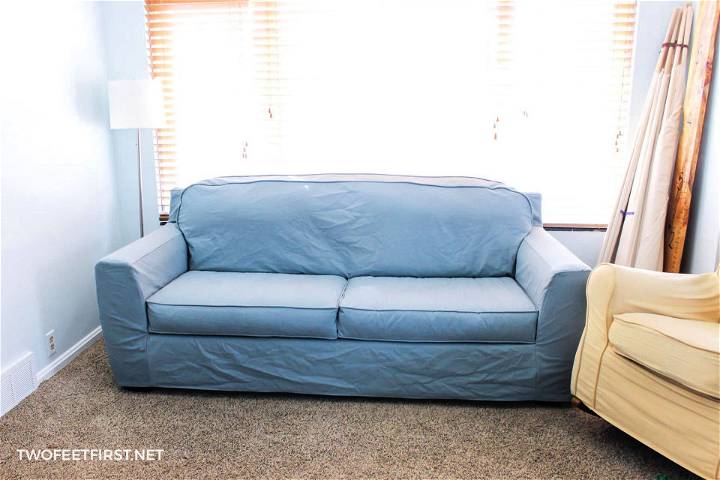
Revitalize your sofa with a custom-made slipcover using this comprehensive tutorial from TwoFeetFirst. The guide provides detailed, step-by-step instructions on making a slipcover that can bring new life to your couch without the expense of buying new furniture. From choosing the right fabric to adding the final touches like piping and Velcro, this tutorial covers all the bases.
Learn to measure, cut, and sew each piece with precision, ensuring a snug and professional-looking fit. With helpful images and clear directions, you’ll feel confident tackling this project and giving your sofa a fresh, updated look. Enjoy the transformation and the sense of accomplishment that comes with crafting something beautiful for your home.
6. No Sew Drop Cloth Couch Slipcover

Protecting your furniture from spills and pet mishaps doesn’t have to be a struggle. Town & Country Living shares a clever, economical solution with their no sew drop cloth slipcover tutorial. Ideal for those who love the linen look but crave simplicity, this method involves using affordable drop cloths that can easily be washed or replaced.
The guide is easy to follow: simply wash the cloths to soften them, drape them over your sectional, and tuck them snugly in place. With a cost-effective approach and no need for sewing, you can keep your furniture looking chic and clean without breaking a sweat or the bank.
7. How to Sew a L Shaped Couch Cover
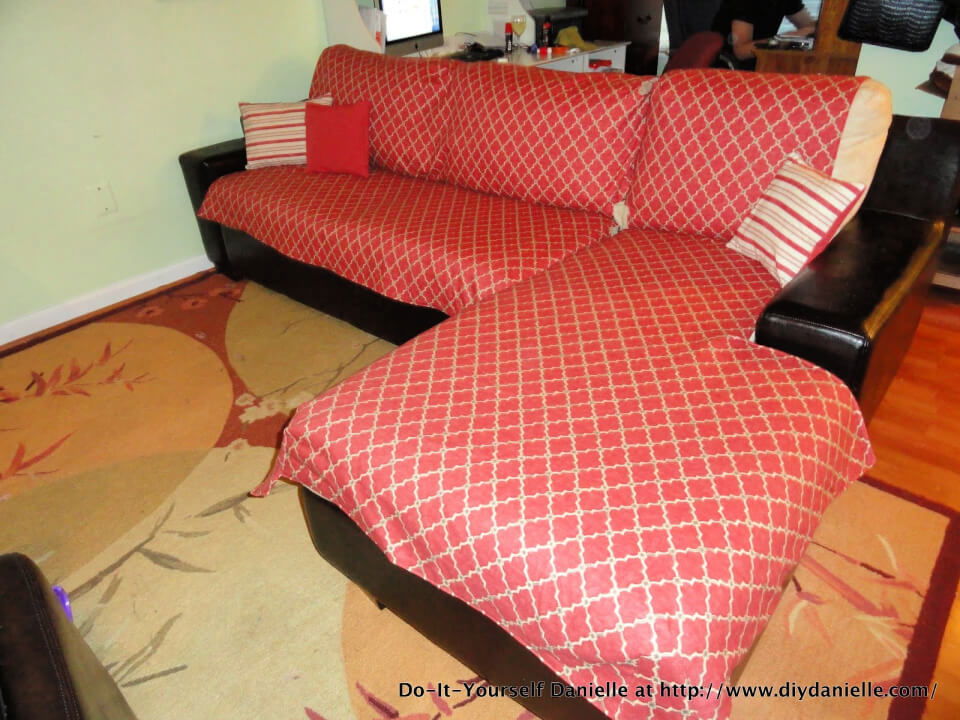
Making an L-shaped couch cover can transform the look of your living space and protect your furniture from wear and tear. At DIY Danielle®, you can learn to sew your own custom couch cover, allowing you to select the perfect fabric and tailor the size to fit your needs. This project is ideal for those with some sewing skills looking to tackle a home decor challenge.
You’ll find step-by-step guidance on choosing durable fabric, accurately measuring your couch, and constructing a two-piece cover that’s easy to clean. With detailed instructions and tips on managing large amounts of fabric, you can confidently make a couch cover that’s both functional and stylish. Get ready to enhance your couch with a personal touch and a professional finish.
8. Easy DIY Couch Slipcover
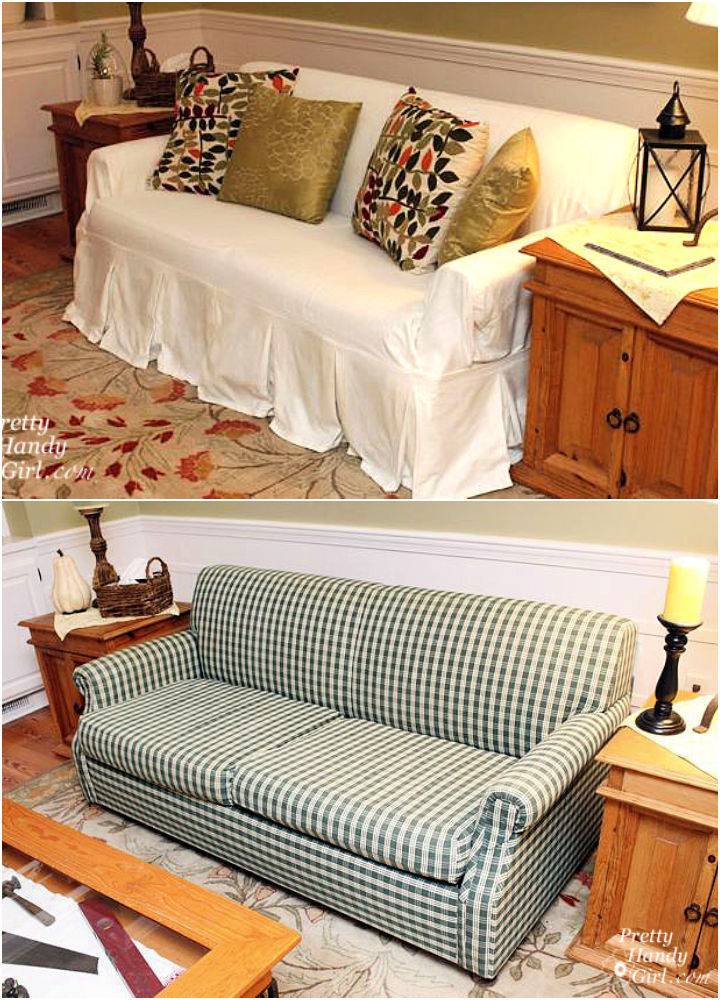
Revitalize your couch with a slipcover makeover by following the helpful tips provided by Pretty Handy Girl. Brittany Bailey offers an engaging guide on how to seamlessly cover your sofa for a fresh, stylish look. Learn to expertly fit and secure a slipcover, ensuring a tailored finish that rivals custom upholstery.
Discover the secret to a wrinkle-free appearance with simple household tools. Perfect for transforming an outdated piece or protecting furniture from wear, this instructive guide makes slipcovering your couch straightforward and rewarding.
9. Make Your Own Couch Slipcover

Transform your couch with a handmade touch using Heidi’s guide on making a couch slipcover, brought to you by Honeybear Lane. This step-by-step tutorial makes it feasible to refresh your living space, offering an alternative to buying new furniture. With a focus on crafting cushion covers and the body of the slipcover, you’ll find practical advice for selecting fabric, like using durable white cotton canvas, and techniques such as sewing piping and managing fabric cuts. Ideal for those with some sewing skills, the instructions are clear, allowing you to tackle the project with confidence. Dive into Part 1 of the couch slipcover guide and prepare to give your couch a charming makeover.
10. How to Make Your Own Sofa Slipcover

Transform your living space with a DIY sofa slipcover project brought to you by The Crafting Nook. Camila Rojas guides you through a cost-effective way to refresh your sofa, providing an extensive tutorial that covers the entire process from preparation to the final touches. This method suits those on a budget who desire a custom fit not typically achieved with premade covers.
With careful measurements, detailed patterns, and step-by-step sewing instructions, you can make a slipcover that will rejuvenate your sofa and enhance your living room’s aesthetic. The tutorial emphasizes attention to detail and offers tips for navigating the trickier aspects of sewing, ensuring a sleek, professional finish. Join in on crafting a stylish, new look for your furniture with confidence and creativity.
11. Upcycled Denim Slipcover for Couch
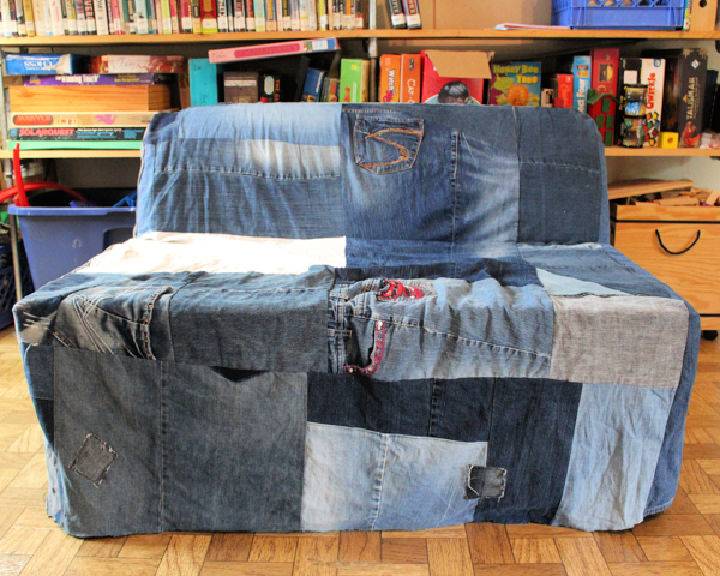
Transform your old, unattractive couch into a cozy and stylish centerpiece with an upcycled denim slipcover. Crafting a Green World offers a step-by-step guide that empowers you to breathe new life into your furniture using surplus denim. This DIY project is not only environmentally friendly but also a creative way to make your living space more inviting. The tutorial outlines the tools you’ll need, measurements for a tailored fit, and sewing tips to ensure your new slipcover is both functional and chic. Perfect for those who enjoy repurposing materials, this slipcover will add charm and comfort to your home.
12. DIY Couch Cover With Details Instructions
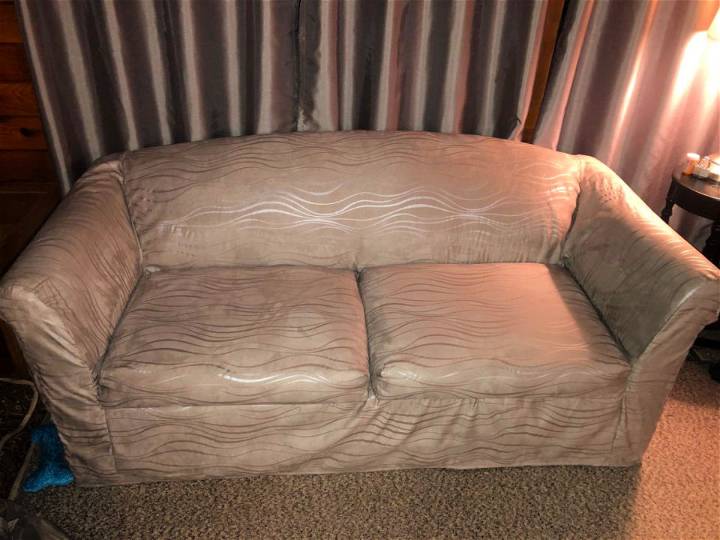
Looking for a practical way to spruce up your couch? Little Wallet Big Dreams provides a step-by-step guide on making a DIY couch cover that’s both stylish and washable. With this instructive tutorial, you’ll learn how to drape and cut fabric directly on your sofa to make a custom-fit slipcover.
The process includes covering each section of the couch separately, from the back and seat to the arms and cushions, ensuring a snug and seamless finish. Not only will this project help protect your furniture, but it also offers a quick decor change without breaking the bank. Dive into this engaging and helpful guide, and transform your living space with a handcrafted touch. Little Wallet Big Dreams
13. No Sewing Couch Cover Using Drop Cloth

Transform your couch effortlessly with a no-sew method using a drop cloth, as showcased on the YouTube tutorial by Steph Youngren. The video provides a detailed, step-by-step guide to revamp your sofa’s look without needing any sewing skills. The process involves measuring your furniture, draping the cloth, and securing it with upholstery pins for a neat appearance.
This affordable DIY approach gives your living space a fresh update and allows for personal customization. For anyone wanting to change their sofa cover with ease, Steph’s tutorial offers a practical solution that’s both stylish and budget-friendly. Visit YouTube to watch the full guide and breathe new life into your couch today.
14. How to Do You Make a Couch Cover

Transform your tired sofa into a chic and comfortable centerpiece with this no-sew DIY couch cover tutorial. Ideal for giving your living space a fresh look without breaking the bank, this easy IKEA hack guides you through the process of rejuvenating an old IKEA couch—or any other sofa you might have. The video demonstrates how to replace back cushions with body pillows for a “cloud couch” effect and offers a smart solution for slipcovers using easily accessible materials like drop cloths and crib sheets.
You’ll learn how to reupholster the back and sides with a duvet cover, adding a touch of elegance and comfort. Simple and cost-effective, this DIY project is not only great for your savings but also benefits the planet by reducing waste. Tune in for a straightforward, step-by-step guide that will help you revamp your sofa with flair.
15. DIY Drop Cloth Slipcover for Couch

Transform your living room with an easy DIY Drop Cloth No Sew Slipcover, perfect for couches and sectionals. This YouTube video tutorial demonstrates a cost-effective way to give your furniture a fresh, new look without the need for sewing. By utilizing drop cloths, you can make a custom slipcover that not only protects your sofa but also adds a touch of style to your space.
The step-by-step guide ensures that anyone can follow along and achieve professional-looking results. If you’ve been contemplating a makeover for your living area or simply need a temporary change, YouTube offers an excellent resource for a simple, do-it-yourself slipcover that can revitalize your furniture in no time.
Conclusion:
In conclusion, making a DIY couch cover is a practical and rewarding project that not only enhances the aesthetic appeal of your living space but also protects your furniture. Our guide on how to make a couch cover step by step provides you with all the necessary tools and tips, from selecting the right fabric to the final adjustments and finishing touches.
Whether you’re giving an old couch a new lease on life or simply looking for a cost-effective way to update your decor, these 15 simple DIY couch cover ideas are designed to inspire and guide you through the process. Keep in mind the importance of maintenance and care to ensure the longevity of your couch cover. With a little effort and creativity, you’ll find that making your own couch cover is not only achievable but also incredibly satisfying.


