Looking for ways to spark joy and creativity in your children’s daily play? Making a DIY play kitchen can be a magical experience, offering endless hours of imaginative play and learning. These play kitchens not only nurture a child’s imagination but also play a crucial role in their developmental journey. From enhancing their social skills to boosting motor abilities, the benefits are vast and varied. With 25 unique DIY play kitchen ideas, you’ll find the perfect project that your kids will absolutely adore.
Navigating through the process of building a play kitchen might seem daunting, but with the right guidance on safety, materials, and step-by-step instructions, it becomes an achievable and rewarding endeavor. Moreover, understanding the educational benefits and incorporating elements that foster creativity, communication, and life skills can significantly enhance the value of a play kitchen in your child’s growth.
Excited to see how you can transform simple materials into a wonderful play area for your little ones? Let’s dive into the heart of these creative projects and discover how to make your child’s playtime both fun and beneficial.
Safety and Materials Guide for DIY Play Kitchens
Making a DIY play kitchen can be a delightful project for both you and your child. However, it’s crucial to prioritize safety and choose the right materials. Here’s a guide to help you make informed decisions:
Selecting Safe Materials:
- Wood: Opt for solid wood or high-quality plywood for the main structure. Avoid treated woods that may contain harmful chemicals.
- Paint: Use water-based, non-toxic paint. Look for products labeled as child-safe or with a “toy safe” certification.
- Adhesives: Choose non-toxic, solvent-free glues. Water-based adhesives are preferable.
- Finishes: For a protective coat, select a food-safe, non-toxic sealant.
Tools and Hardware:
- Screws and Fasteners: Ensure all screws and fasteners are securely tightened and not accessible to children.
- Hinges: Use safety hinges on doors to prevent little fingers from getting pinched.
- Knobs and Handles: Smooth, rounded knobs and handles are safer than sharp-edged ones.
Avoiding Hazards:
- Small Parts: Be vigilant about small parts that could pose a choking hazard. If using buttons or beads for stove knobs, ensure they are firmly attached.
- Sharp Edges: Sand down any sharp edges or corners to prevent cuts and scrapes.
- Stability: Make sure the play kitchen is stable and won’t tip over easily. Anchor it to a wall if necessary.
Sustainability:
- Repurposing Materials: Consider using recycled or upcycled materials for parts of the kitchen. Old furniture or kitchenware can be transformed into play kitchen elements.
- Eco-Friendly Options: Look for sustainably sourced wood and eco-friendly paints and finishes.
By following these guidelines, you’ll make a safe and enjoyable play kitchen that will provide hours of fun for your child. Remember, the key is to balance creativity with caution, ensuring a playful yet secure environment for your little one.
Educational Benefits of Play Kitchens
Play kitchens are more than just toys; they are a platform for children to learn and grow. Here’s how they contribute to a child’s development:
Fostering Creativity and Imagination
Children love to mimic adults. A play kitchen allows them to make their own culinary world, enhancing their creativity and imagination.
Enhancing Language and Communication
As children engage in pretend play, they naturally expand their vocabulary and improve their communication skills. They learn new words and phrases related to cooking and food, which enriches their language development.
Developing Social Skills
Play kitchens encourage children to interact, share, and play cooperatively with others, which is fundamental for developing social skills.
Teaching Life Skills
Through play, children learn about everyday tasks such as cooking, cleaning, and organizing. These activities teach them valuable life skills in a fun and engaging way.
Boosting Motor Skills
Handling small utensils and pretend food helps to refine children’s fine motor skills, which are crucial for writing and other detailed activities.
Encouraging Numeracy and Cognitive Development
Counting food items, measuring ingredients, and following recipes can enhance children’s numeracy and cognitive skills.
By incorporating a play kitchen into your child’s playtime, you’re not just giving them a toy; you’re providing a valuable educational tool that will aid in their overall development. Remember to keep the play engaging and suited to your child’s age and interests.
How to Make a Cardboard Kitchen for Kids
Making a cardboard kitchen for kids is a fun project that fosters creativity and bonding. This guide will help you make a DIY kitchen set using cardboard. Inspired by Salih Art And Tech, bring joy to your children.
Materials You Need
- Large Cardboard Boxes
- Ruler, Pencil, Marker
- Box Cutter or Scissors
- Hot Glue Gun and Glue Sticks
- Paint (your choice of colors)
- Additional Decor (stickers, fabric, etc.)
Step-by-Step Instructions
Learn how to make a cardboard kitchen for kids with this easy DIY guide below:
Preparing the Cardboard
- Collect and Prepare Cardboard: Gather large cardboard boxes. You want enough material to make various kitchen components like a fridge, oven, cupboard, and drawers.
- Design and Layout: Using a pencil and ruler, sketch out the dimensions of each kitchen component on the cardboard. Consider the height and size appropriate for your child.
Cutting and Assembling
- Cutting Pieces: Carefully cut out the shapes with a box cutter or strong scissors. Always cut on a safe surface and keep your hands away from the blade’s path.
- Assemble the Base: Start with the base of your kitchen set – usually the cupboard or oven. Use hot glue to piece together the sides, bottom, and top. Ensure it’s sturdy.
- Additional Components: Similarly, assemble other components like the fridge, drawers, and any additional storage you wish to add.
Adding Details
- Painting: Once assembled, paint your kitchen set in colors that your child loves. This might require a couple of coats for a vibrant finish.
- Hardware and Features: For knobs and handles, you can either use cut-out cardboard pieces or real hardware. Painted cardboard pieces can make good imitation switches and oven dials.
- Decorations: Feel free to add stickers, fabric as curtains, or any other decorations to personalize the kitchen.
Final Touches
- Install Features: If you’re adding any functional elements like lights or a magnetic lock, install these once the paint has dried.
- Let it Dry Completely: Before letting your child play with the kitchen set, make sure everything is thoroughly dry and securely glued.
Safety Tips
- Always prioritize safety when using tools like box cutters and hot glue guns.
- Ensure there are no sharp edges on the cardboard.
- Regularly inspect the kitchen set for any wear and tear.
Enjoy and Play
Introduce the kitchen to your child and watch their imagination come to life. It’s not just a play kitchen; it’s a palette for creativity and endless storytelling.
Video Tutorial
For a step-by-step video tutorial on how to make a DIY cardboard kitchen for kids, watch this amazing guide by Salih Art And Tech on YouTube.
It pairs wonderfully with this written guide, offering a visual representation of the techniques discussed. The video enhances the learning experience by showing each step in action, making it easier to follow along.
Make a cardboard kitchen for your kids to make memories and have fun. Put in the effort to make it special, like Salih Art And Tech did for his daughter. Start this creative project today!
Customization Ideas for Your DIY Play Kitchen
Transforming a basic DIY play kitchen into a personalized playtime paradise is all about creativity and attention to detail. Here’s how you can add a touch of uniqueness to your child’s play kitchen:
Choose a Theme
Start by selecting a theme that resonates with your child’s interests. Whether it’s a rustic farmhouse, a sleek modern look, or a whimsical fairy-tale cottage, a theme can guide your choice of colors, patterns, and accessories.
Color It Beautiful
Paint is your best friend when it comes to customization. Opt for bright, cheerful colors or soft pastels depending on the theme. Remember to use non-toxic, child-safe paint for safety.
Get Creative with Backsplashes
A playful backsplash can be a game-changer. Use stick-on tiles, wallpaper, or even hand-painted designs to make a focal point.
Add Functional Elements
Consider installing hooks for hanging utensils or a small shelf for play spices and ingredients. These elements not only look great but also encourage organizational skills.
Personalize with Accessories
Accessories like miniature pots, pans, and utensils complete the look. You can find these in toy stores or repurpose items from around the house.
Interactive Features
For a truly interactive experience, add elements that move or make noise. Think about knobs that turn, doors that open, or even a bell that rings.
Incorporate Educational Aspects
Incorporate elements that can aid in learning, such as a clock to teach time, a menu board for writing practice, or play money for math skills.
By focusing on these details, you can make a play kitchen that’s not only fun but also a valuable learning tool. Keep it simple, safe, and most importantly, suited to your child’s imagination.
Troubleshooting Common Issues in DIY Play Kitchens
When crafting a DIY play kitchen, you might encounter a few hiccups along the way. Here’s a guide to help you troubleshoot some of the most common issues:
Loose Parts and Fixtures
Over time, screws and hinges may loosen, causing parts of the kitchen to wobble or doors to hang incorrectly.
Solutions:
- Tighten Screws: Regularly check and tighten screws.
- Strengthen Joints: Apply wood glue to joints during initial assembly for added strength.
- Replace Hinges: If doors are not functioning properly, consider replacing the hinges with new, more durable ones.
Peeling or Chipped Paint
A well-loved play kitchen may show signs of wear, such as peeling or chipped paint.
Solutions:
- Sand and Repaint: Lightly sand the affected area and apply a fresh coat of non-toxic, child-safe paint.
- Touch-Up Kits: Keep a small touch-up kit handy for quick fixes.
Sticking Drawers or Doors
Drawers and doors that stick can be frustrating for little ones trying to play.
Solutions:
- Lubricate Tracks: Use a silicone-based lubricant on drawer tracks.
- Adjust Fit: Sometimes, wood can warp or swell. If this happens, adjust the fit by sanding down the edges.
Adhesive Failure
Self-adhesive tiles or wallpaper may start to peel away from surfaces.
Solutions:
- Reapply Adhesive: Clean the surface thoroughly and reapply a strong adhesive.
- Switch Materials: Consider using more durable materials like laminates or painted designs.
By keeping these tips in mind, you can ensure that your DIY play kitchen stays in great shape, ready for endless hours of imaginative play. Regular maintenance and prompt attention to any issues will keep the kitchen safe and fun for your child.
Budget-Friendly Tips for DIY Play Kitchens
Making a DIY play kitchen doesn’t have to break the bank. With some creativity and resourcefulness, you can build a delightful play space on a budget. Here are some cost-effective strategies:
Use Recycled Materials
Look around your home for items that can be repurposed. Old cabinets, tables, and shelves can be transformed into a play kitchen structure.
Shop Secondhand
Visit thrift stores, garage sales, and online marketplaces for used kitchenware and furniture that can be upcycled.
Simplify the Design
A simpler design means fewer materials and less expense. Focus on the essentials like a stove, sink, and storage.
DIY Accessories
Handcraft items like play food and curtains from scrap fabric or felt. It’s a fun activity that also saves money.
Collaborate on the Project
Involve friends and family in the building process. They might have materials to donate or skills to offer.
Be Resourceful with Tools
Borrow tools you don’t have instead of buying them. Many communities have tool libraries or rental options.
By following these tips, you can make a charming and functional play kitchen that encourages imaginative play without costing a lot of money. Remember, the goal is to make a space for creative play, not to replicate a high-end kitchen. Keep it fun, safe, and within budget!
Maintenance and Upkeep for DIY Play Kitchens
Ensuring your DIY play kitchen remains a safe and enjoyable place for your child involves regular maintenance and upkeep. Here’s a straightforward guide to help you keep the play kitchen in top condition:
Cleaning and Sanitizing:
- Daily Cleaning: Wipe down surfaces with a damp cloth to remove crumbs and spills.
- Deep Cleaning: Once a week, use a mild soap and water solution to thoroughly clean all areas.
- Sanitizing: Use a vinegar and water solution for a non-toxic way to sanitize the kitchen.
Checking for Wear and Tear:
- Inspect Regularly: Look for any loose parts, sharp edges, or chipped paint that could pose a risk.
- Tighten Screws: Make sure all screws and fasteners are tight to prevent wobbling or parts coming off.
- Touch-Up Paint: If the paint is chipping, touch it up with the same non-toxic paint used initially.
Updating and Replacing Parts:
- Refresh Accessories: Replace worn-out pots, pans, and utensils with new ones periodically.
- Upgrade Features: As your child grows, consider adding new features to keep the kitchen interesting.
Organizing and Storage:
- Teach Organization: Encourage your child to put away accessories after use.
- Proper Storage: Store the play kitchen in a dry area to prevent warping or mold.
By following these simple steps, you can ensure that the play kitchen remains a beloved and safe fixture in your child’s playtime for years to come. Remember, a well-maintained play kitchen not only looks inviting but also ensures the longevity of the toy and the safety of your child.
Advanced Features for DIY Play Kitchens
Adding advanced features to your DIY play kitchen can take it from a simple play area to an interactive and educational hub. Here are some ideas to enhance your play kitchen with advanced features:
Interactive Elements:
- Clicking Knobs: Install knobs that make a clicking sound when turned, mimicking real appliances.
- Electronic Stovetop Lights: Add battery-operated lights beneath the stovetop area to simulate a real cooking experience.
Educational Add-ons:
- Clock for Teaching Time: Mount a working clock to help children learn to tell time.
- Play Money and Cash Register: Introduce a cash register with play money to teach basic math and money management.
Sensory Play:
- Texture Panels: Make panels with different textures, like faux fur or sandpaper, to stimulate touch.
- Sound Effects: Incorporate sound chips that produce kitchen-related noises, such as boiling water or a timer bell.
Realistic Features:
- Running Water: Rig a pump and basin system to simulate running water in the sink.
- Light-Up Oven: Install a light inside the oven that turns on when the door is opened.
Durability and Safety:
- Sturdy Construction: Use robust materials and construction methods to ensure the kitchen can withstand vigorous play.
- Safe Materials: Ensure all materials used are non-toxic and child-friendly.
By incorporating these advanced features, you not only enhance the play experience but also provide additional learning opportunities for your child.
Frequently Asked Questions About DIY Play Kitchens
Making a DIY play kitchen can be a fun and rewarding project. To help you get started, here are answers to some common questions:
What materials do I need to build a DIY play kitchen?
You’ll need basic supplies like plywood, paint, screws, and tools such as a saw, drill, and sandpaper. Recycled materials can also be used for a budget-friendly option.
How can I ensure the play kitchen is safe for my child?
Use non-toxic, child-safe materials and paints. Make sure all edges are sanded smooth and all screws are tightened securely.
Can I make a play kitchen that’s durable and long-lasting?
Yes, by using quality materials and sturdy construction techniques, your play kitchen can withstand years of play.
What are some budget-friendly tips for building a play kitchen?
Look for secondhand items to upcycle, use recycled materials, and simplify your design to save on costs.
How can I customize the play kitchen for my child?
Choose a theme, use bright colors, add a backsplash, and personalize with accessories to make the kitchen unique.
Are there any educational benefits to having a play kitchen?
Play kitchens can help with creativity, language development, social skills, life skills, motor skills, and cognitive development.
How do I maintain and clean the play kitchen?
Wipe down surfaces regularly, deep clean occasionally with mild soap, and use non-toxic solutions for sanitizing.
What should I do if parts of the play kitchen become loose or damaged?
Regularly inspect the kitchen for wear and tear, tighten any loose screws, and touch up paint as needed.
Can I add advanced features to a DIY play kitchen?
Yes, you can add features like clicking knobs, electronic lights, and even running water for a more interactive experience.
Where can I find inspiration and plans for building a DIY play kitchen?
There are many online resources, including blogs and videos, that offer step-by-step guides and creative ideas for play kitchens.
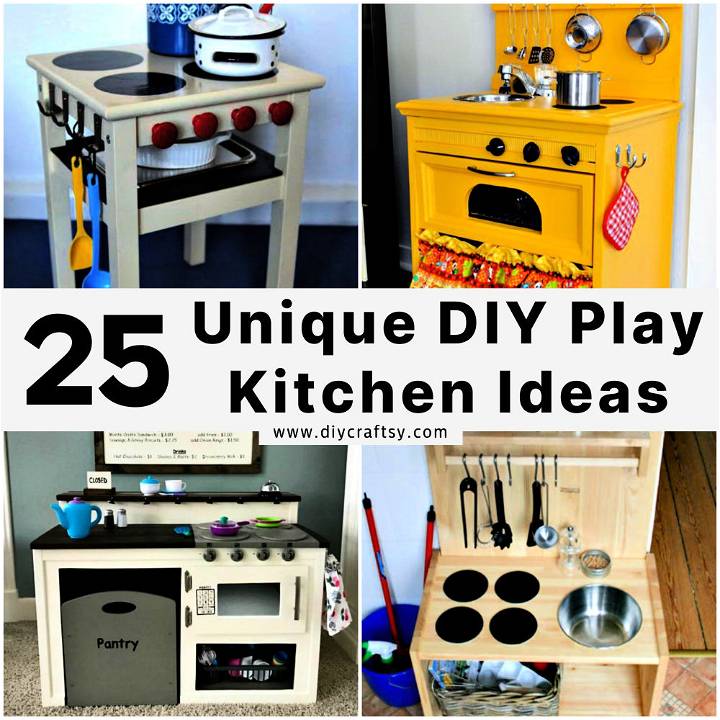
25 Unique DIY Play Kitchen Ideas Your Kids Will Love
Discover 25 fun and creative DIY play kitchen ideas that your kids will adore. Transform ordinary materials into a unique play space for endless imaginative play!
1. Cute DIY Play Kitchen With Back Wall
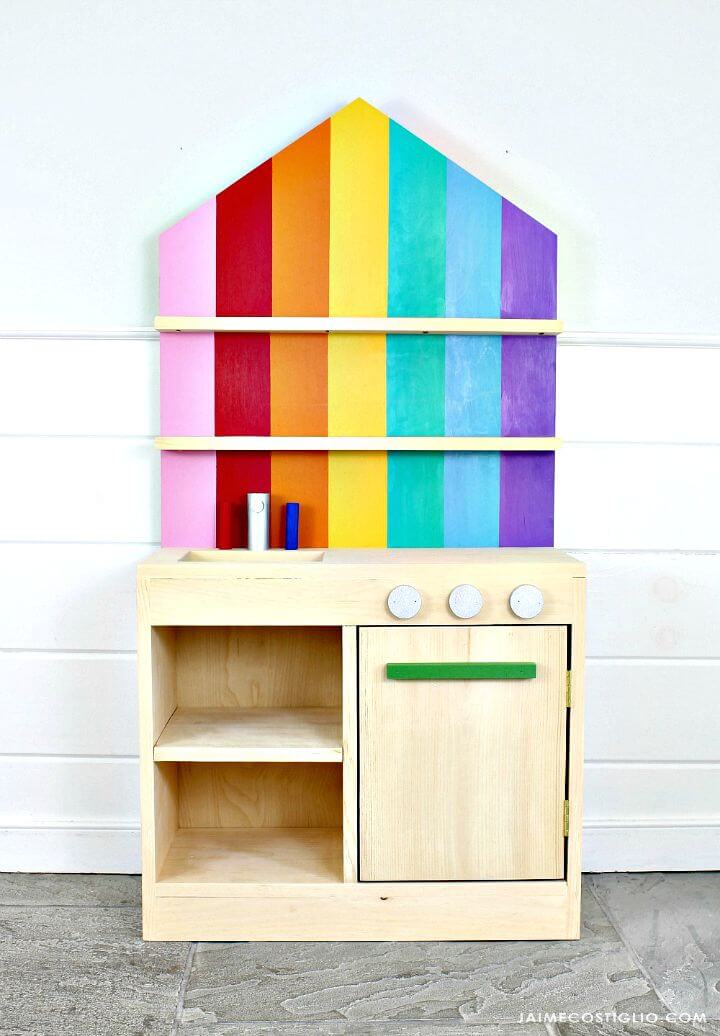
Dive straight into crafting a charming DIY Play Kitchen tailored for the joy of smaller children. Ana White has laid out everything you need: step-by-step instructions, diagrams, and shopping lists, guaranteeing a smooth and engaging build process. From selecting the perfect wood cuts to assembling the kitchen with knobs and hinges, this guide simplifies the creation of a delightful play area. Ready your tools for this beginner project and make a space where little imaginations thrive.
2. How to Make a Play Kitchen
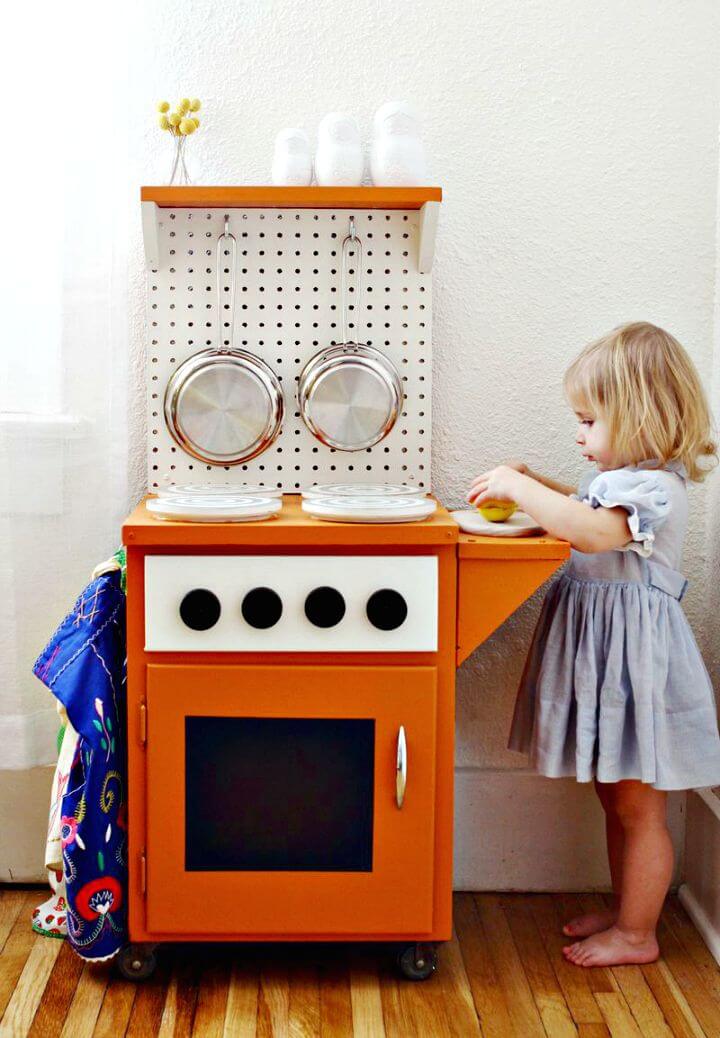
Transform your little one’s playtime with a colorful DIY kitchenette that’s sure to inspire their culinary creativity! Our easy-to-follow guide at A Beautiful Mess makes crafting a functional and sturdy play kitchen a breeze.
From a rolling cabinet base to playful details like chalkboard paint “oven” controls and wooden “burners,” this project not only looks delightful but also holds up to the joyous wear-and-tear of kids at play. Perfect for gifting or as a special addition to your child’s play area, see how to bring this imaginative kitchenette to life today.
3. DIY Kid’s Kitchen Playset
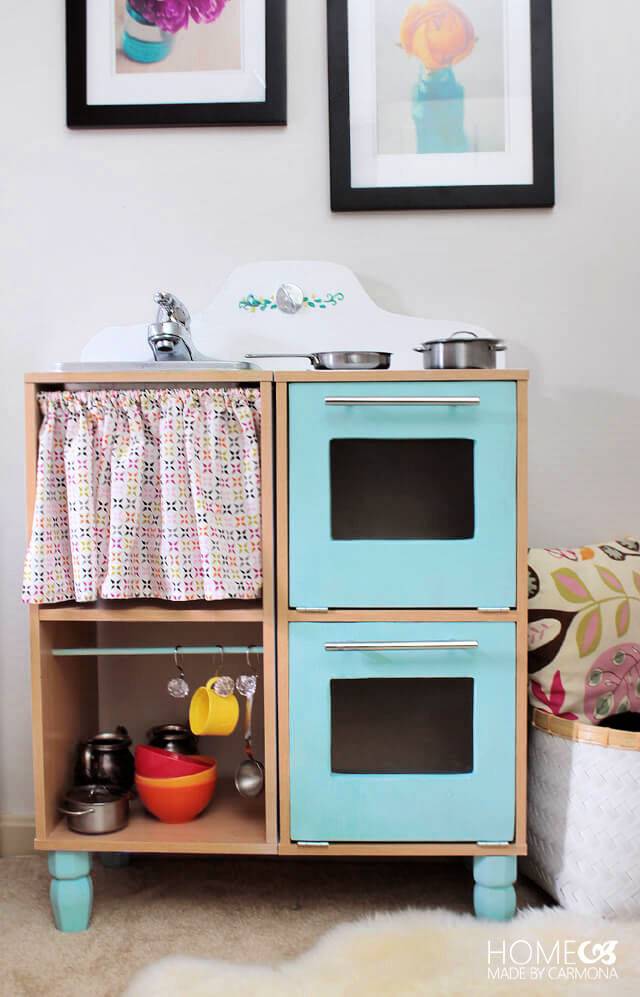
Unleash the inner chef in your little one with this easy-to-follow DIY Kitchen Playset guide from Home Made by Carmona. Transform cube bookshelves into a culinary paradise without breaking the bank. With basic items like a plastic container for the sink, an old faucet, and a touch of creativity, you can craft a playset that rivals high-end store versions. Dive into making a practical kitchen, from a realistic sink to snug oven doors and even a chic curtain divider. Complete with a stovetop and adorable knobs, this project promises endless fun for your aspiring chef.
4. Outdoor Play Kitchen From an Old Shelf
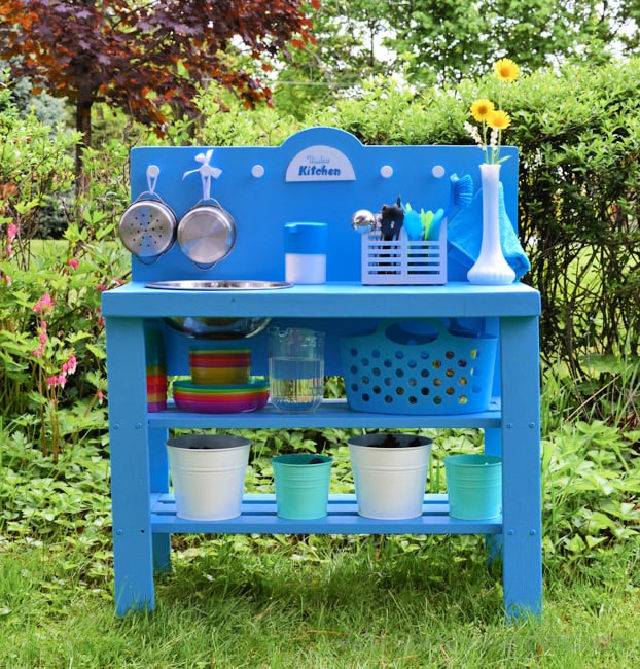
Transform an old shelf into a magical outdoor play kitchen with ease and creativity. Adventure in a Box guides you through making a cost-effective play area that promises loads of fun without the hassle. From using a basic shelf and thrift store finds to adding playful details like knobs for hanging pots and pans, this project is perfect for nurturing little chefs. Unleash imagination in your backyard with this simple and delightful DIY play kitchen project. Ideal for those endless summer adventures at home!
5. Making a Play Kitchen from a Cabinet
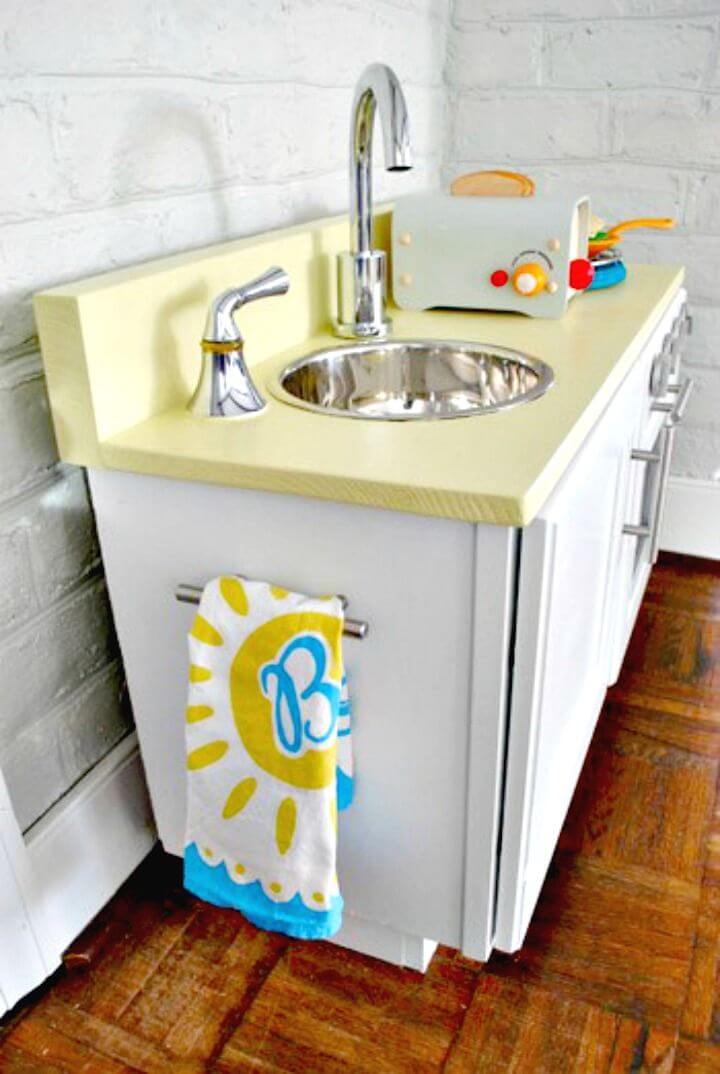
Looking for a heartwarming and creative DIY project for your little one? Discover how to transform a cabinet into a charming homemade play kitchen with this simple, engaging guide from Young House Love.
Dive into the joy of crafting a play area with real-life features like turning oven knobs, a light-up oven, and even a stylish faucet – all on a friendly budget. Perfect for imaginative play, this tutorial is tailored for crafty parents eager to surprise their kids. Roll up your sleeves and start building a play kitchen that’s sure to be a hit!
6. Simple DIY Wooden Play Kitchen
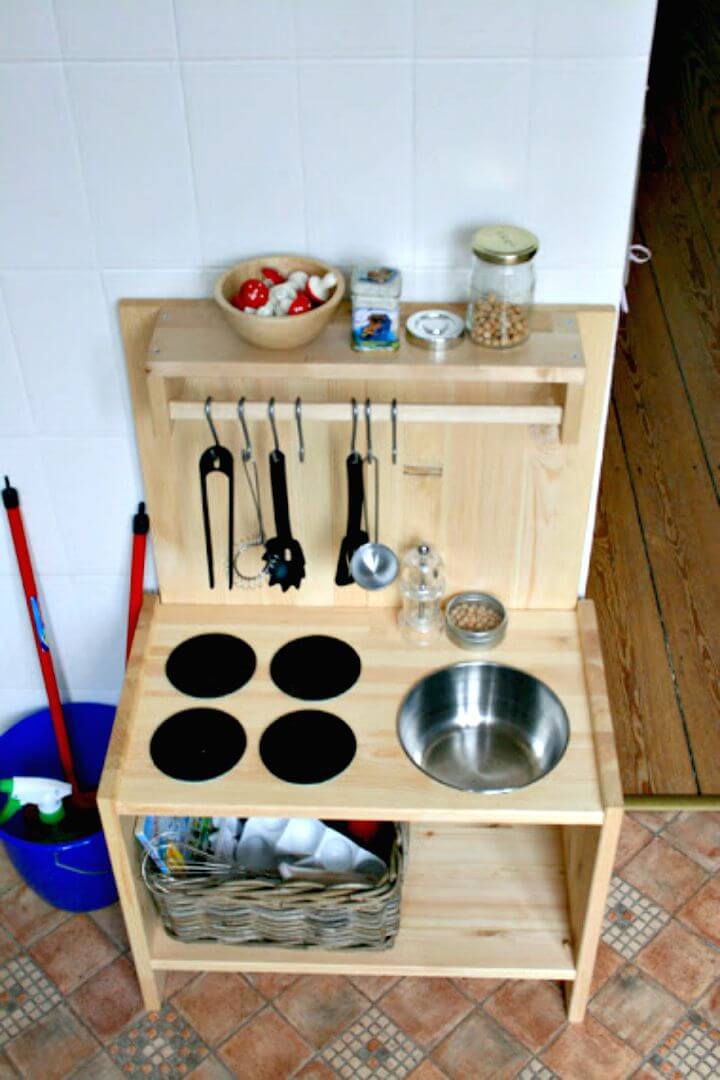
Embarking on a DIY project transforms simple materials into magical play areas for children. Dive into this journey with a straightforward guide to crafting a charming, wooden playkitchen that captures the essence of creativity and style. With items mainly sourced from IKEA, this project is budget-friendly, costing less than €30 ($43).
For details on constructing this minimalist yet stylish kitchen, featuring a Rast Nightstand, Fabian wall shelves, and more, visit ArtsyAnts. Perfect for tiny chefs in the making, this kitchen not only fosters imaginative play but is a testament to the beauty of simplicity and the joy of building.
7. How to Make a Blue Play Kitchen
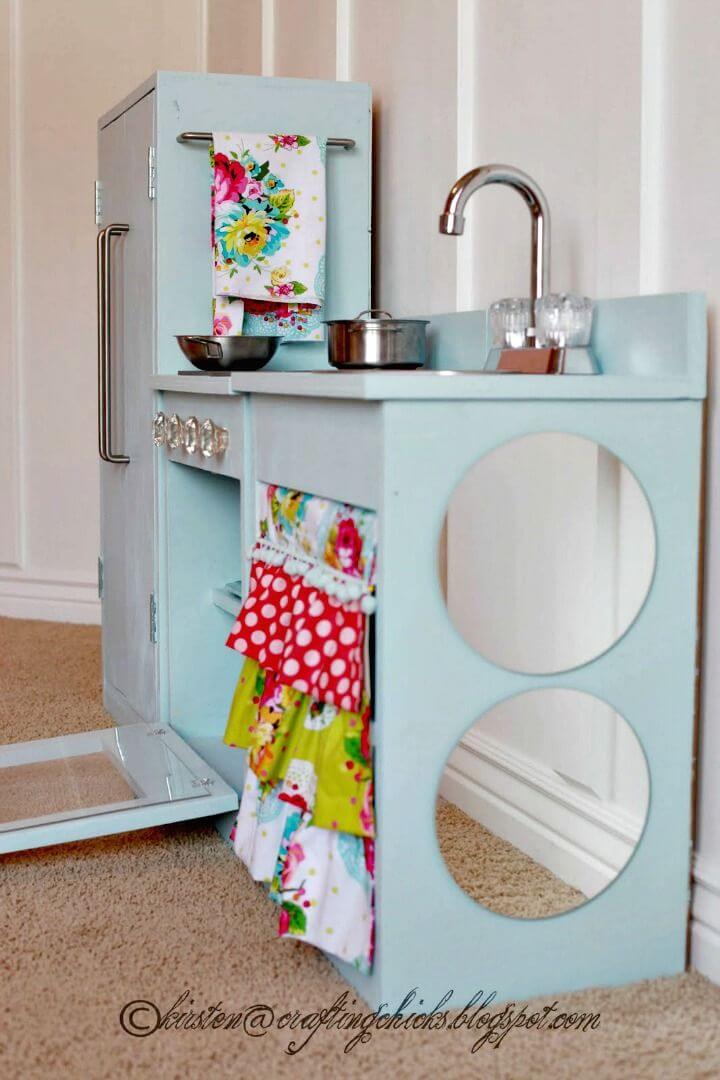
Dive into a world where creativity meets practicality with the inspiring DIY Blue Play Kitchen project. Crafted with meticulous detail and passion, this guide here proves that building your child’s dream kitchen is not only feasible but immensely rewarding. From choosing the right materials to adding those personal touches with accessories, every step is laid out to ensure your success.
With a clear breakdown of tools, materials, and assembly instructions, this guide is your first step towards building a cherished heirloom. Perfect for busy parents, this project, completed at your own pace, offers a unique blend of durability and charm for endless imaginative play.
8. IKEA Play Kitchen Makeover
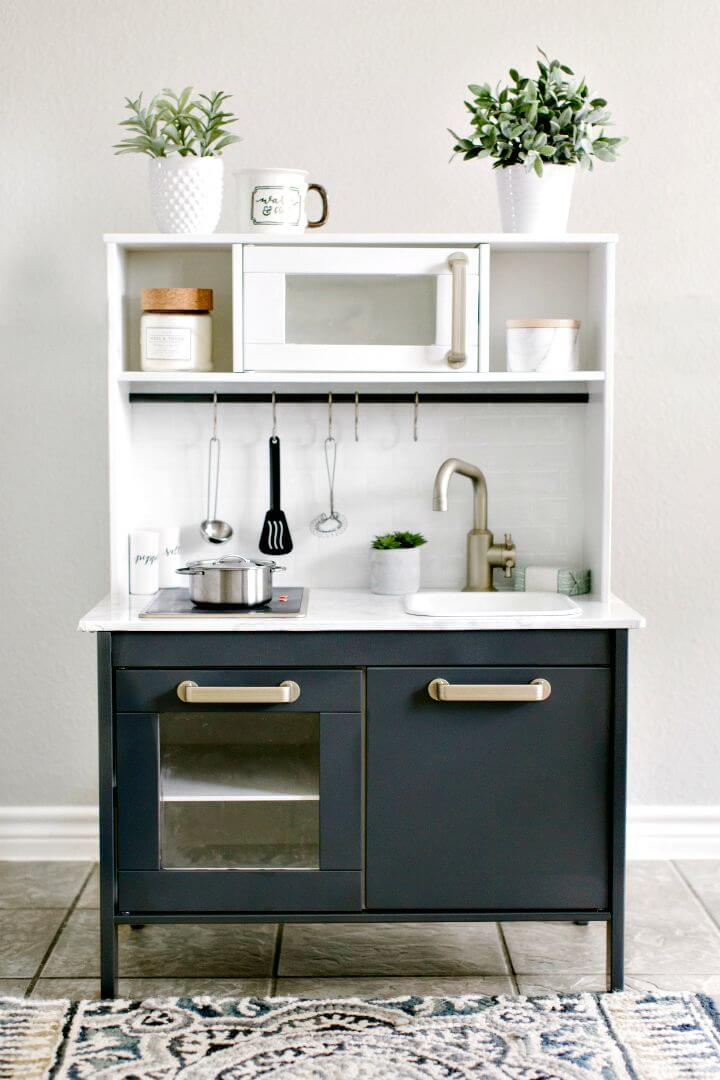
Transform your child’s playtime with a creative and engaging DIY project from Katie Lamb’s blog. Discover a fun and simple play kitchen makeover that brings endless design possibilities to life. Perfect for adding a personal touch to your little one’s play area, this project uses the affordable Ikea Duktig Play Kitchen.
With detailed steps and handy tips, you’ll enjoy customizing this playset, whether it’s choosing a vibrant color scheme or adding unique backsplash options. For a step-by-step guide on building a dream play kitchen, visit Katie Lamb’s blog. Make this DIY makeover a delightful addition to your child’s imaginative play.
9. Vintage Entertainment Center Turned Play Kitchen
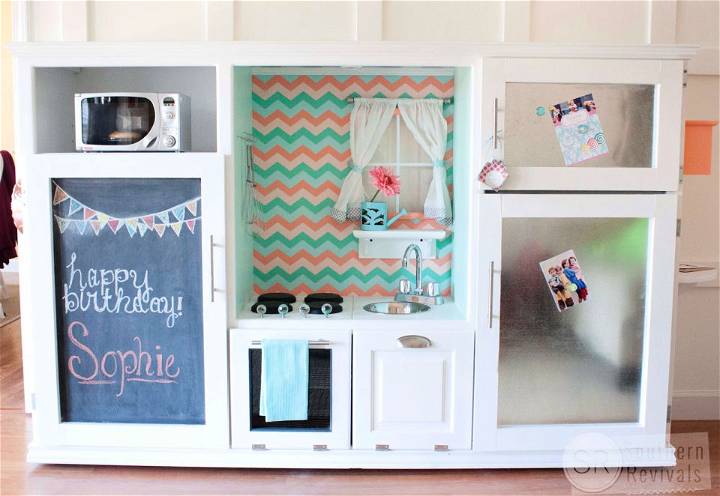
Transform a vintage entertainment center into a dream play kitchen with this inventive DIY guide from Southern Revivals. Discover step-by-step instructions, inspired by a unique find at TJ Maxx and a colorful palette from Hobby Lobby. Learn how to use DecoArt’s Chalky Finish Paint for a charming effect.
The guide covers everything, from crafting a fridge with magnetic doors to installing a working light for that perfect finishing touch. Ideal for a special child’s birthday gift, this resource is packed with tips, tricks, and thrift store finds to make a magical kitchen space.
10. DIY Children’s Stove With Oven
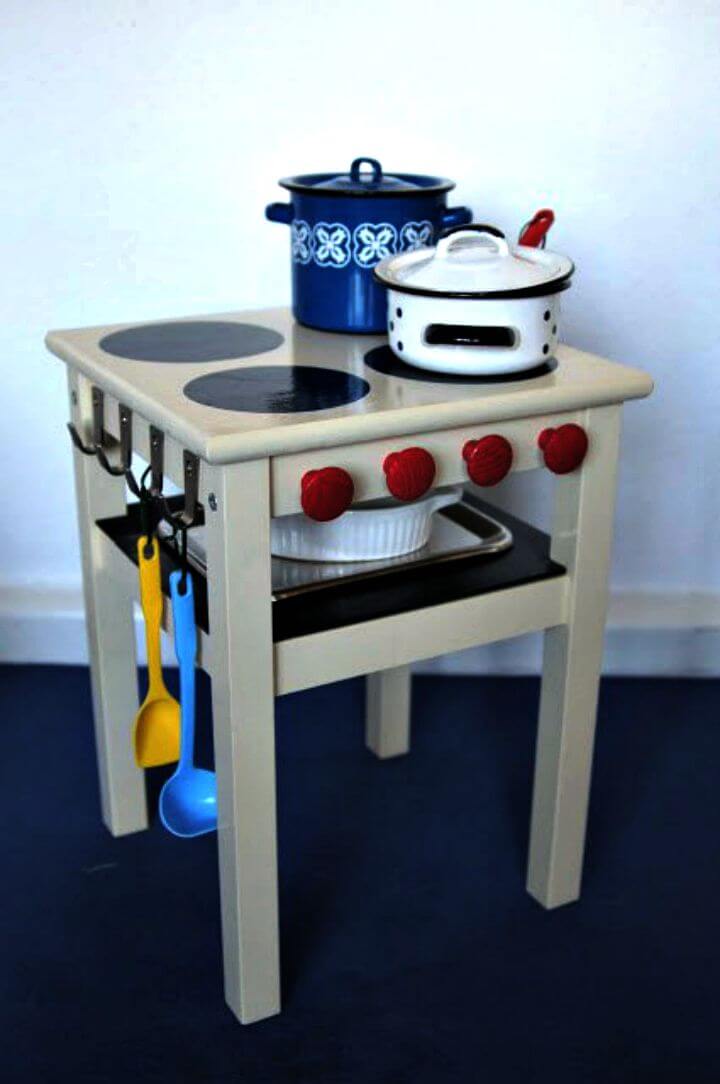
Discover a creative way to spark your child’s imagination with an adorable DIY children’s stove with an oven. Inspired by IKEA Hackers, this project transforms an ODDVAR stool into a playful kitchen for your little ones. With simple materials like BLECKA hooks, wooden knobs, and a dash of paint, you can bring this charming idea to life. Follow easy steps: assemble, paint, and personalize to make a unique play area. Perfect for nurturing culinary skills in young chefs. Get started, and let the fun begin! For detailed instructions, visit IKEA Hackers.
11. How To Build a Play Kitchen
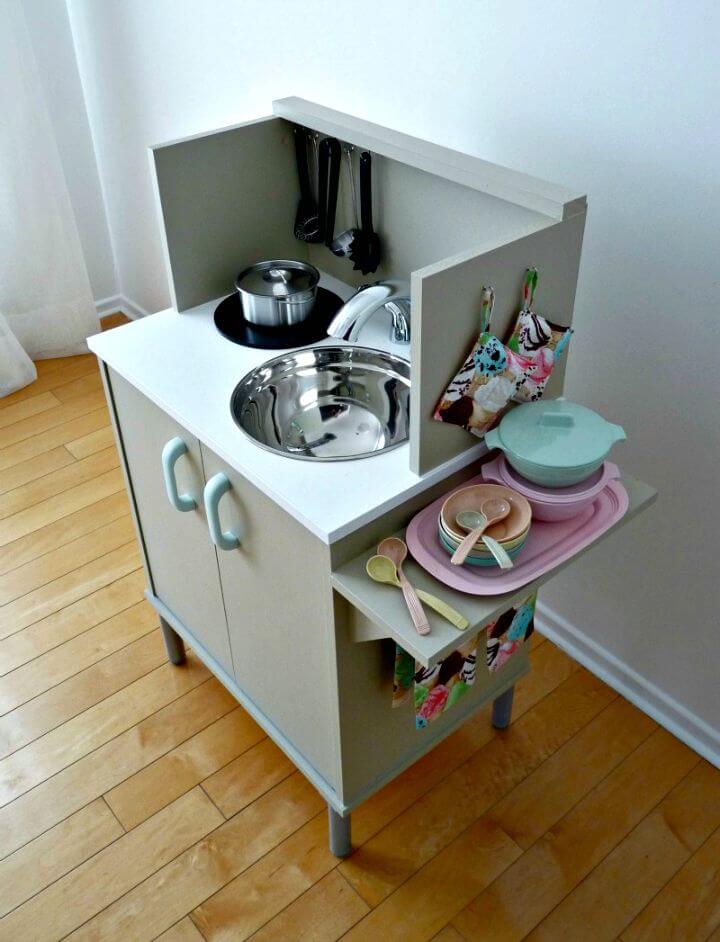
Discover how to transform a simple microwave stand into a charming DIY play kitchen with this easy-to-follow tutorial from Dans le Lakehouse. Dive into the creative process, from selecting the perfect faucet to painting the “quartz” countertop. With practical tips and a detailed cost breakdown, this guide is perfect for anyone eager to craft a personalized play space for their little ones. Plus, find out how to accessorize with vintage finds and DIY details to make it extra special.
12. Pack-n-Go Kids Play Stove
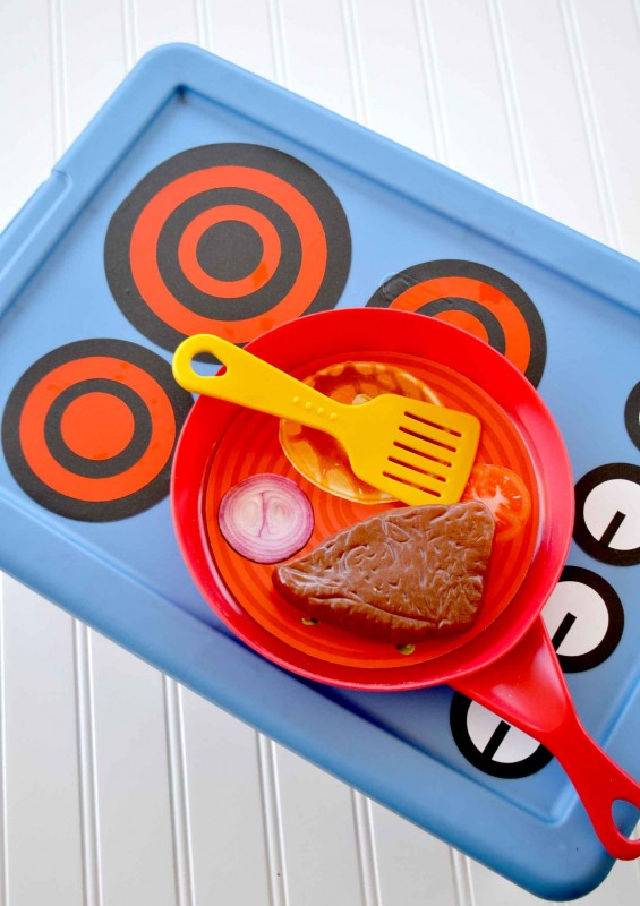
Bring joy and creativity on the go with the Pack-n-Go Kids Play Stove DIY. Perfect for keeping little chefs entertained, this portable play stove is not only easy to make but also budget-friendly.
You can make a durable and adorable stove top using simple materials like a Sterilite container and vinyl. Ideal for playdates, trips, or just having at home, it’s lightweight enough for kids to carry. For a step-by-step guide on crafting this whimsical toy, visit Pinkcakeplate.com. Dive into this craft and prepare to see their imagination sizzle!
13. Play Kitchen in a Box Sewing Tutorial
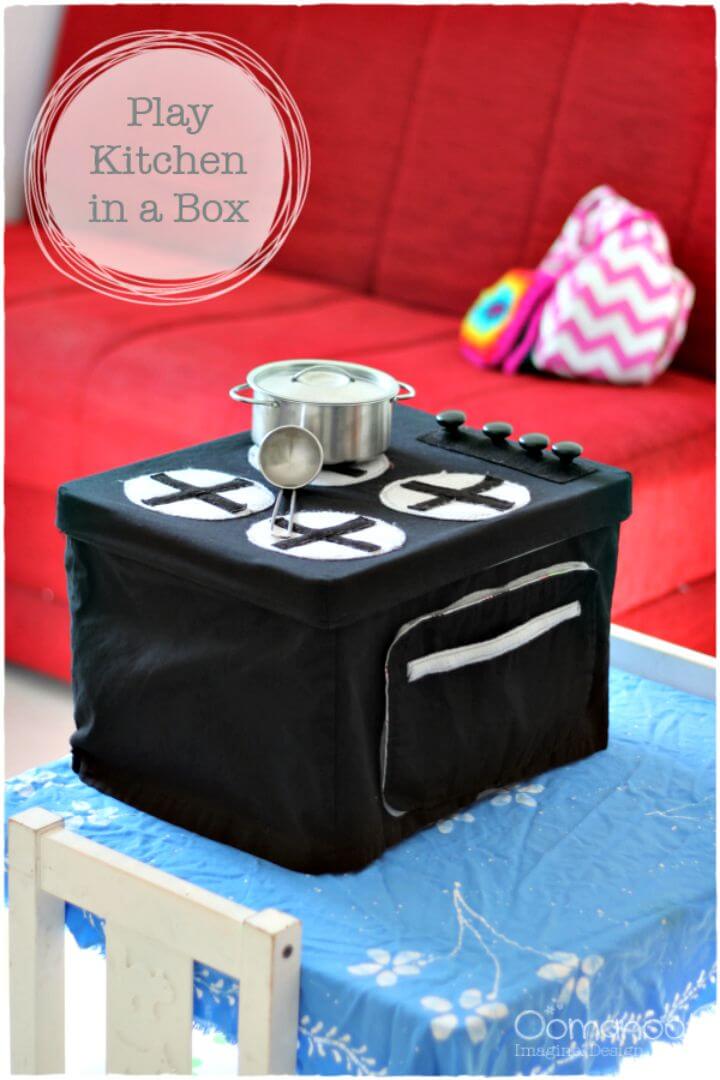
Discover a creative solution for space-saving and imaginative play with our Play Kitchen-in-a-Box sewing tutorial. Ideal for those of us with limited space, this guide on Oomanoot shows you how to make a portable play kitchen from a fabric-covered box, complete with a stove, oven, and accessories that neatly tuck away after playtime. Step-by-step instructions ensure a fun crafting experience, resulting in a washable and easily stored play area. Perfect for indoor picnics and imaginative chefs in the making!
14. Make a Play Kitchen From a $10 Piece of Furniture
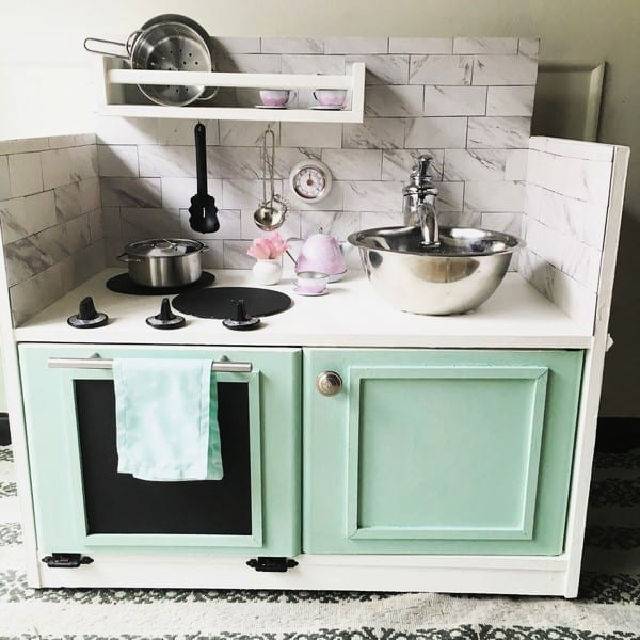
Transform a $10 thrift store find into a dazzling play kitchen with this straightforward guide. Beginning with a simple piece of furniture, like an old entertainment center, this tutorial walks you through the entire creative process. From structural alterations, priming, and painting to adding charming details like a faucet and stove burners, every step is clearly outlined.
Perfect for crafty parents aiming to craft a unique play area on a budget, this project not only saves money but also lets you personalize to your heart’s content. For a comprehensive step-by-step guide, visit At Home With Ashley. Dive in and let your creativity lead the way to a delightful play kitchen that your little ones will adore.
15. DIY Play Kitchen for Under $90
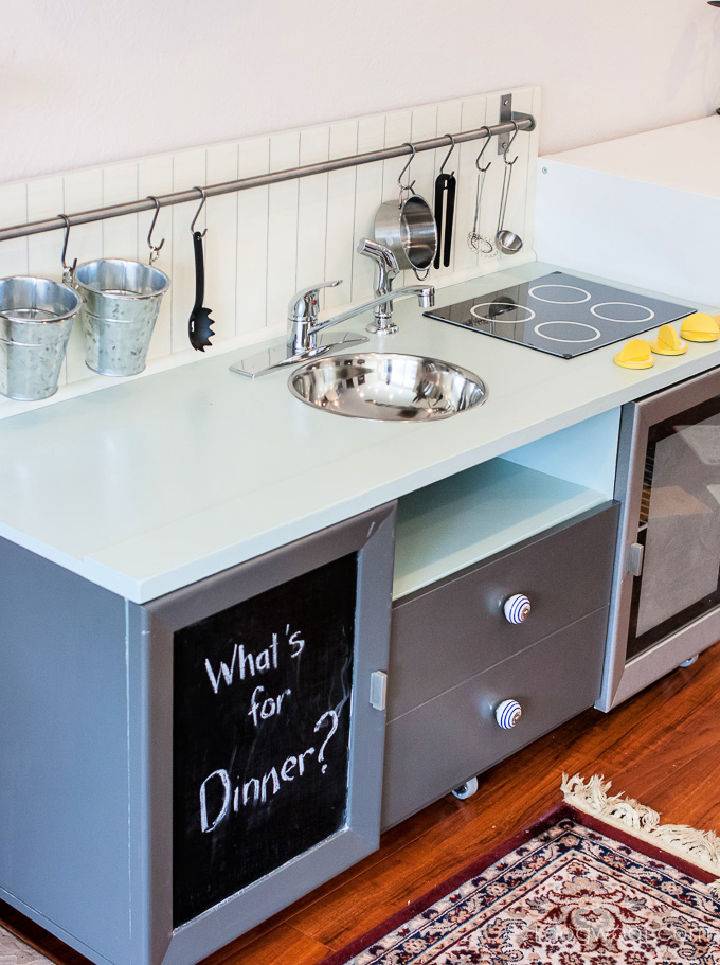
Unleash your creativity and build a bespoke DIY play kitchen without breaking the bank! Discover how one family crafted a stunning play space for their curious toddler using a repurposed TV stand and various household items, all for under $90.
From selecting the perfect piece of furniture to adding personal touches like a hand-drawn backsplash and custom-painted knobs, this guide has everything you need. Get inspired to craft a play kitchen that’s as unique as your little one. For a step-by-step journey through this rewarding project, visit 1 Dog Woof.
16. Build Your Own Play Kitchen Stove
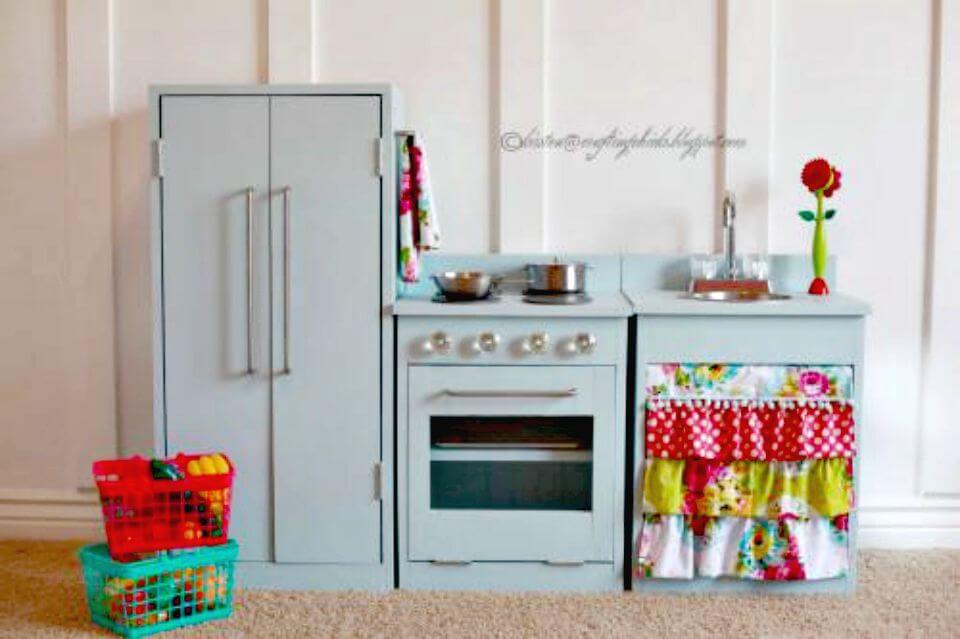
Embarking on a DIY adventure? Make the ultimate playtime accessory with a homemade play kitchen sink and stove that’ll ignite your child’s imagination! Ideal for fostering creativity, this project from Ana White is perfect for anyone looking to craft a special gift with their hands.
Utilizing off-the-shelf materials and requiring only basic building skills, this guide ensures a smooth creation process. Match to your interior or your child’s favorite colors, and turn playtime into a unique, custom experience. Ready to dive in? Start building today for smiles and imaginative play tomorrow.
17. Awesome Play Kitchen Reveal
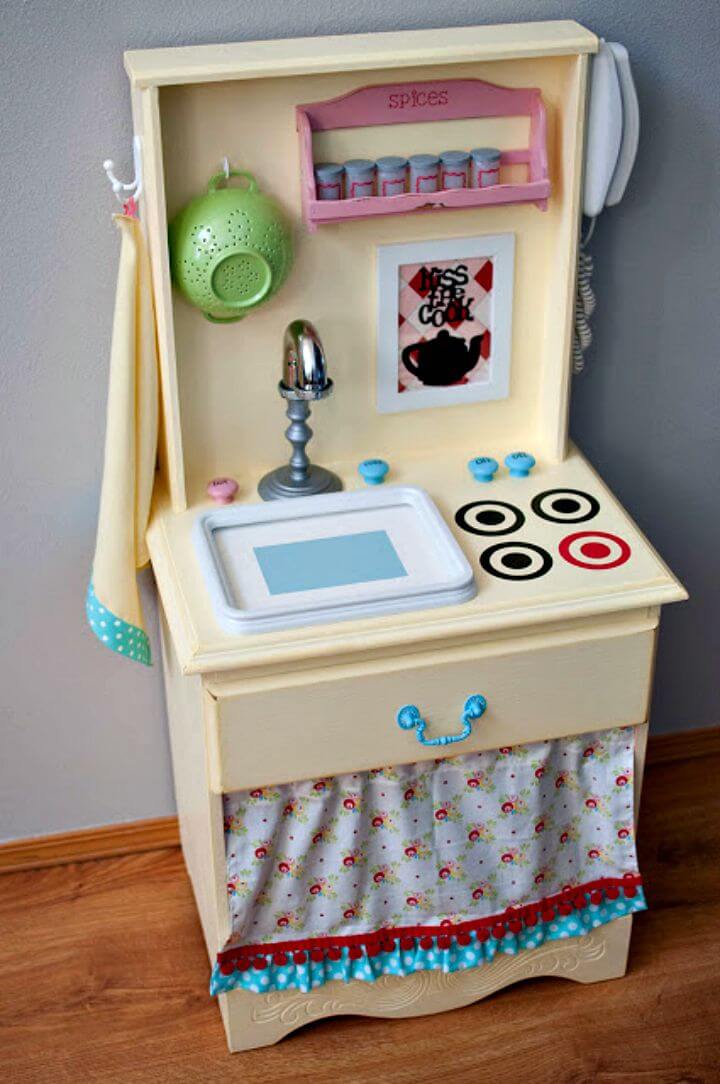
Discover a heartwarming transformation at Little Gray Table, where an old nightstand gets a new lease on life as a vibrant play kitchen. From sanding to painting, every step is shared with joy, including DIY spice racks and a unique sink crafted from a picture frame. With vintage-inspired colors and thoughtful details like a menu chalkboard, this creation promises endless fun and creativity for young chefs. Perfect for inspiring imaginative play, it’s a testament to the magic that comes from repurposing with love and creativity.
18. DIY “Manly” Play Kitchen
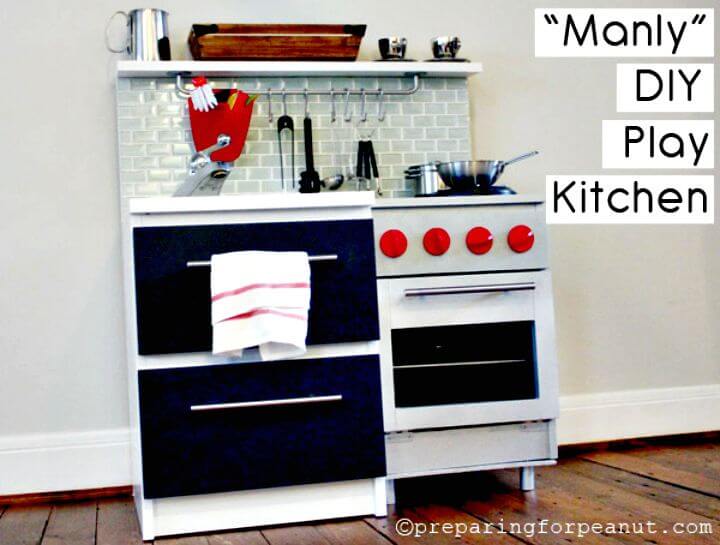
Unlock the joy of DIY with this inspiring play kitchen project for your little chef, as seen on IKEA Hackers. Utilizing Malm nightstands, among other items, this guide provides a step-by-step approach to building a bespoke kitchen that any child would adore. Challenges like limited workspace and the quest for the perfect tile backsplash didn’t deter the determination to craft a culinary haven. From a dog bowl sink to custom-painted knobs, this project blends creativity with practicality, ideal for parents looking to gift a unique and personal play area.
19. DIY Kids Kitchen for Under $10
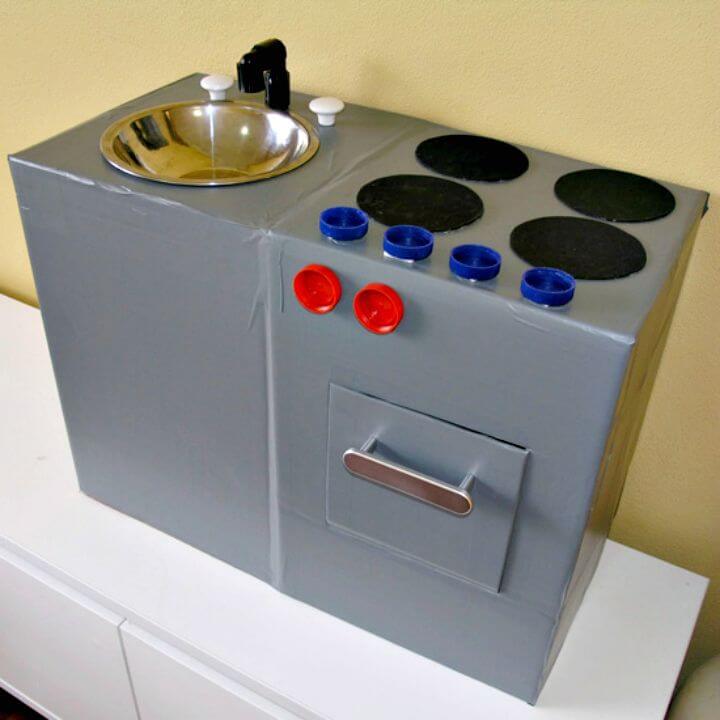
Unleash your creativity and build a DIY Kids’ Kitchen for under $10 with practical tips from Childhood101. Discover how to transform everyday items into a fun play kitchen. From repurposing furniture handles to innovative sink and tap creation, these resourceful ideas are perfect for anyone looking to make an affordable play space. Embrace the challenge and make something special for your little chef without breaking the bank.
20. Make Your Own Play Kitchen
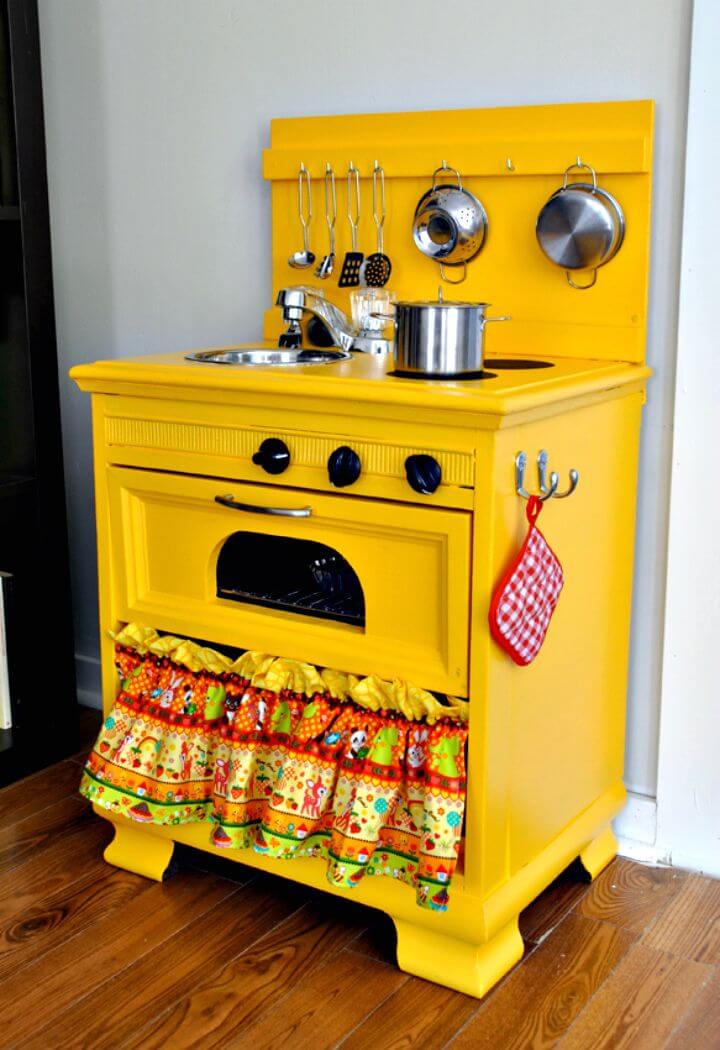
Transform an old nightstand into a charming DIY play kitchen with easy steps and a touch of creativity. For budding craftsmen, this project is not only budget-friendly but also a rewarding way to craft a unique play area for your little ones. Start by scouring flea markets or second-hand stores for a nightstand, a bowl for the sink, and a faucet.
With a total budget of around $70 and about 7-8 hours of enjoyable work, you can make a personalized kitchen that’s both delightful and cost-effective compared to store-bought alternatives. For detailed inspiration and more ideas, check out this helpful guide at Bubble Stitch Quilts.
21. How to Make a Play Cooker
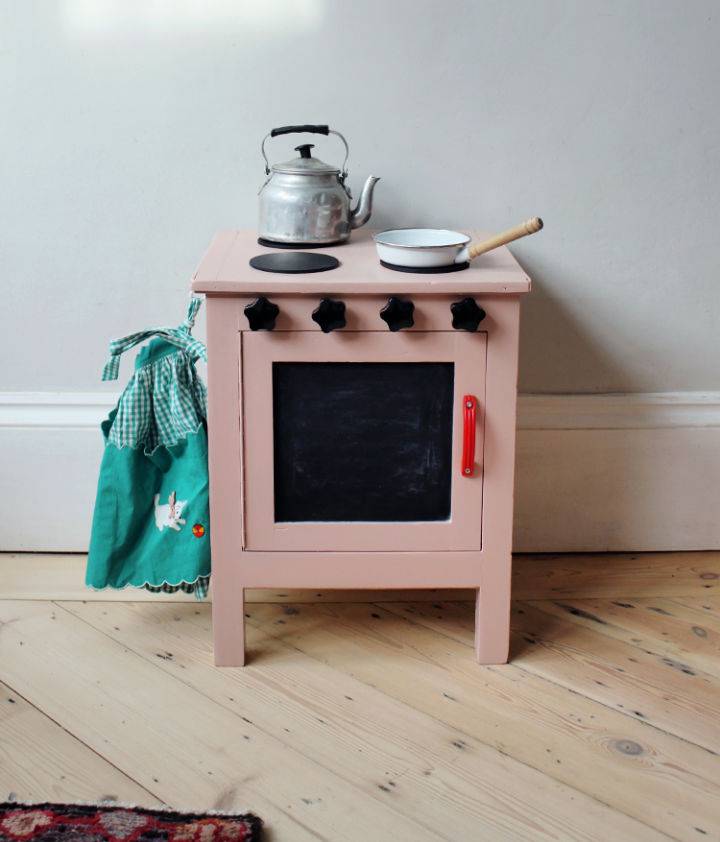
Unveil the joy of crafting a personalized play cooker with our step-by-step guide. Transform a simple cupboard into a delightful play kitchen for your little one, using common materials and a touch of creativity. Perfect for gifting or as a charming addition to your child’s play area. Learn how to add functional knobs, a practical shelf, and a whimsical touch with paint and accessories. For more inspiration and detailed instructions, visit our Kid Play Do. Make this engaging project your next DIY adventure!
22. Homemade Child’s Play Kitchen
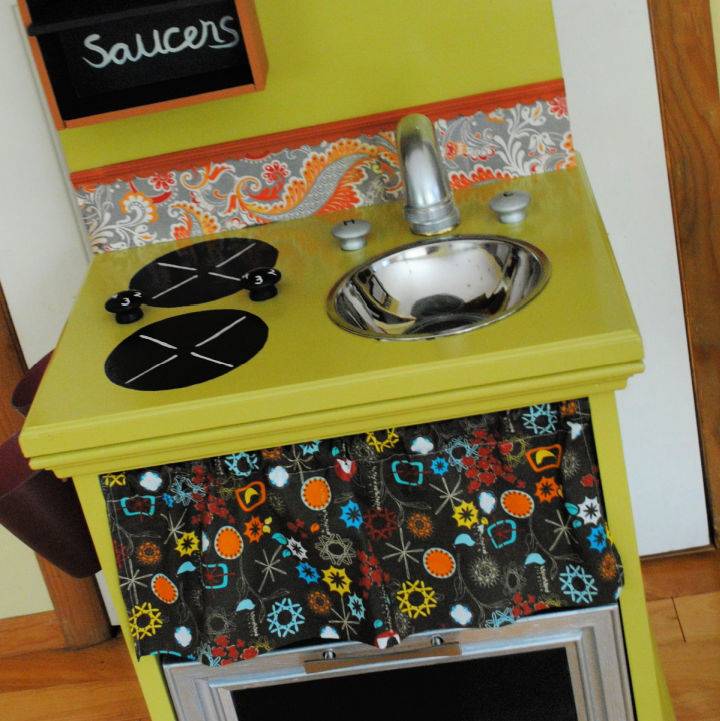
Transform a simple nightstand into a magical play kitchen for your child with this inspiring DIY guide from Jenna Burger Design LLC. Discover how creativity and a few tools can bring joy to your little one’s playtime. From sanding to painting and adding playful details, learn how you can make a unique play area that encourages imagination. Perfect for parents wanting to craft a personal gift filled with love. Start your DIY play kitchen adventure today with guidance from Jenna Burger Design.
23. DIY Farmhouse Style Play Kitchen
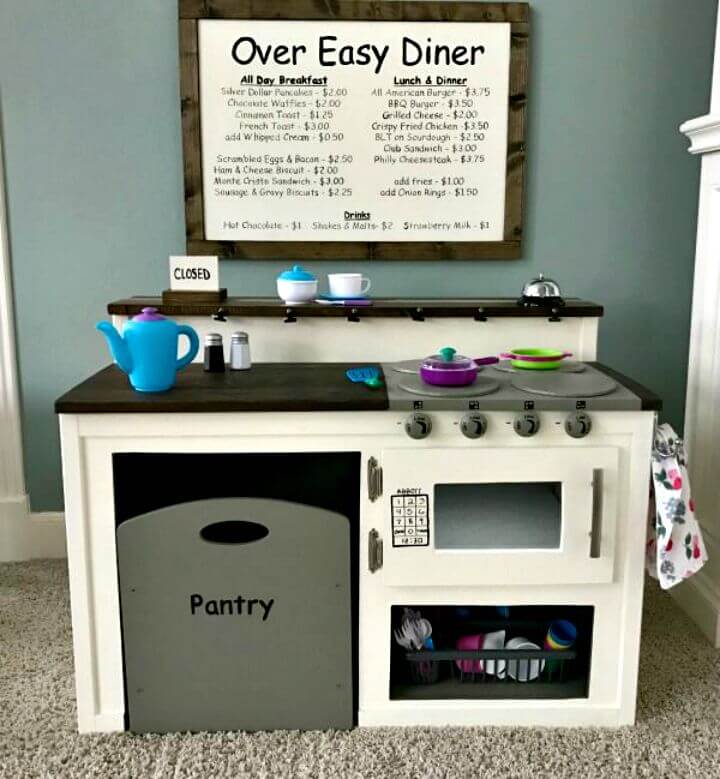
Discover a delightful way to engage your little ones with creativity and fun! This instructive guide walks you through building a charming Kids White Play Kitchen with a farmhouse style, all within a budget of about $50. Perfect for those wanting to spark joy and imagination in their children’s playtime. Dive into this easy-to-follow DIY project and construct a play space where countless memories will be cooked up!
24. Make a Play Kitchen Out Of An Old Entertainment Center
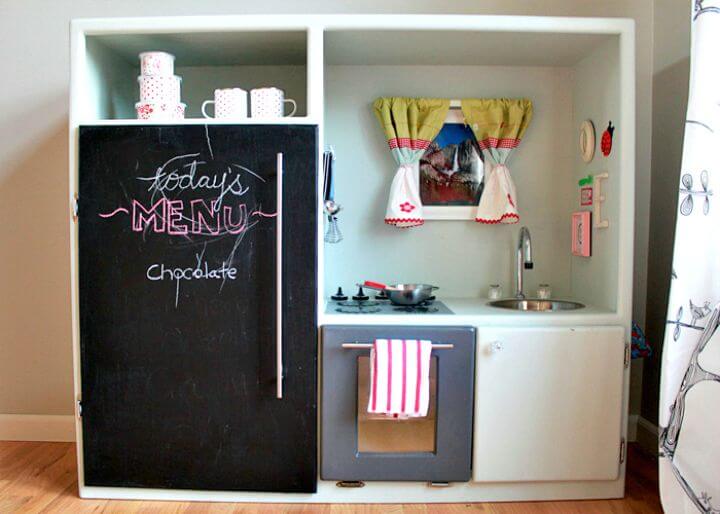
Transform an old entertainment center into a magical play kitchen for your little one with this inspiring DIY project. Rediscover the joy of upcycling with clear instructions and creative ideas to craft a dream kitchen that’s as delightful to make as it is for children to play with.
From selecting the perfect paint color to adding charming details like a faux granite countertop and a working light, this guide walks you through each step. Embrace a little imagination and some elbow grease to bring this heartwarming project to life. For more detailed guidance and to see the transformation unfold, click here: Kitchen Treaty.
25. How to Build a Play Kitchen
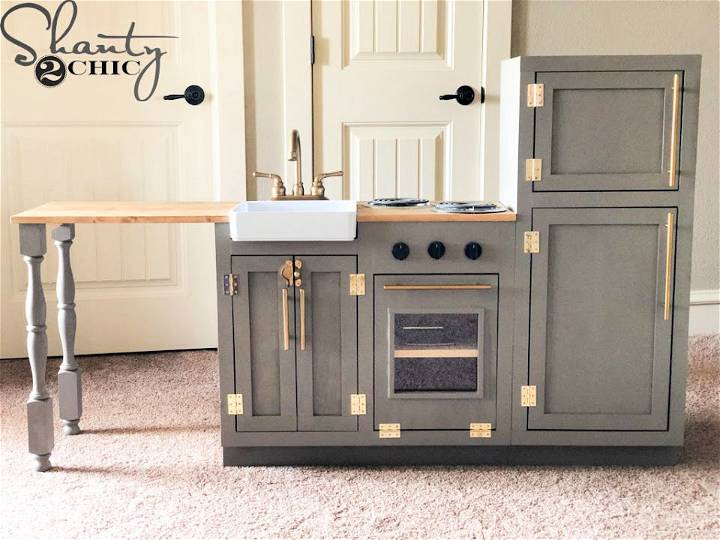
Looking to craft a magical play space that grows with your child? Dive into this creative journey with a custom DIY Play Kitchen project, perfect for kids who’ve outgrown the standard options. This play kitchen isn’t just any toy – it’s a labor of love, featuring a realistic farmhouse sink, operating stove burners, and even a peninsula for added fun.
With easy-to-follow, free printable plans available, you’re set to make a play area that mirrors a modern kitchen’s charm. Find inspiration and all the details to kickstart this delightful project at Shanty 2 Chic. Construct a play space that’s not only proportional to your child but also ignites their imagination with real-life elements.
Conclusion:
In conclusion, exploring 25 unique DIY play kitchen ideas your kids will love has proven not just to be a fun and engaging project but a deeply rewarding way to foster creativity, imagination, and essential life skills in children. From safety and materials to the educational benefits such as language development and social skills, each aspect of building a DIY play kitchen offers a unique opportunity for growth and learning.
By tackling projects like making a cardboard kitchen or customizing with educational aspects, parents and guardians can provide a personalized play area that is both safe and enriching. Remember, the key to a successful DIY play kitchen lies in creativity, customization, and following safety guidelines to ensure a fun and secure play environment. So, get inspired, be resourceful, and make a cherished play kitchen that will see your kids enjoying countless hours of imaginative play.


