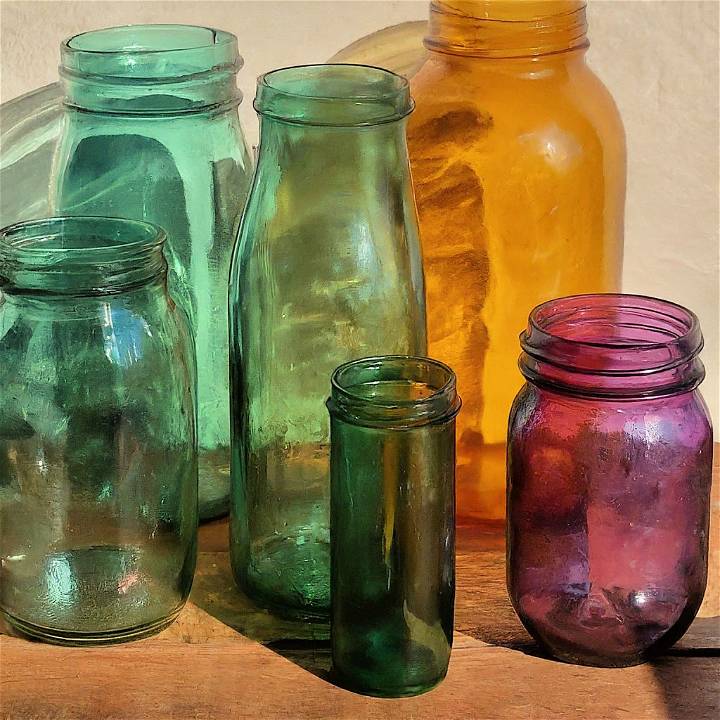
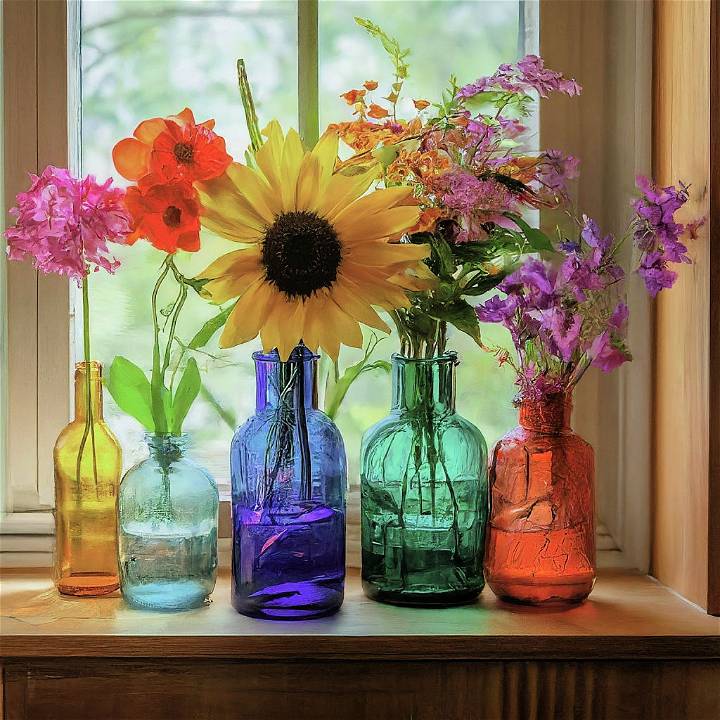
Transforming clear glass jars into colorful, vintage-style decorations is not only easy but also a fun craft project that can add personality to your living space or serve as a perfect afternoon activity with kids. Here’s a step-by-step guide on how to give those plain glass jars a charming, thoughtful makeover.

What You’ll Need
- Glass jars and bottles of various sizes
- Paper towel
- Tin foil
- Cookie sheet
- Half-sized skewers
- Small plastic jars for mixing
- Gel or liquid food coloring
- Elmer’s school glue (or Mod Podge)
- Oven gloves
- An oven preheated to 175–200* °F
How to Color Glass Jars – Step by Step
Learn how to color glass jars step by step and make beautiful tinted glass decorations for your home. It is the perfect DIY project for adding color to your decor.
Step 1: Prepare Your Workspace
Lay down a piece of tin foil covered by a paper towel on your workspace. This arrangement will catch the drips, keeping the area clean.
Step 2: Mix Your Color
In a small plastic jar, mix enough Elmer’s glue to cover your glass jar. There’s no need to dilute with water. Add food coloring until you achieve a dark intensity of your choice, remembering that the color lightens as it dries.
Step 3: Coating the Jar
Pour the colored glue mixture into the glass jar. Swirl it around to ensure the mixture coats the entire interior surface of the jar. Once coated, turn the jar upside down on the paper towel to drain any excess mixture.
Step 4: Prepare for Baking
Preheat your oven to 175–200* °F. Place your coated jars on a cookie sheet lined with tin foil. This prepares them for the drying process.
Step 5: Baking
Wearing oven gloves, place the cookie sheet with the jars into the preheated oven. Bake them for about 30 minutes, rotating every 5 minutes to ensure an even dry. They are ready when the interior looks translucent and the jars are dry.
Cleaning and Precautions
- Ensure jars are grease-free before starting. Wash them thoroughly and wipe with an alcohol wipe if possible.
- This decoration is not permanent. If exposed to water, the color may peel off. It’s intended for decoration only.
- If you’re unhappy with a result, you can peel the dried mixture off, clean the jar, and try again.
Video Tutorial
For a step-by-step visual guide, watch this YouTube video tutorial.
It pairs well with this written guide, offering additional clarity through a dynamic demonstration of each step.
By following these simple steps, you’ll be able to create beautiful, stained glass-like jars perfect for enhancing your home’s decor. Whether you choose vibrant yellows, deep blues, or warm ambers, these crafted jars promise to bring a unique charm to any setting. Happy crafting!
What Other Glass Items Can I Color Using This Method?
Discover the versatility of this coloring technique and expand your DIY project range beyond glass jars.
Vases and Bottles
Transform plain glass vases and bottles into eye-catching decor pieces. Whether it’s a wine bottle or a simple vase, applying this tinted glass method can turn them into beautiful, tinted objects that enhance any room’s aesthetic.
Glass Candle Holders
Give your glass candle holders a colorful makeover. This can add a warm, ambient glow to your space when you light candles inside them, creating a cozy atmosphere.
Window Hangings
Craft small, colored glass pieces that can be hung in windows. When sunlight passes through, it creates a beautiful, stained glass effect, adding a splash of color and light to your room.
Light Fixtures and Lampshades
Apply this coloring technique to glass light fixtures or lampshades for a customized look. This can dramatically change the light’s quality in a room, casting a colorful glow that enhances the mood.
Decorative Dishes and Bowls
Color small glass dishes or bowls to create unique, decorative pieces for your home. These can serve as key holders, jewelry dishes, or simply as beautiful objects to adorn tables and shelves.
- This coloring method offers a wide range of possibilities for making personalized, tinted glass items.
- Experimenting with different objects around your home can be a fun and creative way to enhance your decor.
- Remember to handle these items with care, as the decoration is meant for beauty rather than functionality.

Decoupage Jars: Learn how to decoupage mason jars and make beautiful DIY home décor.
FAQS on Making Colored Glass Jars
Creating colored glass jars is a fun and creative process. Here, we answer some of the most commonly asked questions to help you get started and ensure success in your crafting journey.
Can I use any glass jar for this project?
Yes, you can use any glass jar or bottle for this project. Ensure they are clean and free of grease before starting. Old jam jars, mason jars, or even glass bottles work perfectly.
What kind of glue should I use?
Elmer’s school glue or Mod Podge are the best options for this project. They mix well with food coloring and provide a smooth, even coat inside the jar.
How many drops of food coloring do I need?
The number of drops depends on the intensity of color you desire. Start with a few drops, mix, and gradually add more until you reach your preferred shade. Remember, the color appears darker when wet and will lighten as it dries.
Can I speed up the drying process without an oven?
Yes, you can allow the jars to air dry instead of baking them. However, this will take longer, usually overnight, to ensure they are completely dry. The oven method is faster, taking about 30 minutes.
Is the colored coating waterproof?
No, the colored coating is not waterproof. It’s meant for decorative purposes only. If the jars come in contact with water, the color may peel off. To clean, gently wipe with a dry cloth.
Can I reuse the jars for another project if I don’t like the outcome?
Absolutely! If you’re not satisfied with the result, you can peel off the dried mixture, thoroughly clean the jar, and start over. This makes the project low-risk and fun to experiment with.
How can I ensure an even coat inside the jar?
After pouring the colored glue mixture into the jar, swirl it around to cover the entire interior surface. Turn the jar upside down on a paper towel to drain any excess mixture and ensure an even coat.
By addressing these questions, we hope you will learn how to tint glass jars and make your experience of making colored glass jars enjoyable and successful. Happy crafting!


