Crafting DIY origami bookmarks is a delightful way to express creativity and personalize your reading experience. With just a few folds, you can transform a simple piece of paper into a beautiful and functional bookmark. This guide is filled with tips, techniques, and step-by-step instructions to help you make 20 DIY unique origami bookmark designs. From selecting your design to the final embellishments, each step is designed to be engaging, informative, and achievable in minutes.
As we explore the cultural tapestry of origami, its origins, and how it has evolved into modern practices, this introduction will not only guide you through easy-to-follow steps but also inspire you to personalize your bookmarks. Whether it’s adding color, patterns, or making your origami bookmarks more durable, this guide ensures your creations are not just bookmarks but tiny pieces of art that reflect your personality.
Keep reading to discover a world of creativity waiting at your fingertips, perfect for enhancing your own collection or crafting thoughtful gifts for friends and family.
The Cultural Tapestry of Origami
Origami, the art of paper folding, has a rich and intricate history that intertwines with the cultural fabric of Japan and beyond. Its evolution from a ceremonial practice to a popular recreational activity reflects the ingenuity and creativity of human expression.
Origins and Evolution
The story of origami begins in China, where paper was invented around the year 105 CE. The invention of paper, attributed to Cai Lun, revolutionized the way people recorded information and expressed their creativity. As papermaking skills spread to Korea and then to Japan, the Japanese refined the process, making a higher quality paper suitable for folding.
In Japan, origami started as a ceremonial and religious practice. It was used in Shinto rituals and as a refined way to present gifts, reflecting the importance of presentation and aesthetics in Japanese culture. Over time, these ceremonial folds evolved into a form of recreational origami, capturing the imagination of people of all ages.
The Art Form Blossoms
By the 1600s, origami had become ingrained in Japanese culture. The first known instructional book on origami, “Sembazuru Orikata,” was published in 1797, showcasing the art of folding linked cranes from paper. This period marked the beginning of origami as a widespread leisure activity, with designs becoming more intricate and diverse.
The introduction of origami to the West had a significant impact as well. Friedrich Froebel, the inventor of kindergarten, recognized the educational value of paper folding and incorporated it into his teaching methods. This helped spread the joy of origami around the world.
Modern Origami
Today, origami is not just an art form but also a symbol of peace and hope, often associated with the folding of paper cranes. The influence of origami can be seen in various fields, from mathematics and engineering to design and therapy. Its simplicity and accessibility make it a beloved activity that transcends cultural and linguistic barriers.
By exploring the history of origami, we gain insight into the cultural significance and the shared human experience that this art form represents. It’s a testament to the power of creativity and the endless possibilities that a simple sheet of paper holds.
In your DIY Origami Bookmarks post, this section adds depth and context to the craft, highlighting its rich history and beauty.
Easy Origami Bookmark Corner – Step by Step Guide
Making an origami bookmark corner is a fun, simple craft that not only feeds your creativity but also marks your place in your favorite book with a personal touch. Perfect for crafters of all ages, this guide will walk you through making your own corner bookmark with ease and enjoyment. Let’s dive in!
What You Will Need
- A square piece of paper (15×15 cm recommended, but any size will do)
- A flat surface to work on
- Your hands and a touch of creativity
Step-by-Step Guide
1. Prepare Your Paper
Start by placing your square piece of paper on a flat surface. Orient the paper so it looks like a diamond in front of you, with one corner pointing towards you and one away.
2. Make the First Folds
- Take the bottom corner of your diamond and fold it up to meet the top corner. You should now have a triangle.
- Ensure the fold is crisp and neat as this lays the foundation for your bookmark.
3. Make the Bookmark Shape
- Carefully take the lower right corner of your triangle and fold it upwards towards the top corner. Press down to form a neat crease.
- Repeat this step with the lower left corner of the triangle, bringing it up to the top and pressing down to form another neat crease.
- Your paper should now resemble a smaller diamond sitting atop your original triangle.
4. Finalizing the Bookmark
- Open up the last folds you’ve made to return to the triangular shape momentarily. You’ll see a square-shaped crease in the center.
- Fold down the top layer of paper following the square’s top crease directly downwards, making a rectangle that sits on your triangle.
- Now, refold the left and right corners you previously folded up, but this time, tuck them into the pocket you’ve just created by folding down the top flap.
- Repeat for both sides, ensuring everything is neatly tucked.
Congratulations! Your basic corner bookmark is now complete and ready for personalization.
Personalize Your Bookmark
Feel free to express your creativity by decorating your bookmark. Add drawings, doodles, patterns, or even use colored paper. The possibilities are endless!
Conclusion
Making an origami bookmark corner is not only easy but also incredibly rewarding. You can make something unique and practical in just a few minutes, without needing any complicated materials. Whether you’re making one for yourself or as a gift, it’s a thoughtful way to add a bit of handmade charm to everyday reading.
Video Tutorial
For a step-by-step video tutorial, watch this YouTube video on how to make a basic corner bookmark.
It pairs well with this written guide, enhancing your learning experience with a visual and straightforward demonstration of the techniques discussed.
Personalizing Your Origami Bookmarks
Adding a personal touch to your origami bookmarks can transform them from simple page holders into meaningful keepsakes. Whether you’re crafting for yourself, as a gift, or for a group activity, personalization is key to making each bookmark special.
Choosing Your Design
Start by selecting a design that resonates with you or the person you’re making for. It could be an animal, a geometric shape, or even a favorite fictional character. The design sets the stage for the personal touches you’ll add later.
Adding Color and Patterns
Use colored paper or patterns that reflect personal style or interests. For a more intricate look, combine different papers in one bookmark, such as floral patterns with solid colors.
Embellishments
Consider adding embellishments to your bookmark:
- Stickers: A quick and fun way to add character.
- Washi Tape: Perfect for making borders or stripes.
- Glitter: A touch of sparkle never hurts, but use it sparingly.
- Drawings: Use fine-tip pens to add details or personal messages.
Making It Meaningful
Incorporate elements that have significance. This could be a quote, a date, or initials. Use a fine-tip pen or letter stamps to add these details neatly.
Durability
To ensure your bookmark lasts, consider laminating it or covering it with clear adhesive paper. This will protect it from wear and tear, especially if it’s going to be used frequently.
By customizing origami bookmarks, you make unique art pieces that spread joy and inspire others to create. Have fun letting your creativity shine!
Tips for Beginners in Origami
Embarking on the journey of origami can be both exciting and a bit daunting. Here are some tips to help beginners navigate the folds and creases of this beautiful art form.
Getting Started
- Choose the Right Paper: Start with standard origami paper, which is thin and easy to fold. It often comes in bright colors or patterns.
- Understand the Basics: Familiarize yourself with basic folds like the valley fold (paper bends upwards) and mountain fold (paper bends downwards).
- Follow Instructions Carefully: Whether it’s a book or an online tutorial, take your time to follow each step meticulously.
Practice Makes Perfect
- Start Simple: Begin with straightforward designs like a paper crane or a boat before moving on to more complex patterns.
- Be Patient: If a fold doesn’t work the first time, unfold it and try again. Precision is key in origami.
- Stay Organized: Keep your folding area clean and free of distractions to maintain focus on your project.
Advancing Your Origami Skills
Once you’ve mastered the basics, you’re ready to explore more advanced origami techniques that will allow you to make intricate and impressive designs.
Exploring Complex Folds
- Learn Advanced Folds: Techniques like squash folds, petal folds, and reverse folds add depth and intricacy to your designs.
- Study Diagrams: Advanced patterns may have complex diagrams. Take the time to study and understand them before starting your fold.
Making Your Own Designs
- Experiment: Don’t be afraid to try your own ideas. Origami is an art, and creativity is a big part of it.
- Use Different Papers: Experiment with different types of paper, including foil, washi, or even handmade paper for unique effects.
By practicing tips and improving skills, you can explore the fun world of origami. Keep folding to unleash your creativity!
Embracing Sustainability in Origami
Incorporating sustainability into your origami projects is not only beneficial for the environment but also adds a layer of mindfulness to your crafting practice. Here’s how you can make your origami hobby more eco-friendly.
Choosing Sustainable Materials
Opt for papers that are:
- Recycled: Give new life to used paper.
- FSC Certified: Ensures responsible forest management.
- Biodegradable: Reduces waste in landfills.
Reusing and Recycling
- Repurpose: Use old newspapers, magazines, or wrapping paper.
- Recycle: After enjoying your origami, recycle it if possible.
The Bigger Picture
Origami teaches us to make beauty with minimal resources, aligning with the principles of zero-waste. It’s a craft that encourages us to think creatively about using limited materials to their fullest potential. This approach not only reduces waste but also inspires innovation in design and problem-solving.
By choosing sustainable origami, you help the planet and make art. Every action matters for a green future. Let’s fold purposefully and passionately!
FAQs About Origami Bookmarks
When diving into the world of origami bookmarks, it’s natural to have questions. This section aims to address common inquiries, providing clear and concise answers to enhance your crafting experience.
Starting Your Origami Journey
Q: What size paper is best for origami bookmarks? A: While any square paper works, a 15×15 cm size is ideal for standard bookmarks. It’s large enough to handle and small enough to fit in most books.
Q: Can I use regular printer paper? A: Yes, printer paper is fine, especially for beginners. However, origami paper is thinner and may be easier to fold.
Perfecting Your Technique
Q: How do I make my folds more precise? A: Use a bone folder or a ruler to crease your folds sharply. Also, take your time aligning edges carefully before making a crease.
Q: My bookmark doesn’t stay on the page well. What can I do? A: Ensure the final folds are tight and the corners are tucked in securely. If necessary, use a little glue to keep flaps in place.
Advancing Your Skills
Q: Are there different designs for origami bookmarks? A: Absolutely! From simple shapes to intricate animals, there’s a wide range of designs to explore as you advance.
Q: How can I make my own origami bookmark designs? A: Start by modifying existing designs. Experiment with different folds and shapes until you make something unique.
Decorating and Personalizing
Q: What can I use to decorate my bookmarks? A: Get creative with stickers, washi tape, colored pens, or even a bit of glitter. Just remember, less is often more.
Q: How can I personalize my origami bookmark? A: Add initials, dates, or favorite quotes with fine-tip pens. You can also choose paper that reflects the recipient’s tastes.
By addressing these FAQs, you’ll be better equipped to start and progress in your origami bookmark crafting. Remember, practice and patience are key, and every fold brings you closer to mastering this delightful art form.
20 Best DIY Origami Bookmark Ideas
Discover the top 20 DIY origami bookmark ideas in this curated collection. Get inspired to make unique bookmarks for your favorite books!
1. DIY Fruit Origami Corner Bookmark
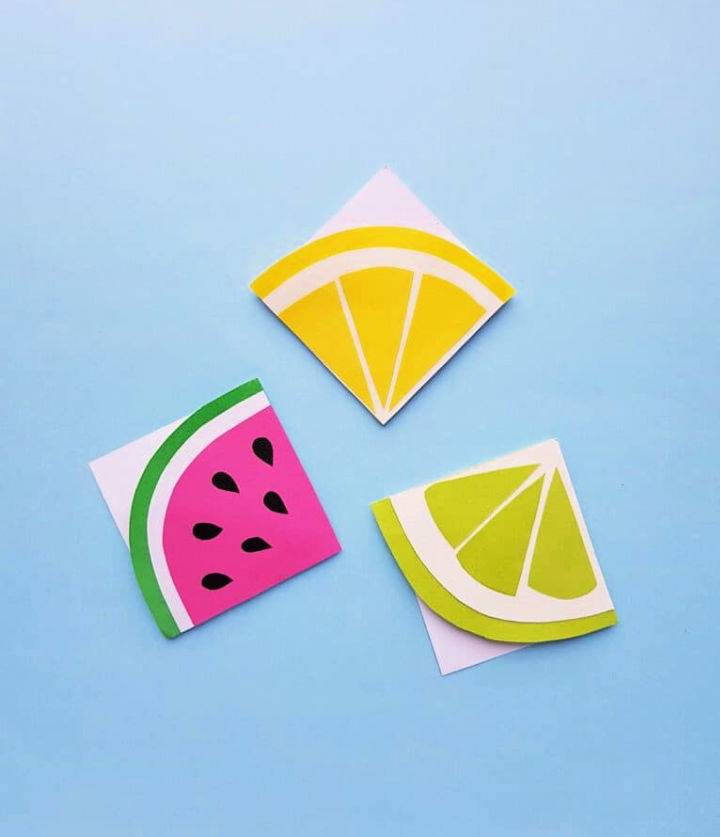
Discover how to make charming fruit origami corner bookmarks with this guide from Big Family Blessings. Engage in a fun and creative activity perfect for craft enthusiasts of all ages. Follow the step-by-step instructions to fold colorful paper into cute watermelon, lemon, and lime bookmarks using a printable template.
With clear directions and a simple supply list, you can easily assemble these adorable bookmarks. Add a touch of whimsy to your reading experience or craft them as thoughtful gifts for friends and family. Join in the crafting fun and brighten up your book collection with these fresh, fruity paper creations!
2. Easy DIY Origami Corner Bookmarks
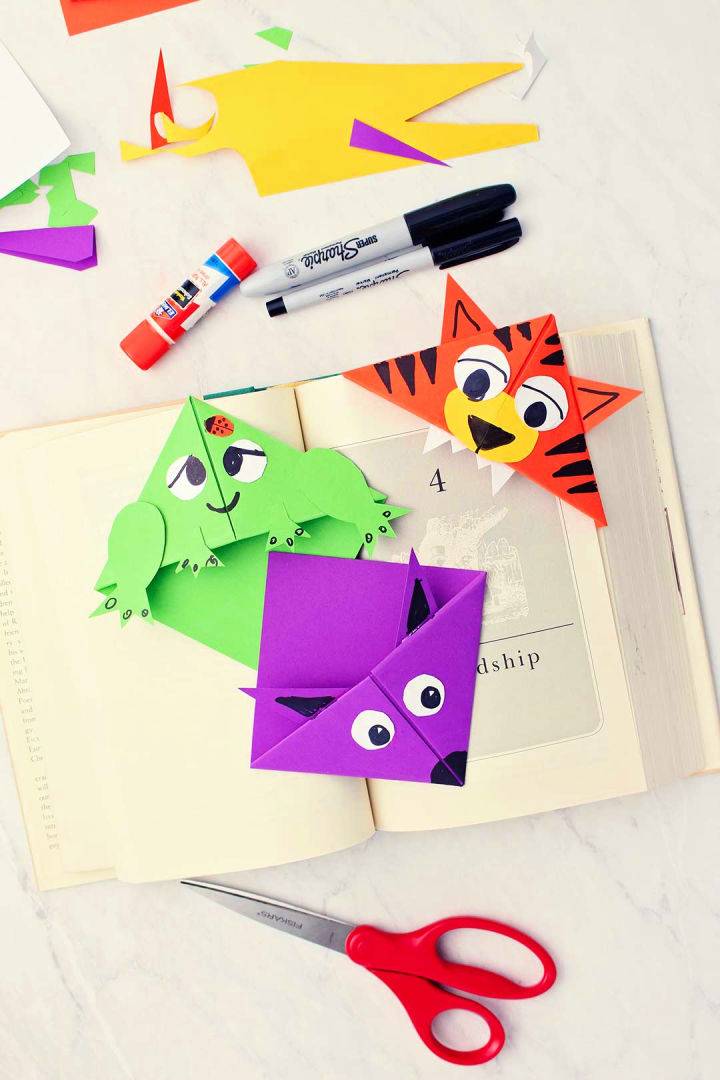
Welcome To Nana’s offers a charming tutorial on how to make easy origami corner bookmarks, a fun and engaging activity suitable for all ages. The step-by-step instructions guide crafters through simple folds to make unique bookmarks that double as delightful page holders and creative expressions.
With minimal supplies—colored copy paper, scissors, a glue stick, and markers—anyone can transform a plain piece of paper into a cute tiger, frog, or fox bookmark. The process is easy to understand, ensuring a rewarding crafting experience. It’s an excellent way to spend quality time with kids, encouraging their imagination and love for reading by personalizing their literary companions. Welcome To Nana
3. Making an Origami Bookmark
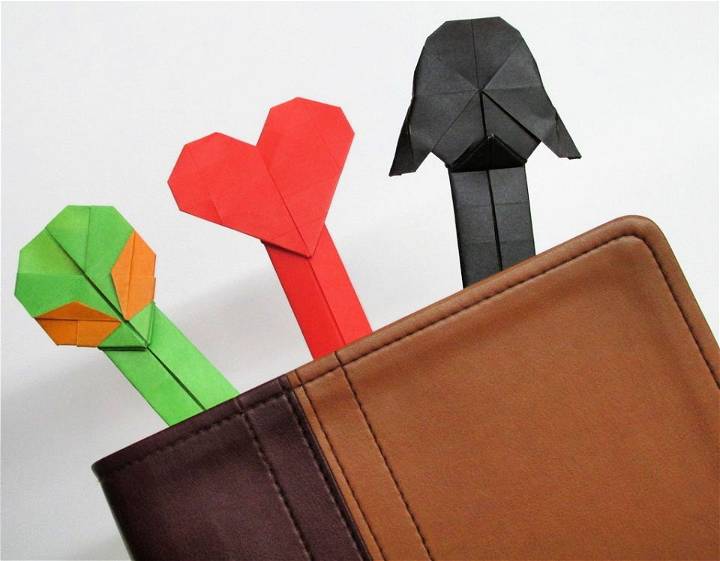
Make unique and engaging bookmarks with this Instructables guide on crafting Darth Vader, Alien, and Heart origami. These easy-to-follow instructions, accompanied by helpful video tutorials, cater to those eager to fold their way into making a personalized page saver out of a simple square paper.
Ideal for gifting or adding a touch of whimsy to your reading experience, these origami bookmarks combine creativity with functionality. Perfect for origami fans or anyone looking to dive into a fun paper-folding project, Instructables offers clear steps for transforming paper into artful bookmarks that are sure to impress.
4. Cute Monster Corner Bookmarks
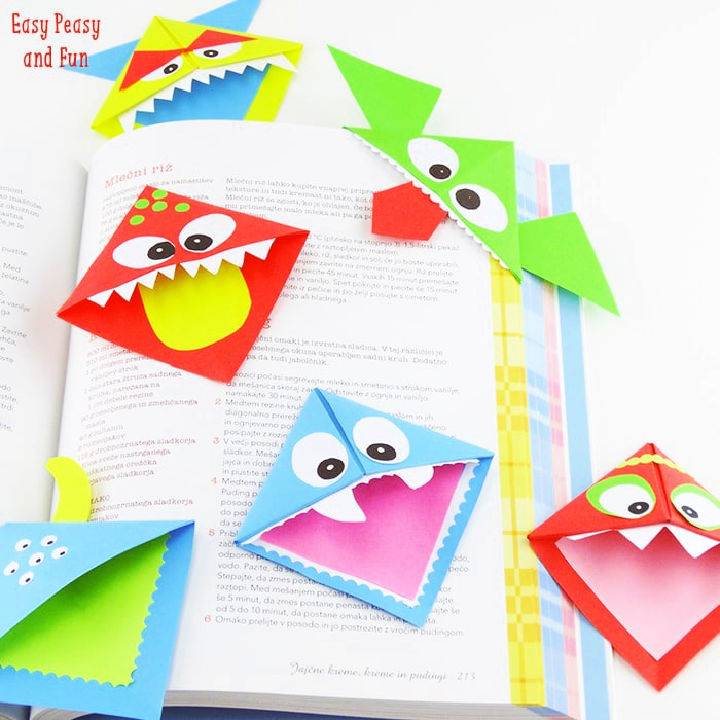
For those keen on spicing up their reading experience with a dash of creativity, Easy Peasy and Fun offers a charming craft project that transforms simple paper into adorable monster corner bookmarks. Ideal for kids and origami novices, this DIY activity not only fosters a love for crafting but also encourages a playful interaction with books.
The process is straightforward: with a sheet of paper, scissors, and a touch of imagination, you can make a colorful monster companion to guard the corners of your pages. Adding eyes, teeth, and other monster features personalizes each bookmark, making reading time an engaging and fun adventure. It’s a delightful way to inspire young readers and nurture a lifelong passion for literature and arts and crafts.
5. Make an Origami Butterfly Bookmark
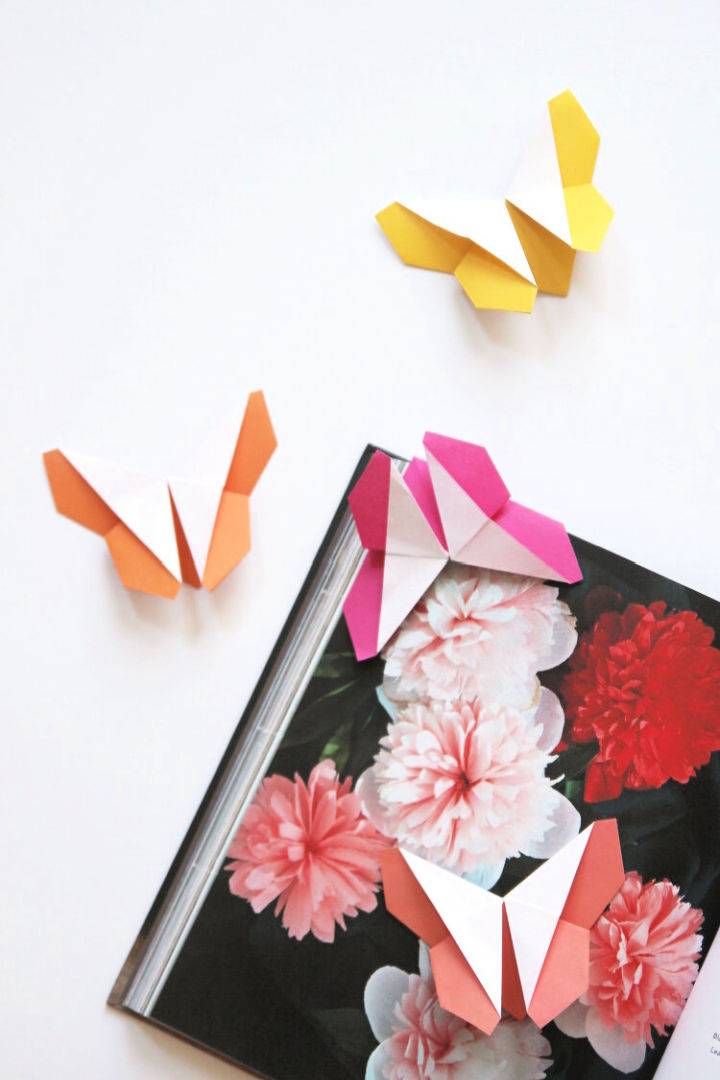
Discover the joy of making beautiful origami butterfly bookmarks with an easy-to-follow guide from Gathering Beauty. Perfect for book lovers, this craft provides a charming way to keep your place as you dive into your latest read. With step-by-step instructions, even those new to paper folding can make these elegant butterflies.
Not only do they make fantastic personal keepsakes, but they also serve as thoughtful gifts for friends and family. Grab some origami paper and get ready to transform it into a fluttering bookmark that’s both functional and lovely to look at.
6. Adorable Origami Koala Bookmark
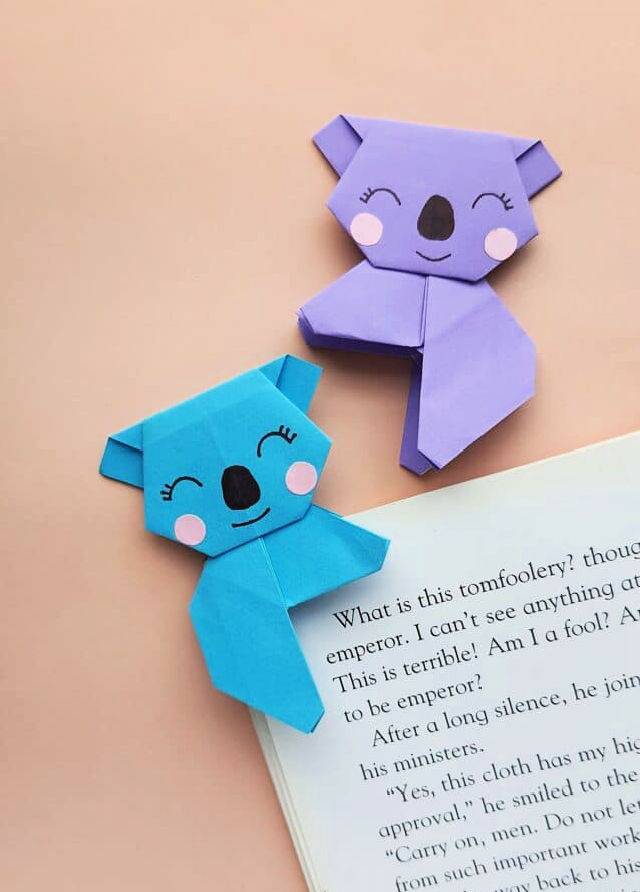
Engage your kids in a fun and creative activity with Big Family Blessings‘ origami koala bookmark tutorial. This charming craft combines the joy of origami with the practicality of a bookmark, making it an ideal project for children who adore handcrafted items and animal themes.
The instructions are clear and straightforward, guiding you through each step to make a cute koala that snugly hugs the corner of your page. Not only does this activity foster patience and dexterity, but it also results in a delightful koala companion for your reading adventures. Perfect for an afternoon of crafting, this origami bookmark adds a personal touch to your child’s reading experience.
7. How to Make an Origami Bookmark
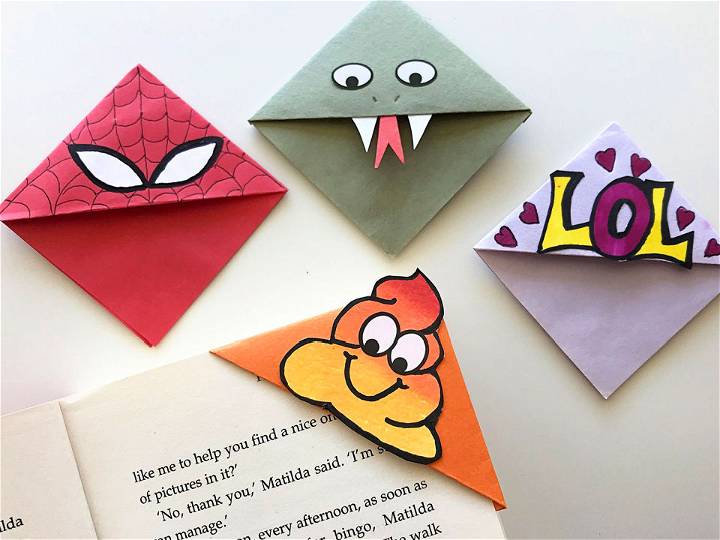
Ignite your child’s love for reading with a playful and creative origami bookmark, courtesy of Scholastic Parents. This crafty project is perfect for little hands, encouraging focus and dexterity as they follow simple instructions to transform a piece of paper into a charming reading accessory.
With only a few folds and some imaginative decoration with markers, stickers, or scraps, kids can personalize their bookmarks to suit their tastes. Whether they’re fans of animals, monsters, or their favorite storybook characters, these bookmarks make page-saving fun. Dive into this easy-to-understand, engaging activity that not only nurtures a child’s artistic flair but also cultivates a keen interest in books.
8. DIY Origami Unicorn Bookmark for Kids
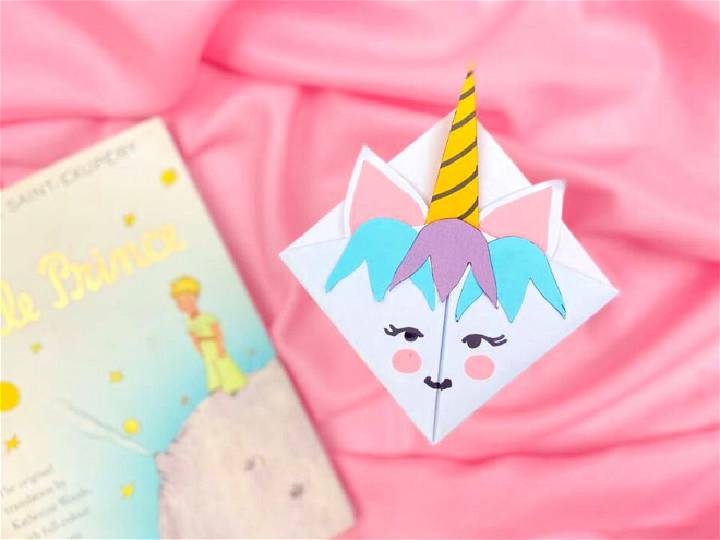
Delve into the charming activity of crafting your very own unicorn bookmark with this engaging tutorial from Growing Up Gabel. Perfect for children who adore mythical creatures, this project combines the art of origami with simple crafting materials to make a magical accessory for your reading adventures.
Using construction or origami paper, glue, scissors, and a black marker, kids can easily follow the step-by-step instructions to fold and decorate their bookmarks. Not only does this activity foster creativity and improve fine motor skills, but it also provides a delightful incentive to keep pages turning. Encourage the joy of reading and the fun of hands-on crafting with this lovely unicorn bookmark DIY guide.
9. Origami Heart Bookmark for Kids
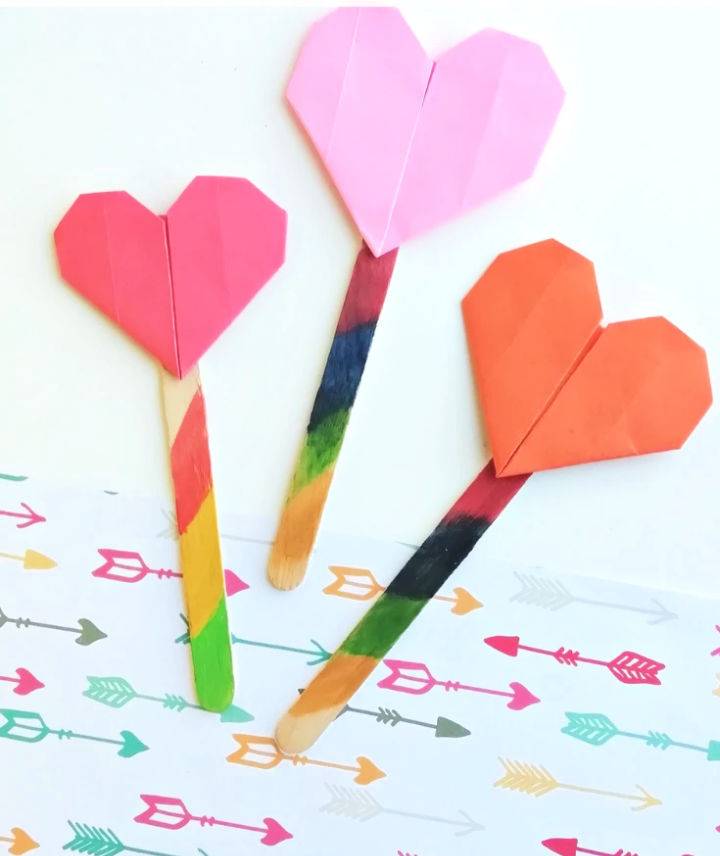
Discover a charming activity on That Kids’ Craft Site by crafting a cute origami heart bookmark, perfect for Valentine’s Day or to add a personal touch to your reading experience any day. Engage in this fun and easy project that will not only enhance your folding skills but also produce a lovely and functional piece. The instructions are clear and instructive, making it accessible for crafters looking to try their hand at origami.
With simple materials like origami paper, scissors, glue, and craft sticks, you can make a heartfelt handmade bookmark. Remember to work on a flat surface, be patient with each fold, and most importantly, enjoy the process of making something unique. Whether it’s for personal use or a thoughtful gift, this origami heart bookmark is sure to bring a smile to any book lover’s face.
10. How to Make an Origami Corner Bookmark
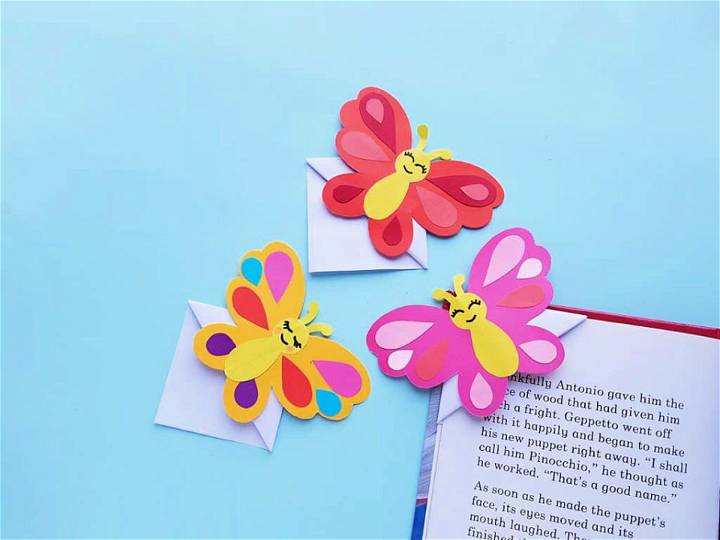
Making an origami corner bookmark is a simple and enjoyable craft that anyone can do with just a piece of paper and some creativity. Big Family Blessings offers an easy-to-follow guide on folding your own origami bookmark, perfect for keeping your place in any book. Start with a square piece of paper, which can vary in size to suit different book types.
Follow a few straightforward folds to shape your bookmark, then unleash your artistic side by decorating it to reflect your personal style or to fit various themes, like unicorns for fantasy lovers or Pokeballs for game enthusiasts. Not only is this a great activity for all ages, but it also results in a functional and personalized accessory for your reading adventures.
11. DIY Origami Bookmark Corners
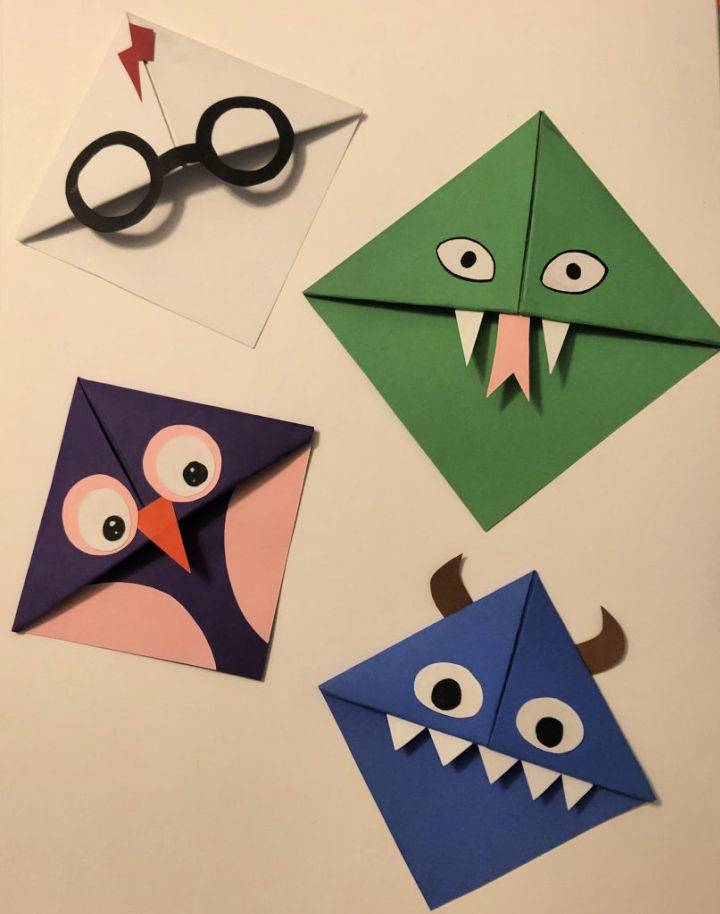
Make unique and personalized origami bookmark corners with Art Sphere Inc.‘s easy-to-follow guide. Dive into this fun activity, perfect for avid readers looking to add a touch of creativity to their reading experience. With simple materials like paper, scissors, and glue, you can fold and decorate your bookmarks to feature your favorite characters, cute animals, or even a character from the book you’re currently enjoying. Not only does this craft encourage artistic expression, but it also serves as a practical way to keep your place in any story. So grab your supplies and let your imagination soar as you design a one-of-a-kind bookmark that’s as special as the books you love to read.
12. Easy to Make Origami Heart Corner Bookmark
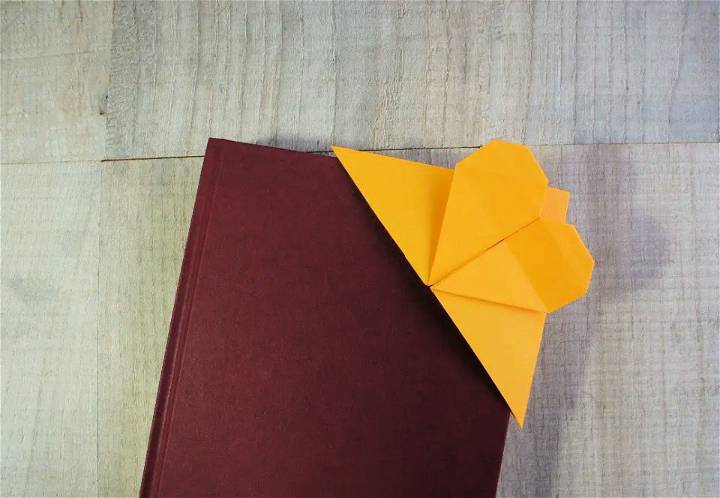
Delve into the charming craft of making an origami heart corner bookmark at Christine’s Crafts. Ideal for personalizing a reader’s book or gifting on special occasions such as Valentine’s Day and Mother’s Day, this easy-to-follow guide is perfect for anyone who enjoys creative paper folding.
Learn the fundamentals of origami, from precise folds to making sharp creases, and transform a simple square of paper into a lovely bookmark with just a few steps. The instructive tutorial, complete with visual aids, ensures a rewarding crafting experience that leads to a beautiful and functional piece of art.
13. Make Your Own Owl Corner Bookmark
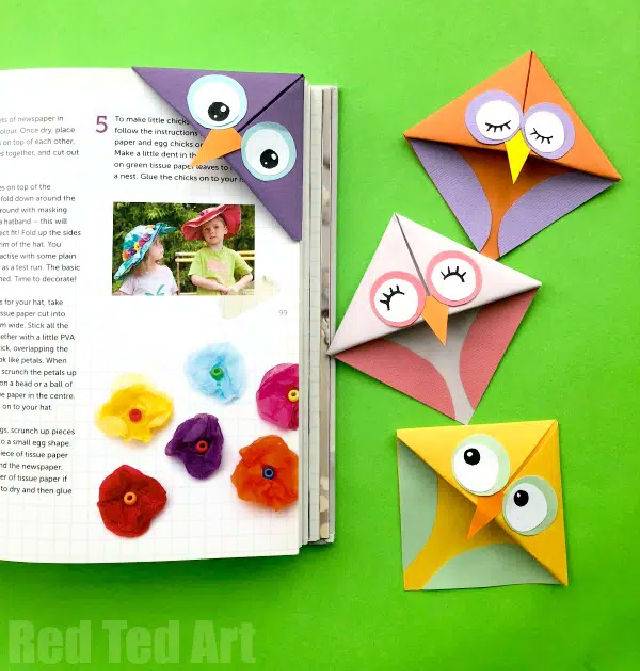
Making an origami owl bookmark is a simple and fun craft that’s perfect for anyone who enjoys adding a personal touch to their reading collection. At Red Ted Art – Kids Crafts, you can find an easy-to-follow tutorial that will guide you through the steps of making your very own paper owl bookmark. This craft is not only a great way to mark your pages but also an excellent activity for encouraging creativity in kids as they head back to school.
With a square piece of paper, some basic craft supplies, and a bit of imagination, you can transform your reading experience with a charming, handmade owl peeking out from the corner of your book. Follow the instructions, get creative with colors and patterns, and enjoy crafting a unique owl bookmark today!
14. Origami Ladybug Corner Bookmark
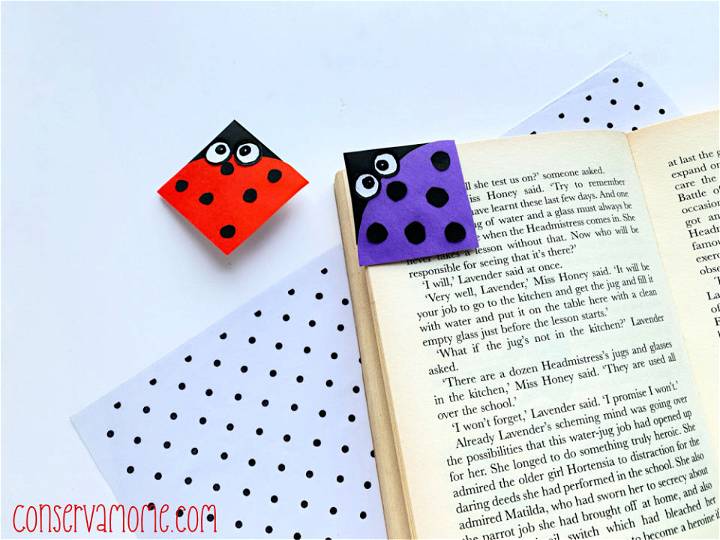
Making a ladybug corner bookmark is a simple and enjoyable paper-craft project that anyone can do at home. With easy-to-follow steps provided by ConservaMom, you’ll learn how to transform origami paper into a charming and practical bookmark, perfect for keeping your place in any book. You’ll need a few basic supplies such as origami craft paper, glue, scissors, marker pens, and a PDF template for the ladybug design.
This craft is not only a great way to celebrate the beauty of ladybugs but also to engage in the creative process of origami. Once finished, these bookmarks can serve as thoughtful handmade gifts or fun projects for a rainy day. Dive into this craft tutorial and make a unique and colorful accessory for your reading adventures.
15. Hedgehog Origami Corner Bookmark for Kids
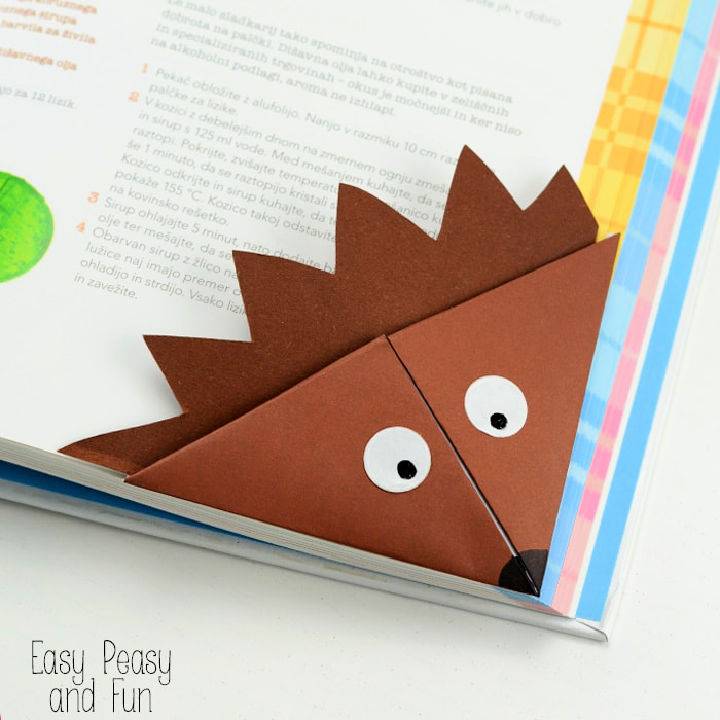
Crafting an origami hedgehog corner bookmark is a charming and practical project, perfect for book lovers of all ages. Easy Peasy and Fun provides an engaging guide to making these delightful paper creatures. Starting with a sheet of brown origami paper, you’ll fold your way to a friendly hedgehog that snugly fits onto the corner of your page, ensuring you never lose your spot.
To enhance its spiky allure, a darker shade of paper is added, with simple cuts and glue. Not only does this activity foster creativity, but it also introduces the fun and fundamentals of origami. Get your scissors, marker, glue, and let’s fold our way into a whimsical reading adventure!
16. Woodland Animals Origami Bookmarks
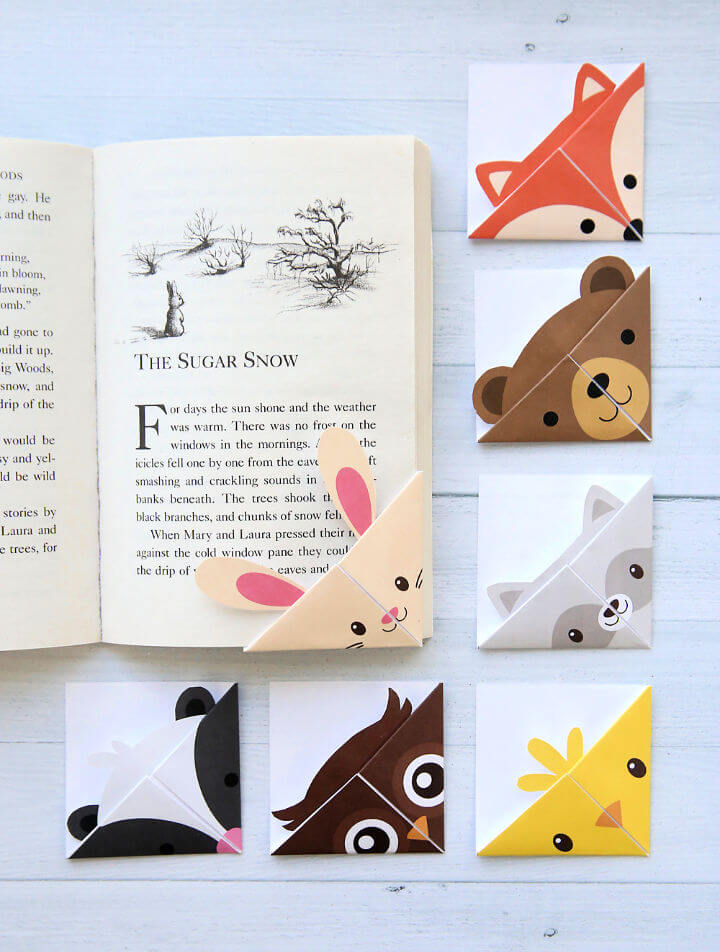
Embrace the charm of woodland creatures with DIY origami bookmarks, a creative project featured on It’s Always Autumn. Perfect for craft enthusiasts and those who cherish their reading time, these bookmarks transform a single piece of paper into adorable animal friends. The provided printable templates make it easy to fold and craft a variety of forest animals, from a cunning fox to a wise owl.
Each template is designed for ease of use, ensuring a smooth crafting experience. By following simple folding instructions, you can protect your book pages in style without turning down corners. These handmade bookmarks are not only functional but also add a touch of whimsy to your reading adventures. Engage in this crafting activity with family or friends for a delightful and productive pastime that celebrates both literature and art.
17. Bat Corner Bookmarks
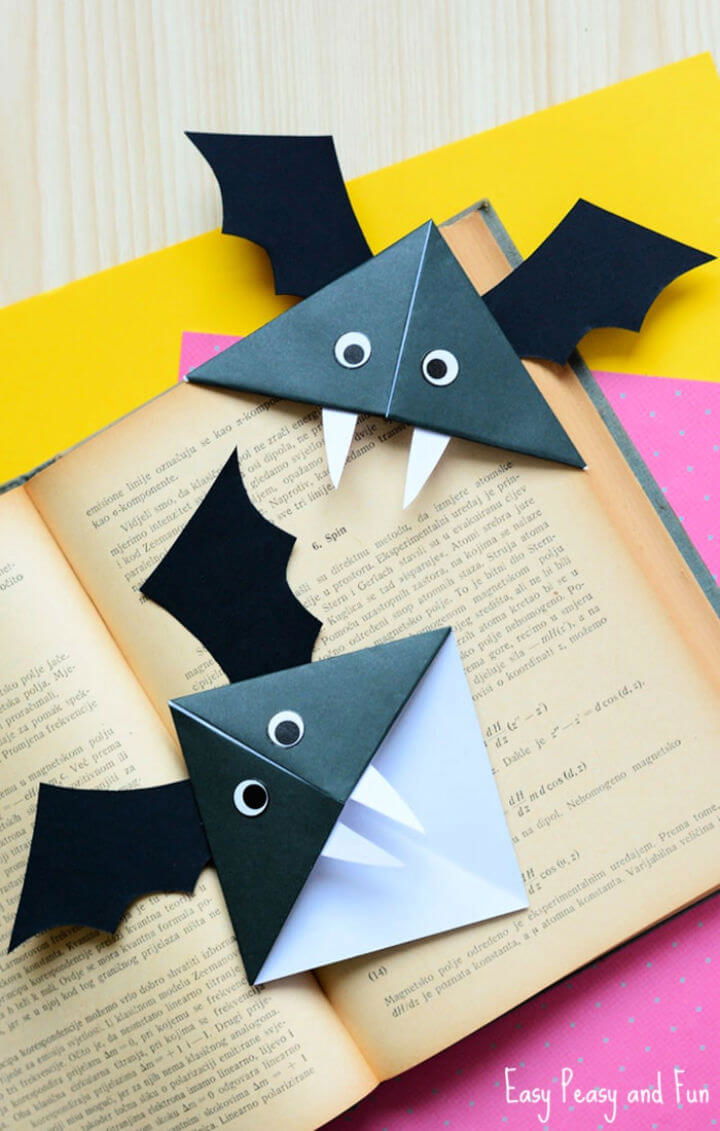
Easy Peasy and Fun brings you a charming DIY craft that’s perfect for Halloween festivities. Making your own bat corner bookmarks is a simple and enjoyable project for kids, adding a touch of spooky fun to their reading time. These bookmarks are not only great for personal use but also serve as excellent party favors.
With clear step-by-step instructions and the option to download a handy printable folding diagram, crafting these cute origami bats is hassle-free. All you need is black origami paper, some construction paper, wiggle eye stickers, scissors, glue, and a bit of creativity. Get ready to give your favorite books a playful companion with these adorable bat bookmarks. Easy Peasy and Fun
18. How to Make Origami Monster Bookmarks
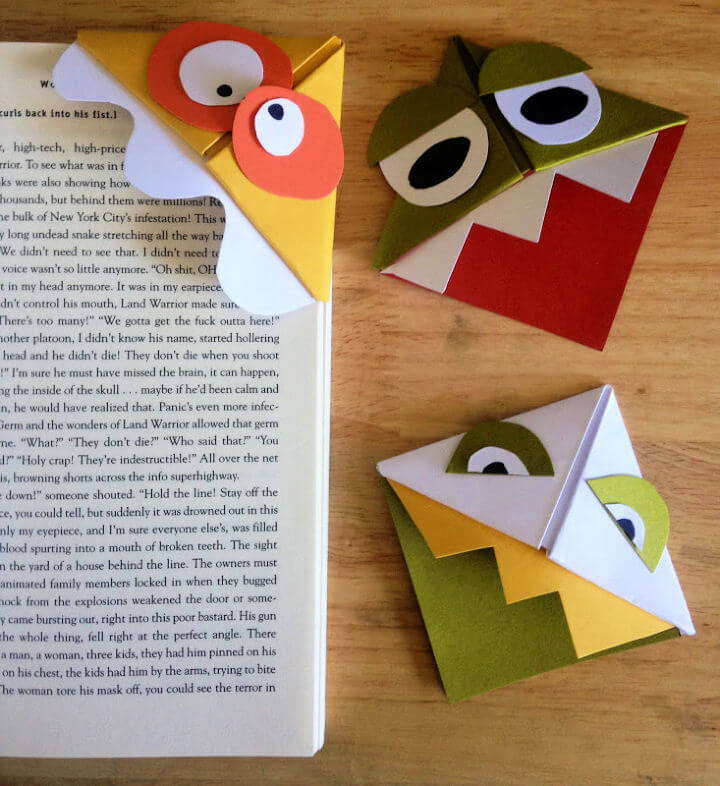
Transform your reading experience with a dash of creativity by making your very own origami monster bookmarks! These charming little creations are not only fun and easy to craft but also add a playful touch to your reading sessions, keeping your pages safe without bending them. Perfect for kids and adults alike, these bookmarks can be made with just a few simple materials—colorful construction paper, scissors, glue, and markers.
Follow the straightforward steps to fold and decorate your paper into a cute monster that ‘bites’ onto the corner of your page. It’s a crafty solution that makes for a great activity with children, encouraging them to read more while taking care of their books. Grab your supplies and enjoy crafting your monster bookmarks with these easy instructions! Kato Kula
19. Heart Origami Bookmark

Discover a charming and straightforward origami heart bookmark craft that is perfect for book lovers and craft enthusiasts alike. On DIY Candy, you’ll find an engaging guide that shows you how to fold an adorable bookmark that resembles a conversation heart candy, fitting snugly onto the corner of your book page. Ideal for Valentine’s Day, party favors, or just a creative afternoon activity, this origami project requires no previous crafting skills, making it accessible for all ages.
You’ll be using everyday materials like origami paper, scissors, a red permanent marker, and clear tape to bring these cute bookmarks to life. The instructions are clear and easy to follow, ensuring a fun and stress-free crafting experience. Embrace the joy of paper folding and make a personal touch for your reading collection with this easy origami heart bookmark tutorial from DIY Candy.
20. How to Make a Corner Bookmark
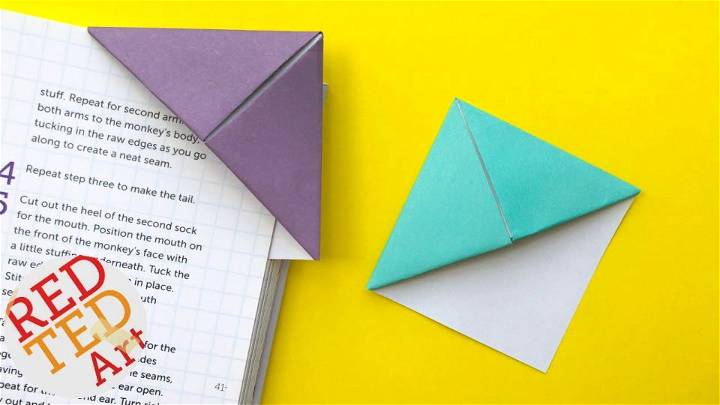
Crafting a corner bookmark from paper is not only a fun activity but also a functional art project. Red Ted Art offers a straightforward tutorial on making an easy origami bookmark corner, perfect for book lovers and craft enthusiasts. The video tutorial is concise, guiding viewers through each fold with clear instructions. It’s an ideal project for those who want to personalize their reading experience or give a handmade gift to a fellow reader.
The beauty of origami lies in its simplicity and the endless possibilities for customization. By following this tutorial, you can learn the basic folds and then let your creativity run wild with decorations and designs. A square piece of paper is transformed into a charming and useful bookmark, ensuring you never lose your page again. Visit Red Ted Art for this and more creative crafting ideas.
Conclusion:
In conclusion, crafting the perfect DIY origami bookmark is not just about folding paper; it’s about weaving a piece of your creativity and personality into a functional art form. Through our comprehensive guide, from the cultural tapestry of origami to personalizing your bookmarks and embracing sustainability, we’ve covered essential techniques and inspirations to help you master this delightful craft.
Whether it’s choosing sustainable materials or advancing your origami skills, the journey of making 20 best DIY origami bookmarks ideas to craft in minutes offers a rewarding way to blend artistry with practicality. Happy folding, and may your next reading adventure be marked with a piece of your handcrafted art!


