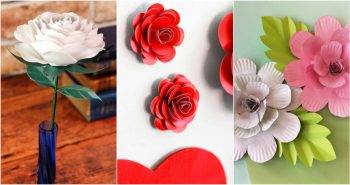
Making stunning decorations at home has never been easier with these 25 DIY paper garland ideas. Making your own paper garland is not only a fun, creative activity but also adds a personalized touch to any space. This guide provides a straightforward process, ensuring anyone can craft beautiful decorations, regardless of their skill level. From selecting the right type of paper to the final touches, each step is designed to make your crafting experience enjoyable and fruitful.
As you embark on this crafting journey, you’ll discover various ways to customize your garland, ensuring it complements your space perfectly. We also cover crucial safety tips, troubleshoot common problems, and offer advice on making your project as sustainable as possible. With helpful FAQs and a video tutorial to guide you, making your very own paper garland is just a few steps away.
So, let’s get started and add that special touch to your home decor with a beautiful, handcrafted paper garland.
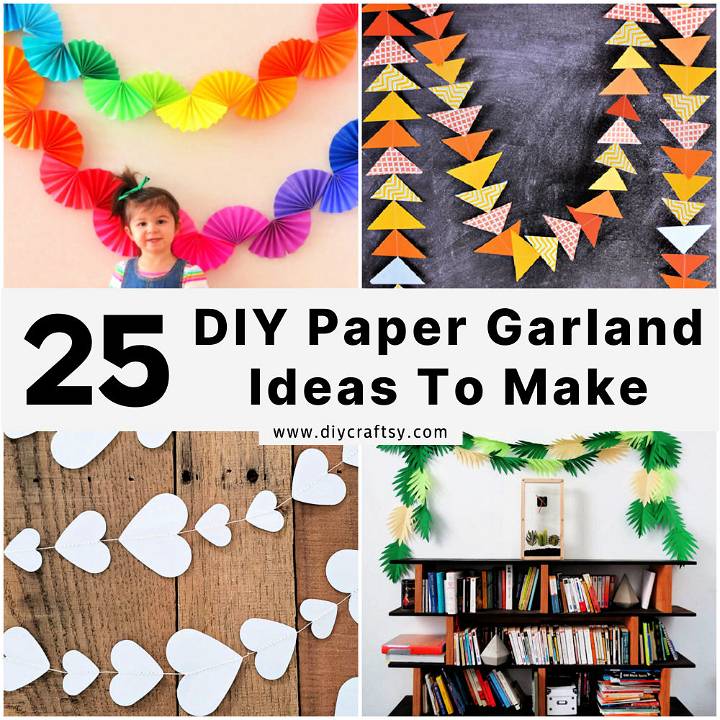
How to Make Paper Garland: A Simple Guide for Stunning Decorations
Making a beautiful paper garland can transform any space into a festive and cheerful setting. It’s perfect for birthdays, weddings, or simply adding a splash of color to your home decor. This easy-to-follow guide will show you how to make a stunning paper garland, inspired by the Orthy Art & Crafts YouTube tutorial. Let’s dive into this fun and creative activity!
What You Will Need:
- A4 colored paper
- Scissors
- Glue
- Thread
Step by Step Process:
Step 1: Choose Your Paper
Select colorful A4 papers based on your theme or preference. The colors can be bright and vibrant for a festive look, or pastel shades for a softer appeal.
Step 2: Cutting the Paper
Fold your A4 paper in half lengthwise, then begin cutting strips about 1 cm wide, leaving a margin at the folded edge. This margin is crucial as it keeps the strips connected. For variation, you can cut the strips thicker or thinner based on the desired look of your garland.
Step 3: Making the Loops
Open up the folded paper to reveal the connected strips. Take one strip, loop it around, and glue its end to the base near the fold. Continue this process, making loops with all the strips. This step will start forming the intricate, looped design of your garland.
Step 4: Attaching the Garland to Thread
Once you have your paper loops ready, it’s time to string them together. Cut a length of thread as long as you want your garland to be. Slide the thread through the top part of each looped design, spacing them as closely or as far apart as you like. Ensure they are secured, and add a dab of glue if necessary to keep them in place.
Step 5: Finishing Touches
After attaching all the looped designs, hang your garland up to see if any adjustments are needed. You can add more loops, adjust the spacing, or even mix in different colors or patterns to make your garland uniquely yours.
Video Tutorial
For a step-by-step video tutorial on making paper garland, watch the Orthy Art & Crafts tutorial on YouTube.
It pairs well with this written guide, offering a dynamic visual representation of each technique described, making it easier to follow and understand.
Make a paper garland to add a personal touch to your decorations. Handmade garlands are charming and bring joy to any space. Enjoy crafting and the beautiful result!
Customization Ideas for Your DIY Paper Garland
Making a DIY paper garland is not just about following instructions; it’s about adding your personal touch to make it uniquely yours. Here are some ideas to inspire your creativity:
- Themes: Match your garland to the theme of the event. For a birthday party, use bright colors and add shapes like balloons or cakes. For a more elegant event, such as a wedding, consider white or pastel colors with touches of gold or silver.
- Shapes: Don’t limit yourself to traditional circles or triangles. Experiment with different shapes like stars, hearts, or even animals. You can also mix and match shapes for a playful effect.
- Textures: Add depth to your garland by using paper with different textures. Combine smooth, glossy paper with matte finishes or embossed patterns.
- Layers: Make a 3D effect by layering multiple pieces of paper. This can be as simple as placing smaller shapes on top of larger ones or making intricate designs with several layers.
- Embellishments: Personalize your garland with embellishments such as glitter, beads, ribbons, or stickers. These small details can make a big impact.
There’s no right or wrong way to customize your garland. The most important thing is that it reflects your style and brings joy to your space.
Safety Precautions for Crafting Your DIY Paper Garland
Safety is paramount when crafting, especially if children are involved. Here are some tips to ensure a safe and enjoyable crafting experience:
- Scissors: Always use scissors with care. If children are participating, provide them with safety scissors that have rounded tips.
- Adhesives: Choose the right adhesive for the job. If using glue, ensure it is non-toxic and keep it away from eyes and mouth. Tape can be a safer alternative for younger crafters.
- Staplers: Staplers should be used by adults or under close adult supervision. Keep your fingers away from the stapling area to avoid accidental injury.
- Clean Workspace: Maintain a clean and organized workspace. This not only helps prevent accidents but also makes the crafting process more enjoyable.
- Supervision: If crafting with children, always supervise them closely. Teach them how to use tools safely and step in when necessary.
By following these safety tips, you can focus on the fun part of crafting—making something beautiful and unique.
Troubleshooting Tips for DIY Paper Garland
Crafting can sometimes come with its set of challenges. Here are some troubleshooting tips to help you overcome common hurdles when making your DIY paper garland:
- Paper Tearing: If your paper tears while threading, try using thicker paper or reinforcing the holes with tape before threading.
- Uneven Shapes: For symmetrical shapes, use a template. Trace the template onto your paper to ensure each shape is uniform.
- Garland Tangling: To prevent tangling, lay out your garland flat while working on it. Store it by wrapping it around a piece of cardboard.
- Color Bleeding: If you’re using colored paper, opt for high-quality, colorfast paper to prevent colors from bleeding when in contact with moisture.
Encountering issues is part of the crafting process. Don’t get discouraged; with a little patience and these tips, you’ll make a beautiful garland.
Sustainability Tips for Your DIY Paper Garland
Incorporating sustainability into your crafts is not only good for the environment but also adds a meaningful touch to your creations. Here are some eco-friendly tips:
- Recycled Paper: Use recycled paper or repurpose old magazines, newspapers, or book pages for an eco-conscious choice.
- Biodegradable Materials: Choose materials that are biodegradable, such as natural twine or cotton thread, for stringing your garland.
- Reusable Design: Design your garland so it can be easily taken down, stored, and reused for future events.
- Non-Toxic Adhesives: Select adhesives that are non-toxic and environmentally friendly.
By following these sustainability tips, you’ll not only craft a beautiful garland but also contribute positively to our planet.
FAQs About DIY Paper Garlands
Here are some common questions and answers to help guide you through the process of making your own DIY paper garland.
What type of paper is best for making garlands?
The best paper for garlands is sturdy enough to hold its shape but light enough to hang well. Cardstock, scrapbook paper, or construction paper work great.
Can I use recycled paper for my garland?
Absolutely! Using recycled paper like old magazines or book pages is eco-friendly and adds a unique touch to your garland.
How do I keep my paper garland from tangling?
Store your garland by wrapping it around a flat piece of cardboard. This will keep it neat and ready for the next use.
What can I use to string the garland if I don’t have twine?
You can use a variety of materials like yarn, dental floss, or even thin ribbon as alternatives to twine.
How can I make my garland more durable?
Laminating the paper shapes or using clear tape for reinforcement can help make your garland more durable.
Is it possible to make a garland without a sewing machine or needle?
Yes, you can use tape, glue, or staplers to assemble your garland without the need for sewing.
How long does it take to make a DIY paper garland?
The time varies depending on the complexity and length of the garland, but a simple one can be made in about 30 minutes to an hour.
Can I make a garland with different shapes?
Of course! Feel free to mix and match different shapes to make a unique design.
How do I hang my paper garland without damaging the walls?
Use removable adhesive hooks or washi tape to hang your garland without leaving marks on the walls.
Can children participate in making a paper garland?
Yes, with adult supervision, children can enjoy crafting their own garland. Just ensure safety scissors and non-toxic adhesives are used.
What should I do if the paper shapes keep flipping over?
Try attaching a small weight, like a bead or button, to the bottom of each shape to keep them facing forward.
By keeping these FAQs in mind, you’ll be well on your way to making a beautiful and successful DIY paper garland. Enjoy the process and let your creativity shine!
25 DIY Paper Garland Ideas To Make
Discover 25 exquisite DIY paper garland ideas to easily craft at home. Spark creativity and add a touch of whimsy to any space with these handmade decorations.
1. DIY Paper Leaves Garland in 30 Minutes
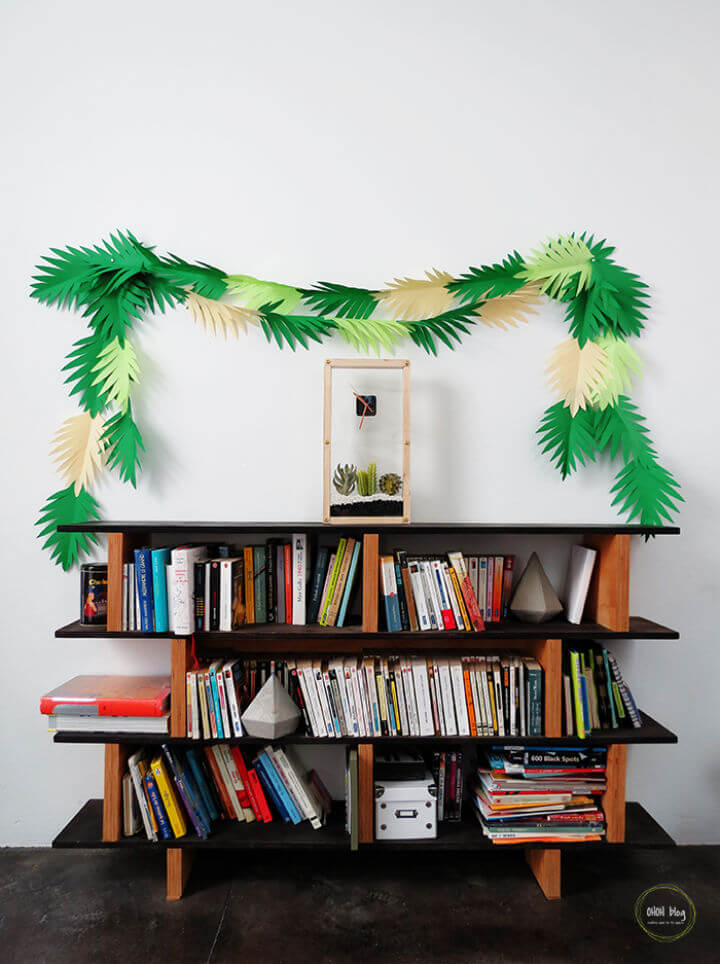
Brighten up your living space or add a festive touch to your next party with a handmade paper leaves garland. Ohoh Deco offers an easy-to-follow tutorial that transforms simple paper sheets into a lush, tropical decoration in just 30 minutes. You’ll need color paper, scissors, a pencil, and a glue stick to start crafting your vibrant garland.
Perfect for a photo backdrop or to jazz up a corner at home, this DIY project allows you to get creative without any fancy equipment. Alternate shades of green for a dynamic effect and consider pairing your garland with tissue paper tropical flowers for an extra pop of color. Get ready to cut, glue, and hang your way to a charming, jungle-themed nook that brings the outdoors inside.
2. Awesome DIY Paper Leaf Fall Garland
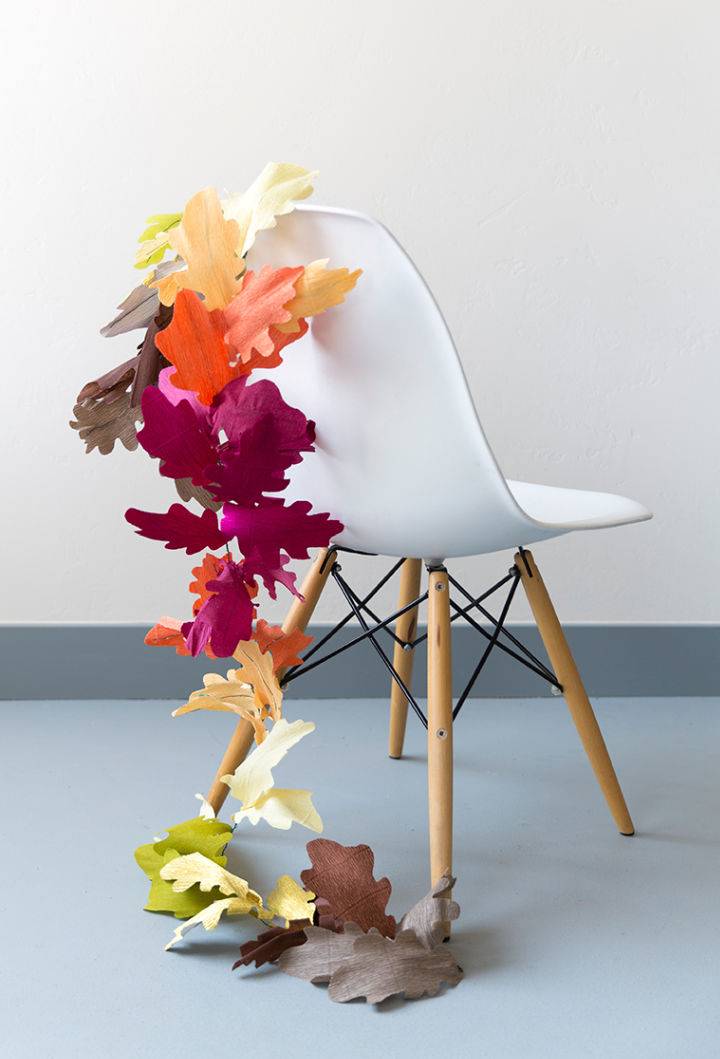
Welcome the autumn season with a creative twist by crafting a charming paper leaf fall garland, as shown on The House That Lars Built. Perfect for home decor or festive gatherings, this garland is a fun DIY project that adds a touch of nature without the mess of real leaves.
You’ll need crepe paper in various fall shades, scissors, a leaf template, floral wire, wire cutters, and a glue gun to begin. The process is straightforward: cut out leaves, attach wire for structure, and assemble your garland by twisting the wires together. Hang it on your mantle or any space that could use some fall flair. With this engaging craft, you’ll make a beautiful seasonal decoration that lasts.
3. Pretty DIY Paper Geode Garland
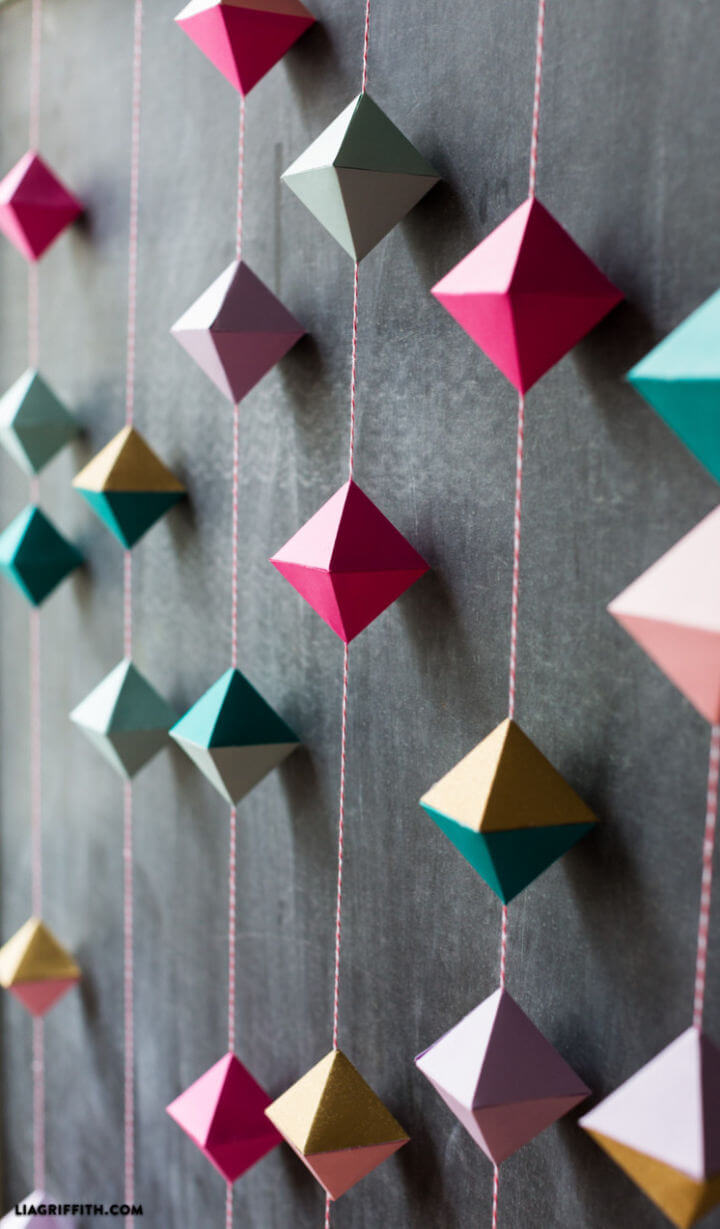
Make a beautiful paper geode garland at home with a simple craft knife and some colorful paper. Lia Griffith offers an engaging pattern and tutorial for this charming DIY project. Perfect for sprucing up your living space or adding a unique touch to celebrations, this handcrafted decoration is both rewarding to make and stunning to display.
By using a variety of papers, you can customize the color palette to suit your style. A hot glue gun is recommended for assembly, ensuring a strong hold and easy crafting process. Visit Lia Griffith for this and more creative home decor ideas, enhancing your space with a personal, crafted touch.
4. Making St. Patrick’s Day Rainbow Garland
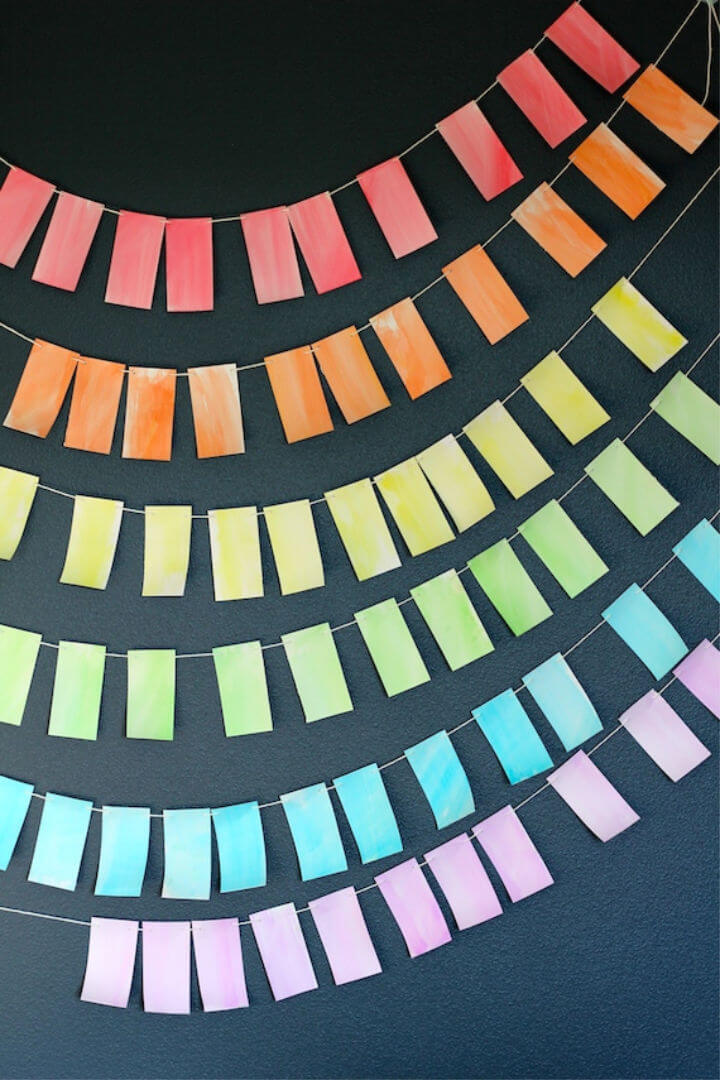
Brighten up your St. Patrick’s Day celebrations with a handcrafted rainbow garland that adds a splash of color to the occasion. Julep’s DIY tutorial guides you through the simple process of making a festive decoration that’s sure to impress. You’ll need basic supplies like card stock, watercolor paints, and twine to assemble your garland.
Follow the straightforward steps to paint, cut, and string together your paper rectangles, resulting in a charming addition to your holiday decor. With easy-to-understand instructions, this craft is accessible to anyone wanting to bring a bit of rainbow magic into their home. Get ready to dazzle your guests with a touch of creativity and St. Patrick’s Day spirit! Minted
5. Handmade Spring Paper Flower Garland
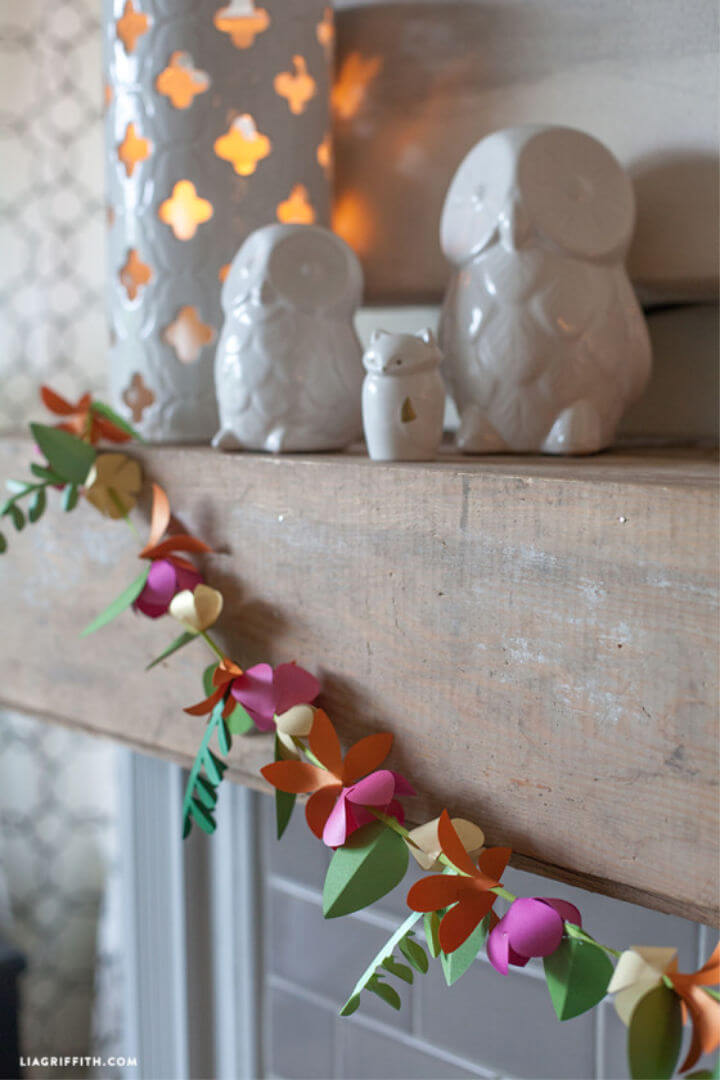
Making a spring paper flower garland can add a touch of seasonal charm to any space. Lia Griffith provides an easy-to-follow tutorial for crafting these beautiful decorations. With simple templates and vivid metallic papers, you can handcraft a variety of flowers and leaves to string together into a festive garland.
Perfect for brightening up mantels or windows, this garland is a fun project that enhances your home’s decor. By downloading the pattern from Lia Griffith’s website, cutting out the shapes, and using a few basic crafting tools, you’ll transform paper into a stunning display. Join the crafting community at Lia Griffith for access to more inspiring projects.
6. Gorgeous Summer Flower Garland
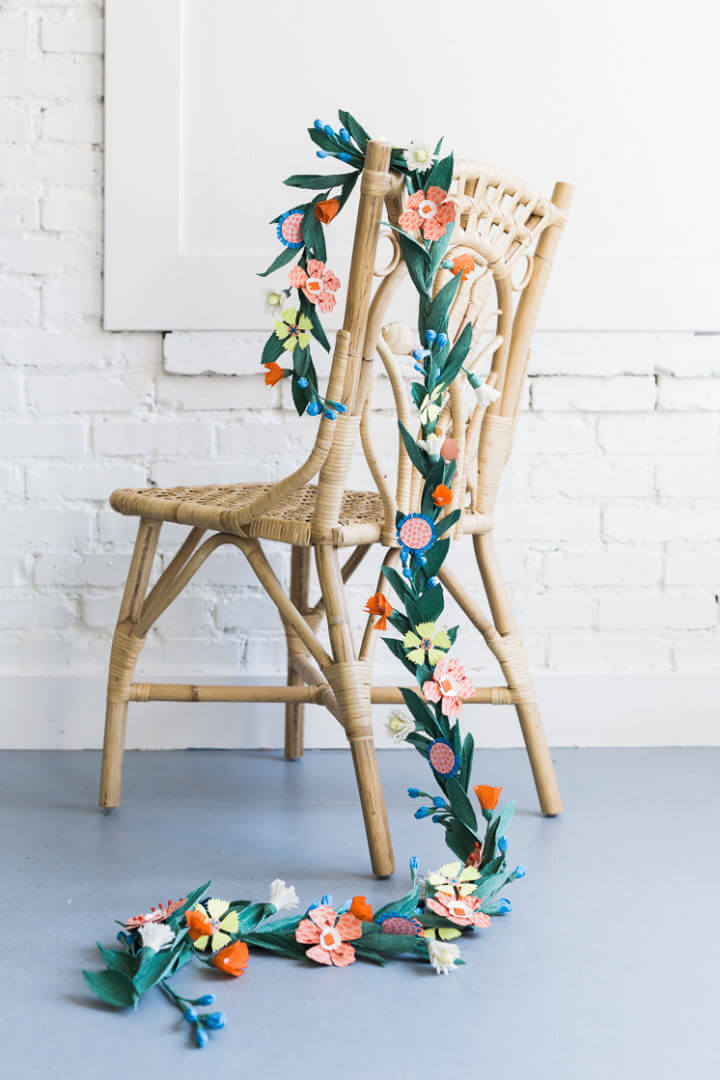
Make a vibrant touch of summer in your home with a DIY Summer Flower Garland. The House That Lars Built offers an engaging guide on crafting a garland that will brighten any space. This garland, made with crepe paper and cardstock, is not only an affordable way to decorate but also a delightful project to undertake.
The design is fully customizable, allowing you to choose colors that match your style. Perfect for gatherings or as a charming addition to your décor, it can adorn staircases, doorways, or walls. Gather your materials, and enjoy crafting a piece that captures the essence of summer. For detailed instructions, visit their website and infuse your days with creative joy.
7. Cool Dipped Crepe Paper Garland for Chair
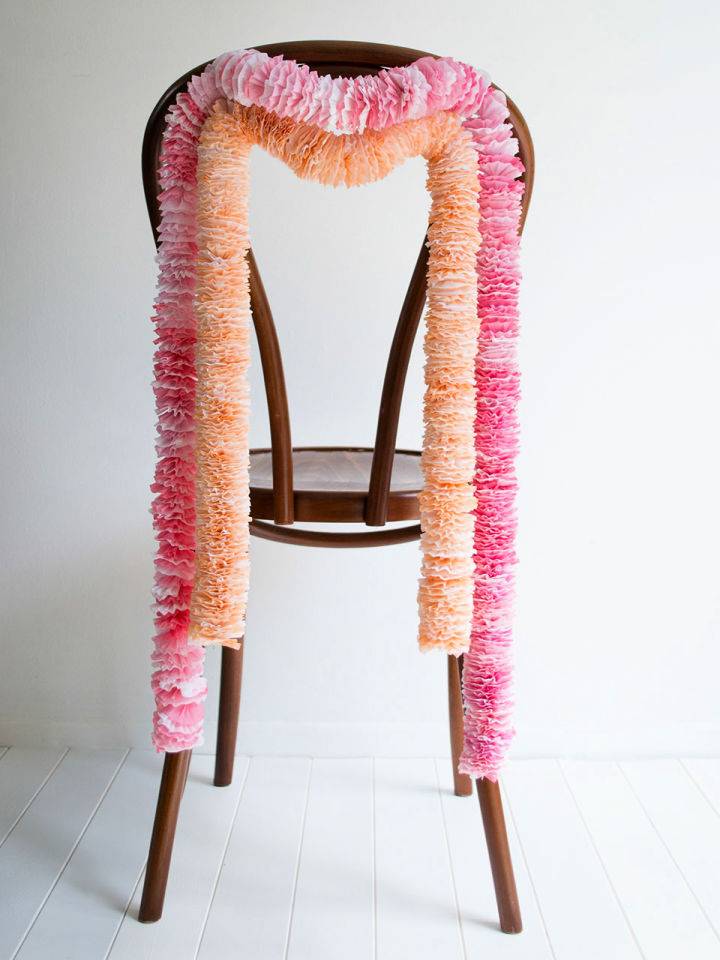
Dive into DIY wedding decor with Love My Dress® UK Wedding Blog’s tutorial on making dipped crepe paper chair garlands. Perfect for adding a personal touch to your big day, these garlands are simple to make and offer an eye-catching detail for your ceremony or reception chairs.
With easy-to-follow instructions, you’ll transform strips of crepe paper into elegant decorations using watercolors and a few craft supplies. Ideal for anyone who enjoys hands-on projects, this guide helps you fashion beautiful, cost-effective accents that elevate your wedding aesthetic. Get ready to impress your guests with your DIY skills and make a stunning visual impact.
8. Creative Paper Leaf Garland
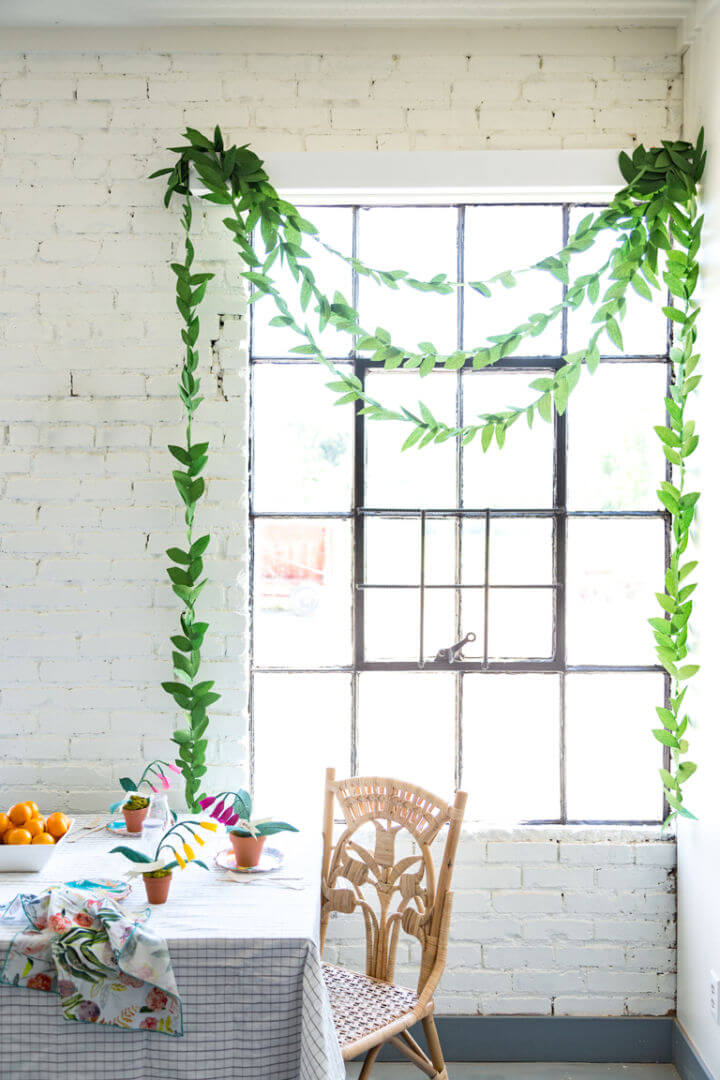
Make a stunning DIY paper leaf garland with ease using the tutorial from The House That Lars Built. All you need is green crepe paper, scissors, a template, and a sewing machine. Simply cut out the leaves using the provided template, making sure the grain runs vertically. Sew them together down the middle in a criss-cross fashion, and continue until you’ve achieved your desired length. Ideal for adding a touch of nature to your home decor or spicing up seasonal gatherings, this reusable garland is both simple and stylish. Get crafting and elevate your decorating game!
9. Make Your Own Paper Net Garland

Craft a charming paper net garland with this simple DIY guide inspired by vintage craft books. Perfect for adding a festive touch to any occasion, these garlands are made from materials you likely have on hand. Start by cutting a paper strip and folding it lengthwise. Then, make alternating snips along the edges, unfold gently, and flatten the crease. For extended length, glue multiple garlands together. Attach it to walls using washi tape for an instant decorative lift. Follow these steps for an easy, engaging craft experience that adds a vintage flair to your decor. Oh Happy Day
10. Pretty DIY Triangle Paper Garland
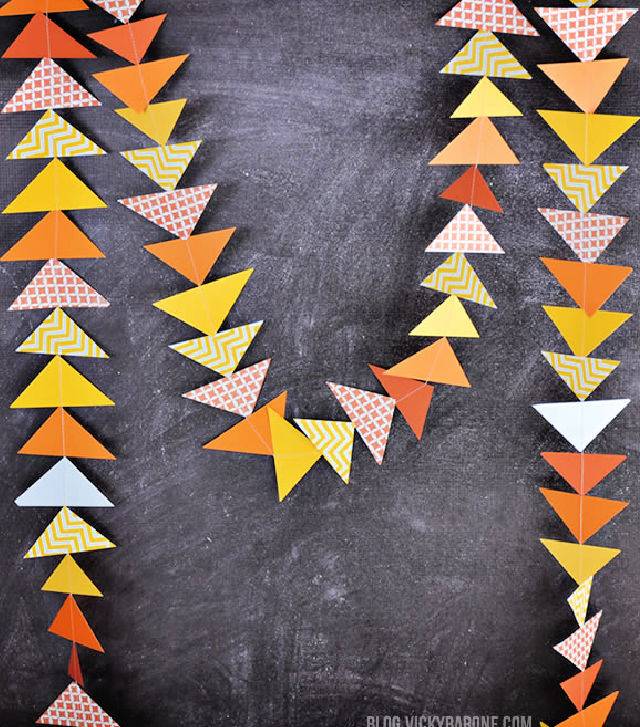
Make a charming triangle paper garland with ease following the DIY tutorial on Vicky Barone‘s blog. Perfect for adding a playful touch to any kid’s room, playroom, or office, this craft project only requires scrapbook paper, a paper cutter, and a sewing machine. Cut your paper into squares, then triangles, and stitch them together for a delightful décor piece. Customize your creation using patterned or solid-colored papers and varying triangle sizes. It’s a delightful way to personalize your space and enjoy a fun crafting session. Visit Vicky Barone for the full step-by-step guide and more creative ideas.
11. Tissue Paper Flower Garland Design
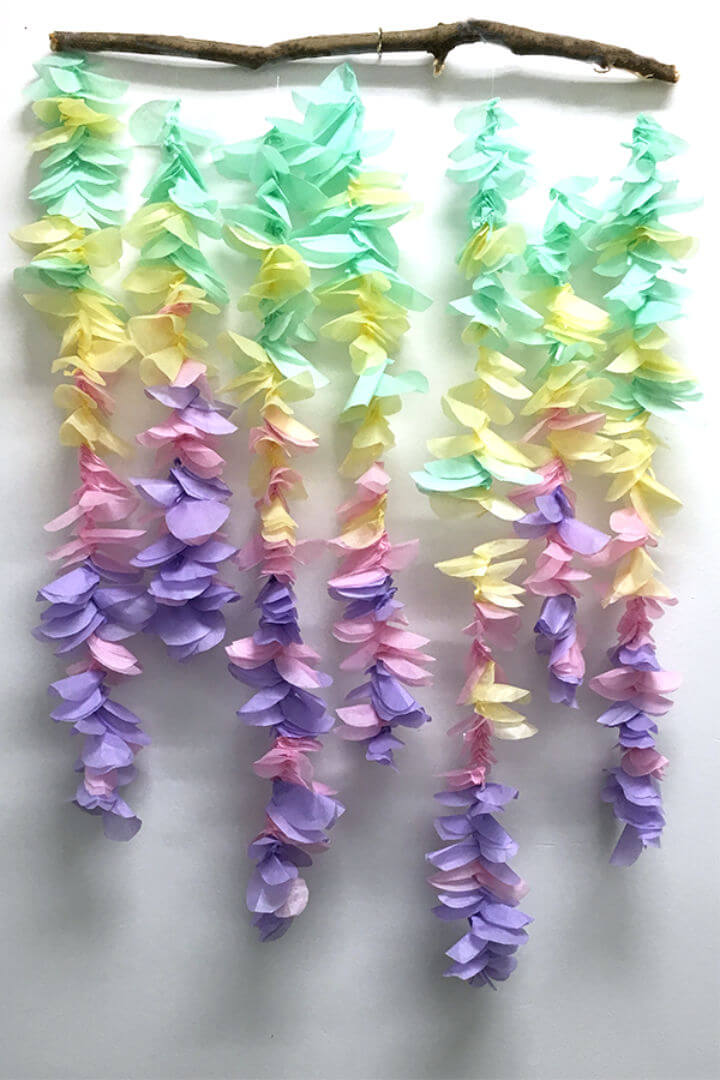
Transform your living space with a touch of handmade charm using this DIY Tissue Paper Flower Garland guide from JAM Paper. Ideal for party centerpieces, bedroom wall art, or even as a unique ceiling hanging, this project promises an enchanting and colorful addition to your décor. With a simple list of supplies such as colorful tissue paper, a needle, clear string, and scissors, you can make an eye-catching garland.
Follow the step-by-step instructions to craft a myriad of petals, string them together in your preferred pattern, and attach them to a branch or any hanging device of your choice. The process is straightforward and yields a beautiful, cost-effective alternative to store-bought decorations, allowing for customization to match any interior design scheme.
12. Beautiful DIY Ruffled Tissue Garland
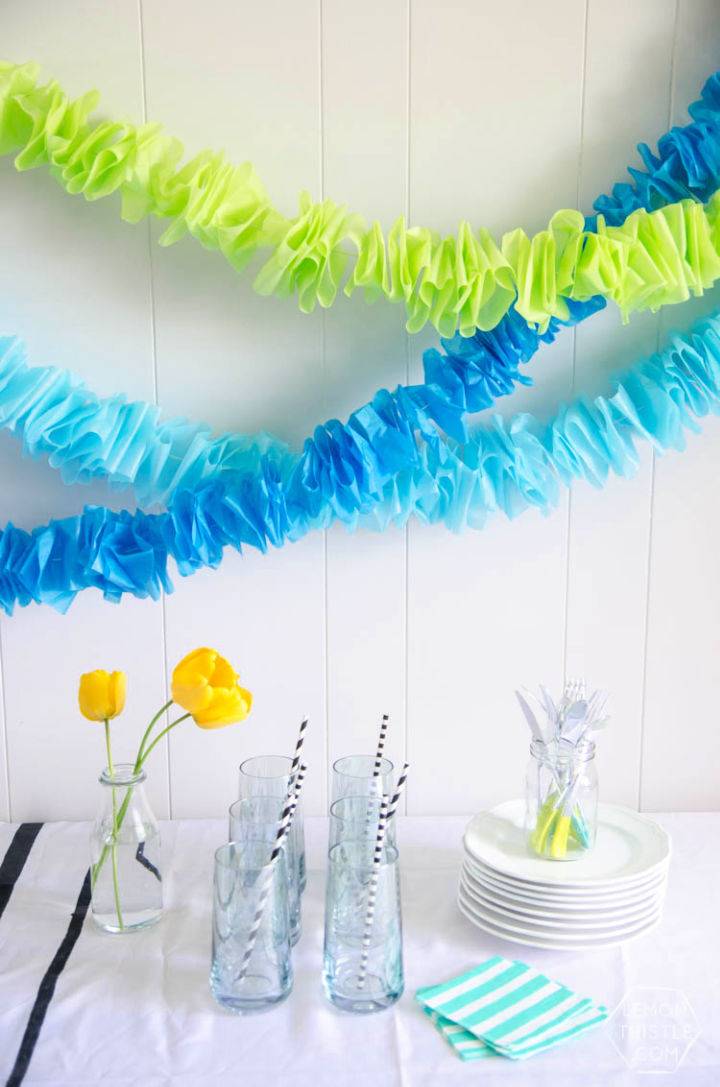
Make a charming atmosphere for your next party with a DIY Ruffled Tissue Garland that’s as delightful as it is simple to make. Lemon Thistle offers a step-by-step guide to crafting this cost-effective decoration, proving that you don’t need a hefty budget to add a touch of whimsy to your celebrations.
Grab some tissue paper in your preferred colors, a string, a large needle, and scissors to start. In less than an hour, you can transform your space with a colorful, ruffled accent that’s fully customizable for any event theme. This engaging, easy-to-follow tutorial ensures your decor stands out with a personal, handcrafted flair.
13. Make a Paint Chip Paper Chain Garland
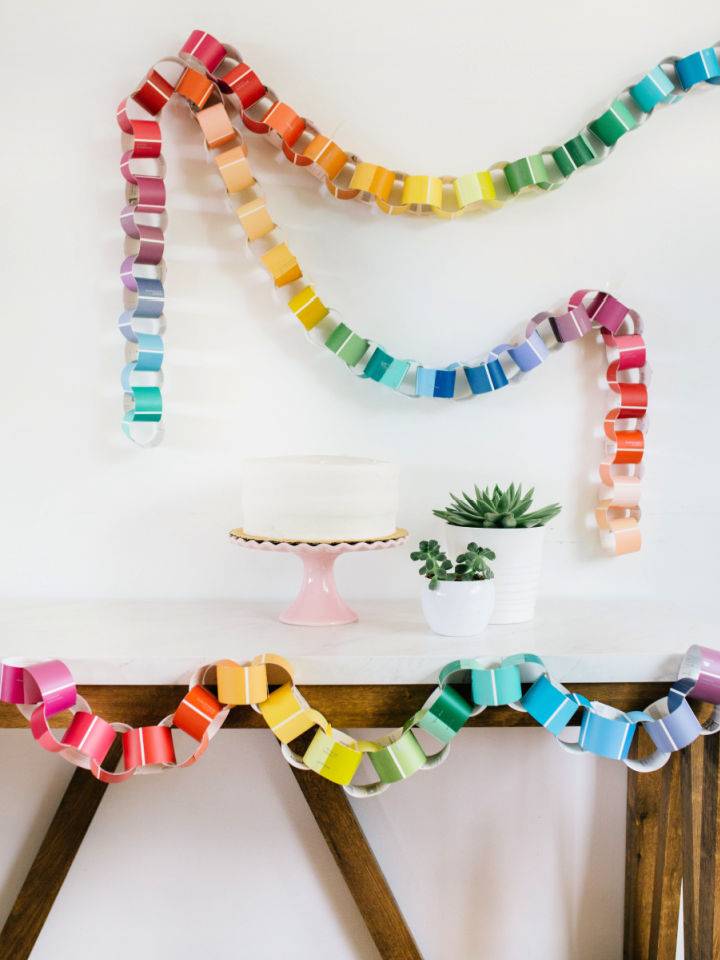
Ready to add a splash of color to your next celebration? The Pretty Life Girls guide you through crafting a vibrant DIY Paint Chip Paper Chain Garland that’s not only eye-catching but also budget-friendly. Gather paint chips in your favorite hues, along with scissors, a stapler, and some string or tape.
Cut the chips to width, loop them into rings, secure with staples, and continue linking until you achieve your desired length. Then, simply hang your garland to infuse any space with a cheerful, personalized touch. Perfect for parties, this easy-to-make decor promises to be the highlight of your event, inspiring joy and creativity in every fold and staple.
14. Colorful Homemade Paper Garland
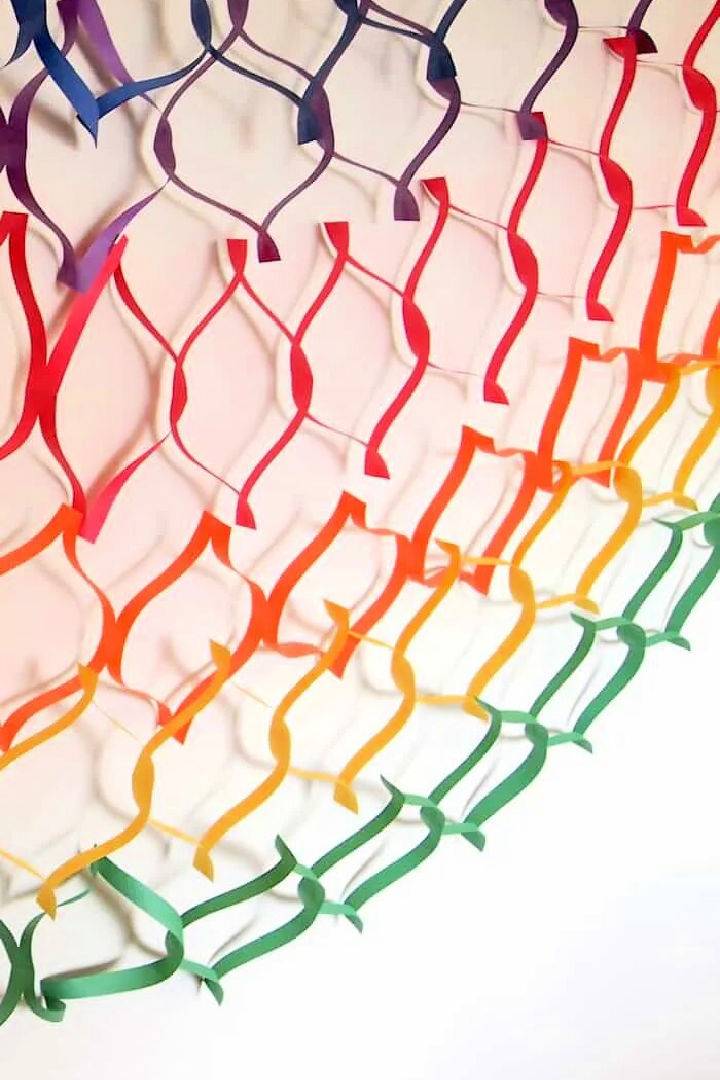
If you’re ready to add a pop of color to your party decor or brighten up a room, crafting a DIY paper garland is a perfect choice. With simple supplies like construction paper, scissors, a ruler, and a pen, you can make a vibrant garland in minutes. DIY Candy provides an easy-to-follow guide that’s great for all crafters, regardless of experience.
Start by folding your paper, marking measurements, and alternating cuts to make a playful, accordion-style chain. Stretch it out, repeat with various colors, and you’ll have an eye-catching decoration ready to be hung and admired. Not only is this project budget-friendly, but it’s also a fun activity that kids can participate in. Get creative and enjoy making your custom paper garland for any occasion!
15. DIY Rainbow Paper Garland for Party Decoration
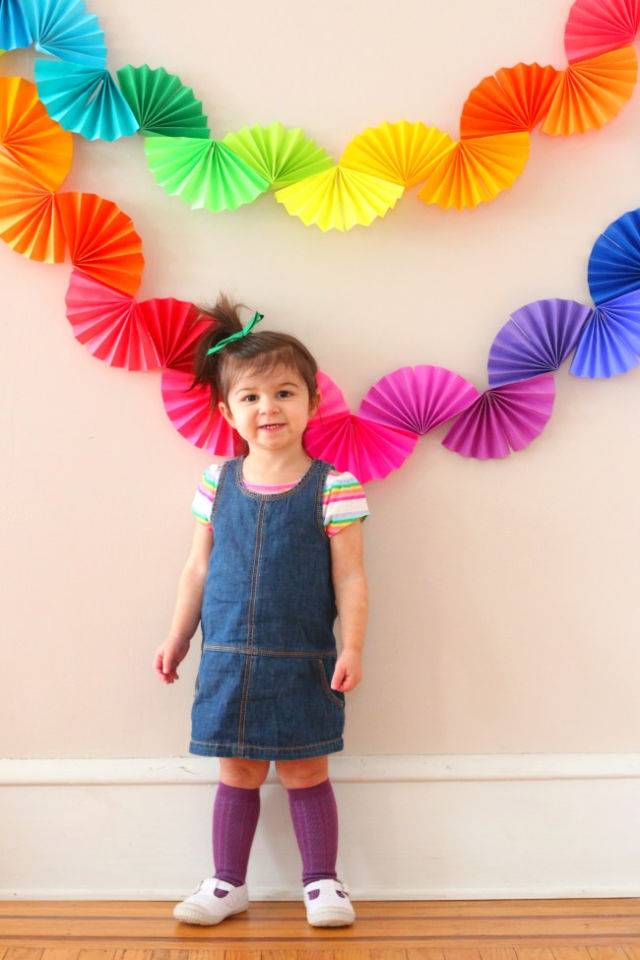
Brighten up your celebration with a touch of whimsy using a homemade Rainbow Fan Garland. Ice Cream Off Paper Plates brings you a simple, yet striking DIY decoration perfect for a rainbow-themed or art-inspired party. With just scissors, paper in various colors, and tape, you can craft this vibrant garland.
Start by cutting your paper into squares, then accordion fold them into a fan shape. Secure the middle with tape and arrange the fans in a color gradient, alternating the direction of each fan. Connect them side by side, and voilà – your rainbow fan garland is ready to dazzle. It’s an easy, budget-friendly way to add a pop of color and fun to any event.
16. Making a Paper Heart Garland
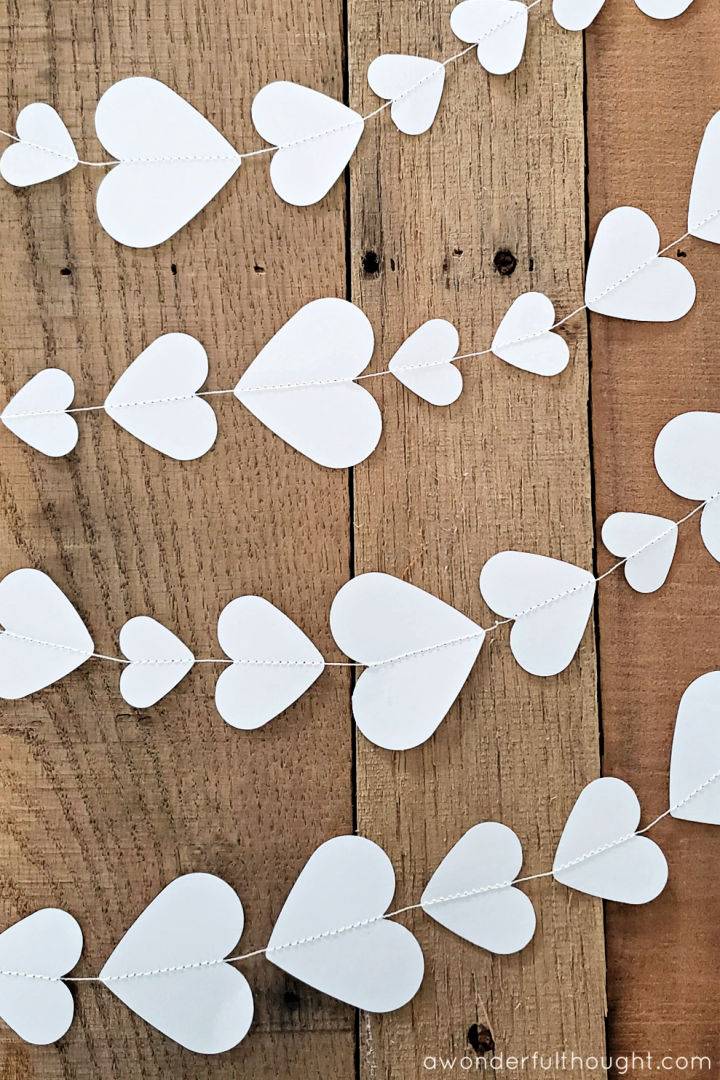
Make a charming ambiance in any room with a handmade paper heart garland. A Wonderful Thought presents a straightforward guide to crafting this lovely decoration, perfect for Valentine’s Day or to enhance a cozy corner all year round. With a few supplies such as heart punches, paper, and a sewing machine, you’ll be on your way to adding a touch of whimsy to your space.
Simply punch out hearts in different sizes, sew them together, and voila – a beautiful garland ready to drape across a mantel or window. Engage in this easy craft and let your creativity bloom while adding a personal touch to your home decor.
17. Handmade Paper Flower Garland
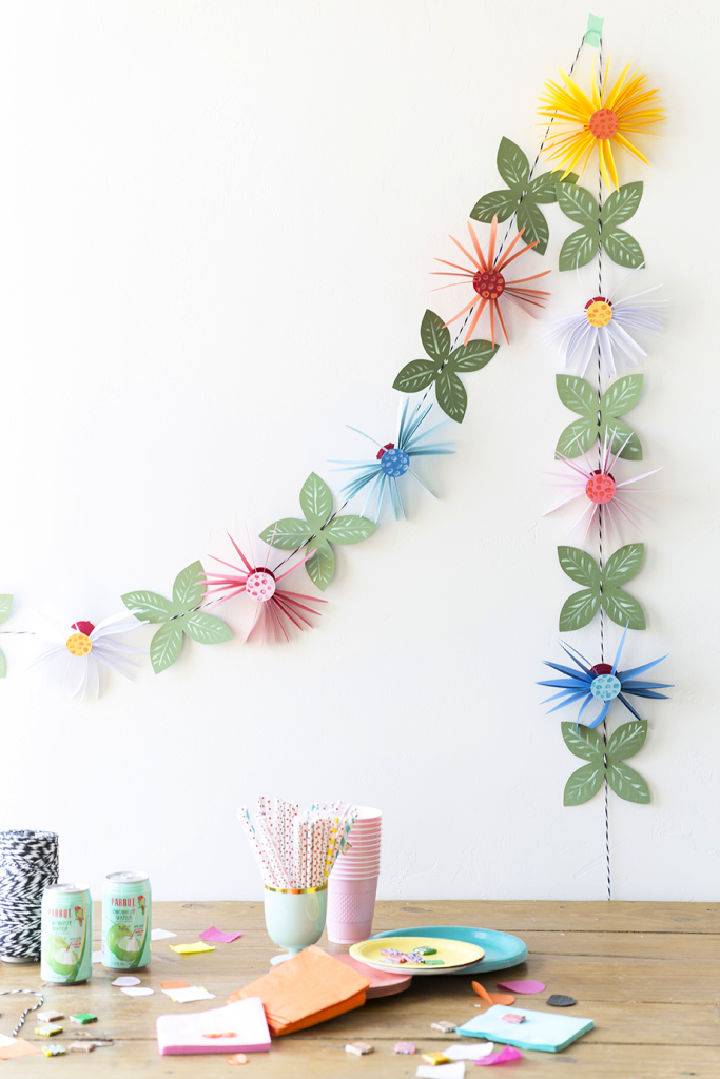
If you’re keen to add a long-lasting, charming touch to your decor, crafting a paper flower garland is a fantastic choice. The House That Lars Built offers an easy-to-follow guide for making these vibrant decorations. With simple materials like colored cardstock and a hole punch, you can make blooms that defy the seasons.
Perfect for parties or just brightening up your living space, this DIY project is not only water-wise but also a fun way to express your creativity. Engage in this craft to bring a floral flourish into your home without worrying about the environmental impact of watering real plants. Get ready to enhance your surroundings with a garland that’s both beautiful and eco-friendly.
18. Beginner-Friendly DIY Paper Garland
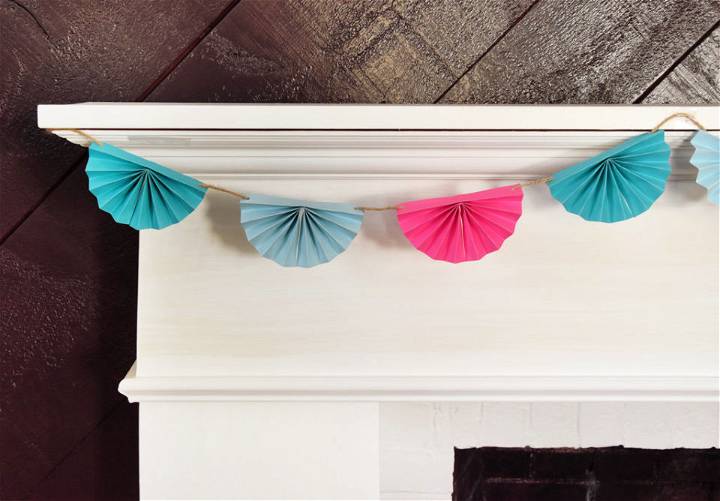
For an engaging craft activity, Design Fixation‘s DIY paper garland tutorial offers a fun and colorful project that’s both easy and enjoyable to create. Perfect for sprucing up your space for a party or simply adding a vibrant touch to your home decor, this guide walks you through the process of crafting a stunning paper garland using simple materials like colored copy paper and jute twine.
With clear, step-by-step instructions, you’ll be able to fold and assemble your paper garland in no time, tailoring the color scheme and length to suit your aesthetic preferences. It’s an ideal project for anyone eager to add a handmade flair to their surroundings.
19. Paper Fall Leaves Fringe Garland for Party
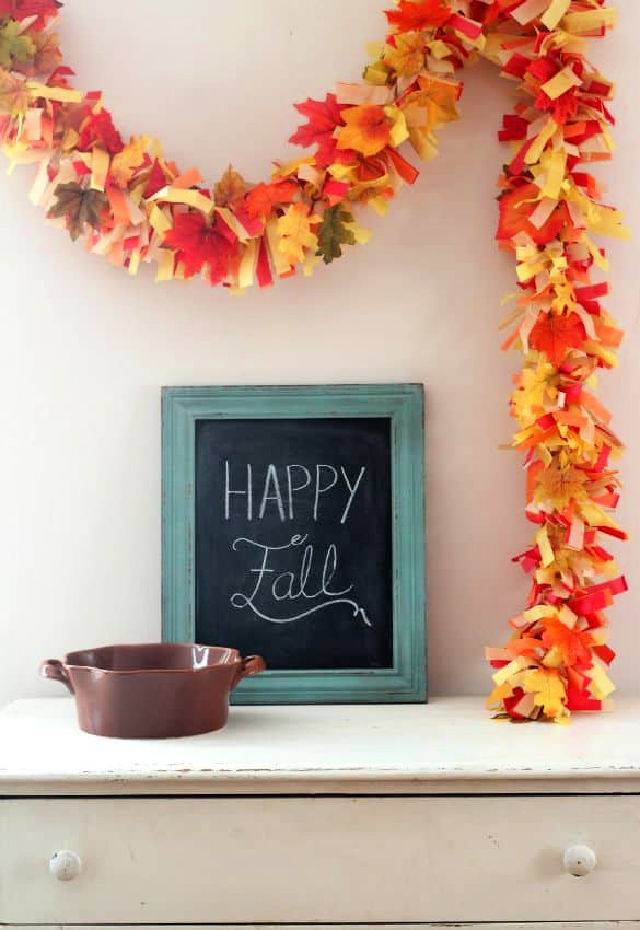
Embrace the cozy vibes of autumn with a charming DIY Fall Leaves Fringe Party Garland, perfect for any festive gathering. Presented by Pretty Providence, this guide offers a simple, step-by-step process to make a captivating decoration using just tissue paper and faux fall leaves. Ideal for sprucing up your space for back-to-school events, showers, or an evening with friends, this lightweight garland can be hung effortlessly, adding a touch of seasonal cheer. Follow these instructions, and you’ll have a lovely garland that’s not only cost-effective but also elevates your party décor to new heights.
20. How to Make a Paper Leaf Garland for Fall
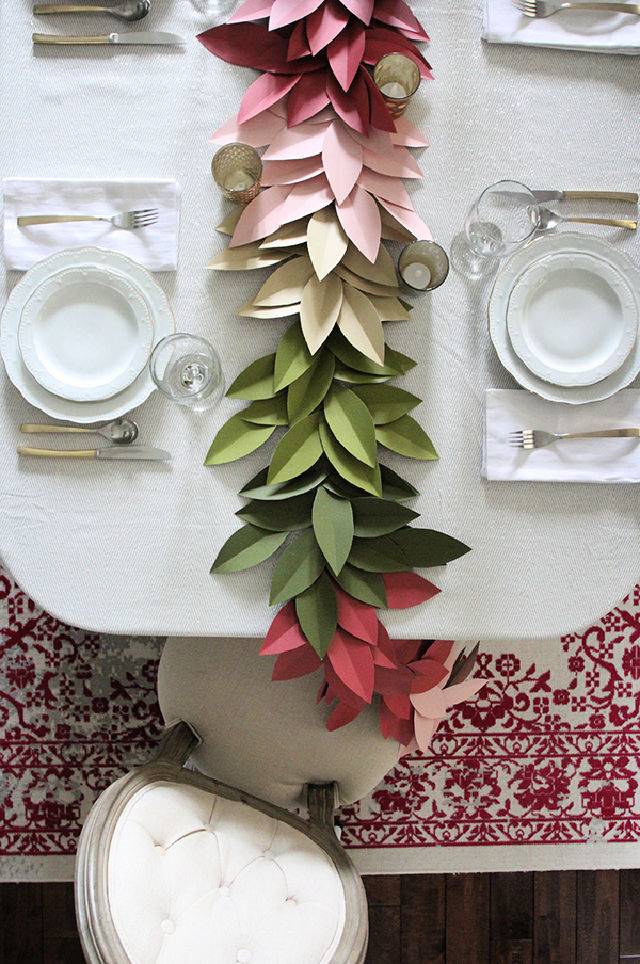
Embrace the change of seasons with a handmade touch by crafting a Colorful Paper Leaf Garland, as detailed on Less Than Perfect Life of Bliss. This engaging project brings autumn’s charm into your home with a cascade of vibrant leaves. The instructions are easy to follow, requiring simple materials such as colored cardstock, scissors, a leaf template, an Xacto knife, cutting mat, ruler, twine, and a hot glue gun.
By cutting and scoring the leaves, then strategically gluing them onto the twine, you’ll make a festive garland that’s perfect for mantles or tables. This craft not only adds a pop of color to your decor but also offers a fun activity to share with family. Get creative and let this fall-inspired garland brighten up your living space!
21. DIY Tissue Paper Garland for 4th of July
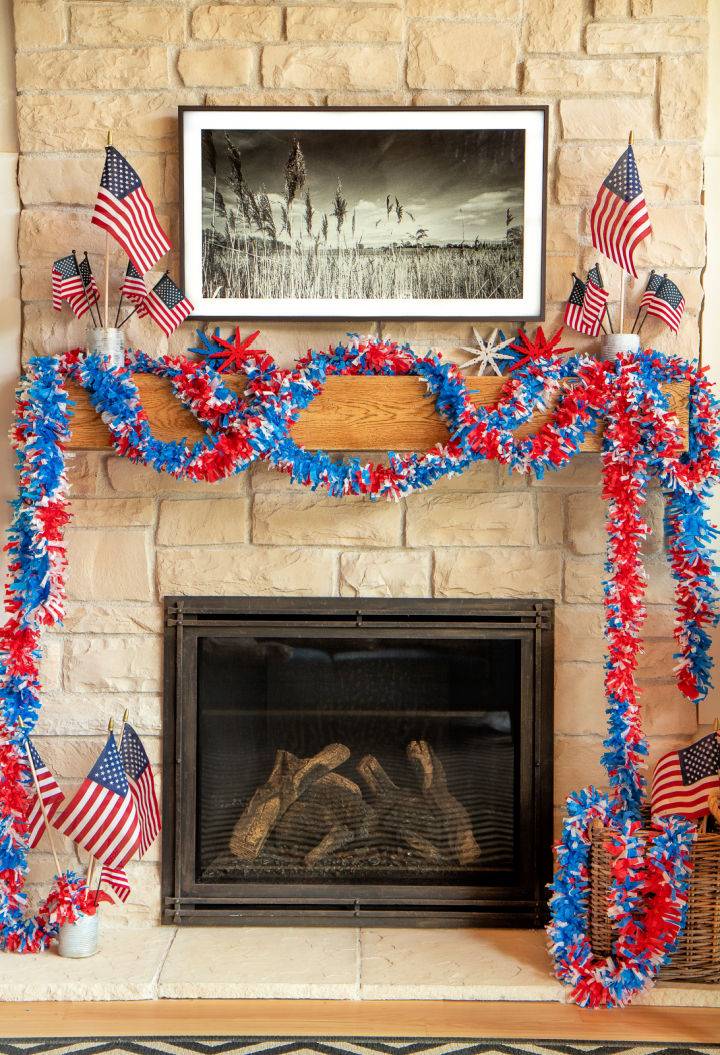
Get ready to add a festive touch to your 4th of July celebrations with a DIY tissue paper garland! At Everyday Laura, you can discover a simple yet charming project that brings patriotic flair to your decor. No need to worry about perfection; this craft is forgiving and fun, suitable for crafting enthusiasts of all levels.
With just red, white, and blue tissue paper, scissors, and a stapler, you can make a garland that’s perfect for draping over mantels or decking out your outdoor space. Follow the easy-to-understand instructions, enjoy the crafting process, and watch your space transform with this homemade touch of Americana.
22. Making an Autumn Leaf Paper Garland for Curbly
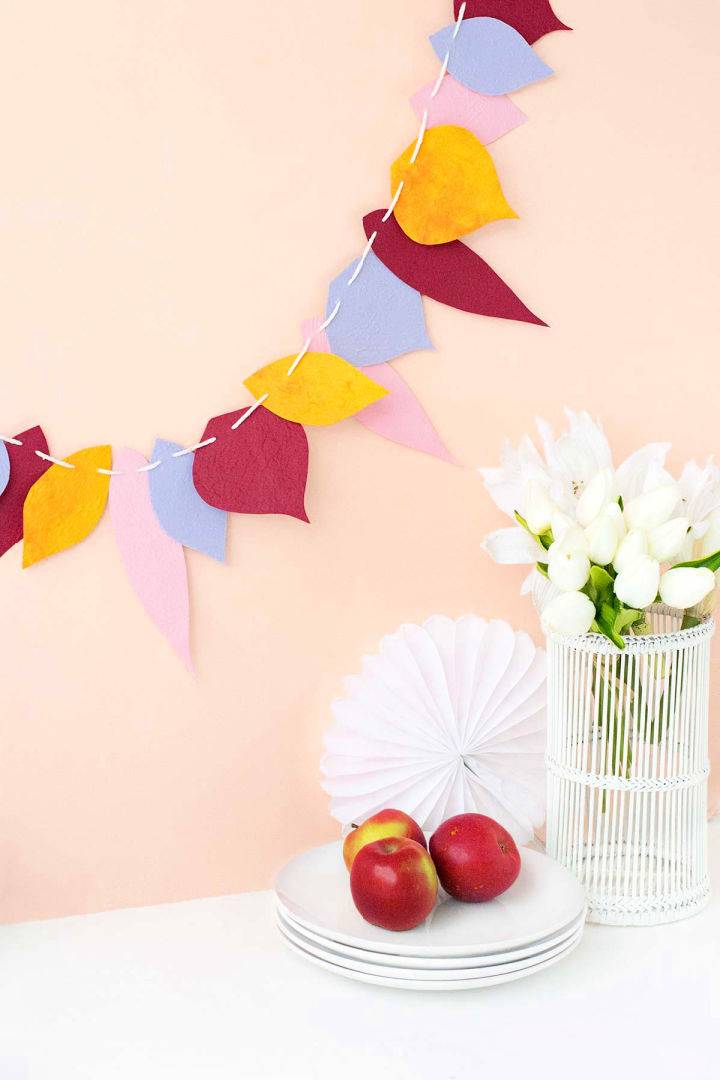
Brighten your home this fall with a handmade colorful leaf garland, perfect for celebrating the cozy vibes of the season. Curbly brings you a simple and engaging DIY guide that will help you make a festive atmosphere for Thanksgiving and beyond. With just white cardboard, fall-colored paper, and a few crafting staples like scissors and twine, you can transform your space with the vibrant hues of autumn. No need for advanced skills—this project is fun and straightforward. Get ready to add a personal touch to your fall decor that’s both charming and budget-friendly.
23. Tropical Paper Garland for Summer Party
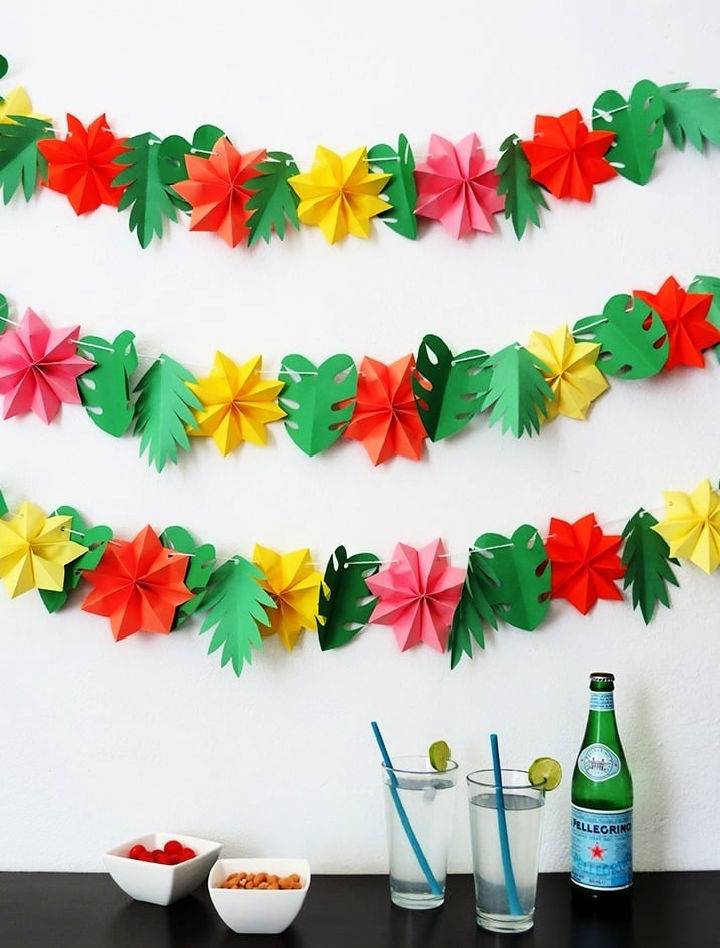
Hosting a summer party? Elevate your celebration with a handmade tropical garland from Dream a Little Bigger. This DIY guide provides an engaging, step-by-step process to make vibrant paper flowers and lush tropical leaves. Perfect for party planners seeking a personal touch, you’ll need basic supplies like colored paper, glue, scissors, and yarn. Craft beautiful decor with easy folding and cutting techniques. Punch holes, string them together, and voila! Your summer bash is adorned with a festive, tropical vibe. Simple, creative, and fun, this craft is ideal for anyone eager to spruce up their party ambiance.
24. DIY Punched Tissue Paper Garland
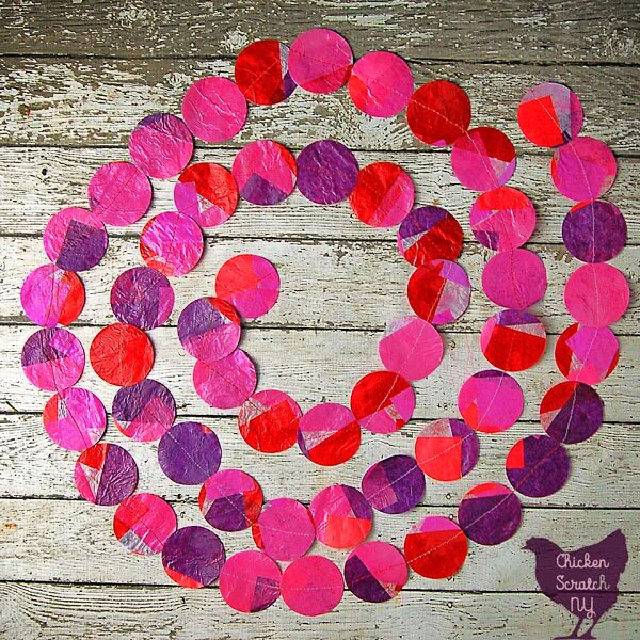
Ready to add a pop of color to your home decor? Chicken Scratch NY offers a creative way to craft a vibrant tissue paper garland using just a few supplies, including tissue paper, Mod Podge, and a sewing machine. Perfect for any celebration or just brightening up a room, this DIY project is both fun and customizable.
Follow these simple steps to make your own stunning garland: lay out your background tissue, apply Mod Podge in sections, stick and seal colored tissue pieces, punch out circles after drying, and sew them into a garland. Get ready to hang your masterpiece and enjoy the lively atmosphere it brings to your space!
25. Homemade Paper Fan Garland
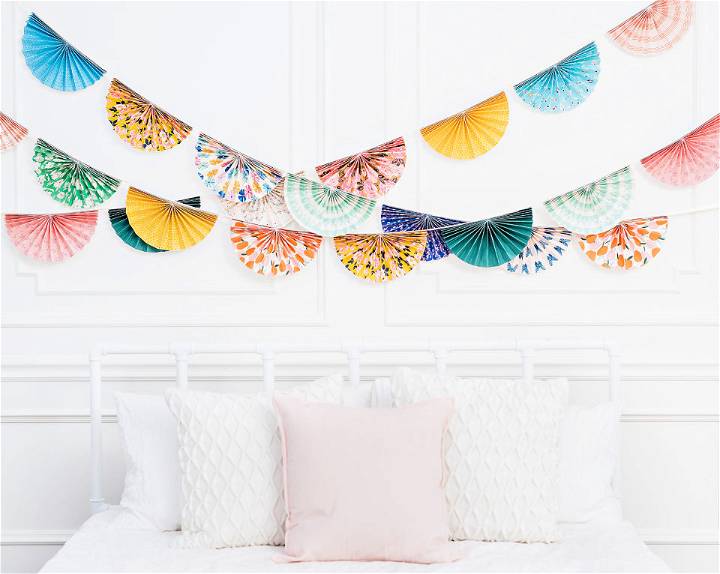
Make charming paper fan garlands with Maggie Holmes Design‘s easy-to-follow tutorial. Dive into this creative project that adds a whimsical touch to parties, weddings, or home decor. With simple materials like patterned paper, a scoring tool, and a hot glue gun, you’ll fashion stunning paper rosettes that bring color and flair to any setting.
The step-by-step instructions are accompanied by a handy free printable guide, making the crafting process a breeze. Customize your garland with paper choices that reflect your personal style, and enjoy the satisfaction of DIY decor that’s sure to impress. Visit Maggie Holmes Design for the full tutorial and start transforming your space today.
Related DIY Projects and Ideas
DIY Paper Flowers: Transform your home with these stunning DIY paper flower ideas that are perfect for any occasion – from Valentine’s Day, Mother’s Day, and Father’s Day to birthdays, anniversaries, and graduations.
DIY Paper Roses: Learn how to make paper roses with these free templates and tutorials. These are the perfect DIY project for your wedding or Valentine’s Day decor!
DIY Paper Crown: Paper crowns are a great craft project to do with kids, and they also make awesome party decorations! These cute DIY paper crown templates include both traditional styles and more modern versions.
3D Paper Flowers: Paper flowers are beautiful, affordable and easy to make. Follow these step-by-step instructions for different pretty 3D paper flower designs.
Crepe Paper Flower Patterns: Crepe paper flowers are a great way to add some color and texture to an event. These free crepe paper flower templates will show you how to make your own.
Crochet Garland Patterns: Crochet a beautiful and elegant garland to adorn your home or to use for a wedding decoration. These free crochet garland patterns are easy to make and so versatile.
Balloon Garland Ideas: Add a special touch to your party with these beautiful DIY balloon garland ideas! These ideas are perfect for birthdays, weddings, or any other celebration.
Conclusion:
In conclusion, our journey through the world of 25 DIY paper garland ideas has equipped you with the knowledge and inspiration to make stunning decorations that can transform any space. From selecting the right type of paper to the step-by-step process of crafting your garland, this guide has covered everything needed to bring your DIY project to life.
Customization allows for personal touches that reflect your style while adhering to safety precautions to ensure a smooth crafting experience. Should you encounter any hiccups along the way, our troubleshooting tips are here to help. Moreover, sustainability tips ensure your crafting is not only creative but also eco-friendly. Dive into crafting your DIY paper garland today and add a unique charm to your decor.


