Discover the art and elegance behind making your very own origami hand fans. These simple yet beautiful items are not only a nod to cultural history but also a testament to personal creativity. Making 15 DIY paper fans can be both a relaxing hobby and a way to craft unique gifts. By following a few easy steps, anyone can transform sheets of paper into a breezy accessory or a decorative piece, breathing new life into traditional crafts.
As we journey through the process of making an origami hand fan, you will learn not just about the necessary materials and step-by-step methods, but also tap into the cultural tapestry that surrounds these charming artifacts. Each section is designed to guide you clearly, ensuring a smooth crafting experience. So, get ready to unfold layers of creativity and elegance as we explore how to make these stylish and functional fans. Continue reading to ignite your imagination and add a personalized touch to your handcrafted fans.

The Cultural Tapestry of Paper Fans
Paper fans are not just tools for cooling oneself; they are woven into the cultural fabric of societies, carrying historical significance and stories of the past. Let’s delve into the rich history and cultural importance of paper fans, particularly in Asian cultures where they have been a staple for millennia.
A Symbol of Elegance and Artistry
In Japan, paper fans are synonymous with tradition and are often associated with iconic images of geisha, samurai, and the intricate art of kimono. These fans have played various roles throughout history, from being a part of ceremonies to serving as symbols of power and status. The Japanese fan, or ‘sensu,’ has evolved over time, becoming a canvas for artistic expression and a tool for communication within the nuanced language of etiquette.
Fans Across Dynasties
China’s history with paper fans stretches back over 3,000 years, with the earliest known fans dating to the 2nd century BCE. Initially, fans were a luxury item used by royalty and nobility, made from exquisite materials like feathers and silk. As time progressed, fans became more accessible to the common people, with bamboo and paper fans gaining popularity. The Chinese fan, or ‘shan,’ is not only a means to cool oneself but also a symbol of grace and a medium for artistic and poetic expression.
The Fan’s Journey Westward
The fascination with paper fans extended beyond Asia, capturing the hearts of Victorian England. The Victorians developed their own ‘language of the fan,’ using it to convey messages in a society bound by strict social codes. A fan could communicate everything from acceptance to jealousy, becoming an essential accessory for the fashionable ladies of the era.
Preserving the Legacy
Today, paper fans continue to be a testament to cultural heritage and craftsmanship. They are cherished collectibles, souvenirs, and even serve as inspiration for modern design. By understanding the history and cultural significance of paper fans, we not only appreciate their beauty but also the stories and traditions they carry with them.
Incorporating this section will enhance readers’ understanding of paper fans, enriching their knowledge and content value. Keep language simple and clear for a broad audience. Make helpful content that aligns with people-first principles.
How to Make a Paper Fan: Step by Step Guide
Making your own Japanese fan can be a delightful project, allowing you to craft something both beautiful and functional. Whether it’s for a costume, decoration, or just for fun, this guide will lead you through each step to ensure that anyone can follow along effortlessly. With a bit of patience and creativity, you’ll have your very own Japanese fan in no time.
Necessary Materials
- 10 bamboo sticks
- A thin, durable pin or a small nail
- Glue (preferably paper glue)
- Paper (of your choice, but traditionally washi paper is used for its durability and beauty)
- Scissors
Step 1: Lay Out the Sticks
Start by laying out your 10 sticks side by side on a flat surface. Make sure they are evenly spaced and align them by their ends to maintain symmetry in your fan.
Step 2: Secure the Sticks Together
Take your thin pin or nail and carefully thread it through the pre-made holes in the sticks. These holes are usually near one end of the stick. If your sticks don’t have holes, you might need to make them yourself with a small drill or needle. Once all sticks are threaded onto the pin or nail, twist it to secure them together.
Step 3: Position the Sticks Evenly
Spread out the sticks evenly in a semicircular shape. This will give you a good foundation for the shape of your fan. Make sure each stick is equally spaced to achieve an even and aesthetically pleasing final product.
Step 4: Prepare the Paper
Place your semicircular array of sticks onto the paper you’ve chosen. Use a pencil to trace around the outer edge of the sticks, making the arc of your fan. Then, with scissors, cut off the excess paper, following the line you drew.
Step 5: Make and Attach the Fan Surface
Draw a smaller arc inside the one you just cut to make the actual surface of the fan. This ensures that when you glue the paper to the sticks, the edges won’t protrude beyond the sticks. Apply glue sparingly to each stick and carefully lay the paper over them. Press down gently to ensure the paper sticks well without any bubbles or creases.
Step 6: Let It Dry
Allow your fan sufficient time to dry. This might take a few hours, depending on the glue you’ve used. It’s important not to use it or fold it until it’s completely dry to avoid damaging your work.
Step-by-step Video Tutorial
For a more comprehensive guide, please watch the step-by-step video tutorial on making Japanese fans on YouTube: How to Make Japanese Fans.
This visual guide pairs well with this written instruction, offering clear insight into each technique and making the process easy to understand and follow.
Making your Japanese fan can be an exciting and rewarding craft, allowing for personal creativity and a touch of traditional elegance.
Unleashing Creativity: Personalizing Your DIY Paper Fans
Crafting your own paper fans is a delightful way to express creativity and add a personal touch to any event or home decor. Whether you’re planning a party, decorating a room, or simply looking for a fun craft, customizing paper fans offers endless possibilities. Here’s how you can make your DIY paper fans truly unique.
Choose Your Palette
Start by selecting a color scheme that reflects your personality or matches the theme of your event. You can opt for bright and bold colors, pastel shades, or even a monochromatic look. Mixing patterns with solid colors can add depth and interest to your fans.
Add Textures and Layers
Incorporate different textures by using various types of paper, such as tissue, cardstock, or even fabric. Layering different materials can make a 3D effect that makes your fans stand out.
Decorate with Details
Embellish your fans with stickers, stamps, ribbons, or washi tape. These small additions can transform a simple fan into a work of art. If you’re feeling artistic, draw or paint your own designs directly onto the paper.
Make It Interactive
Let the kids join in on the fun by having them doodle on the paper before folding. This not only personalizes the fans but also makes for a memorable crafting experience.
Handle with Flair
The handle of the fan is just as customizable as the fan itself. Paint the sticks, cover them with ribbon, or attach decorative elements to make them unique.
Functional and Fashionable
Remember that your fans can be both functional and fashionable. They can serve as practical tools for staying cool while also being stylish accessories or party favors.
By using these tips, you’ll make paper fans that are unique and creative. Have fun and let your imagination guide you! Keep it simple and easy to read.
Crafting Safely: Essential Safety Tips for DIY Paper Fans
Making DIY paper fans is a fun and engaging activity that can be enjoyed by crafters of all ages. However, it’s important to prioritize safety to ensure a pleasant crafting experience. Here are some essential safety tips to keep in mind when making your own paper fans.
Choose the Right Workspace
Select a well-lit area with enough space to work comfortably. A clean and organized workspace will help prevent accidents and make the crafting process more enjoyable.
Handle Tools with Care
Use scissors and other cutting tools with caution. If children are involved, provide them with safety scissors and supervise their use. Always cut away from your body and keep your fingers clear of the blades.
Be Mindful of Adhesives
When using glue or adhesive tapes, be aware of any potential allergies. Opt for non-toxic adhesives, especially when crafting with kids. Ensure proper ventilation if using strong-smelling glues or solvents.
Paper Cuts Prevention
Paper cuts are a common but avoidable hazard. Handle paper with care, especially when folding or making precise cuts. Using a paper folder or bone folder can help make clean folds without risking paper cuts.
Keep Your Crafting Area Tidy
Regularly clear away scraps and dispose of waste materials. A clutter-free space not only looks better but also reduces the risk of slips, trips, and other accidents.
Store Tools Properly
After crafting, store all tools and materials safely out of reach of young children. Sharp tools should be kept in a secure place to prevent injury.
By following these safety tips, you can ensure that your DIY paper fan project is not only creative and fun but also safe for everyone involved. Remember to always put safety first and enjoy the art of crafting with peace of mind.
Overcoming Obstacles: Troubleshooting DIY Paper Fan Creation
Crafting DIY paper fans can be a rewarding experience, but sometimes you may encounter a few hiccups along the way. Here’s a helpful guide to troubleshoot common issues and ensure your paper fan creation is a breeze.
Fan Folds Aren’t Lining Up
If your fan folds are uneven or not lining up, it could be due to inconsistent folding. To avoid this, use a ruler or a folding tool to make precise, even folds. Start by making a small crease at the edge and continue folding in an accordion style, ensuring each fold is the same width.
Fan Won’t Stay Open
A fan that won’t stay open is often a result of not securing the center tightly enough. Use a strong adhesive or a stapler to attach the ends of the paper together at the center. If using glue, allow it to dry completely before fanning out the paper.
Paper Rips During Folding
Delicate paper might tear during the folding process. To prevent this, choose a sturdier paper or reinforce the folds with clear tape. When folding, be gentle and apply even pressure to avoid tearing.
Fan Looks Lopsided
A lopsided fan could be due to the string not being tied at the exact center of the fan. Measure and mark the center of your paper strip before tying the string or using a clip to ensure symmetry.
Decorations Fall Off
If your added decorations fall off, it’s likely that the adhesive isn’t strong enough for the material. Use a hot glue gun for heavier embellishments or double-sided tape for lighter ones. Make sure the surface is clean and dry before applying any decorations.
By keeping these troubleshooting tips in mind, you’ll be well on your way to making beautiful, flawless DIY paper fans. Remember, patience and practice make perfect.
Preserving Your Paper Fans: Maintenance and Storage Tips
After investing time and creativity into making DIY paper fans, it’s important to maintain their beauty and ensure they last for future use. Here are some practical tips for maintaining and storing your paper fans so they remain as charming as the day you made them.
Keep Them Clean
Dust can accumulate on paper fans, especially if they’re displayed or stored for long periods. Use a soft, dry cloth to gently wipe the surface of the fans. For more intricate fans, a soft-bristled brush or compressed air can help remove dust from crevices without damaging the paper.
Avoid Moisture
Paper fans and moisture don’t mix well. Store your fans in a dry place away from humidity to prevent warping and damage. If you live in a humid climate, consider using silica gel packets in your storage area to absorb excess moisture.
Flat Storage
When not in use, lay your fans flat in a storage box or drawer. Stacking them on top of each other can cause the folds to become misshapen. If you need to stack them, place a piece of acid-free paper between each fan to protect the surfaces.
Prevent Fading
Sunlight can cause the colors on your paper fans to fade over time. Store them in a dark place or in a box that blocks light. If you want to display your fans, rotate them periodically to minimize prolonged exposure to light.
Repairing Damage
If your fan gets a tear or the folds start to come undone, you can make simple repairs with clear tape or a glue stick. For best results, repair any damage promptly to prevent it from worsening.
Reusable Containers
Consider using clear plastic containers with lids for storage. Not only do they protect your fans from dust and light, but they also allow you to see the contents without opening the container, making it easier to find the fan you want.
By following maintenance and storage tips, you can keep paper fans in good condition for future use.
Eco-Friendly Farewell: Disposing of DIY Paper Fans
When the time comes to part with your DIY paper fans, it’s important to do so in an eco-friendly manner. Proper disposal ensures that your creative efforts don’t negatively impact the environment. Here’s how you can say goodbye to your paper fans responsibly.
Recycling Your Paper Fans
Most paper fans can be recycled, as they are made from materials that are often accepted by local recycling programs. Before recycling, remove any non-paper components such as ribbons or plastic decorations. Flatten the fans to save space in the recycling bin and ensure they are dry and free from food residue or other contaminants.
Composting: Returning to Nature
If your paper fans are made from uncoated, plain paper, they can be composted. Composting is a great way to return the materials to the earth and enrich the soil. Tear the fans into smaller pieces to speed up the composting process.
Repurposing with Purpose
Consider repurposing your paper fans before deciding to dispose of them. They can be transformed into book covers, origami projects, or even used as packing material for fragile items. Get creative and give your fans a second life.
Donation: Sharing the Joy
If your paper fans are still in good condition, consider donating them to local schools, art programs, or community centers. They can be used for educational purposes or as decorations for events.
By following these eco-friendly disposal methods, you ensure that your DIY paper fans leave a positive legacy. Remember, every small action counts towards a more sustainable future.
FAQs About DIY Paper Fans
Making DIY paper fans is a fun and artistic activity that can lead to many questions. Here are answers to some common queries to help you craft with confidence and creativity.
What type of paper is best for making paper fans?
The best paper for making fans is lightweight but sturdy. Options include scrapbook paper, card stock, or even basic copy paper for simpler designs.
How do I make my paper fan stay open?
To keep your fan open, secure the base with a paper clip or a staple. For a more permanent solution, use a strong adhesive or tape.
Can I make a paper fan using recycled materials?
Absolutely! You can use old newspapers, book pages, or any paper you have on hand. Just ensure it’s clean and sturdy enough to hold the folds.
How can I prevent my paper fan from tearing?
Choose a thicker paper or reinforce the folds with clear tape. Be gentle when folding, and avoid pulling or tugging on the paper.
What can I use for the handle of my paper fan?
You can use popsicle sticks, wooden skewers, or even sturdy straws. Attach them with glue or tape to the base of the fan.
How do I make a rounded edge on my paper fan?
Use scissors to carefully trim the edges of the fan into a rounded shape. Do this before unfolding the fan completely.
Can I decorate my paper fan with markers or paint?
Yes, you can! Just make sure the ink or paint is dry before folding the paper to avoid smudging.
Is it possible to make a two-sided paper fan?
Certainly! Just glue two pieces of paper back-to-back with the decorative sides facing out. Make sure the glue is dry before you start folding.
How do I make a large paper fan?
For a larger fan, use bigger sheets of paper or attach multiple folded sections together at the base before securing the handle.
Can I make a paper fan without using glue?
Yes, you can use staples or paper clips to hold the base together instead of glue. This is also a quicker method.
How do I store my paper fans when not in use?
Store them flat in a cool, dry place. If you have multiple fans, stack them with sheets of acid-free paper in between to prevent sticking.
By addressing these FAQs, you’ll be well-equipped to make beautiful and durable paper fans. Remember, practice makes perfect, so don’t hesitate to experiment with different techniques and materials.
15 DIY Paper Fans to Make Your Own Origami Hand Fans
Discover how to make beautiful origami hand fans with these 15 easy DIY paper fan tutorials. Perfect for any occasion!
1. Quick and Easy DIY Paper Fans
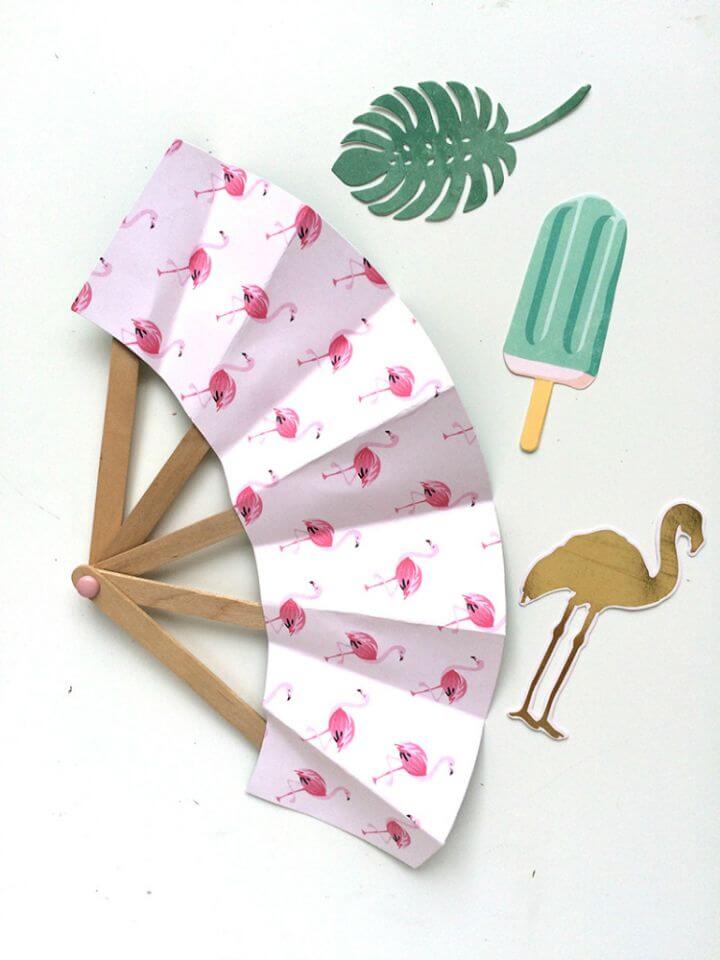
Making paper fans is a simple and engaging summer craft suitable for kids, and We R Memory Keepers Blog offers an easy-to-follow tutorial. Using the DIY Party Board and some colorful scrapbook paper, children can design their personalized fans perfect for those hot days.
Start by cutting the paper with the DIY Party Board, punch holes in popsicle sticks, and secure them with a brad. Glue the sticks to the paper, fold, and voila – your handcrafted fan is ready! This activity not only sparks creativity but also provides a useful accessory for the summer heat. Make sure to choose vibrant papers to add a pop of fun to your creation!
2. Make Your Own Summer Paper Fans
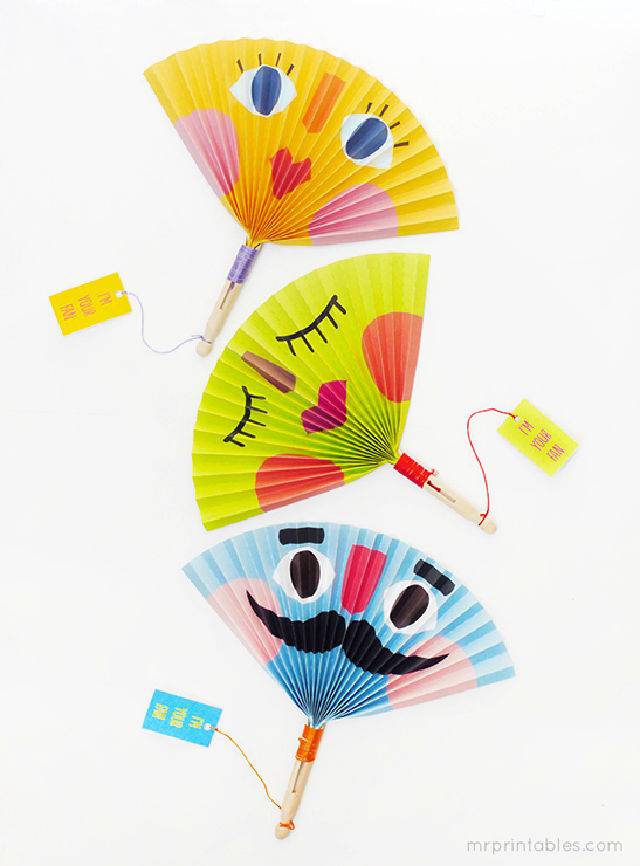
Looking to engage kids in a fun summer activity? Mr Printables offers a simple and creative way to make paper fans. With just a few materials, such as paper, wooden dolly pegs, and string, anyone can make these colorful fans. Ideal for crafty afternoons, the site provides free printable templates and easy-to-follow instructions.
Personalize fans by choosing your own paper designs, or enjoy coloring the blank versions for an extra touch of creativity. Crafting paper fans not only spark imagination but also provide a charming way to stay cool during the warm season. Enjoy the process and watch as each fold brings smiles and a refreshing breeze to your day.
3. Homemade Paper Fruit Fans for Kids
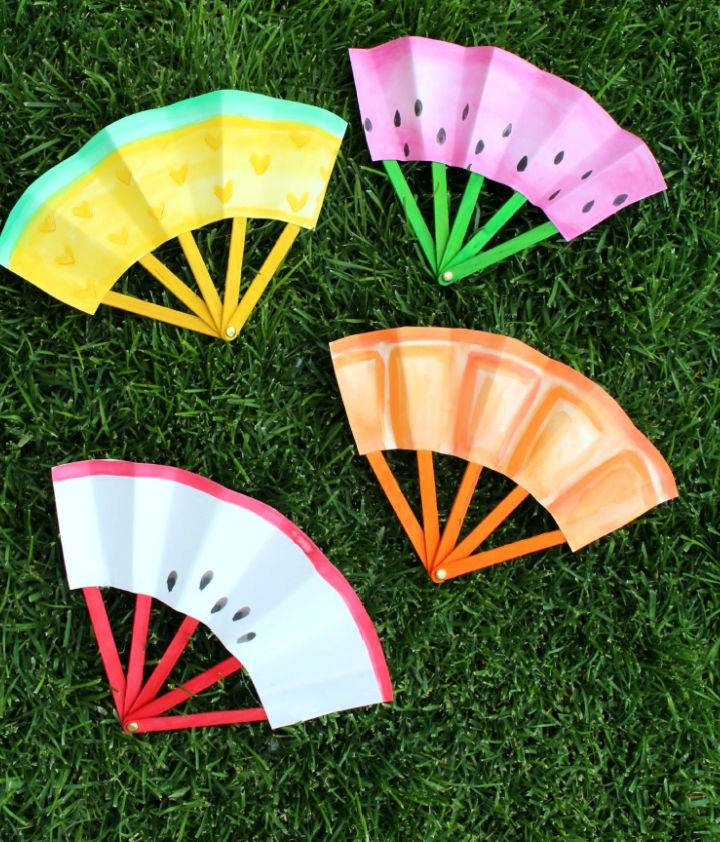
Get crafty with your kids this summer by making DIY Fruit Fans. The Idea Room offers a simple and fun way for your little ones to stay cool while exploring their creative side. All you need are some colored Popsicle sticks, a drill, watercolor paints, paper, and a glue gun or regular glue for the kids. Follow easy steps to trace, paint, and assemble these charming fans. Personalize with fruit shapes or patriotic designs for festive occasions. With this engaging activity, your kids can enjoy both the crafting process and the breezy results!
4. How to Make a Summer Paper Fan for Kids
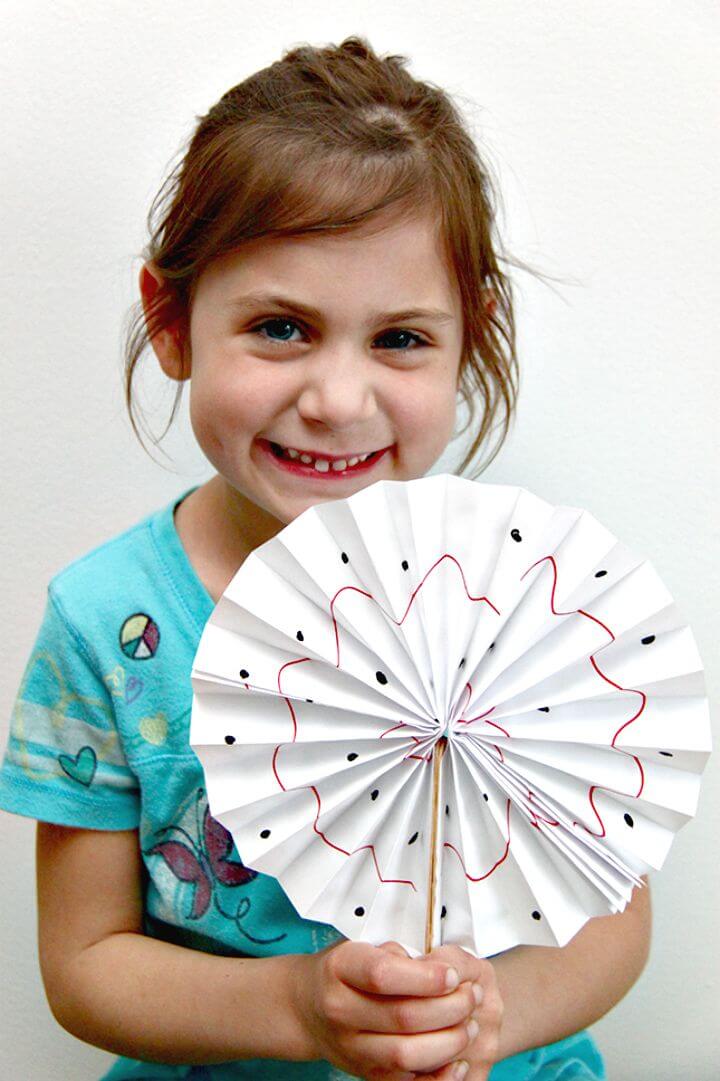
Looking for a fun and engaging craft to enjoy with your little ones during the hot summer days? Smashed Peas & Carrots offers a creative solution with an easy-to-follow guide on how to make vibrant paper fans. Perfect for beach trips or poolside play, this activity encourages artistic expression and helps develop fine motor skills.
With simple materials like paper, paint markers, glitter, and popsicle sticks, you can make a personalized fan to keep cool. Dive into this crafty adventure with a little help from an adult for the hot glue gun steps, and delight in the breeze of your handmade creation.
5. DIY Paper Plate Watermelon Fan
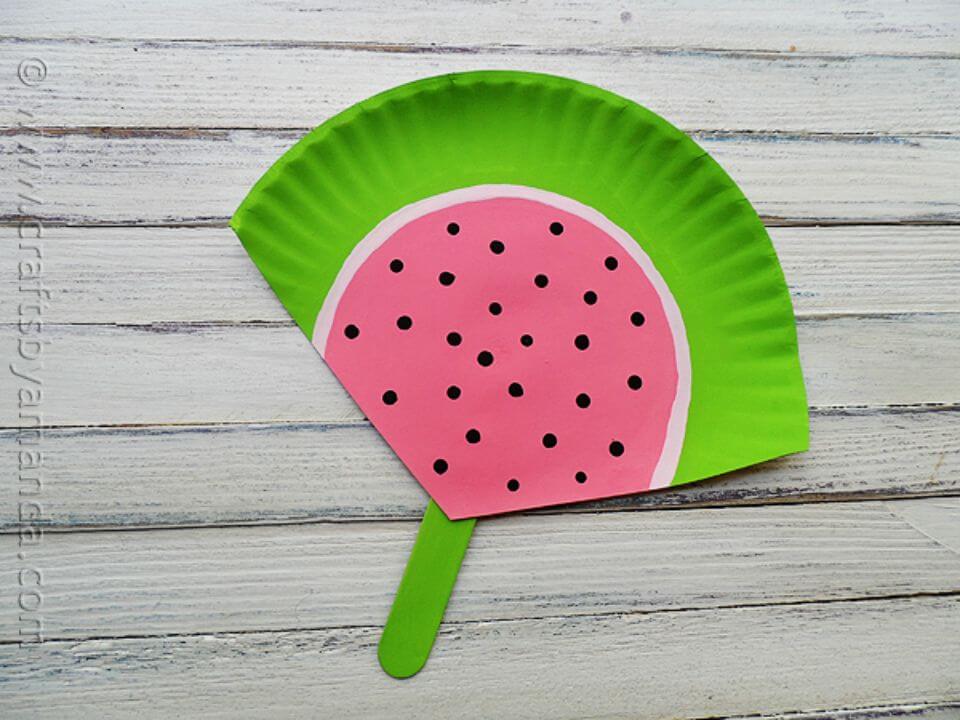
Making paper plate watermelon fans is a fun and creative craft project perfect for kids to enjoy during the summer. Crafts by Amanda offers an easy-to-follow tutorial for these adorable, hand-held fans, which can also be an excellent activity for camps or classroom crafts.
All you need are some basic supplies like paper plates, jumbo craft sticks, acrylic paint, scissors, and glue. The process involves cutting the plates into a watermelon slice shape, painting them, and attaching a handle. This activity not only fosters artistic expression but also provides a handmade way to stay cool on hot days. Get ready to add a slice of fun to your crafting sessions with these charming watermelon fans!
6. Make a Paper Fan for New Years
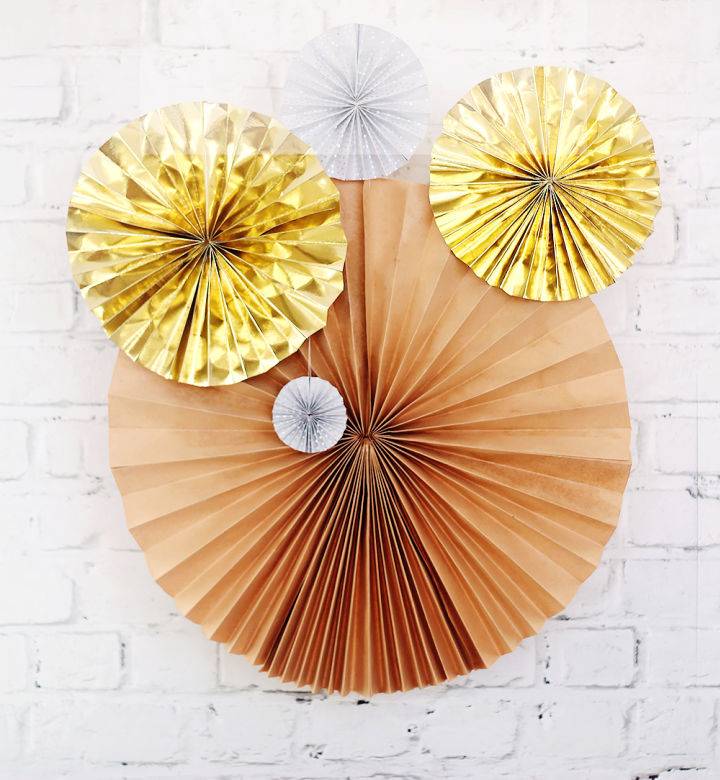
Get ready to make your New Year’s Eve celebration shine with a touch of DIY elegance! Fall For DIY presents a simple guide for making sparkling paper fans from leftover wrapping paper. With just a few materials—wrapping paper, scissors, glue, and needle and thread—you can craft eye-catching decorations to liven up your party space.
Start by folding a strip of wrapping paper into a concertina, then glue and combine three of these to make a dazzling fan. Hang them up to catch the light and add an instant festive flair to your soirée. These easy-to-follow instructions help ensure your décor is as unique and joyful as your New Year’s festivities.
7. Beautiful DIY Paper Melon Fans
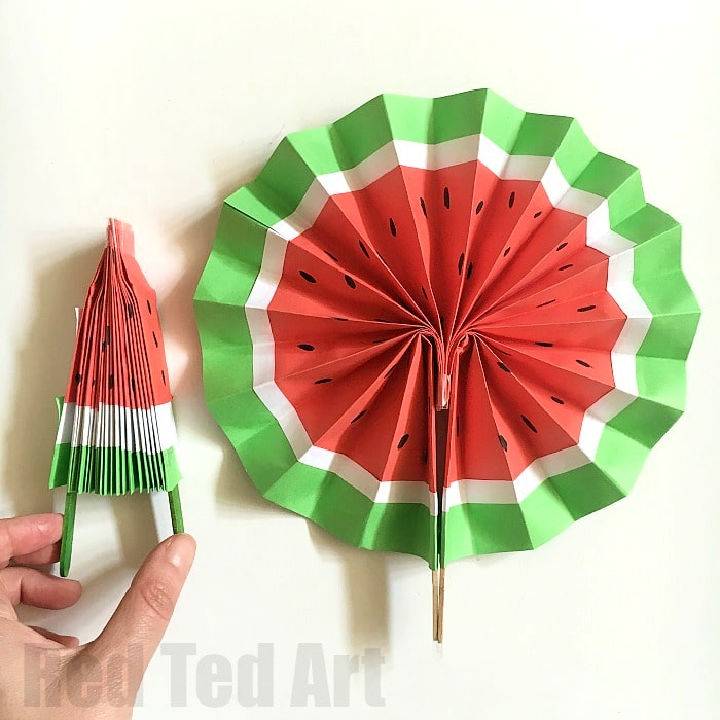
Make your own vibrant and playful melon paper fans with this easy-to-follow DIY guide from Red Ted Art. Perfect for summer crafts, these fans are not only fun to make but also serve as a charming addition to any party or room decor. All you need are some basic supplies like A4 paper, a glue stick, craft sticks, tape, and optional pens for decoration.
Follow the step-by-step instructions to cut, fold, and assemble your paper into a refreshing watermelon design. Dive into the crafting fun with these melon-themed fans and explore other creative paper toy projects for added inspiration. Get ready to fan away the heat with your own handcrafted creation!
8. How to Make Your Own Paper Fan
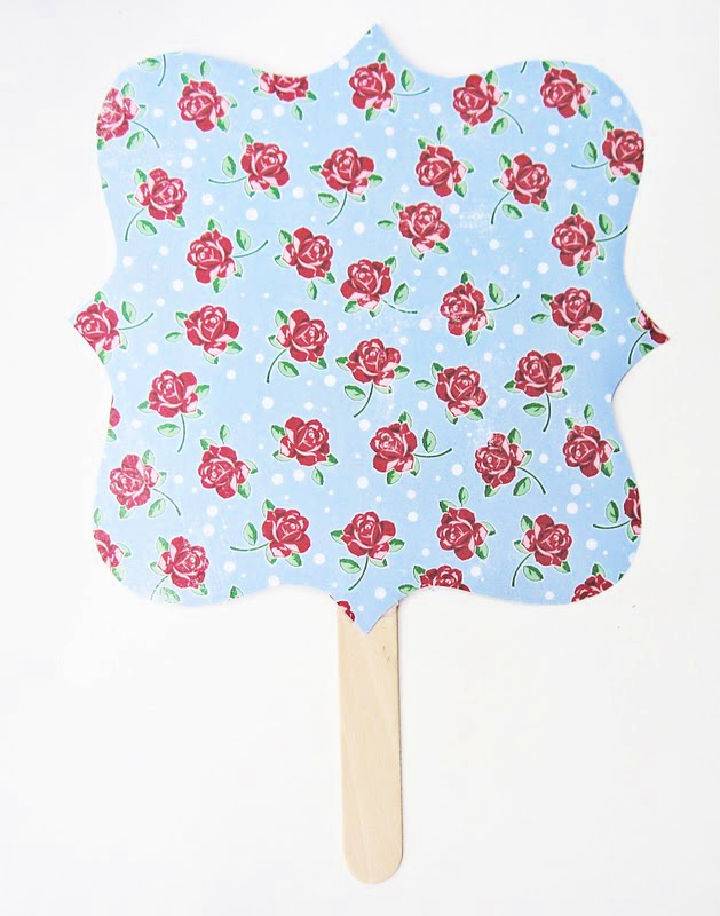
Dive into crafting with Pretty Paper Party Things, where inspiration for unique paper projects awaits! Discover how to make elegant fans to keep guests cool at your summer gatherings with a handy downloadable template. Transform ordinary utensils into eye-catching table additions by wrapping them with doilies and twine for a touch of charm.
Plus, learn how to revamp mason jar sippy cups with gorgeous plastic paper designs for a refreshing twist on party beverages. Perfect for those who love adding personalized flair to their celebrations, these ideas are designed to elevate any event with simplicity and style. Enjoy crafting these lovely details that are sure to impress your guests!
9. Simple and Easy DIY Paper Fans
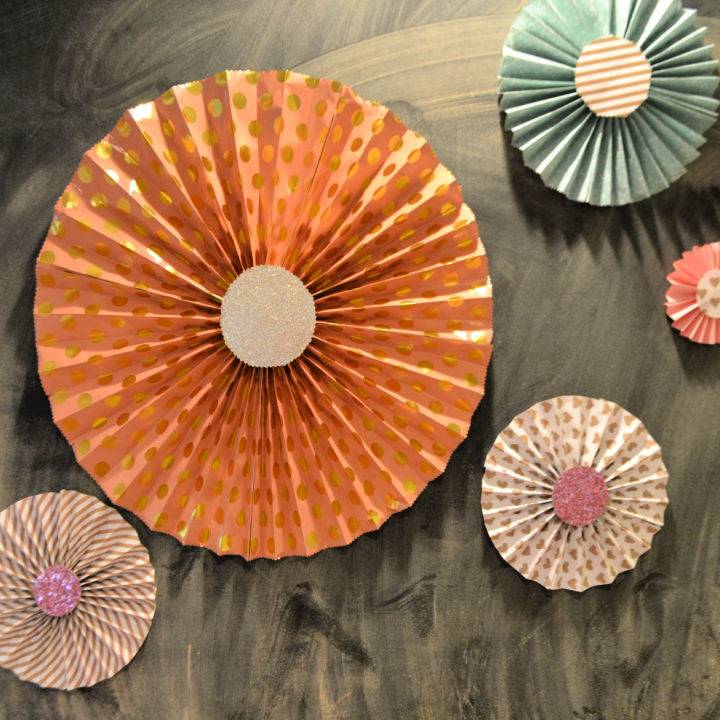
Ready to add a personalized touch to your next celebration? Moms Without Answers shares a fantastic DIY: Paper Fans tutorial that’s perfect for jazzing up any party decor. With simple tools like a glue gun, scissors, and twine, plus your choice of cute paper, these fans are not only adorable but also budget-friendly and simple to create.
Follow the easy step-by-step guide to fold, assemble, and hang your paper fans, making your event’s ambiance whimsically beautiful. Ideal for any occasion, from ballet birthday bashes to casual get-togethers, these DIY paper fans will surely elevate your party’s look. Get crafty and let your decor stand out!
10. How to Make Folding Paper Fans
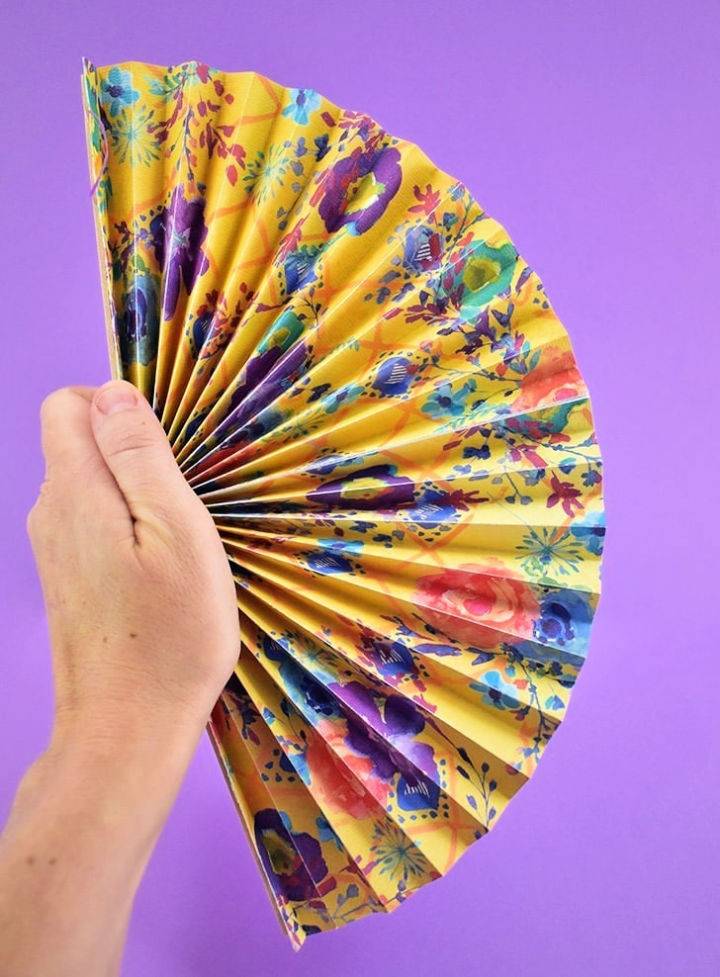
Beat the heat with a homemade touch by making your own folding paper fans. Dream a Little Bigger offers an easy-to-follow tutorial that transforms patterned cardstock into stunning and efficient fans, perfect for those sweltering days. This craft project is ideal for adding a personalized and practical item to your essentials, whether you’re at a beach, on a hike, or simply need a breeze on a hot day.
With simple materials like cardstock, skinny sticks, and a few crafting tools, you can make a fan that not only looks good but also generates a strong cooling effect. The guide provides step-by-step instructions for both handcrafted and Cricut Maker methods, ensuring that you can fold, score, and assemble with ease. Get creative and keep cool with this engaging craft activity.
11. Cool Homemade Watermelon Paper Fan
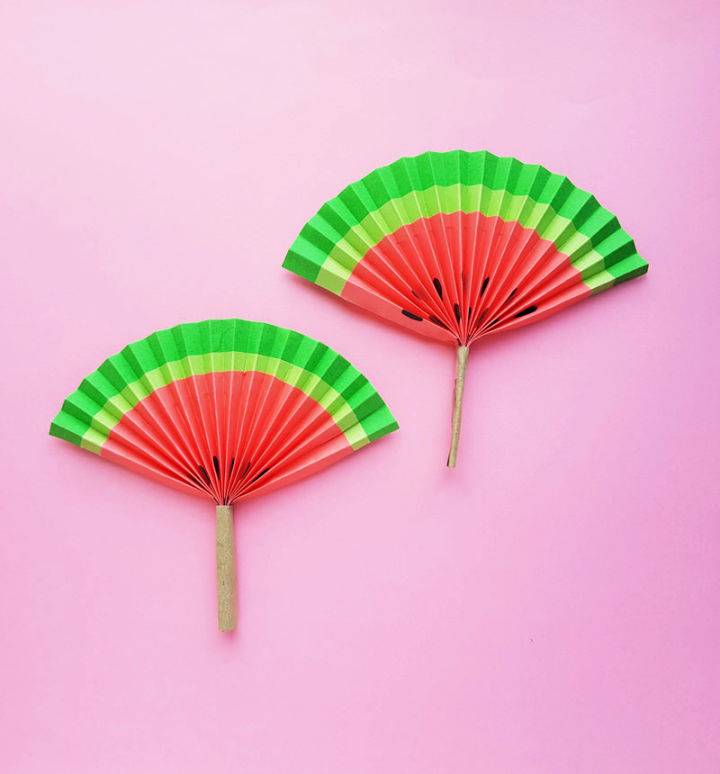
Stay cool and crafty this summer with a delightful watermelon fan paper craft from Moms and Crafters. Perfect for family picnics, summer camp activities, or even as a themed party favor, this easy-to-make paper fan requires only colored craft paper, cardstock, craft glue, a marker, scissors, and clear tape.
Follow the simple step-by-step instructions to make your own slice of fun. Cut and layer strips of green and pink paper, add seed details, fold accordion-style, and secure it all to a handle for a charming, functional fan. Dive into crafting with this engaging project that promises a refreshing burst of creativity and a personal breeze on those hot summer days!
12. Easy Steps to Make Paper Fans
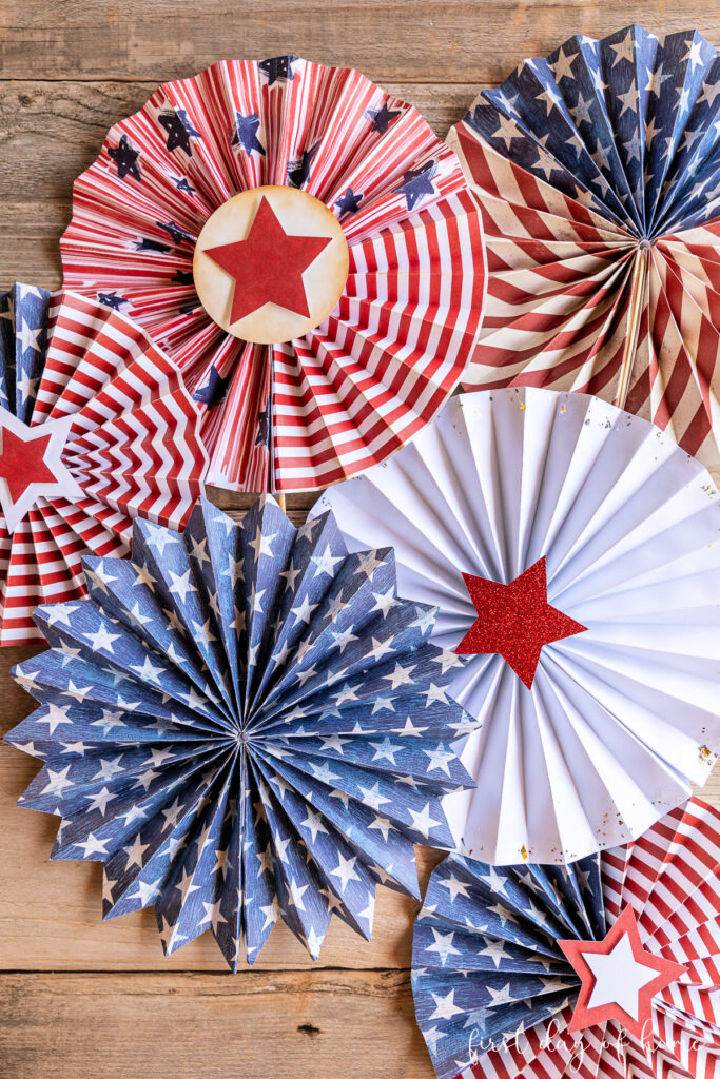
Discover how to make charming paper fans with a straightforward tutorial from First Day of Home. Crafting these fans is a breeze, and they can be personalized to fit any special event or celebration. From selecting the right scrapbook paper to adding final touches with wooden skewers or string, you’ll find each step engaging and easy to follow.
Helpful tips, such as how to achieve a vintage look or store your fans for future use, ensure a fun crafting experience. Ideal for party decorations or a homemade centerpiece, these paper fans add a touch of creativity to any occasion. Explore this guide and enjoy making a unique and stylish paper accessory.
13. Making Folded Paper Fans for Preschooler’s
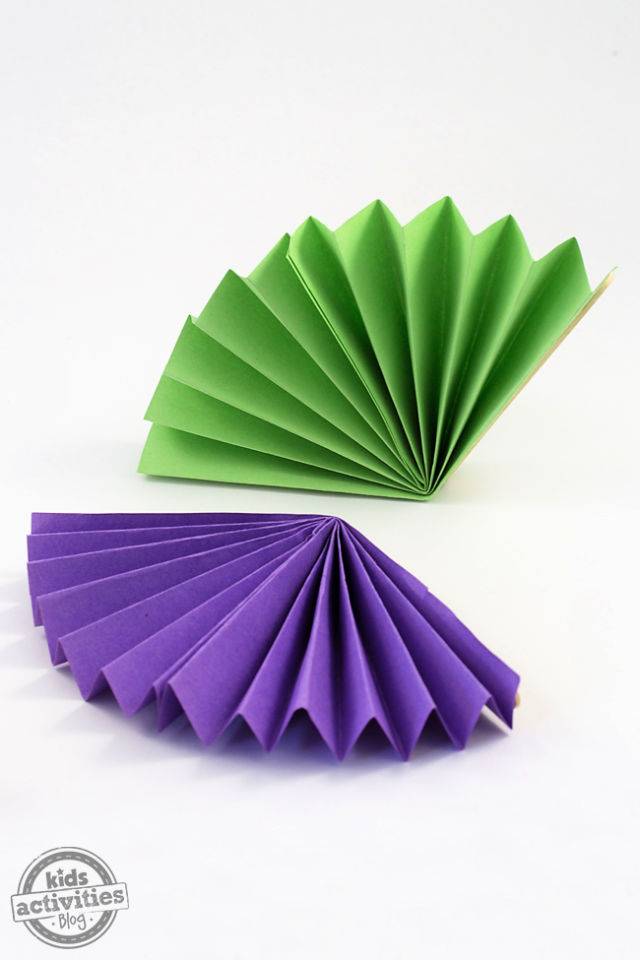
Making a paper fan is a classic craft activity that’s not only fun but also practical for hot days. Kids Activities Blog guides children through making their own vibrant paper fans using simple materials like construction paper and popsicle sticks. This engaging craft is suitable for kids of all ages, honing their fine motor skills with each accordion fold they make.
Step-by-step instructions ensure that the process is easy to follow, leading to a colorful, handmade accessory that’s perfect for keeping cool. Encouraging personalization, children can add their own artistic touches to the fans, making this an ideal project for school, home, or camp crafts.
14. Easy-Peasy DIY Pocket Folding Paper Fan

Looking to craft a cool summer accessory with the kids? The Gluesticks Blog presents a simple and engaging DIY Pocket Fan project that’s perfect for those warm days. This craft activity allows kids to tap into their creativity by decorating a paper fan that’s both functional and compact enough to fit in a pocket.
With easy-to-follow instructions and basic supplies like plain copy paper, popsicle sticks, and a mini hairband, this tutorial offers a great way to spend quality time making something practical and fun. Learn how to score, fold, and assemble your very own handheld cooling device. Ideal for summer camps, birthday parties, or just a creative afternoon, making this pocket fan promises to be an enjoyable project for children who love to make and display their artwork.
15. Wonderful Handmade Coloured Paper Fans
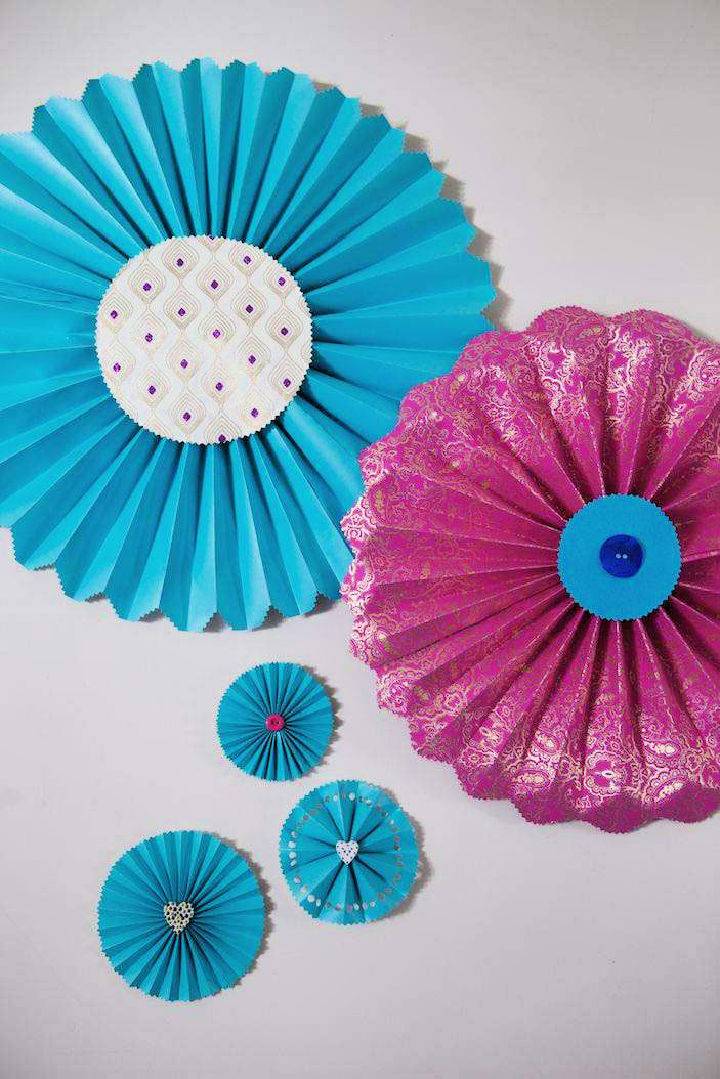
Discover how to brighten up any space with handmade paper fans from Rock n Roll Bride. This DIY tutorial by Kathryn Williams guides you through making colorful paper decorations perfect for adding a personal touch to your events or home decor. You’ll need simple supplies like wrapping paper, buttons, a craft knife, and a glue gun to craft these eye-catching fans.
The tutorial provides a size guide and step-by-step instructions for measuring, cutting, and folding your paper into a charming decorative piece. With practical advice and engaging direction, crafting these paper fans is made easy and fun, suitable for all craft enthusiasts who enjoy adding a splash of creativity to their surroundings.
Related DIY Projects and Ideas
Fruit Crafts for Kids: Here are easy and fun fruit crafts for kids, preschoolers and toddlers. The ideas range from simple to slightly more challenging, so there’s something for everyone.
Space Crafts for Kids: From rockets and satellites to shooting stars and constellations, these super simple space crafts for kids will provide hours of imagination and creativity.
Crafts for Kids: From painting and drawing to beading, these easy crafts for kids will keep your offspring entertained for hours.
Felt Board Ideas: Felt boards can be a creative way to play and learn with children. Here are creative DIY felt board ideas that you can try!
Crafts to Do When Bored: When you’re bored and want to do something, but don’t know what, these fun crafts to do when bored might just be the answer! Some of them are quick and easy while others take a little prep time.
Sunflower Crafts For Kids: From kids crafts to home decor, these simple sunflower crafts for kids and adults are sure to brighten up your day.
Colored Sand for Crafts: With these colorful sand recipes, you can craft anything from a beach scene to an Easter egg (or just simply play in the sandbox!).
Conclusion:
In conclusion, crafting your own origami hand fans through DIY paper fans projects is not just a fun, creative endeavor but also a beautiful way to connect with ancient traditions and cultural artistry. From selecting materials to personalizing each fan with unique decorations and ensuring their proper maintenance, this guide offers a comprehensive journey into making and preserving your very own paper fans.
Whether incorporating traditional techniques or experimenting with modern designs, the satisfaction of holding a self-made, elegant paper fan is unparalleled. So, grab your supplies and let’s breathe new life into the timeless craft of paper fan creation, ensuring these symbols of elegance and artistry continue to flutter gracefully in our hands and hearts.


