Making a DIY disco ball planter Transforms ordinary spaces into vibrant displays of light and life. Perfect for adding a sparkle to your home or garden, this project combines the retro charm of a mirror ball with the natural beauty of plants. Suitable for a variety of plant types, from bright light plants to shade-tolerant Species, this unique planter invites a playful yet elegant atmosphere into any setting.
As we journey through the steps to make your very own mirror ball plant pot, we’ll cover everything from the materials required to the final touches that bring your creation to life. You’ll learn how to prepare the planter, apply mirror tiles effectively, and ensure your plants thrive in their new, gleaming home. Our guide aims to make the process clear, enjoyable, and fruitful. So, let’s get ready to give your plants a dazzling makeover that will light up your surroundings.
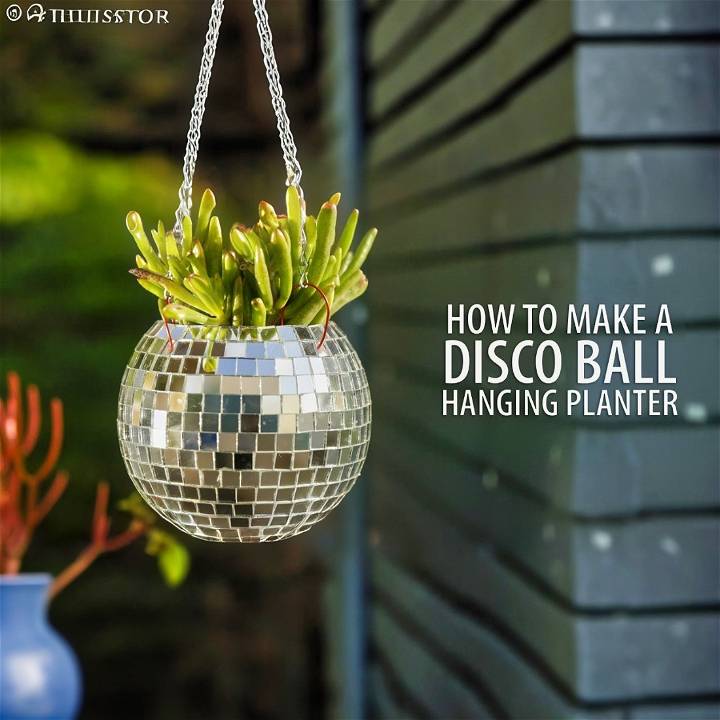
What You’ll Need:
- A plain hanging pot
- Approximately 1,000 tiny mirror tiles
- 10 feet of stainless steel chain (length may vary based on preference)
- Magnet wire
- A swivel hook
- A gem setter tool
- A syringe and industrial adhesive
- Jewelry pliers, needle nose plier, and metal snips
- A small plastic pot and drip tray (optional for planting)
- Sandpaper and alcohol (for surface preparation)
Step by Step Instructions:
Learn how to make a mirror ball plant pot with this DIY disco ball planter tutorial below:
Preparing the Planter:
- Surface Preparation: Begin by sanding the glazed surface of your ceramic planter with sandpaper to make a rough, porous surface. This helps the glue adhere better. Wipe the surface clean with alcohol.
- Glue Preparation: Fill your glue syringe carefully to make applying the adhesive easier and more precise. Working slowly will prevent spills and ensure a smooth fill.
Applying Mirror Tiles:
- Starting the Application: Pour a small amount of mirror tiles into a container for easy access. Use your gem setter tool to pick up a tile, apply glue to its back, and start placing the tiles at the bottom edge of your planter.
- Find Your Rhythm: You may alternate between applying glue directly to the planter’s surface or to each tile individually. This process is time-consuming, so prepare to dedicate some time to it, and maybe play some disco tunes to keep the vibe alive!
- Adjusting Tiles: Use the gem setter tool to adjust any tiles that start to slide out of place. Ensure they are evenly spaced and aligned as you work your way around the planter.
Attaching the Chain:
- Preparing for Hanging: As you near the top edge, leave enough space between tiles for the chain to attach through the planter’s overhang holes. Cut lengths of magnet wire to attach through each hole, twisting and crimping them securely with pliers. Trim any excess wire with snips.
- Adding the Chain: Open the bottom link of each chain segment with pliers and attach it around the magnet wire loop. Join all chains at the top to the swivel hook. This allows your planter to hang freely and spin, catching the light from every angle.
Final Steps:
- Hanging Your Planter: Now, your disco ball planter is ready to be hung. Choose a spot where it will receive plenty of natural light for the best reflections. If you’re using it as a planter, consider placing a halved small plastic pot inside to reduce the weight and fill it with soil and plants as desired.
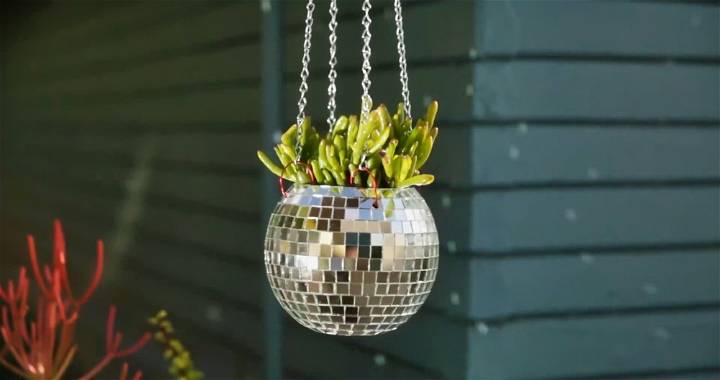
Video Tutorial
For a step-by-step video tutorial on making your DIY Disco Ball Hanging Planter, check out this YouTube video here.
It pairs well with this written guide, providing a visual representation of the techniques discussed, ensuring clarity and enhancing your crafting experience in a dynamic way.
By following these steps, you’ll have a stunning disco ball hanging planter that adds a sparkling touch to any space. Enjoy your crafting, and don’t forget to share your dazzling creation!
Variations and Inspirations for Your Disco Ball Planter
Transforming a disco ball into a dazzling planter offers endless creative possibilities. Whether you’re keen on hanging your sparkly creation or looking for alternative display methods, there are numerous ways to make your disco ball planter a stunning centerpiece. Here’s how to get creative with your disco ball planter project.
Alternative Display Methods
- Plant Stand: Place your disco ball planter on a stylish plant stand. This not only elevates the planter for better visibility but also integrates it seamlessly into your interior decor. Choose a stand that complements the disco ball’s shiny aesthetic for a cohesive look.
- Decorative Pedestal: Showcasing your disco ball planter on a decorative pedestal can turn it into a striking focal point in any room. Opt for a pedestal that contrasts with the disco ball for a dramatic effect or one that mirrors its glitz for a more harmonious feel.
Succulent Disco Ball
Succulents are the perfect match for disco ball planters. Their minimal watering needs mean less risk of water damage to the mirror tiles, and their compact size allows them to fit snugly inside the planter. Here’s why succulents are ideal:
- Low Maintenance: Succulents require minimal care, making them suitable for a disco ball planter that might be harder to access for watering.
- Visual Appeal: The natural green hues of succulents contrast beautifully with the mirror tiles, making a visually appealing display.
- Variety: With so many succulent varieties available, you can easily find one that fits the size and aesthetic of your disco ball planter.
Mosaic Art
Don’t let those leftover mirror tiles go to waste. Use them to make a mosaic design that can enhance the beauty of your disco ball planter or be applied to other decorative items. Here’s how:
- On the Planter: Applying mirror tiles in a mosaic pattern on the exterior of your planter adds another layer of sparkle and dimension. It’s a great way to cover any imperfections or simply to make your planter even more eye-catching.
- Decorative Items: Mirror tiles can also be used to decorate other items around your home. Consider adorning vases, picture frames, or even tabletops with mosaic patterns for a cohesive look that ties back to your disco ball planter.
Embracing variations inspires a unique disco ball planter, elevating it from a DIY project to stunning decor that reflects your style. Display it on a stand, fill it with succulents, or add mosaic art for an eye-catching conversation starter.
In-Depth Plant Care for Your Disco Ball Planter
Transforming a disco ball into a planter not only adds a unique flair to your space but also requires specific care for the plants you choose to nurture within it. Here’s how to ensure your plants not only survive but thrive in their sparkling new home.
Light Requirements
Bright Light Plants
These plants thrive under the generous rays of the sun, making them perfect for locations near south-facing windows or spaces that receive ample daylight. Consider succulents, cacti, or the vibrant croton, which not only enjoy bright light but also add a splash of color that complements the disco ball aesthetic.
Shade-Tolerant Plants
Not every spot in your home will be bathed in sunlight, and that’s where these resilient plants come in. Ferns, peace lilies, and snake plants are excellent choices for parts of your home that receive less direct light, thriving in the indirect sunlight and lower light conditions they find there.
Watering Tips
The key to watering is not adhering to a strict schedule but understanding the needs of your plant based on its type, the current season, and the size of your pot. In general:
- Bright light plants often require more frequent watering, as the light they love also increases evaporation. However, ensure their soil has excellent drainage to prevent root rot.
- Shade-tolerant plants typically need less water. Their slower growth rate and reduced light exposure mean water evaporates more slowly. Always check the top inch of the soil; if it’s dry, it’s time to water.
- Be mindful of seasons. Plants usually require more water during their growing season (spring and summer) and less during dormant periods (fall and winter).
Plant Selection Guide
Choosing the right plant for your disco ball planter not only involves considering the plant’s light and water needs but also its size and growth habits. Here’s a brief guide:
- Succulents and Cacti: With their low water needs and love for bright light, they’re ideal candidates. Their slow growth rate also means they won’t outgrow your chic disco ball home too quickly.
- Small Ferns: For less sunny spots, a small fern can bring a touch of greenery without needing hours of direct sunlight. Their moderate growth ensures they’ll fit snugly in the planter for longer periods.
- Air Plants (Tillandsia): If you’re looking for an almost no-maintenance option, air plants are your go-to. They don’t need soil, get their nutrients from the air, and require only occasional soaking, making them perfect for a disco ball planter hanging in a bright bathroom or kitchen.
When selecting your plant, also consider the disco ball planter’s size and ensure there’s enough room for the plant’s roots to grow. With the right care, your disco ball planter will turn into a dazzling display of greenery and style.
Troubleshooting and FAQs for Your DIY Disco Ball Planter
Making a disco ball planter is a fun and unique way to spruce up your living space. However, you might encounter a few hiccups along the way. Here’s a quick guide to troubleshooting common issues and answering some frequently asked questions.
Problem: The Disco Ball Cracks When Cutting
Solution: Cutting into a disco ball can be tricky. To prevent cracking:
- Use a serrated knife or a jigsaw for a smoother cut. These tools are better suited for the material of most disco balls.
- Apply minimal pressure while cutting to avoid cracks.
- Optionally, pre-warm the blade with a hairdryer. A warmer blade can slice through the material more easily, reducing resistance and the likelihood of cracking.
Question: My Plant Doesn’t Seem to be Thriving in the Disco Ball Planter. What Could be the Issue?
Answer: If your plant isn’t happy in its new disco home, the issue could be with water drainage. To fix this:
- Ensure there are adequate drainage holes at the bottom of your planter. These are essential for preventing water from pooling at the roots.
- Use a well-draining potting mix. Different plants have different needs, so pick a mix that suits the specific requirements of your plant.
Question: Can I Use a Solid Disco Ball for This Project?
Answer: Yes, but it might be more challenging. If you’re up for it:
- Be prepared to put in more effort to hollow out the center. This can be time-consuming and requires careful work to avoid damaging the outer shell.
- Consider opting for a pre-made, hollow disco ball designed for crafting. These are easier to work with and are specifically made for projects like this.
Make a DIY disco ball planter for added room glamour. Use proper tools, drainage, and disco ball type. Enjoy crafting!
Conclusion:
In conclusion, crafting your DIY disco ball planter is not only a creative journey but also an opportunity to add an eye-catching element to your indoor garden. From the meticulous selection of mirror tiles to the pivotal care tips for your plants, each step ensures your mirror ball plant pot stands out brilliantly.
Tailoring the planter with variations such as the succulent disco ball or exploring mosaic art allows for personal expression and customization. Furthermore, addressing potential troubleshooting issues ensures your dazzling decor thrives alongside your green companions. So, gather your supplies and let your creativity shine with your very own disco ball planter, a shimmering testament to your love for gardening and flair for DIY projects.


