Making a DIY whiteboard can elevate your home office, study, or kitchen, offering a reusable surface for notes, reminders, and creative expression. With simple tools and a bit of creativity, crafting your very own dry erase board is not only affordable but also highly customizable. This process allows for personalization in size, style, and functionality, making it a project worth considering for anyone in need of an organized writing surface.
Why settle for store-bought options when making a dry erase board can be a fun and rewarding DIY project? This guide lays out all you need, from selecting the perfect frame to the final touches that make your board uniquely yours. Perfect for to-do lists or a drawing area for kids, the versatility of a homemade whiteboard is unmatched. Keep reading for a comprehensive overview of making your functional and stylish dry erase board.
Why Choose DIY Whiteboards?
Making a DIY whiteboard has numerous advantages that can cater to both personal and professional needs. Here’s why you should consider making one:
- Cost-Effective: DIY whiteboards are significantly cheaper than store-bought ones. With basic materials and a bit of creativity, you can save money while achieving similar, if not better, functionality.
- Customizable: One of the greatest benefits is the ability to tailor your whiteboard to your specific needs. Whether it’s size, shape, or style, you have full control over the end product. This means you can build something that perfectly fits your space and purpose.
- Eco-Friendly: By choosing to DIY, you can repurpose materials like old frames, glass, or metal sheets. This not only gives a second life to items that might otherwise be discarded but also reduces waste and supports a more sustainable lifestyle.
- Fun Project: Building your own whiteboard can be an enjoyable and fulfilling project. It’s an opportunity to engage in a creative and productive activity that results in a useful tool for your home, office, or classroom.
- Personal Touch: Adding your own design, colors, and features gives your whiteboard a personal touch that can’t be found in mass-produced items. This can make the space it inhabits feel more personalized and welcoming.
In summary, DIY whiteboards offer a versatile, affordable, and enjoyable solution to your organizational needs. They encourage creativity, sustainability, and personalization, making them a rewarding project for anyone looking to enhance their space.
How to Make a Dry Erase Board
Making a DIY dry-erase board is an efficient, fun, and creative way to repurpose an old frame into something useful and decorative. Whether you need a message board for your home office, kitchen, or dorm room, this guide walks you through making one in no time. Let’s dive into the steps to craft this customizable accessory that blends functionality with style.
What You’ll Need
- An old wooden frame with glass
- Patterned paper of your choice
- Scissors or a paper cutter
- Glue or double-sided tape
- Dry erase markers
- Optional: Cloth pins, embellishments like flowers
Step-by-Step Guide
Choose and Prep Your Frame
Start by selecting a wooden frame that fits your space. If the frame needs a facelift, consider painting it in a color that complements your decor. Ensure the glass is clean and intact, as this will be your writing surface.
Measure and Cut Your Paper
Lay your frame over the patterned paper to measure the size needed to cover the frame’s back. Use scissors or a paper cutter for a precise cut. This step allows you to customize the look of your dry erase board to match your personal style or intended recipient’s preferences.
Attach the Paper to the Frame
Flip the frame to expose its backside. Apply a thin layer of glue or double-sided tape around the edges, close to where the glass sits. Carefully place your cut piece of paper onto the glue, patterned side facing down, so it shows through the glass. Smooth out any air bubbles or wrinkles.
Embellish Your Board (Optional)
For a functional touch, add cloth pins to the bottom or sides of the frame. This feature is great for hanging notes, photos, or important reminders. Feel free to also adorn your dry erase board with additional embellishments like flowers, stickers, or anything that sparks joy.
Enjoy Your New Dry Erase Board
Once the glue has dried, and your board is assembled, grab a dry erase marker and start jotting down your to-do lists, reminders, or motivational quotes. The glass surface works perfectly with dry erase markers and is easy to wipe clean.
Maintenance
To keep your dry erase board looking its best, use a soft, dry cloth for regular cleaning. For more stubborn marks, a damp cloth with a bit of rubbing alcohol can remove residues without damaging the surface.
Video Tutorial
For a step-by-step video tutorial, watch How to Make a DIY Dry Erase Board. It pairs well with this written guide, offering a visual complement to the techniques discussed here. The video tutorial breaks down the process in a straightforward and engaging way, making it even easier to follow along.
Making your own dry erase board is not only a quick and satisfying project but also an excellent way to recycle old frames into something both beautiful and practical. Whether you’re crafting for yourself or making a personalized gift, this DIY project is sure to add a touch of creativity and organization to any space.
Frequently Asked Questions about DIY Whiteboards
Making your own DIY whiteboard can be a fun and rewarding project. Below are some of the most commonly asked questions to help you get started.
What materials do I need for a DIY whiteboard?
For most DIY whiteboard projects, you will need:
- A smooth, flat surface such as a piece of glass, melamine board, or any glossy finish material that dry erase markers can write on and be wiped off easily.
- A frame to hold or mount your whiteboard surface, depending on your design preference.
- Adhesives or mounting tools suitable for the materials you’re using and where you plan to install your whiteboard.
- Dry erase markers and an eraser for writing and cleaning.
Can I make a whiteboard without a glass surface?
Yes, you can. While glass provides a smooth and durable surface for a whiteboard, other materials such as melamine panels, glossy painted wood, or even certain types of metal can also work. The key is ensuring the surface is smooth and non-porous so that it can be easily wiped clean after use.
How do I hang a DIY whiteboard?
The method for hanging your DIY whiteboard depends on its size and weight, as well as the type of walls you have. Here are a few options:
- Adhesive Strips: Good for lighter boards and can be used on most wall surfaces.
- Mounting Brackets or Screws: Suitable for heavier boards, but you’ll need to ensure your wall can support the weight.
- Standing Frame: If you prefer not to hang your board, you can build or purchase a standing frame to hold it.
Always ensure that your whiteboard is securely mounted to prevent it from falling and potentially causing injury or damage.
Can I turn a wall into a whiteboard?
Yes, turning an entire wall into a whiteboard is a popular option for classrooms, offices, or even home use. This can be done using whiteboard paint or large whiteboard panels that cover the wall. Whiteboard paint can be applied directly to a smooth, clean wall, transforming it into a writable surface once dry. Alternatively, large whiteboard panels can be mounted to the wall for a similar effect.
How do I clean a DIY whiteboard?
For daily cleaning, a soft, dry cloth or a whiteboard eraser works well to remove most markings. For more stubborn stains or to give your whiteboard a deeper clean, use a cloth dampened with isopropyl alcohol or a whiteboard cleaner solution. Avoid using abrasive cleaners or tools, as these can damage the surface.
Can I customize the size of my DIY whiteboard?
Absolutely! One of the advantages of making your own whiteboard is the ability to customize its size to fit your specific needs and space. Whether you need a small board for personal reminders or a large one for brainstorming sessions, you can tailor the dimensions accordingly. Just ensure you have a smooth, writable surface material and a frame that matches your desired size.
By following these guidelines, you can build a functional and stylish DIY whiteboard that suits your specific needs and enhances your space.
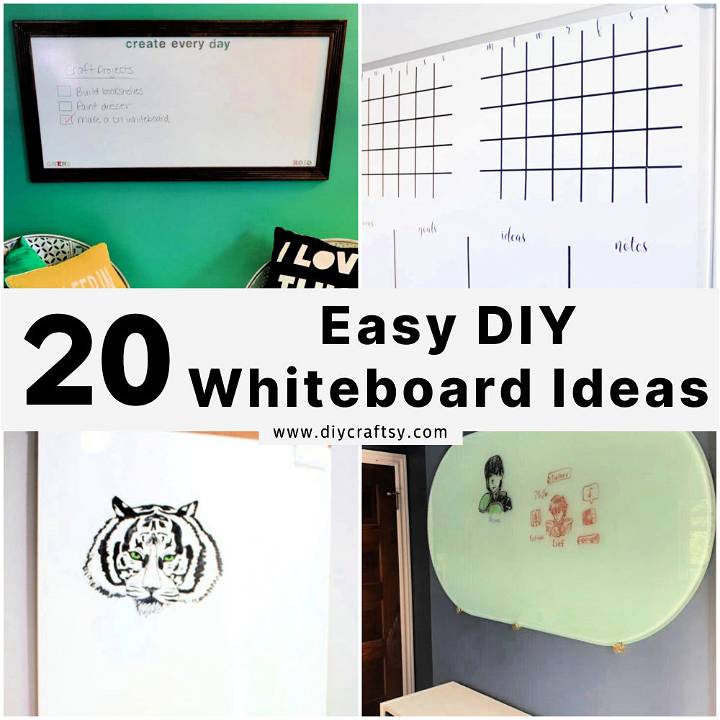
20 DIY Whiteboard Ideas (How to Make a Dry Erase Board)
Explore 20 creative DIY whiteboard ideas to make your own custom dry-erase board at home. Learn how to personalize and improve your workspace with these handy tutorials.
1. How to Make a Whiteboard at Home
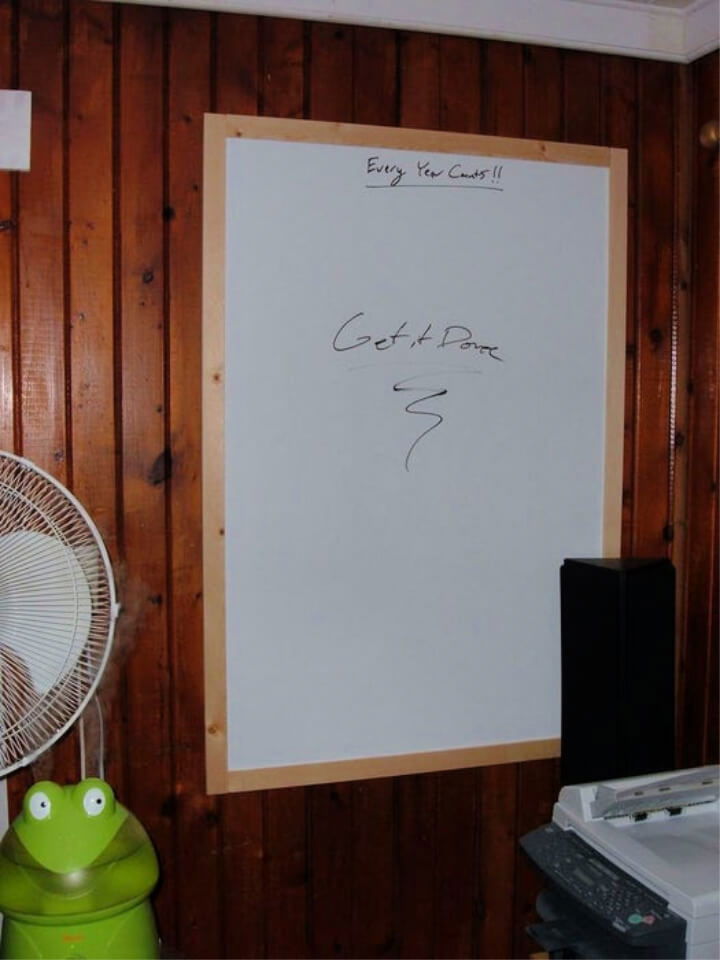
Making a homemade whiteboard is a practical and customizable project that can enhance any workspace or study area. Instructables provides a detailed guide to help you construct a whiteboard tailored to your space and needs.
From selecting the right materials to assembling a frame, this step-by-step tutorial ensures a smooth DIY experience. By making your whiteboard, you gain the freedom to choose the size and style that best fits your home, enabling efficient organization and creative expression. Whether it is for jotting down reminders or brainstorming ideas, a homemade whiteboard is a valuable addition to any room.
2. Making a Whiteboard Under $30
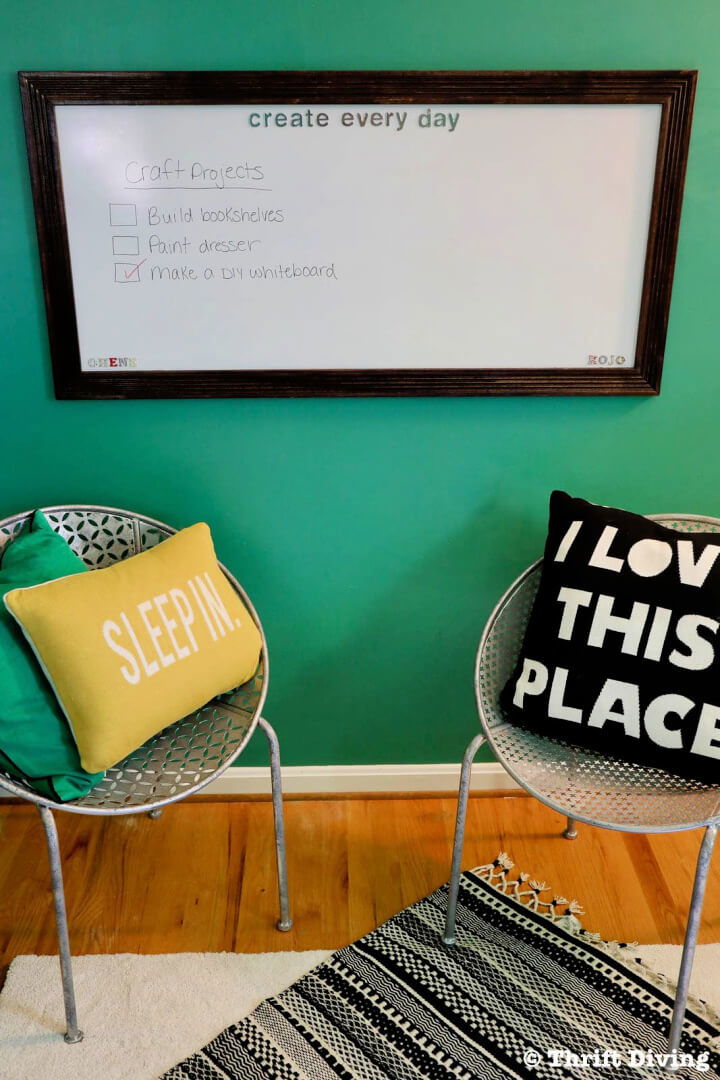
Elevate your workspace with a custom DIY whiteboard, a creative and budget-friendly project showcased by Thrift Diving. This guide walks you through crafting a large, elegant whiteboard using a 2×4 foot panel, decorative trim, and Gorilla Clear Grip adhesive for a secure fit.
Perfect for organizing thoughts or teaching, this board is framed beautifully with stained trim for a rich, expensive look without the hefty price tag. Complete with a step-by-step process, including cutting trim with a miter saw or box, staining, and secure mounting with adhesive and sticky strips, this project promises a professional-grade whiteboard tailored to your space.
3. Quick and Easy DIY Whiteboard
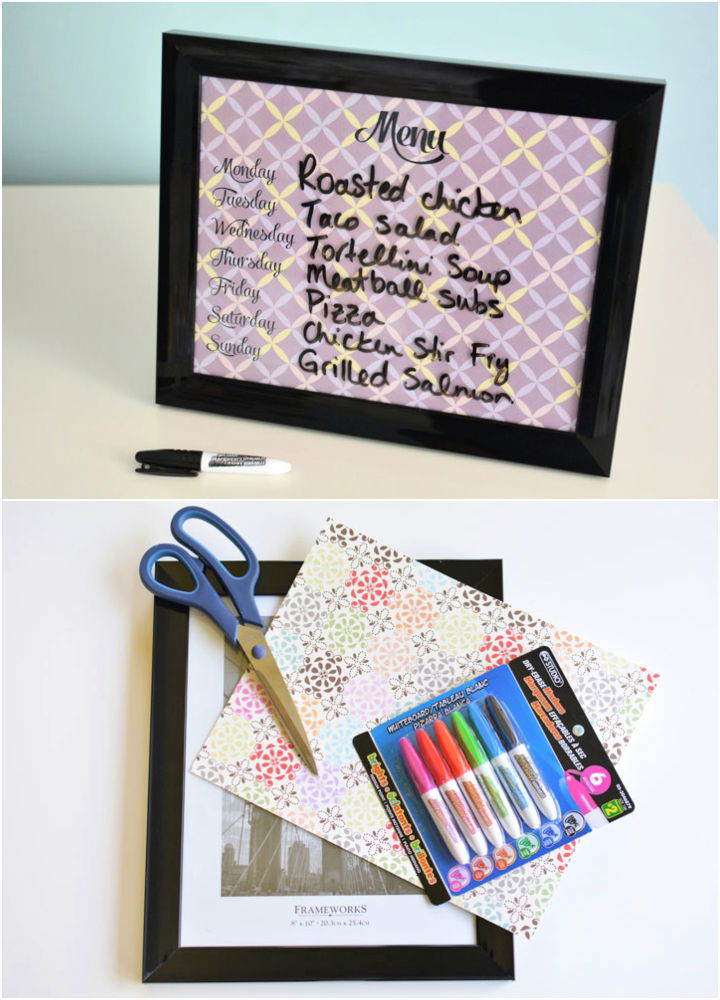
Make your own reusable whiteboards with a simple and budget-friendly DIY project from One Little Project. Ideal for jotting down quick notes, to-do lists, or meal plans, these easy-to-make whiteboards add a touch of personal flair to your space.
All you need is a picture frame from the dollar store, some stylish scrapbook paper, and dry-erase markers. Swap out the paper for a fresh look anytime, and say goodbye to unnecessary paper waste. Follow this engaging and instructive guide to craft an eco-friendly and efficient solution for daily reminders and doodles.
4. Make a Multipurpose Whiteboard
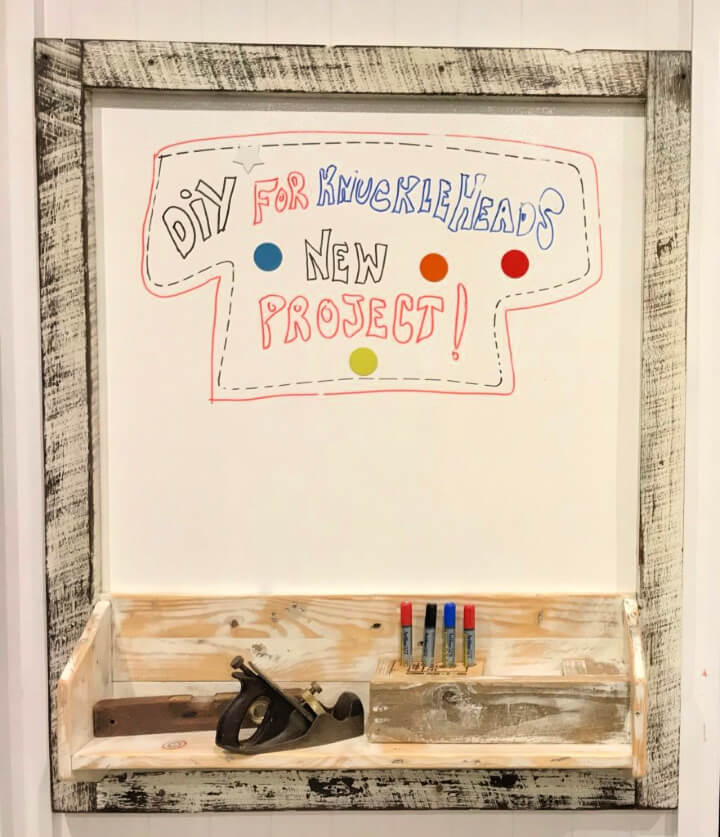
Looking to craft a DIY whiteboard with a touch of rustic charm? DIY For Knuckleheads offers a step-by-step guide to making a multipurpose whiteboard framed with recycled timber from pallet wood and old fencing materials.
Perfect for your garage or workspace, this project is tailored for novice DIYers, emphasizing sustainability and practicality. With detailed instructions, a list of required tools and materials, and helpful tips, you’ll be able to assemble and customize a whiteboard that’s both functional and stylish. Get ready to enhance your space with this practical and eco-friendly DIY addition.
5. Homemade Pantry Door Whiteboard
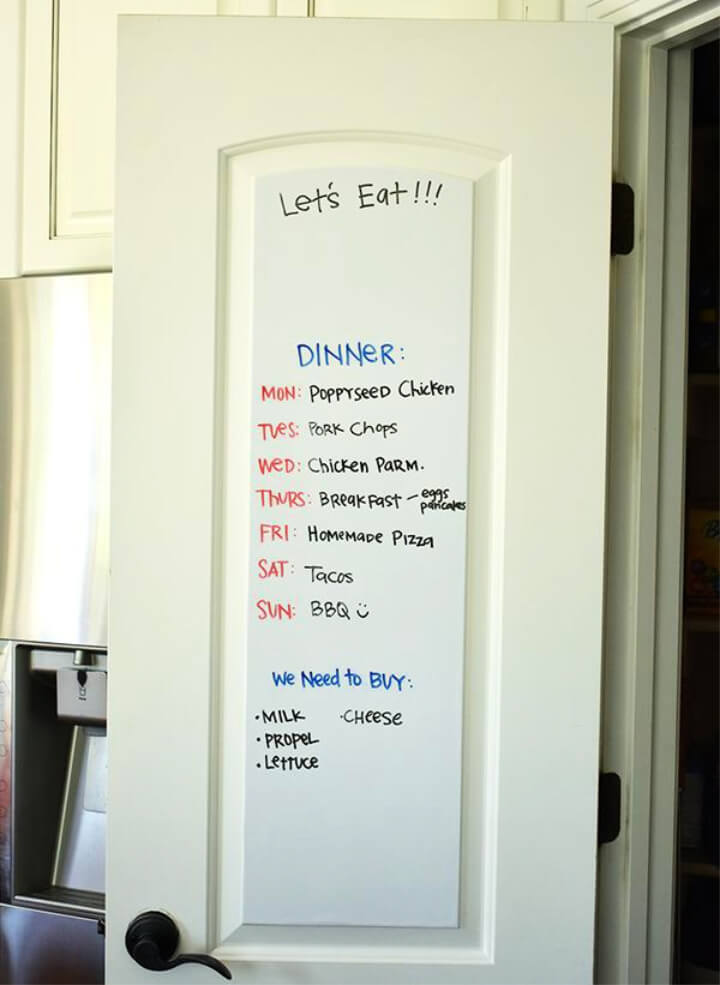
Transform your kitchen’s pantry door into a practical whiteboard with this easy-to-follow DIY project from Kassa. Ideal for jotting down shopping lists or planning weekly meals, this creative solution adds functionality to your space. All you need is Kassa whiteboard contact paper, dry-erase markers, and scissors.
Begin by measuring your door panel, cut the contact paper to size, and ensure your door is clean before application. Carefully adhere to the paper, smoothing out any bubbles as you go. In just five simple steps, you’ll have a reusable writing surface that’s both stylish and convenient. Keep your family in the loop and your pantry organized with this clever kitchen upgrade.
6. DIY Whiteboard Calendar and Planner
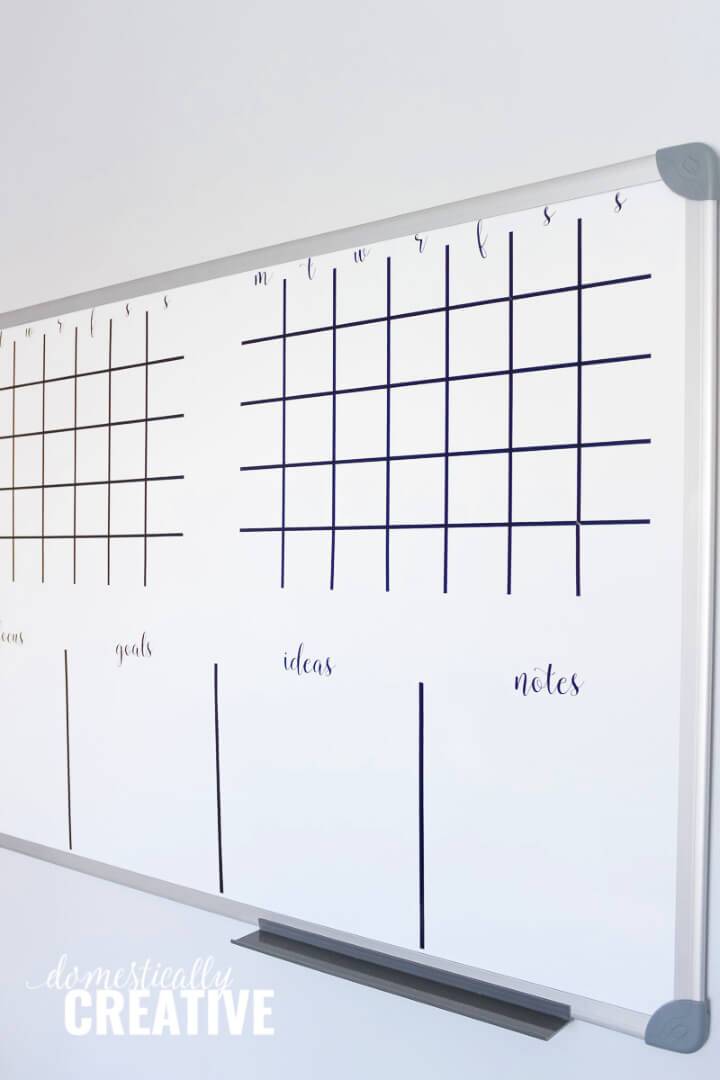
Make a personalized DIY whiteboard calendar and planner with Domestically Creative‘s easy-to-follow guide. Transform a simple dry-erase board into a visual planning tool for your editorial content or family activities.
Learn how to customize your whiteboard using a Silhouette Cameo or Cricut, or even simple materials like washi tape and alphabet stickers. Keep your goals, ideas, and schedules in clear view with this budget-friendly and fully customizable project. Stay organized and inspired as you plan your days with this creative solution that sits right by your workspace.
7. Handmade Wall Mounted Whiteboard
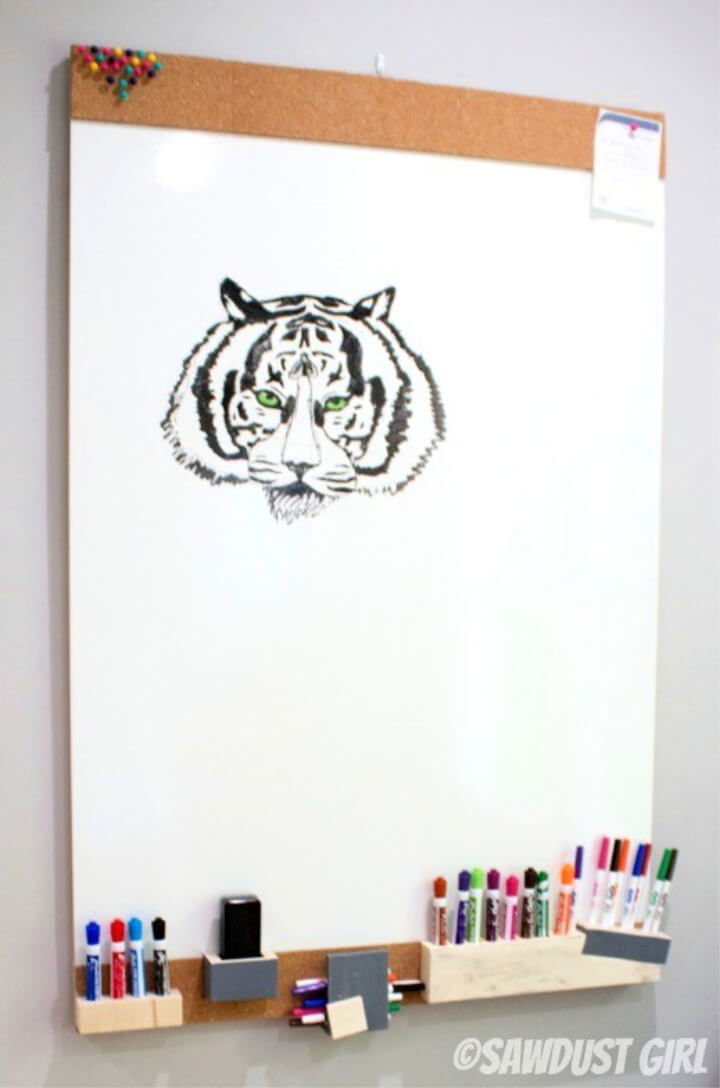
Making your own DIY whiteboard can add a personalized touch to your workspace, and it’s simpler than you might think. Sawdust Girl® offers an engaging guide that walks you through crafting a unique and functional whiteboard, complete with a cork strip and custom marker holders.
With easy-to-follow instructions, you’ll learn how to build a frame from pine boards, attach a white panelboard, and even construct holders for your markers and eraser. This project is not only budget-friendly but also allows you to express your creativity in a practical way. Whether for organizing tasks, jotting down ideas, or doodling this DIY whiteboard is a quirky addition to any office or home space.
8. How to Build a Giant Whiteboard for $14
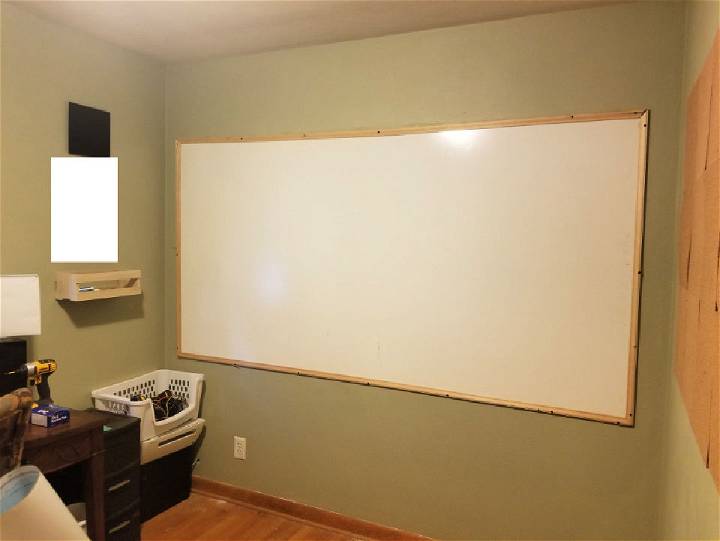
Transform any room into an innovative workspace with this easy, cost-effective DIY guide from Crazy Chick DIY. Learn to build a giant whiteboard for just $14, using simple tools and a melamine board. Perfect for brainstorming, teaching, or just staying organized, this project is achievable in an afternoon. Whether you use the full board or customize its size, follow these steps for a rewarding DIY experience. Say goodbye to expensive whiteboards and hello to creativity and productivity!
9. Inexpensive DIY Whiteboard From Scratch
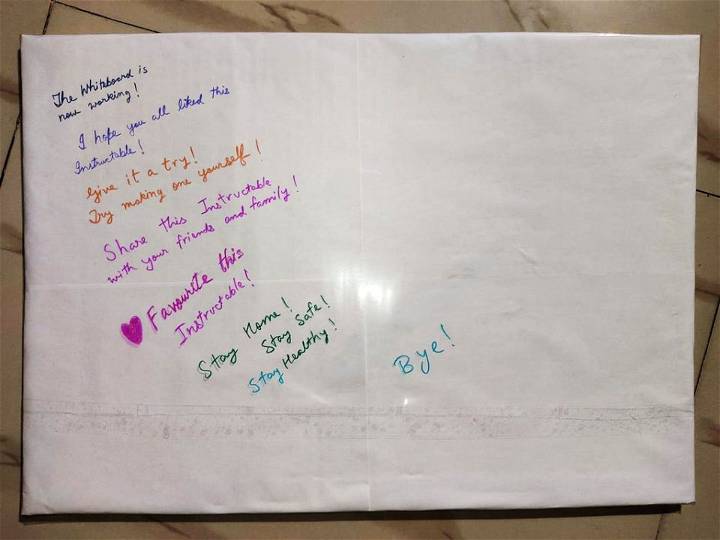
Discover how to build a fun and functional homemade whiteboard/dry-erase board with an easy-to-follow guide at Instructables. Perfect for doodling, note-taking or planning, this DIY project turns simple materials into a creative space for all your thoughts and ideas. Get started today and craft your very own scratch-made whiteboard!
10. Make a Whiteboard Wall for the Home Office
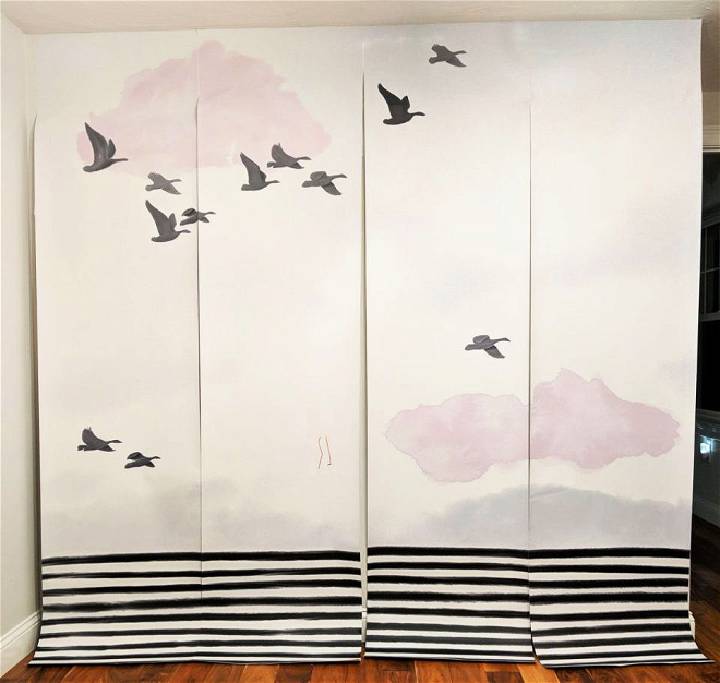
Elevate your home office or study area with an innovative DIY whiteboard wall! A whiteboard wall is incredibly versatile, perfect for jotting down daily tasks, brainstorming projects, or assisting with homeschooling efforts. Learn how with a detailed guide from Bloom in the Black. Transform any corner into a dynamic space where creativity and productivity thrive. Say goodbye to standard dry erase boards and hello to a customizable workspace tailored just for you and your family’s needs.
11. Unique DIY Classroom Whiteboard Table
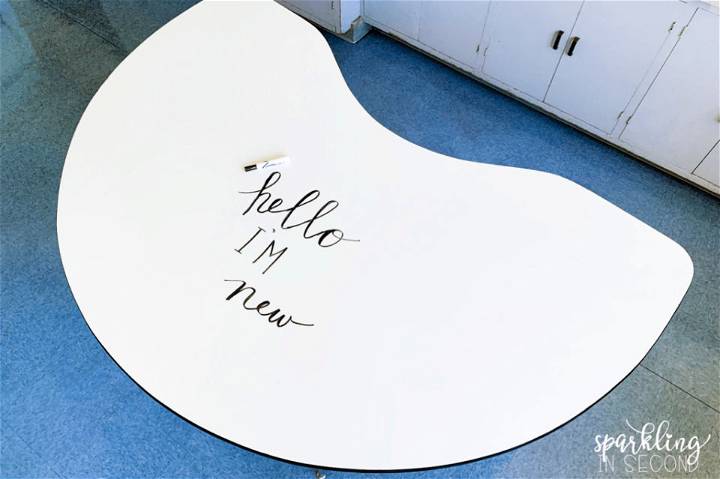
Transform your classroom with an innovative DIY whiteboard table, as shown on Sparkling in Second Grade. Without spending much or needing to paint, this project uses WallPops’ peel-and-stick dry erase wallpaper for an easy application. Just one roll covers an average-sized table, making an interactive space for students. Follow simple application tips, like using a level and removing air bubbles, for a smooth finish. This removable solution enhances learning while preserving school property. Ideal for educators seeking a creative and functional classroom upgrade.
12. How to Make a Classroom Whiteboard
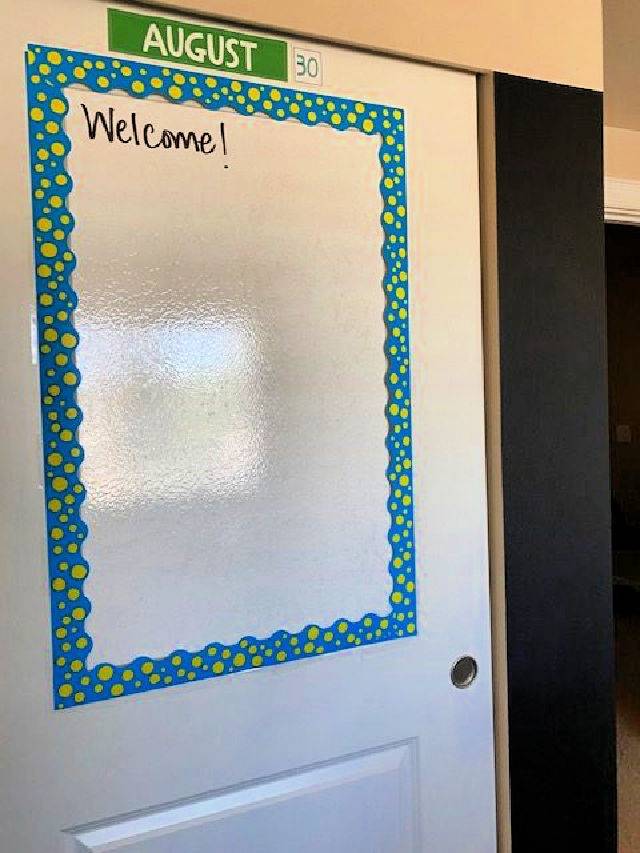
Elevate your home classroom with a DIY whiteboard! Transform any space into a dynamic teaching environment easily with whiteboard paint. Perfect for engaging students during virtual lessons, this simple project infuses a classroom vibe into your home without a full makeover. Visit blikebianca.com for a step-by-step guide on making your own writable surface that’s ready for learning adventures. A fun, interactive addition for both teaching and personal use – start painting today!
13. Build a Whiteboard With Step by Step Instructions
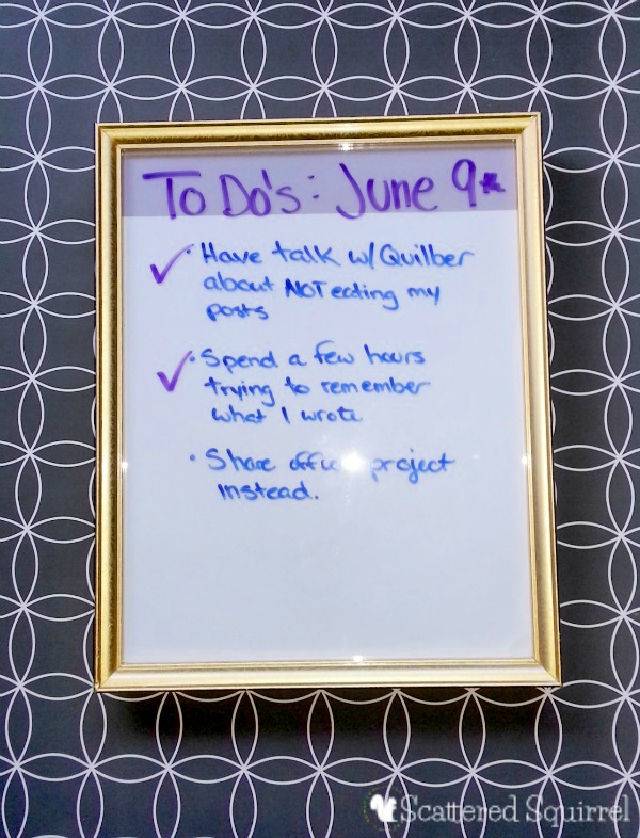
Transform your workspace with a simple yet innovative DIY whiteboard project. With items you likely have at home, this quick makeover involves using a picture frame and scrapbook paper. Elevate your office with this practical, cost-effective solution, perfect for lists or a calendar. Dive into a 5-minute craft that combines functionality and style, and start organizing your space smarter. Ideal for renters or anyone seeking a temporary and creative solution to stay organized.
14. Make Your Own Whiteboard With Cricut
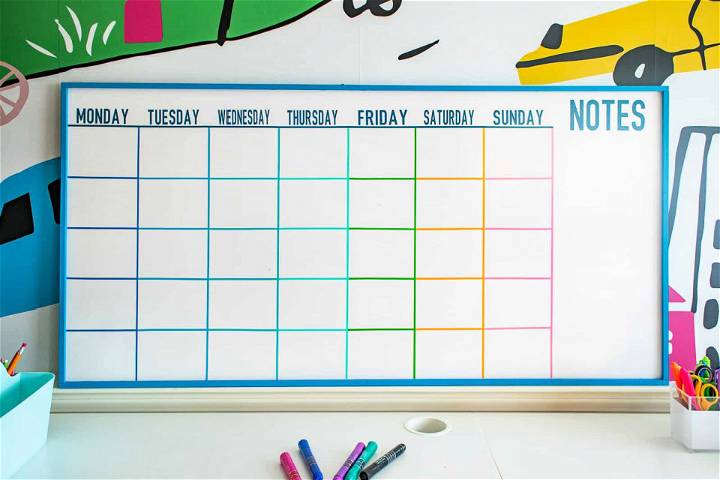
Making a custom DIY white board is simpler than you might think, and atcharlotteshouse.com offers an engaging, detailed guide to help you through the process. From selecting your base material to the final touches with vinyl decals and trim, you’ll be guided step-by-step on how to make an organizational tool that’s both functional and aesthetically pleasing. Ideal for back to school or home office setups, this DIY project is not only practical but allows for creative freedom to design a board that truly fits your needs and style.
15. Cheap DIY Glass Whiteboard for Dry Erase
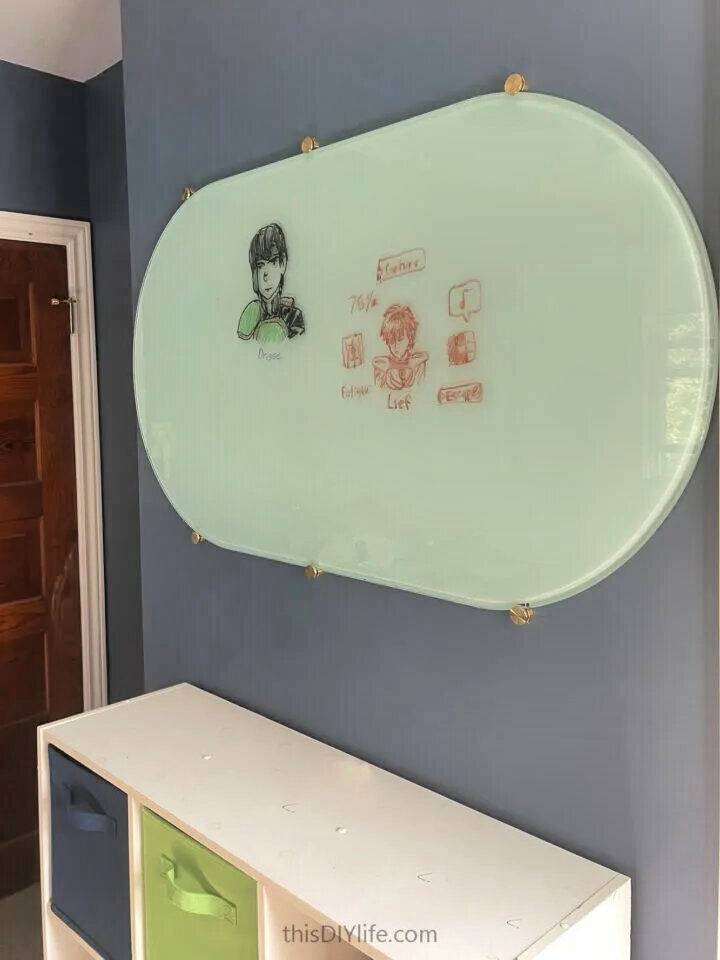
Discover how to build your own stylish and functional DIY glass whiteboard for any space with this simple, beginner-friendly guide from Frugal Family Times. Learn the ins and outs of choosing the right glass, preparing it for use, and hanging it with ease. Transform any room with this sleek, modern update to traditional dry erase boards. Perfect for home offices, classrooms, or creative studios, this project proves that practical can also be beautiful.
16. How to Build a White Board for Kids
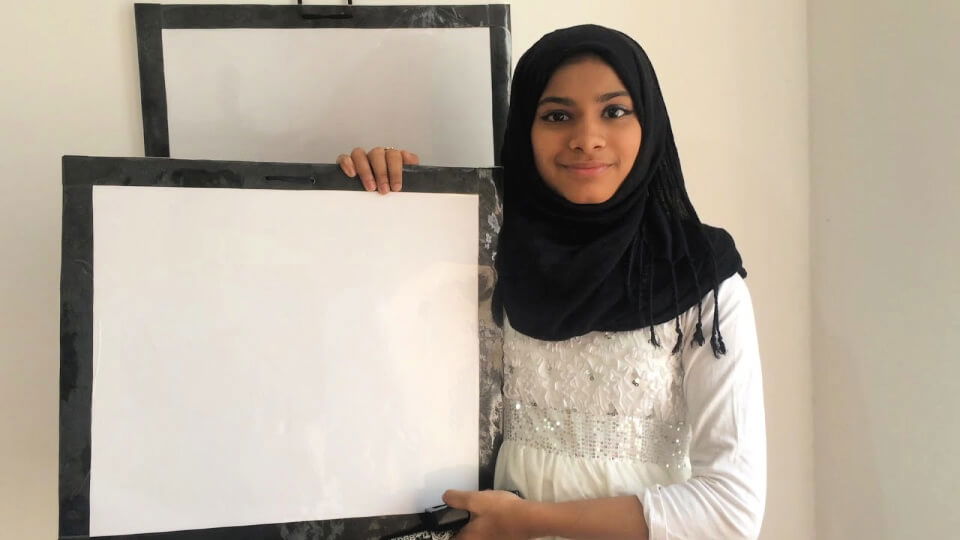
Make a versatile and educational whiteboard for kids with a simple DIY project, perfect for enhancing their learning experience at home. You’ll need basic materials such as cardboard, white chart paper, a transparent polythene sheet, scissors, glue, and decorative strips for the border.
Follow the easy steps to assemble your board: cover the cardboard with chart paper, secure the edges, embellish with colored strips, and finalize by covering it with the transparent sheet to ensure durability. Drill holes to attach lace for easy hanging. This customizable whiteboard is an excellent tool for children to practice writing, arithmetic, and more, making learning interactive and fun. youtube
17. DIY Giant Whiteboard on a Budget
18. Building a Dry Erase Board Under $20
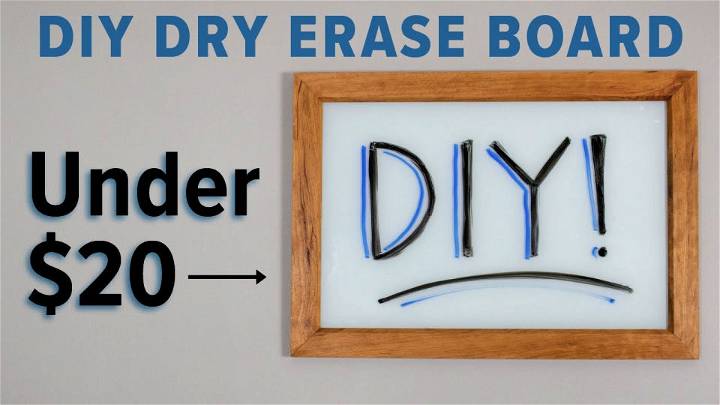
Make a stunning DIY Dry Erase Board for under $20, combining functionality with a touch of elegance. This guide details transforming a simple piece of glass into a chic whiteboard using basic materials: a 16×20 glass pane, white paint for clarity, and a cherry frame for sophistication.
With careful steps including painting, framing, and finishing, you’ll craft a bespoke piece perfect for any space. Ideal for shops or homes, this project enhances your decor while providing a practical writing surface. Embrace creativity and add a personalized touch to your environment with this budget-friendly, yet luxurious, dry-erase board project.
19. DIY Whiteboard Without Transparent Sheet
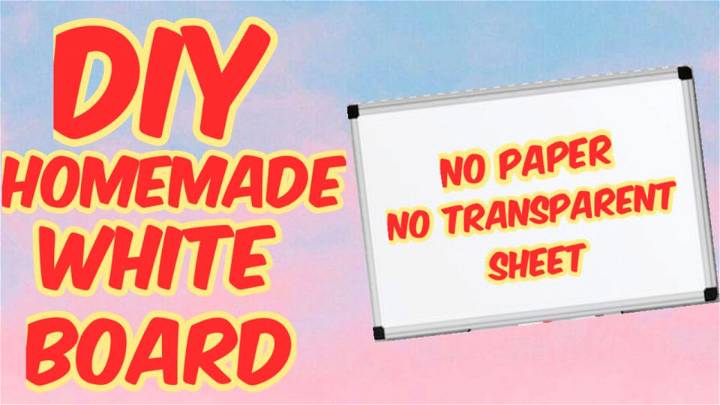
Discover a simple way to build a homemade whiteboard using items you likely already have at home! This engaging and easy-to-understand video walks you through each step, ensuring you finish with a functional and handy whiteboard, perfect for jotting down reminders or unleashing your creative doodles. No transparent sheet? No problem! Click here to watch and learn how you can make this practical DIY whiteboard today: watch the tutorial.
20. How to Make a Whiteboard – Step by Step
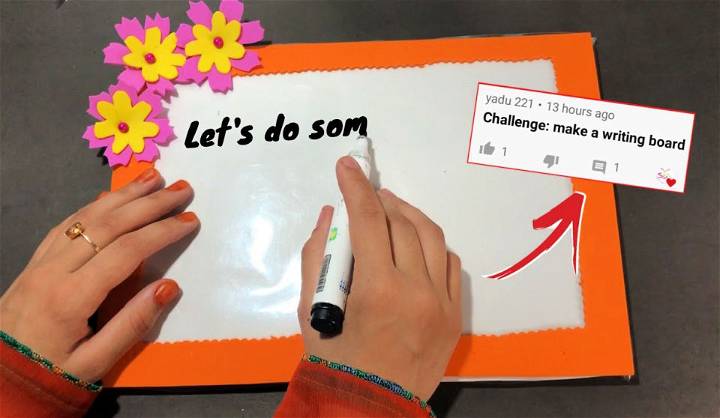
Discover how to build a DIY whiteboard easily at home with Sajal’s Art. Perfect for organizing your day, teaching, or just scribbling ideas, this guide provides step-by-step instructions to make a functional whiteboard. Ideal for those who love crafting and personalizing their space, this video will fuel your creativity and offer a practical solution for any home. Transform any wall into your canvas today and enhance your home’s functionality and aesthetic.
Frequently Asked Questions
1. What is a whiteboard?
A whiteboard is a type of reusable writing surface that can be used for brainstorming, drawing, teaching, presentations and more. It has a glossy finish and can easily be wiped clean with a dry cloth or eraser to start over again. Whiteboards are popular in classrooms, offices and homes.
2. What are the benefits of using a whiteboard?
Whiteboards are great for brainstorming and creative problem solving, as they allow ideas to be visualized and explored in real-time. They also help people work together more effectively, enabling collaboration and fostering better communication.
3. How do I make a DIY whiteboard?
To make a DIY whiteboard, you will need a hard surface (eg. a piece of wood or MDF panel), whiteboard paint, abrasive cloth and sandpaper, brush, roller or sponge applicator. Apply the paint following the instructions on the packaging and allow to dry. Sand with the abrasive cloth for a smooth finish before use.
4. What are some tips for using a whiteboard?
Using a whiteboard can be a great way to organize ideas, brainstorm, or teach. Some tips include writing legibly, cleaning the board regularly, and pre-planning content before presenting. Additionally, use colors and visuals to enhance your message.
5. How do I care for my whiteboard?
Clean your whiteboard regularly with a soft cloth and an approved cleaner. Use markers specifically designed for whiteboards, and store them properly when not in use. Erase completely after each use to avoid staining or ghosting.
6. What material can be used as a whiteboard?
Whiteboards are usually made of a hard, glossy material such as melamine, laminate or porcelain. These materials can be cleaned easily and allow markers to write on them with ease. Some other materials that can also be used for whiteboards include glass, metal, vinyl, wood and even fabric.
7. Can I DIY a dry erase board?
Yes, it is possible to build a DIY dry erase board using materials such as a whiteboard, magnetized sheeting and markers. With careful preparation and assembly, one can easily make their own dry erase board at home.
8. How do you make a cheap dry erase board?
You can make a cheap dry erase board by using a picture frame, white poster board, and clear contact paper. Cut the poster board to fit inside the frame, cover it with contact paper, and voila – you have your very own dry erase board.
Related DIY Projects and Ideas
Bulletin Board Ideas: These super cool DIY bulletin board ideas will help you organize your home or office. They are easy to make and can be used for many purposes.
Chore Chart Ideas: These simple DIY chore chart ideas are great for homes with children. Use these charts to help your kids keep track of their daily chores, and make them feel rewarded for their efforts.
Bullet Journal Ideas: Bullet journaling is the perfect way to plan your daily life, stay organised, and track your progress. Get easy bullet journal ideas for starting your own bullet journal here!
Back to School Projects: This is a list of easy and best DIY back to school projects that you can do yourself or with your kids. The list covers school supplies, projects for the classroom, crafts, and more!
Felt Board Ideas: Here are creative DIY felt board ideas for your kids’ room, crafting time, and more. All you need is a few supplies and a couple of hours to build your own felt boards to decorate with.
Family Command Center Ideas: Whether you’re trying to build a command center for your family or just need some ideas, these amazing DIY family command center projects are easy to make and require little to no experience.
Conclusion:
In conclusion, crafting your own DIY whiteboard presents a unique opportunity to blend functionality with personalized style. From selecting the perfect frame to adding final decorations, this guide has walked you through each step to make your dry erase board. Whether it’s for jotting down daily tasks, teaching, or just doodling, a homemade whiteboard is a versatile addition to any space. Embrace the chance to build something that’s not only practical but also a reflection of your style with these 20 DIY whiteboard ideas. Thanks for following along, and here’s to your success in making your own dry erase board!


