Making easy paper hats can be a lot of fun and an excellent project for crafters of all ages! Whether it’s for a party, a play, or just for some creative fun at home, mastering the art of making paper hats in 5 minutes is a skill worth having. From classic designs to more unique creations, this guide will take you through the essential steps and provide valuable tips to ensure your paper hats are a hit.
Dive into our comprehensive guide on how to make paper hats that stand out! We’ll walk you through the necessary materials, offer a step-by-step guide for crafting basic to more specialized hat types, and share useful troubleshooting tips to overcome common issues. With an emphasis on quick, straightforward methods, we make it easy for crafters to succeed in their projects.
Ready to get started on your paper hat adventure? Keep reading to unlock simple yet creative ideas that will elevate your crafting game.
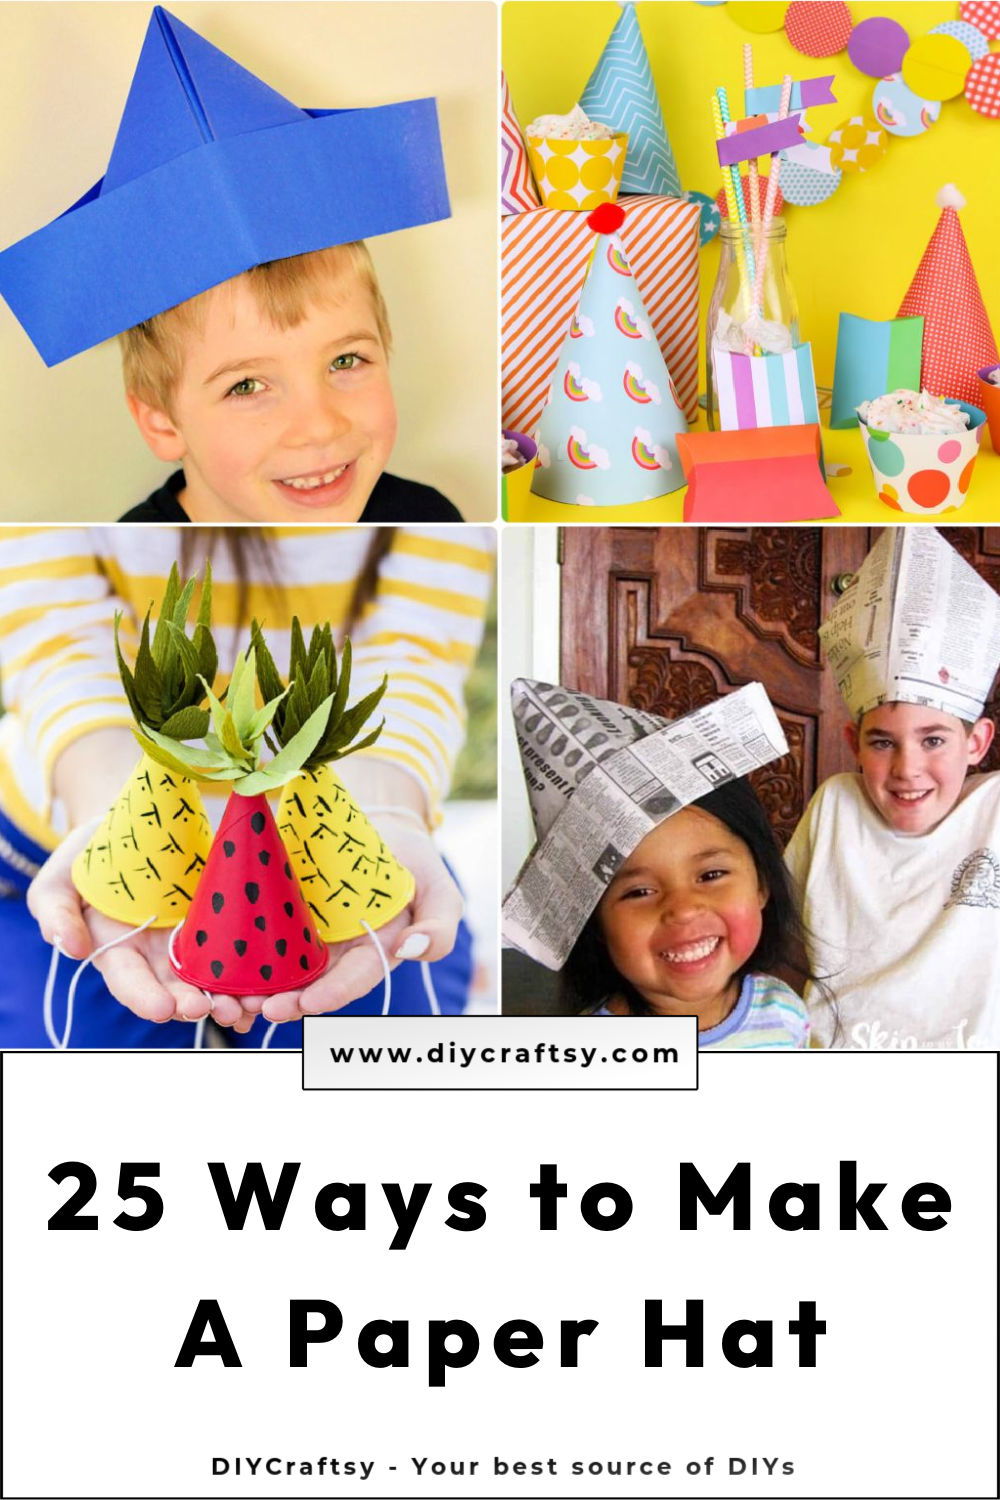
How to Make a Paper Hat – Step by Step Guide
Making a paper hat is a simple and enjoyable project for a rainy day or party. This guide will help you make either a classic cap or a cone hat with ease. Let’s start crafting!
Materials Needed
- 8 by 11-inch (20 by 28 centimeter) piece of paper (for the classic hat)
- Construction paper (for the cone hat)
- Ruler
- Compass (for the cone hat)
- Scissors
- Stapler or Tape
Step-by-Step Guide
Learn how to make a paper hat in a few simple steps below:
For the Classic Paper Hat:
- Prepare Your Paper: Take an 8 by 11-inch piece of paper. Fold it in half lengthwise and then unfold it. This initial crease is essential for guiding the rest of your folds.
- Fold Again: Now, fold the paper in half from top to bottom.
- Making the Peaks: Take the top left corner and fold it down towards the middle crease you first made, forming a triangle at the top. Repeat this step with the top right corner, ensuring both the left and right corners meet in the middle, forming a diamond shape.
- Form the Brim: Locate the bottom edge of the paper. You’ll notice a strip below the diamond shape; fold this strip upwards, making the brim of your hat. Ensure it’s an even fold across.
- Flip and Repeat: Turn your paper over. There’s another strip on this side too. Repeat the fold, lifting the strip upwards to line up with the other side.
- Open to Finish: Now, gently pull apart the bottom edges of the hat, opening up the space inside. Mold it a bit with your hands if necessary, and voil* à, your classic paper hat is ready!
For the Paper Cone Hat:
- Drawing the Half Circle: On your piece of construction paper, use your compass to draw a half-circle that is between 6 to 8 inches (15 to 18 centimeters) across. This size will influence the height and fit of your cone hat.
- Cutting Out: With your scissors, follow the line you’ve drawn and cut out the half-circle.
- Forming the Cone: Bring the straight ends of your half-circle together, overlapping them until you form a cone. The amount of overlap will determine the cone’s opening size – more overlap for a tighter fit.
- Securing the Cone: Once you’re satisfied with the cone size, either staple or tape the ends together at the base. Make any adjustments to ensure it fits comfortably on your head.
You’ve just maked your own paper hat. Whether it’s the classic style or the festive cone hat, you can customize these further with drawings, stickers, or even paint. It’s a straightforward craft, but the joy and creativity it brings are endless.
Video Tutorial
For a step-by-step video tutorial, watch this video on how to make a paper hat.
It pairs wonderfully with this written guide, enhancing your understanding of each step with visual representations in a manner that’s both clear and highly engaging.
Variations and Customizations for Paper Hats
Making paper hats is a fun and creative activity that allows for a lot of personalization. Whether you’re making hats for a party, as a craft project with kids, or just for fun, here are some ideas to make your paper hats stand out.
Styles and Shapes
Experiment with Different Shapes: While the classic pointed hat is always popular, try branching out with different shapes such as:
- A rounded “newsboy” cap style.
- A wide-brimmed hat for a sunhat effect.
- A folded “samurai” helmet for a unique look.
Size Matters: Adjust the size of your paper to make everything from tiny hats for dolls or pets to oversized ones for a comedic effect.
Decorations
- Color Your World: Use colored paper or decorate your hats with paints, markers, or crayons. Patterns, stripes, polka dots, or even a tie-dye effect can add a splash of color.
- Add Some Texture: Glue on materials like cotton balls for a fluffy rim, or attach pieces of aluminum foil for a metallic finish.
- Personal Touches: Customize each hat with the wearer’s name, favorite symbols, or characters. Stickers and stencils can be helpful for this.
Themes
Match the Occasion: Tailor your hats to fit any theme:
- Birthday parties could have hats with the age or balloons.
- Holiday-themed hats with relevant decorations, like pumpkins for Halloween or trees for Christmas.
- Sports events can have team colors or logos.
Cultural Inspirations: Draw inspiration from different cultures’ traditional headwear. For example, make a simple version of a Japanese kasa, a Mexican sombrero, or an Egyptian nemes.
By adding variations and customizations, you’ll make paper hat making more fun and memorable for all. Let your creativity flow, and enjoy the process!
Troubleshooting Common Issues
When crafting paper hats, you might encounter a few hiccups along the way. Here’s how to solve some common problems so that your hat-making experience is as smooth as possible.
Hat Doesn’t Fit
- Measure Twice, Cut Once: Before you start folding, measure the head circumference of the person who will wear the hat. Add an extra inch for overlap where the hat will be secured.
- Adjustable Designs: Make hats with a tab and slot closure or add a string to tie the hat, which allows for size adjustments.
Hat Loses Shape
- Reinforce Your Creases: Use a ruler or a blunt edge to make your folds crisp. This will help the hat maintain its shape better.
- Sturdy Materials: If regular paper isn’t holding up, try using cardstock or construction paper for more durability.
Decorations Fall Off
- Right Adhesive for the Job: Regular glue might not be strong enough for heavier decorations. Use hot glue or double-sided tape for a more secure hold.
- Less is More: Sometimes, too many decorations can weigh down the paper. Keep it simple, or reinforce the hat with an extra layer of paper where you’ll attach heavier items.
Hat Isn’t Standing Out
- Contrast and Complement: Use contrasting colors or complementary shades to make elements pop. For example, a black hat with a bright red band will be more striking than a monochrome design.
- Layer Up: Add layers of paper or different materials to make a 3D effect that adds depth and interest to your hat.
By anticipating issues and being creative, you ensure your paper hat-making success. Don’t fear experimenting with the best solutions. Enjoy the process and unique creations.
Sustainability Tips for Paper Hats
When crafting paper hats, it’s important to consider the environmental impact of the materials and methods you use. Here are some tips to make your paper hat project more sustainable:
- Use Recycled Paper: Opt for paper that has been recycled or is marked as eco-friendly. This can include old newspapers, magazines, or even scrap paper from previous projects.
- Reuse and Repurpose: Encourage readers to think of ways to reuse their paper hats. For example, a party hat can later become a decorative piece or a playful toy for a pet.
- Biodegradable Decorations: Choose decorations that are biodegradable, such as leaves, flowers, or biodegradable glitter, to minimize waste.
- Avoid Plastic: Steer clear of plastic-based decorations and adhesives. Instead, use natural materials like twine or water-based glues.
- Educate on Disposal: Provide information on how to properly dispose of the paper hats when they’re no longer needed, such as recycling or composting if appropriate.
By following these sustainability tips, you’ll not only make a fun craft but also contribute to a healthier planet.
Historical Context of Paper Hats
Paper hats have a rich history and have been used in various cultures for centuries. Here’s a brief overview:
- Ancient Times: In ancient China, paper was used to make hats for both practical and ceremonial purposes. The tradition of folding paper into intricate shapes, including hats, is believed to have originated there.
- Middle Ages: In Europe, paper was a valuable commodity, and hats were often made from less expensive materials. However, paper hats were sometimes used in festivities and celebrations.
- Modern Day: Today, paper hats are commonly seen at parties, especially New Year’s Eve and birthday celebrations. They have become a symbol of festivity and are often used as a fun, disposable accessory.
Understanding the historical context of paper hats can add depth to your craft and provide readers with a greater appreciation for this simple yet significant item. Happy crafting and learning!
FAQs About Making Paper Hats
When it comes to crafting paper hats, several questions often arise. Here’s a helpful FAQ section to address those common queries and provide clear, reliable answers.
How do I choose the right paper?
Quality: Opt for sturdy paper like cardstock for durability. Size: Larger sheets allow for bigger hats; adjust based on the wearer’s head size. Type: Consider the occasion; use colorful or patterned paper for festive hats.
What if my hat doesn’t fit properly?
Adjust the Size: Measure the head circumference and add an inch for overlap. Use Flexible Closures: Incorporate string ties or adjustable tabs for a better fit.
Can I make my paper hat waterproof?
Wax Paper: Use wax paper as a base for slight water resistance. Clear Tape: Cover the hat in clear tape, but this may affect recyclability.
How can I make my paper hat stand out?
Bold Colors: Choose vibrant colors or patterns. Unique Shapes: Experiment with unconventional hat shapes. 3D Elements: Add layers or pop-up features for a three-dimensional effect.
How do I keep my hat from falling apart?
Reinforce Folds: Use a ruler to crease folds sharply. Proper Adhesive: Select the right glue or tape based on the decoration’s weight.
By incorporating these FAQs into your post, you’ll provide valuable insights that enhance the reader’s experience and ensure their paper hat-making is both enjoyable and successful.
25 Easy Paper Hats to Make for All Ages!
Discover how to make 25 easy paper hats in just 5 minutes with our fun and simple DIY guide suitable for all ages!
1. How to Make a Paper Hat – Step by Step
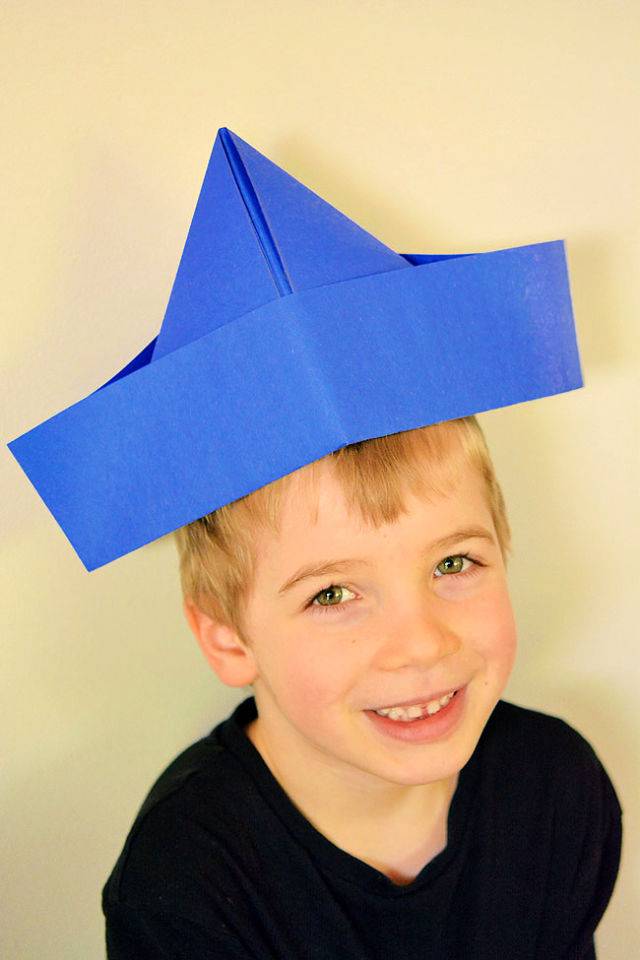
Immerse yourself in a simple and delightful DIY experience by making paper hats. All you need is 5 minutes and two sheets of construction paper to dive into this fun activity, which is perfect for adding a touch of creativity to parties, playtime, or even costumes.
The process is straightforward, featuring an easy step-by-step guide or video tutorial to aid your crafting journey. From bright-colored paper to vibrant markers, pencil crayons, and stickers, you can make your paper hat as personalized as you like.
This craft is suitable for all age groups, with younger kids potentially requiring some assistance. So why wait? Embark on this exciting DIY project today, and add a unique touch to your events or playful moments! onelittleproject
2. Make Your Own Origami Pirate Hat
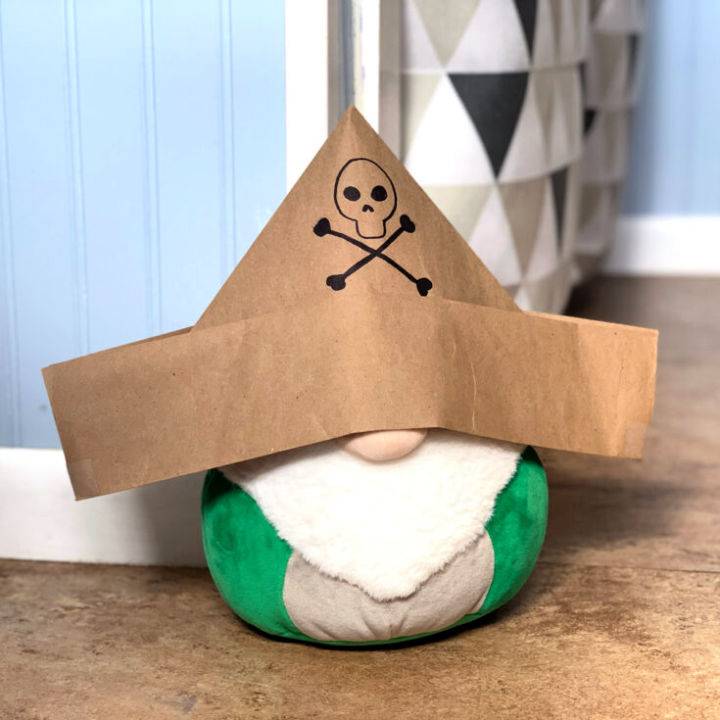
Bring the thrilling tales of pirate adventures to life with an easy DIY origami pirate hat project! All you need is a large rectangular piece of craft paper, a pencil, a black marker, and scotch tape. This activity offers the perfect blend of hands-on craft and imaginative play, making it a fun summer activity for kids.
This step-by-step guide makes the process easy, resulting in a Bicorn-style hat perfect for pretend sword fights and treasure hunting. With just a few folds and creases, you can convert an ordinary piece of paper into a part of a pirate costume. So hoist up the anchor, and get ready for a swashbuckling time with this simple origami pirate hat project! backyardsummer
3. Mini Fruit-Inspired Party Hats
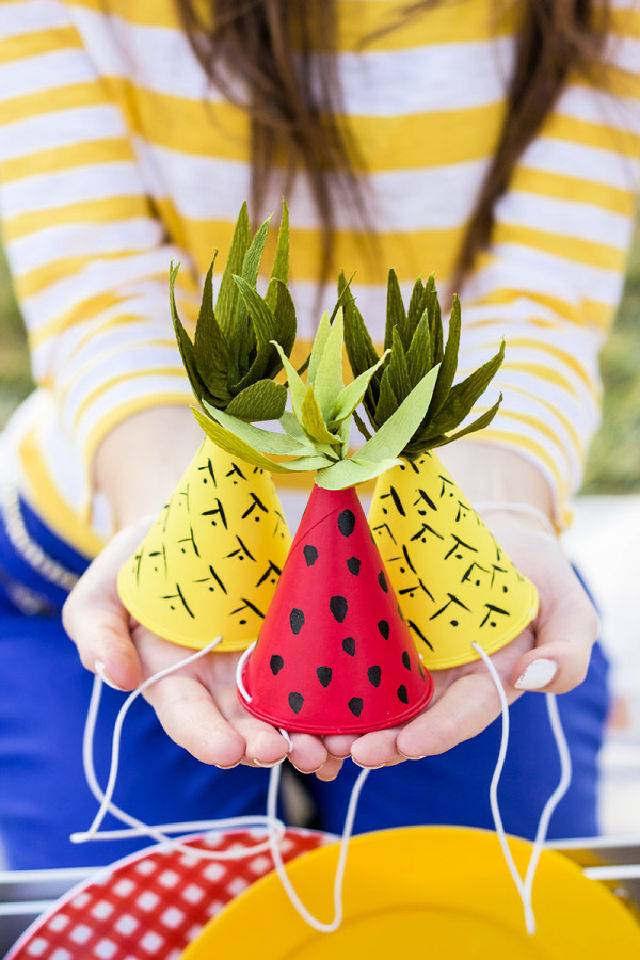
Explore creative party accessories with these adorable DIY fruit-inspired mini-party hats. These hats are crafted using budget-friendly paper cone cups, perfect for picnics and fruit-themed birthday celebrations. You can transform these cones into vibrant strawberries and pineapples with craft paint and some green crepe paper.
The preparation process is simple and allows for a lot of fun. Crafting these hats not only adds a unique touch to your celebrations but also serves as a fantastic creative outlet. Moreover, they can be utilized as decorative pieces in children’s rooms post-party. Begin your DIY journey today and add fruity fun to your celebrations! studiodiy
4. Wonderful DIY Paper Hats for Kid’s
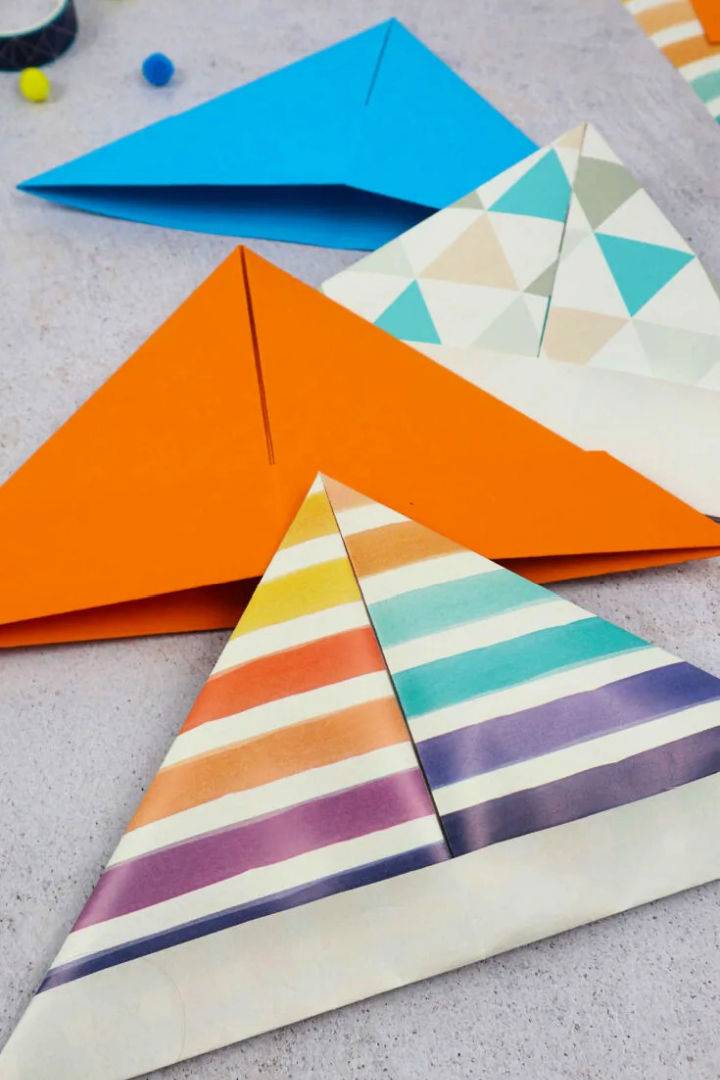
Revitalize the magic of childhood with a fun DIY project that’s as easy as folding a piece of paper! Discover the joy of making unique paper hats, ideal for kids’ parties, recitals, and adventurous play.
Using just rectangular paper sheets (A4, A3, or A2) and a touch of creativity, these hats can be made in an instant. Jazz them with craft pompoms, washi tape, letter stickers, and decorative glue.
Every paper hat can be personalized to the creator’s preference, making them a great activity for kids. Dive into this easy, cost-effective, and engaging project and relive your childhood while engaging young minds in creativity. craftsyhacks
5. Making a Paper Graduation Cap

Make an unforgettable graduation surprise with this DIY gift box project. This instructional guide will instruct you how to craft a mini box replicating a graduate’s mortarboard and tassel using paper in their school color. With a template to download and print, cutting, folding, and sticking, you’ll transform a round box into a unique keepsake, perfect for hiding sweet treats or a class ring.
The envelope on top is ideal for stashing more substantial gifts. This personalized creation adds a heartfelt touch to your graduation gift and is a delightful memento of this significant milestone. Craft your graduation gift box today and honor your graduate’s accomplishment especially. marthastewart
6. How to Make a Birthday Party Paper Hat
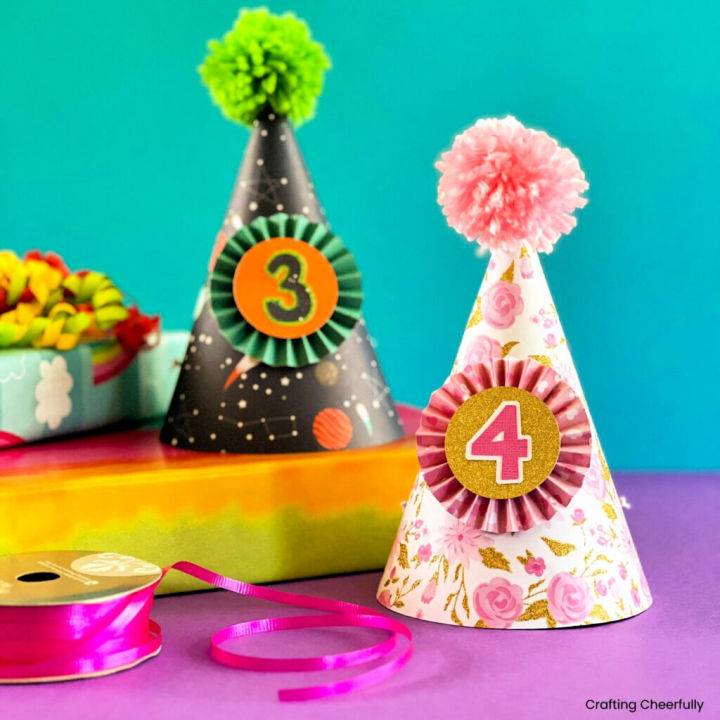
Craft a customized DIY birthday party hat using your imagination and a selection of scrapbook paper and yarn! With the flexibility to match any party theme, these DIY hats make an outstanding addition to the celebratory atmosphere. Enjoy crafting your unique hat with the help of the free template, and SVG cut file.
This project can be a cherished keepsake for the birthday boy or girl, personalized with the year they celebrate. Or, make it more inclusive by making a hat for each guest! Utilizing scrapbook paper and yarn, you’ll be amazed at how swiftly these hats come together.
Whether it’s a Winnie the Pooh-themed party or a Woodland Animal Party, these hats can be customized to fit your theme perfectly. Get started today and add a personalized charm to your party with these delightful DIY party hats. craftingcheerfully
7. Make a Pikachu Paper Hat – Free Printable Template
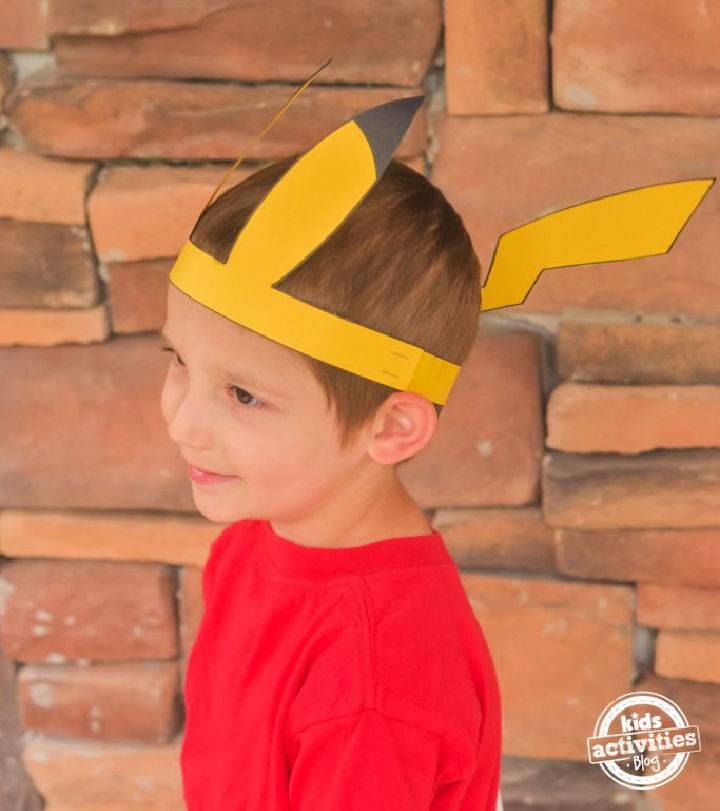
Showcase your passion for Pokemon with a DIY Pikachu hat! A playful paper craft perfect for kids and Pokemon fans alike, this hat is easily crafted using yellow, black, and brown cardstock, scissors, a stapler, glue, and a sharpie. Download and print the Pikachu hat template, or make your own, then follow the step-by-step instructions to draw, cut, and assemble this lovable accessory.
The distinctive Pikachu ears and lightning-bolt tail add an exciting twist to this simple project, making it a fun activity for the home or classroom. It’s not just a craft; it’s a delightful expression of your ‘pika pika’ side! Make your own Pikachu hat and embrace the joy of Pokemon crafting today. kidsactivitiesblog
8. Simple DIY Paper Hat for Columbus Day
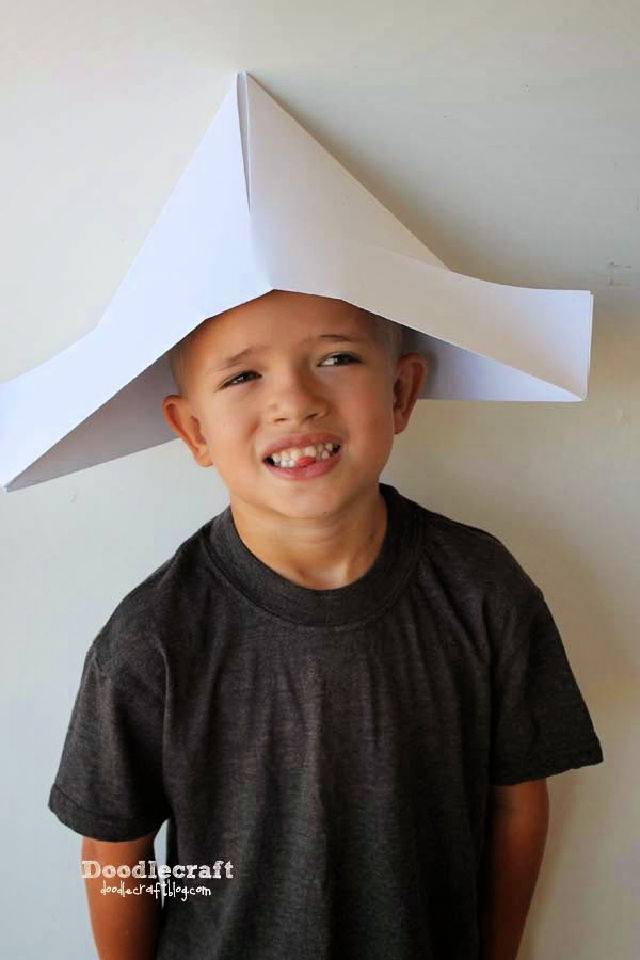
Celebrate Columbus Day by making fun, playful DIY paper hat origami! This simple and creative craft is perfect for engaging children’s imaginations while marking this momentous day. All you need is a sizable piece of paper like 18″ x24″ construction paper or a newspaper. Follow the easy folding steps provided:
- Fold the paper half the shorter way.
- Make a gentle center fold.
- Line up the corners to this center.
- Fold up the flaps from the bottom.
Once done, the hat is ready to wear! Add your personal touch by decorating with markers or feathers. Enjoy this simple yet entertaining activity, sparking creativity and enjoyment for kids and adults alike! doodlecraft
9. How to Make a Newspaper Hat
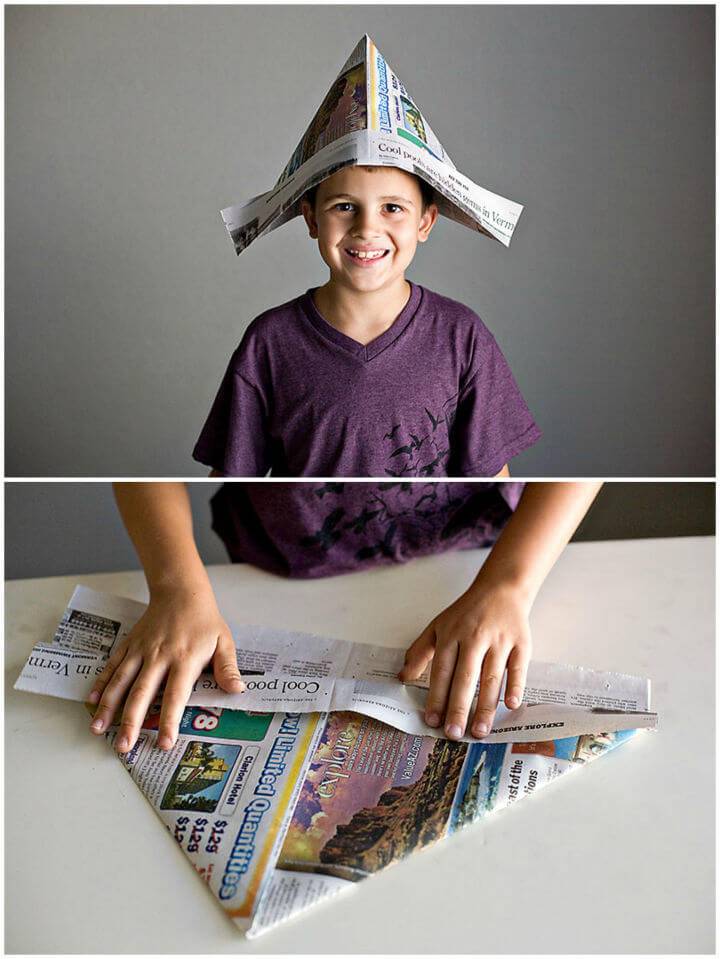
Unleash your child’s creativity with the simple, timeless art of newspaper hat-making. This engaging DIY activity can morph ordinary kids into exciting characters – sailors, soldiers, pirates, and more. All you require is a sheet of newspaper and a keen imagination. Carefully follow the straightforward steps to fold your newspaper into a classic hat, adding an element of fun to your child’s playtime.
Beware, though, newspaper ink may rub off onto hands and furniture. Adjust the hat size as needed by trimming the non-folded edges. With a little imagination, this versatile hat can transform into various objects, including a fireman’s hat and even a paper boat.
For an added twist, tear the sides and the top to make a life jacket – adding more layers to your imaginative story. Transform your reading material into a source of endless fun today with this charming newspaper hat activity. Remember, newspapers aren’t just for reading! allfortheboys
10. Cheap DIY Newspaper Party Hat
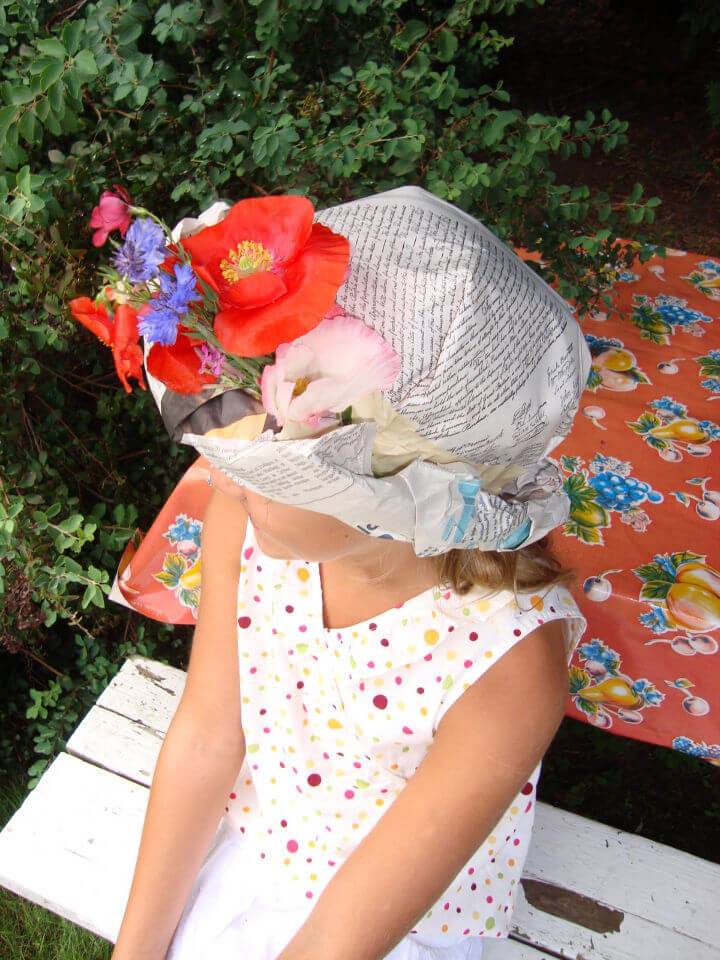
Delight in the joy of making unique, environmentally friendly DIY party hats out of recycled newspapers for your next celebration! This tutorial lets you craft different headpieces from a few simple materials: newspaper, masking tape, and flowers.
You can make a customized hat by gently molding a few sheets of newspaper over your head and securing it with tape. Add a vibrant touch to your creations by incorporating fresh or paper flowers.
These hats serve as a fun activity and promote recycling and composting. Making these hats is a pleasure, especially knowing they can be disposed of responsibly after your event. Engage in this eco-friendly project and amplify the fun at your next party! mayamade
11. Making a Paper Hat With Written Instructions

Embrace your creativity and stand out with this unique DIY paper hat. With only a large piece of paper required, this project is not just cost-effective but also a fun activity for all ages. Whether you prefer an adult-sized hat, which requires an 18″ x 24″ packing paper sheet, or a kid-sized one made from a 15″ x 20″ piece, the choice is yours.
Newspaper or wrapping paper can be an alternative, but be mindful of newsprint ink. After cutting your paper to size, you’ll enjoy a straightforward 6-step process that includes folding the paper and corners, making the ‘brim,’ customizing your hat with cool designs, and, finally, wearing it with pride.
Unleash your artistic side using paint, markers, stamps, or washi tape to decorate. This paper hat is fun to make and adds a touch of fancy and individuality to any outfit. So, why wait? Start crafting your very own hip paper hat today! instructables
12. Perfect Paper Hat for Parties
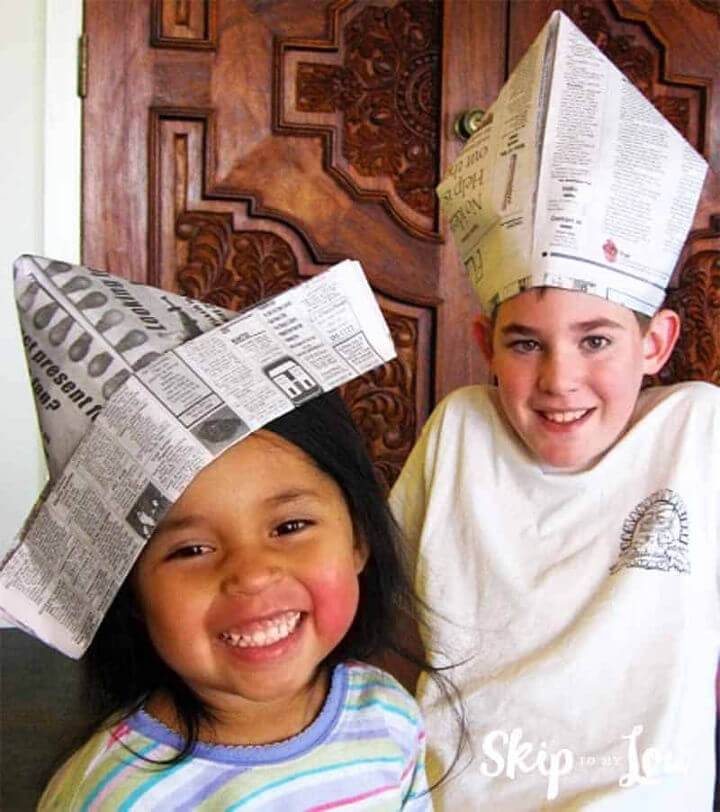
Make the party even more memorable with a unique DIY hat – it’s sure to be a hit! It is perfect for New Year’s Eve or any festive gathering! This fun and simple project will entertain kids and adults, adding to the celebratory mood. You can craft a sailor, pirate, or bishop’s hat using just a newspaper and following straightforward folding instructions.
This creative activity helps alleviate boredom and adds a unique touch to your party costumes. Moreover, you can further experiment and modify the design according to your preference. Learn to make your paper hat today, and get ready to spark joy at your next party! skiptomylou
13. Cool DIY Paper Leprechaun Hat
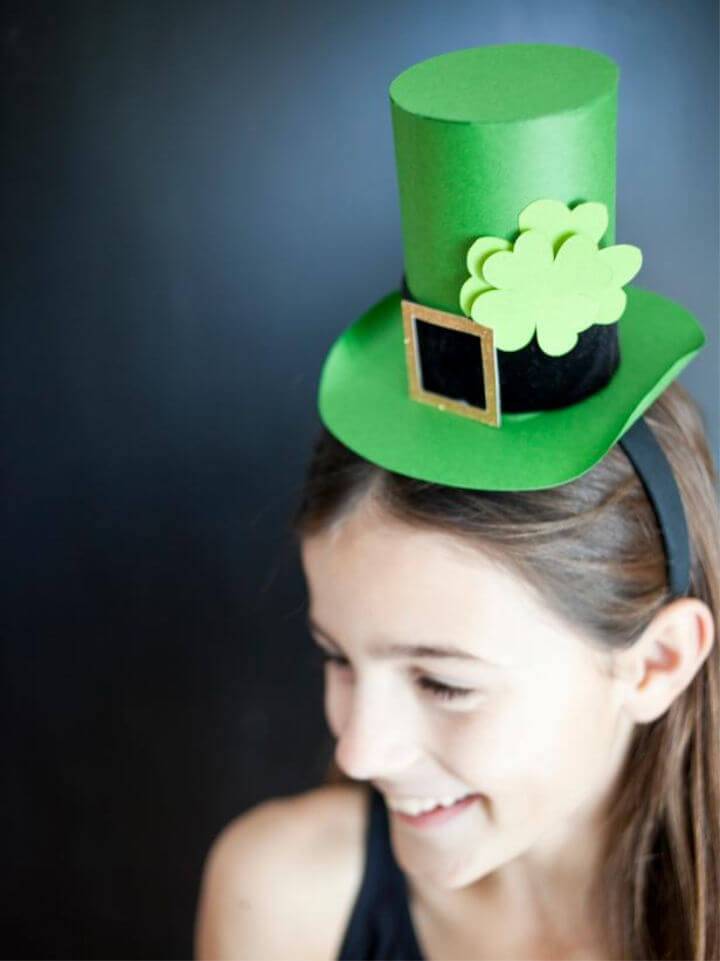
Commemorate St. Patrick’s Day this year with your handcrafted leprechaun hat. You can make a unique festive DIY accessory with the simple use of green card stock, a 3-inch hole punch, a headband, and a few other supplies. Start by downloading the leprechaun hat pattern, cut out the pieces, and construct your hat.
Don’t forget to add flair with a wide black ribbon and a square-shaped gold paper buckle. Attach your completed hat to a plain headband, and you are ready to flaunt your festive look! This project is an engaging way to get into the St. Patrick’s Day spirit and an opportunity to showcase your creativity and crafting skills. hgtv
14. Quick and Easy Tissue Paper Chef Hat
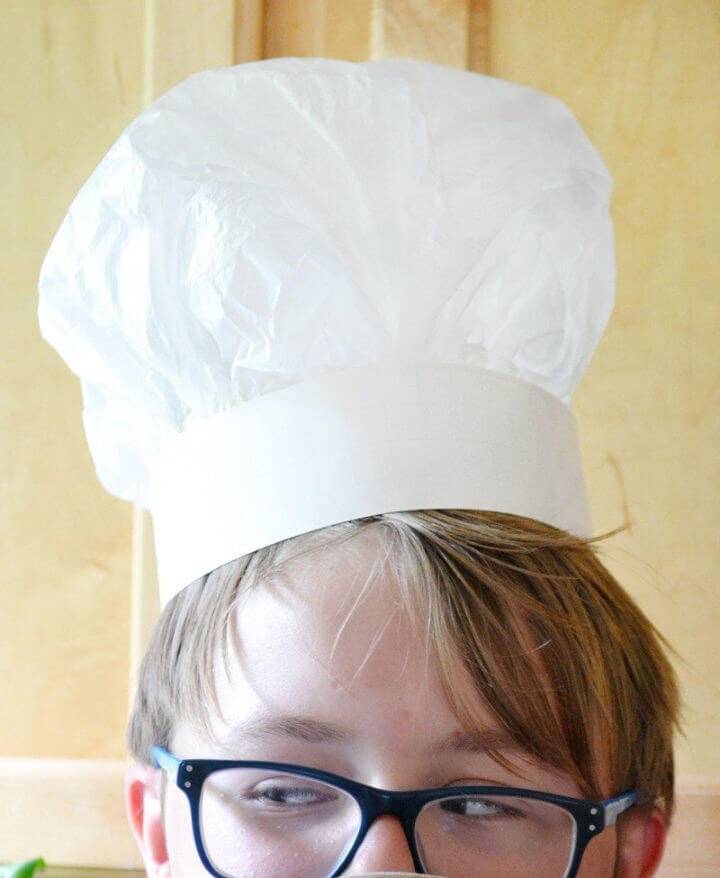
Capture your children in a creative culinary journey while promoting a healthy relationship with food, and make your chef hat in minutes with this DIY tissue paper project. It is perfect for budding chefs of all ages! This quick, fun, and cost-effective project uses readily available materials – tissue paper, copy paper, and tape.
Start by measuring the child’s head circumference using a strip of card stock. Pleat and attach a piece of tissue paper around it, adjusting the strap to fit the head snugly. The step-by-step instructions provided make the process straightforward yet thrilling for the children.
This chef hat is a great addition to children’s pretend play kitchen set or a fun element for their cooking adventures. Encourage your kids’ creativity and help them embrace the joy of making and making in the kitchen. This project is the perfect fusion of craft and cooking – let the culinary adventures begin! nelliebellie
15. How to Make a Paper Hat for Kids
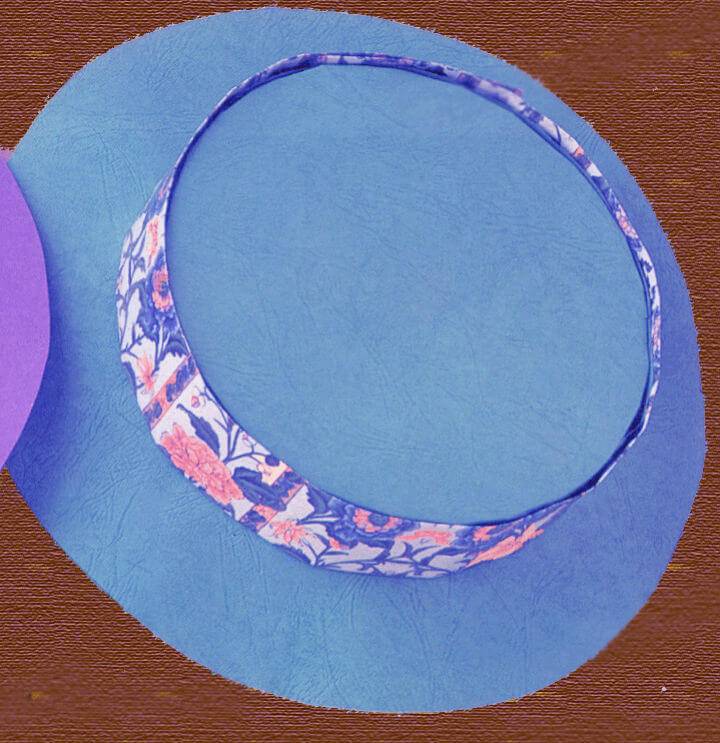
Engage your kids in fun and stimulating DIY craft project – making a simple yet visually appealing hat using chart paper. This interactive activity not only helps in fostering creativity but also enhances their fine motor skills. You would need a couple of chart papers in any color, glue, scissors, and a pencil.
The process involves drawing and cutting out circles of specific diameters from the chart paper, making fringes, and then gluing them together in a specific manner. You can embellish the hat with a band of appealing wrapping paper to add a finishing touch. Make your children’s leisure time productive and enjoyable with this creative DIY chart paper hat project. webindia
16. Pretty DIY Paper Party Top Hat
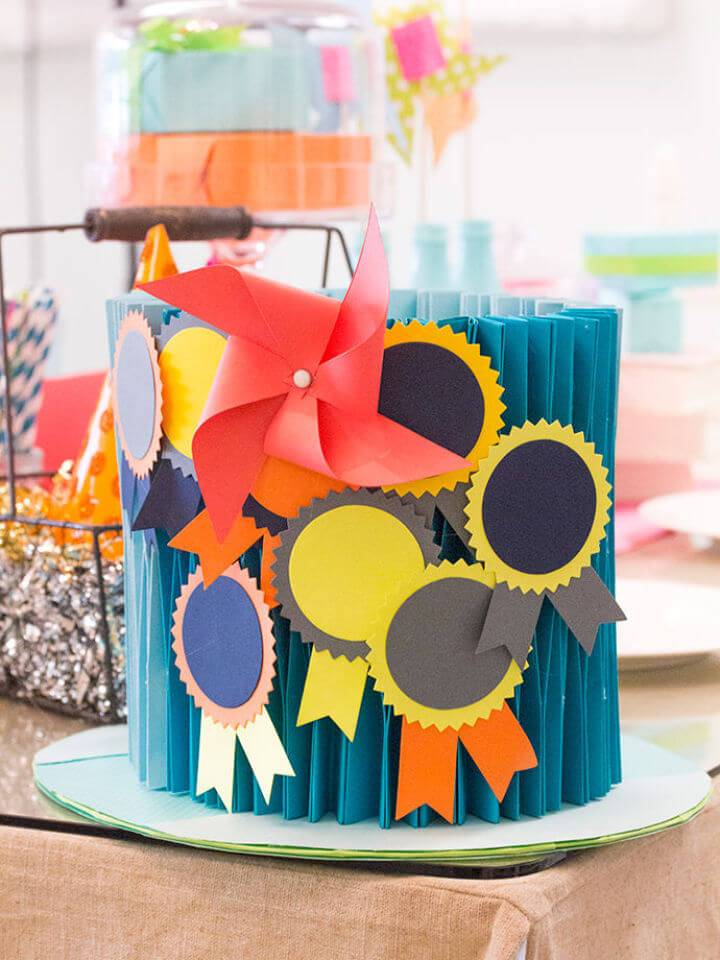
Experience the joy of crafting with this easy-to-follow guide for making a unique and eye-catching paper-smocked top hat. With the precision of the Sizzix Big Shot Plus, crafting becomes a fun and stress-free process.
This tool effortlessly cuts through multiple sheets of scrapbooking paper or cardstock, resulting in perfect shapes every time. Other essential materials include a hot glue gun, spray adhesive, and scrap cardboard.
The process is simplified further with a step-by-step video and a downloadable template to ensure your project succeeds. This project promises to be a showstopper at any party and provides a creative outlet for the artist within you. So grab your materials and start crafting this beautiful paper-smocked top hat today! handmadecharlotte
17. Make Paper Flower Party Hats
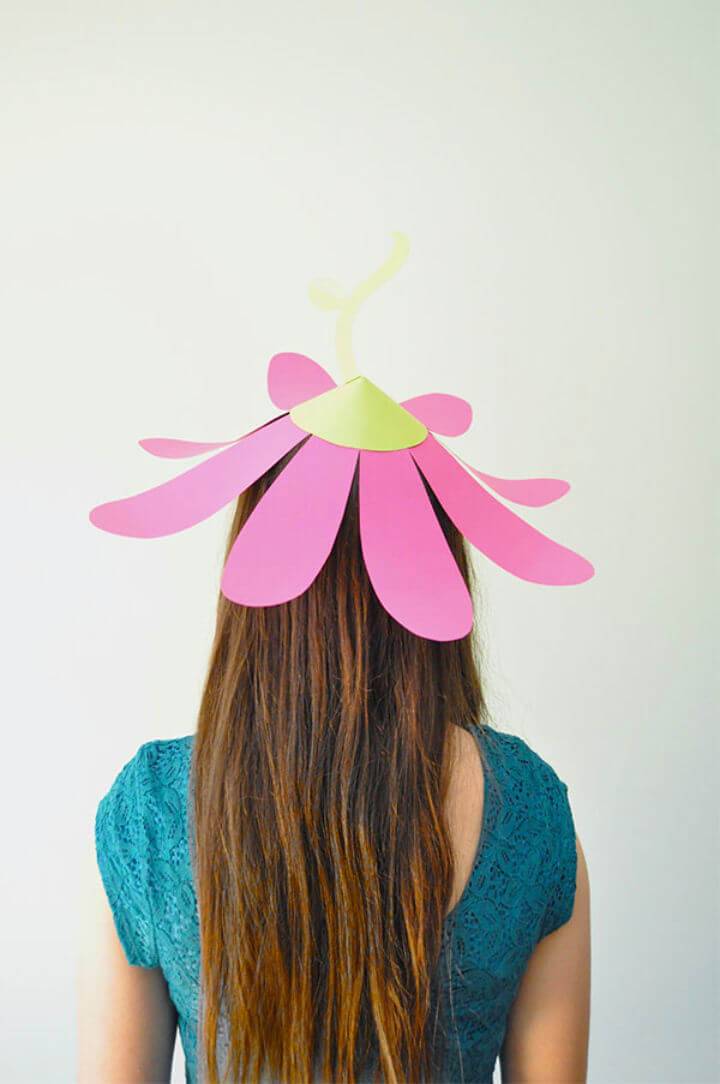
Invite the spring season into your space by hosting an enchanting ‘April Showers Bring May Flowers’ themed party, complete with stunning DIY paper flower hats. With this project, your guests will bloom like a bouquet, adding a unique twist to your group photographs.
The materials needed include green and petal-colored cardstock, a pencil, scissors, a hot glue gun, an elastic cord, and optional washi tape. Begin by making the hat base using a 5″ circle of green cardstock, adding stem, leaf, and petal details.
For a delightful finishing touch, gently curl the petals upwards for a realistic effect. Secure your hat with an elastic cord, customizing the length for a perfect fit. Make as many hats as needed and bring your springtime party to life! ohhappyday
18. Uncle Sam’s Paper Hat With Cricut
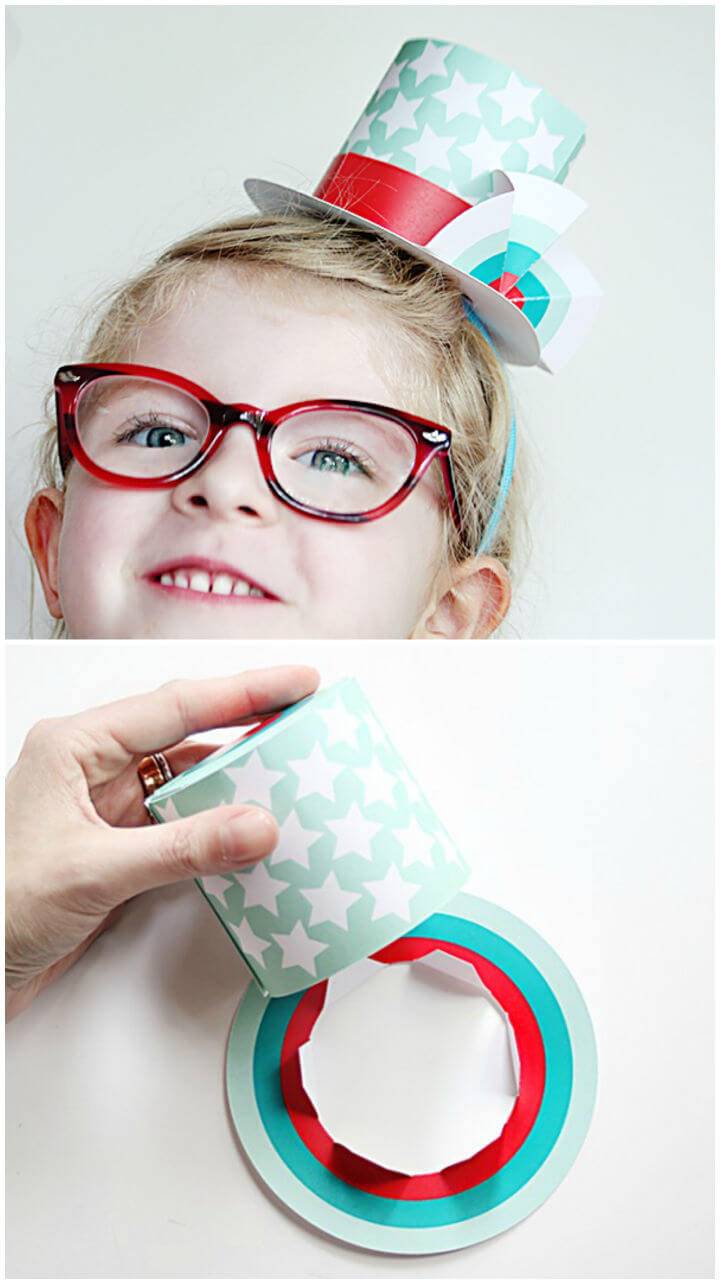
Take out a fun-filled creative journey with a DIY mini top hat project, perfect for adding a playful touch to your 4th of July celebrations. This dapper Uncle Sam-inspired hat, complete with mini bunting, is a fashion statement that all ages can appreciate.
Craft several of these festive pieces for your friends, or assemble them at your Independence Day party as a group activity. You’ll need the Cricut Explore machine, Cricut Design Space software, and some basic crafting materials like cardstock, glue, and a headband or other accessory to attach to the hat.
This project offers a patriotic piece of wearable art that will make your 4th of July party truly memorable. It’s not just about making a hat – it’s about making memories and sharing joy through crafty exploration. Begin your creative journey today, and let the festive spirit take flight. smallforbig
19. Mini Paper Flower Party Hats

Take your party decor to new heights with a DIY project for paper flower party hats. Perfect for springtime gatherings, these hats are vibrant, festive, and simple to make. All you need are basic materials, including a party hat template, colored and crepe paper, jewelry wire, elastic, scissors, an X-Acto knife, and tape.
Follow the step-by-step instructions to assemble the hat and make stunning crepe paper flowers attached to the hat using the jewelry wire. This crafting activity offers the opportunity to tailor the color and design of the hats to your party’s theme, ensuring a unique and personalized celebration. With their striking appearance and the joy of handcrafting, these paper flower party hats will surely be a hit at your next event. ohhappyday
20. Awesome DIY Paper Hat for Party

Let the party begin with a DIY twist – make your awesome paper hats! These fun and creative hats are simple to make, with materials including colored or patterned cardstock, a template, scissors, a Xacto knife, and some string or ribbon. This step-by-step guide lets you quickly transform cardstock into a delightful hat without any glue or tape.
Add decorative touches, like tissue paper pompoms or fringe, for extra flair. Customizing your hat lets you match any party theme perfectly. Crafting paper party hats can turn any event into a vibrant and festive celebration. Enjoy the fun and satisfaction of making these party hats, and share the joy with your friends and loved ones! ohemcee
21. How to Make a Pirate Paper Hat
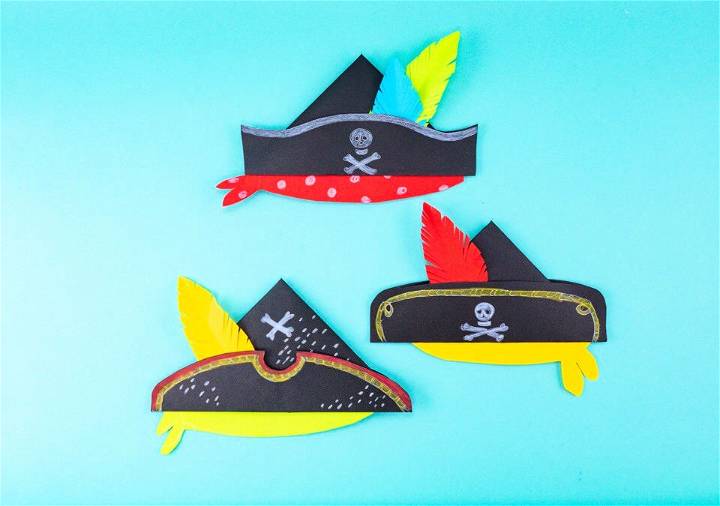
Ahoy matey, let’s make an adventure with this DIY pirate paper hat! You only need two sheets of black construction paper, some colorful paper for feathers, pencil crayons, a glue stick, scissors, and tape to embark on this artistic journey. This fun project involves taping, folding, trimming, and decorating your hat with beautiful features to make it unique.
Give your hat an authentic pirate feel with a skull or fancy gold trim drawn with pencil crayons. Add some extra charm by crafting feathers from construction paper and attaching them to the hat’s brim.
Finalize your masterpiece with a bandana and a piece of yarn to secure the hat on your little pirate’s head. It’s not just about crafting; it’s an invitation to make a world of pirate adventures! Remember, every pirate hat you craft is a ticket to an imaginative journey across the high seas! supersimple
22. Make Your Own Paper Party Hat
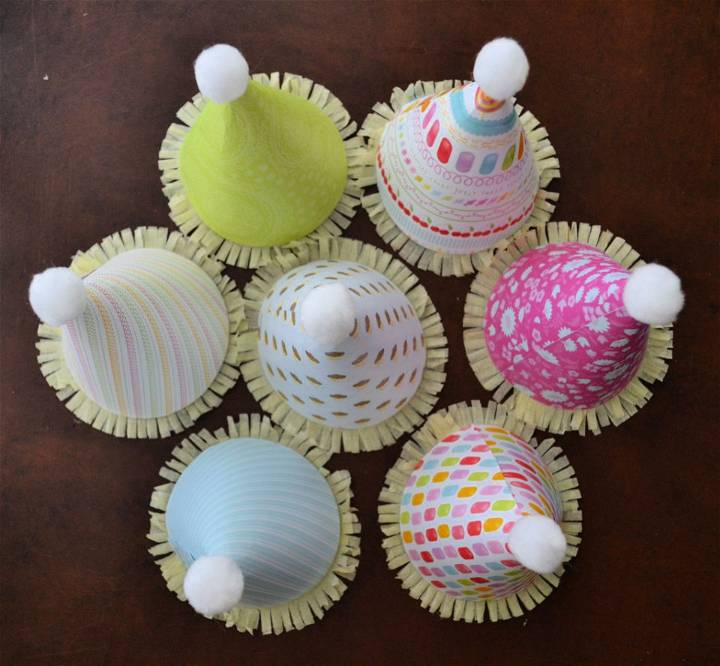
Unshackle the power of scrapbook paper to craft stunning DIY paper party hats, making your gatherings memorable. Start with 12×12 scrapbook cardstock, add fringed crepe paper, pompoms, elastic cording, and voila! – you’ve fashioned a customized piece of party decor.
With a little time, patience, and hot glue, you can make hats that outshine store-bought ones and perfectly match your party theme. This project demands minimal tools such as staplers, scissors, and sewing machines, proving how effortlessly a regular craft session can transform into a fun-filled, festive preparation. So, gear up to glamorize your parties with these vibrant, custom-made hats that promise to turn heads and light up smiles. livingwellspending
23. Handmade Paper Hat and Leprechaun Trap
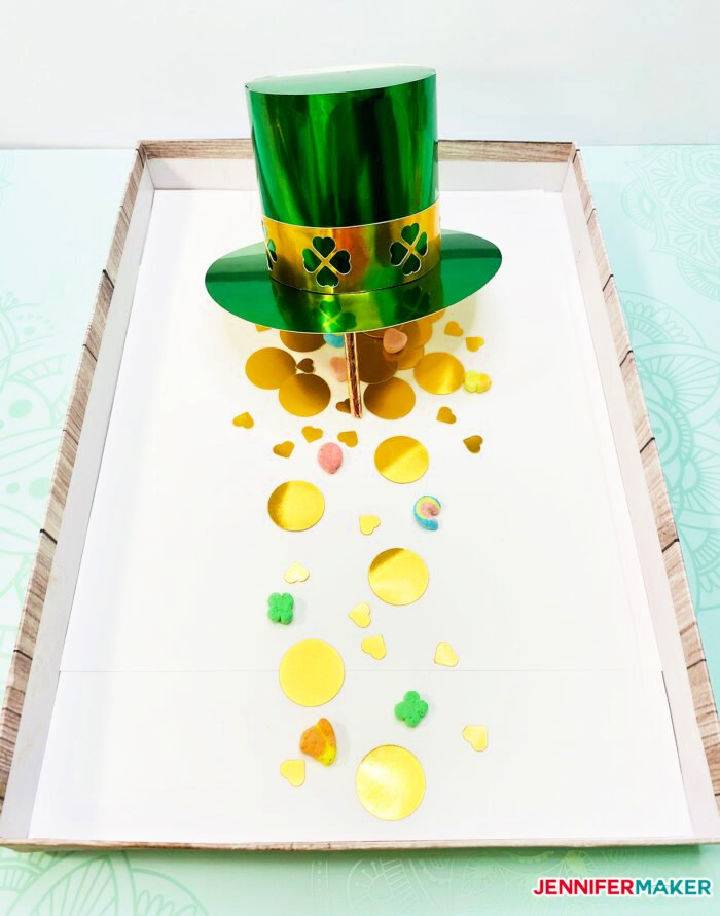
Experience the joy of festive accessorizing and St. Patrick’s Day fun with this creative project. With easy-to-follow instructions, you’ll learn how to make a DIY mini paper hat fascinator, perfect for celebrating any holiday. But there’s a twist – this adorable hat doubles as a leprechaun trap, adding a touch of enchanting playfulness to your St. Patrick’s Day festivities.
Made from simple materials such as cardstock, tacky glue, and everyday household items, this project is a great way to spend cherished time with your family while nurturing your craft skills. Whether you’re accessorizing for a celebration or setting a whimsical trap for those elusive leprechauns, this project is a unique and fun addition to your holiday crafts. jennifermaker
24. News Paper Hat Craft for Kids
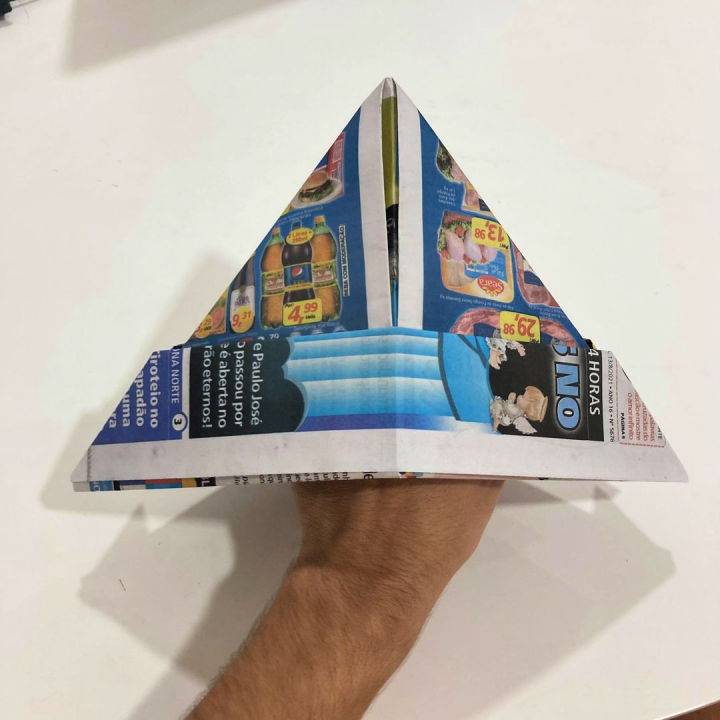
This engaging DIY paper hat activity brings out the creative side in kids! Learn how to craft unique and fun origami hats from nothing but newspapers. This affordable and recyclable project offers a fantastic opportunity to teach kids about reusing materials and sparking their imagination.
You only need a half-sheet of newspaper and possibly some hot glue or masking tape for stability, and your children can delve into the art of hat-making. Folding, creasing, and shaping paper, they’ll develop their origami skills while crafting their paper hats.
From sailor hats to alpine or pirate styles, this activity promises a world of artistic exploration. Personalize hats with different paper colors and patterns, and let their creativity shine. Perfect for parties, playdates, or just a regular day at home! homify
25. DIY Paper Party Hats With Cricut
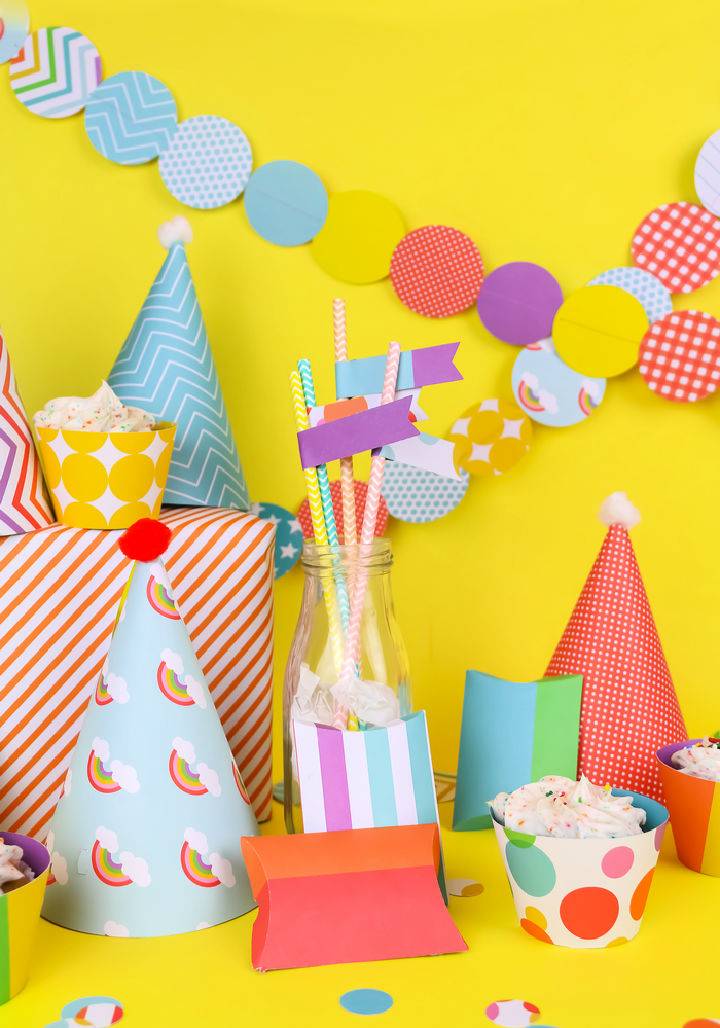
Elevate your next party with these DIY party hats, designed to be as silly as they are celebratory. Forget the store-bought versions and turn to your scrapbook paper pack and Cricut machine to make whimsical, coordinated hats for any occasion. With clear, easy-to-follow instructions, assembling these party hats is a breeze.
Not only does this project cut down on waste, but it also adds a personalized touch to your party decor. Utilize the Design Space canvas to make multiple party elements, from cupcake wrappers to garlands, all from a single paper pack.
Top them off with a pompom and attach an elastic cord for a comfortable fit. Craft these colorful hats in any pattern that suits your party’s theme and witness the delight of your guests. Party planning has never been this creative and economical. madincrafts
Conclusion:
In conclusion, mastering the art of making 25 easy paper hats to make in 5 minutes for all ages can add a touch of fun and creativity to any occasion. From selecting the right materials to customizing each hat for special events, our comprehensive guide ensures that anyone can craft stunning paper hats with ease.
If you’ve encountered common issues like fit or durability, our troubleshooting tips have got you covered. Remember, making paper hats is not just an activity but an eco-friendly way to bring joy and color to your celebrations. Now that you’re equipped with the knowledge and inspiration, it’s time to turn ordinary paper into extraordinary creations that are sure to impress!


