Welcome to the art of corner to corner crochet (c2c crochet), which can transform your crafting experience. C2C crochet, a technique that allows you to create colorful, textured projects, starts from one corner and progresses diagonally to the opposite. This method is ideal for blankets, scarves, and graphgans, offering a unique approach to crochet patterns that’s both engaging and satisfying for crafters.
Mastering C2C crochet opens up a world of possibilities, from intricate pixelated designs to simple, elegant creations. By learning C2C increases, decreases, and color changes, you can craft a range of items, large or small. With this step-by-step c2c crochet pattern and detailed instructions, you’ll gain the confidence to tackle any C2C project. Let’s get ready to explore the fundamentals of corner to corner crochet in the next section, where creativity meets skill in every stitch.

Why Learn Corner-to-Corner Crochet (C2C)?
Versatile Technique for Varied Projects:
- Wide Range of Items: Once you’ve mastered C2C crochet, you can create a vast array of items including blankets, scarves, shawls, and even intricate graphgans that feature detailed designs or characters.
- Personalized Gifts: C2C crochet is perfect for making customized gifts that are both personal and practical. Imagine gifting a handmade blanket with someone’s favorite character or design.
Creative Freedom with Designs:
- Pixel Art Creations: The pixelated nature of C2C makes it ideal for translating graphic designs, logos, or images into crochet form, giving you the creative freedom to craft unique pieces.
- Design Adaptability: You can modify or create your own graphs to crochet anything from simple patterns to complex images.
Flexible Sizing Options:
- Adjustable Dimensions: C2C crochet projects are easily scalable. By simply increasing or decreasing the number of tiles, you can adjust the size of your project to suit your needs.
- Shape Variations: Whether you’re aiming for a square or a rectangle, C2C allows you to achieve your desired shape with straightforward adjustments to the increase and decrease phases.
Efficient Use of Yarn:
- Stash Buster: C2C crochet is excellent for using up leftover yarn from other projects, making it a cost-effective and environmentally friendly crafting option.
- Variegated Yarn Showcase: If you have multicolored yarn, C2C crochet can beautifully display the color transitions without needing complex stitch patterns.
Skill Building:
- Enhanced Technique: For beginners and seasoned crocheters alike, C2C crochet is an opportunity to enhance your skills and learn a new crochet technique.
- Foundation for Advanced Projects: Mastering C2C can act as a stepping stone to more advanced crochet techniques and intricate projects.
Now that we’ve outlined the benefits of learning corner-to-corner crochet, let’s delve into the foundational steps to get you started on your C2C journey. Remember, patience and practice are key. Happy crocheting!
Understanding the Corner-to-Corner (C2C) Technique
Corner-to-Corner crochet, commonly abbreviated as C2C, is a unique method of crocheting that allows you to work your project in a diagonal fashion, starting from one corner and ending at the opposite corner. This technique creates a textured, tiled appearance that is perfect for graphgans or projects that involve color work. Below, we’ll explore the basics of C2C crochet in a way that’s easy to grasp and apply.
Basic Skills to Know First
Before diving into the C2C method, let’s ensure you’re familiar with the fundamental crochet stitches that form the building blocks of this technique:
- ch – Chain: Chain stitches create the foundation of your crochet work and are used in a turning chain to start each new row in C2C crochet.
- dc – Double Crochet: This is the primary stitch used in C2C crochet, forming the “tiles” that compose the fabric of your project.
- sl st – Slip Stitch: Slip stitches are used to seamlessly connect one tile to the next in C2C crochet.
- ch-3-sp – Chain 3 Space: This refers to the gap created by chain 3 and the first double crochet of a tile. Understanding this will be crucial as we proceed with the tutorial.
Other stitches
Occasionally, you might encounter C2C patterns that use half double crochet stitches (hdc) instead of double crochet stitches (dc), leading to a mini C2C variation with smaller tiles. For now, we’ll focus on the traditional double crochet-based C2C technique.
What Supplies Need
Gathering the right materials is the first step to a successful crochet project. Here’s what you’ll need for your practice swatch:
- Yarn: Any smooth, light-colored yarn in a DK or worsted weight is perfect for practice. Light colors help you see your stitches more clearly, which is especially helpful when learning a new technique.
- Crochet Hook: Select a hook that matches your yarn weight. A size H-8 (5.0 mm) hook is commonly used for worsted weight yarn.
- Stitch Marker: Use stitch markers to denote the right side of your first tile. This helps in identifying the bottom right corner of your C2C project.
- Scissors: For snipping yarn when changing colors or finishing off your work.
- Tapestry Needle: For weaving in ends upon completing your project.
Pattern Notes
- This pattern is written in US crochet terms.
- When looking at your project from the right side (RS), the initial tile will form the bottom-right corner.
- We’ll be working on a simple swatch to practice the technique, so don’t worry about gauge just yet.
How to C2C Crochet – Step by Step
Learn how to c2c crochet with a step-by-step tutorial:
Starting Off: Your First C2C Tile
- Begin with a slipknot on your hook and chain 6. Remember, the chain is your foundation, so keep your tension even.
- Perform a double crochet (dc) into the fourth chain from your hook. This creates the first “stitch” of your tile.
- Complete the tile by adding two more dc into the next two chains. You’ve now crafted your initial tile—your project’s cornerstone!
Expanding Your Project: Increasing Tiles
- As you turn your work, you’ll start a new row. Each row builds upon the previous, creating a diagonal expansion.
- Chain 6 to begin the next row, and repeat the process of double crocheting into the fourth chain from the hook.
- Join tiles by slip stitching into the ch-3 space of the previous tile, creating a seamless connection.
Growing Rows: Adding More Tiles
- Every row you start, you’re effectively increasing the width of your work by adding an additional tile.
- Start each new row by turning your work, chaining 6, and creating your first tile of the row.
- As you progress, it’s the repetition of these steps that will help you build the fabric of your crochet piece, one tile at a time.
Reaching the Halfway Point: Time to Decrease
- Upon reaching the desired project width, it’s time to decrease to start shaping the opposite corner of your piece.
- Begin the decrease row by slip stitching across the top of the last tile from the previous row.
- Chain 3 and work 3 dc into the ch-3 space. This sets up your first decrease tile, reducing the project’s width gradually.
Finishing Your C2C Creation
- Continue the pattern of decreasing tiles each row, matching the decrease on both sides to form the perfect diagonal.
- As you approach the final corner, you’ll notice your work naturally taking shape, with each row shorter than the last.
- Complete the last tile with the same ch-3 and 3 dc method, culminating in the creation of your corner-to-corner masterpiece.
Weaving in Those Ends: The Final Touch
Now that you’ve completed your C2C creation, it’s time to give it that polished look by weaving in the ends. This final step is crucial for ensuring the durability and neatness of your work. It’s simple:
- Cut the yarn, leaving a six-inch tail for weaving.
- Thread the tail onto a tapestry needle and weave it in and out of the backside of your stitches.
- Be careful not to distort the fabric’s tension as you secure the yarn tail.
- Once secure, trim any excess yarn close to your work.
By mastering these initial steps, you’ll have the foundation you need to tackle any C2C pattern. With practice, the rhythm of increasing and decreasing will become second nature, and the world of C2C will open up a universe of options for your crocheting patterns.
How To Read C2C Graphs
Some C2C crochet patterns come with detailed, spelled-out instructions, while others are presented as C2C graphs.
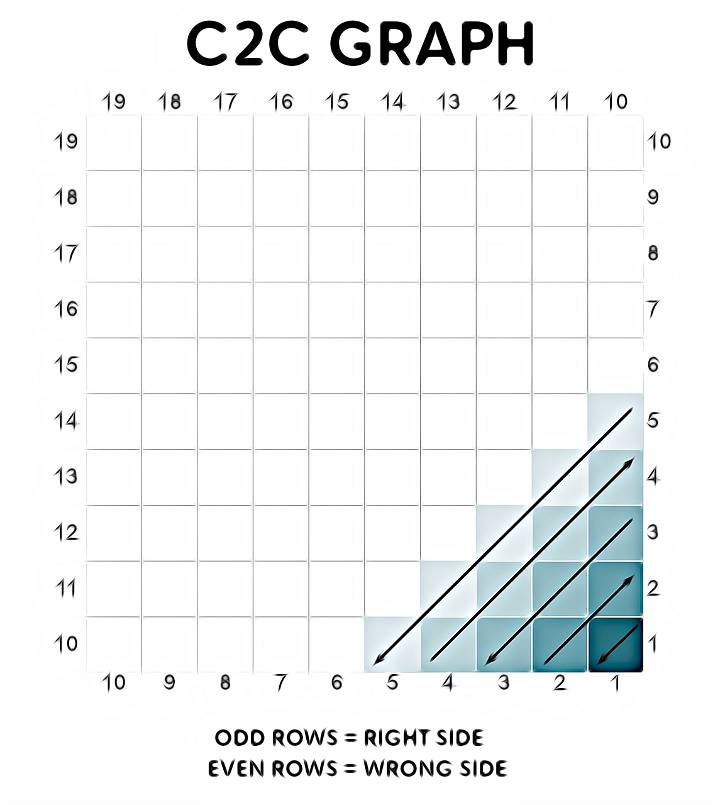
C2C graphs, also known as C2C charts, are visual representations with grids indicating the yarn colors for each tile. Each chart square corresponds to one C2C tile.
As you begin to work with C2C graphs, you’ll notice that each square can be a different color, depending on the design. It’s essential to plan your color changes in advance to ensure a smooth transition and an accurate depiction of the pattern.
C2C Crochet Graphs: How to Work and Track Progress
Master C2C crochet graphs to create vibrant patterns.
- Starting Point: Begin at the bottom-right corner and progress towards the top-left corner of your crochet design.
- Working Method: Crochet across the design in diagonal rows, following the pattern from the bottom-right to the top-left tile.
- Tracking Rows: Utilize the numbered sides of the graph to identify your current row.
- Staying Organized: Mark off completed rows with diagonal lines to easily see which sections have been finished.
Creating Custom C2C Charts
- Personalize Your Craft: Design original C2C crochet patterns using your own creations.
- Tools for Charting: Employ simple graph paper and colored pencils or use digital resources like Stitch Fiddle to bring your designs to life.
Crafting Rectangles Using the C2C Technique
As we are already familiar with crafting a C2C (corner-to-corner) square, you might wonder how to adapt this method to create a rectangular shape. Thankfully, the adjustment is quite clear.
The process for a square involves simultaneously increasing each side until the square reaches its desired width, then decreasing both sides to complete the shape. For a rectangle, the approach is slightly different.
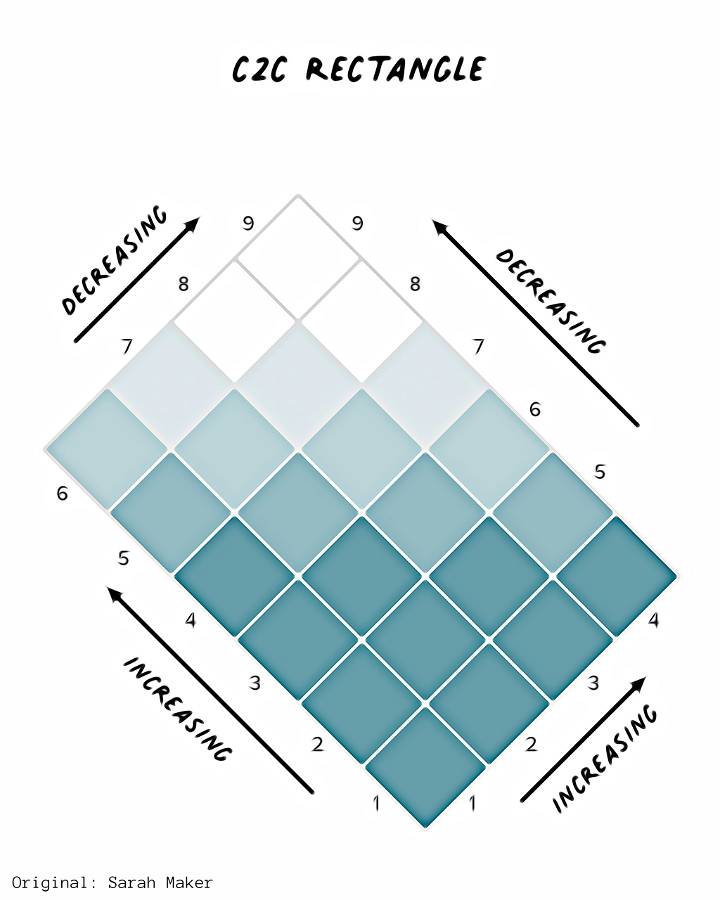
You’ll increase both sides until you reach the desired width at one corner of the rectangle. Then, you’ll begin decreasing on one side while continuing to increase on the other, elongating the piece without widening it further.
Once you reach the desired length at the next corner, you’ll decrease on both sides until the piece is finished.
Introducing Color Changes in C2C Crochet
The ability to switch colors seamlessly is one of the delightful aspects of C2C crochet, allowing for vibrant patterns and images. Color changes in C2C crochet are akin to those in traditional crochet.
To change colors, complete the final stitch in the current color until the final two loops remain on the hook. Let go of the old yarn, then draw through the new color through these loops to proceed with your work. Typically, you’ll change colors during the third double crochet of a tile, transitioning with a slip stitch into the new shade.
Managing Multiple Colors
When your C2C project includes a variety of colors, it’s crucial to prevent your yarn from becoming a tangled mess. Keeping organized is key.
Using small bobbins to sort your colors can be quite helpful. For an innovative approach, consider creating a DIY bobbin holder, following a guide tailored to C2C crochet.
Working with Large Color Blocks
In designs where a single color covers several rows, it’s not necessary to cut the yarn with each color transition.
Simply leave the yarn attached and pick it up again as needed in the subsequent row using the usual method for color changes.
Yarn Carrying Techniques
Minimizing the number of yarn changes can simplify your project. ‘Carrying’ the yarn across to its next point of use is an effective strategy. To do this, place the inactive yarn along the working row and crochet over it, concealing it within your stitches.
This technique is best for short distances, such as over one or two tiles, and is most effective when the carried yarn matches the color of the adjacent tiles.
Finishing Touches: Adding a Border to Your C2C Blanket
With all of your yarn ends neatly woven in, it’s time to give your corner-to-corner (C2C) creation the perfect finishing touch with a border.
A classic and straightforward choice is the single crochet border, which complements any C2C project beautifully. Begin by attaching your yarn at any corner using a slip stitch. Then proceed to single crochet around the entire perimeter of the blanket, maintaining an even distribution of stitches. A good rule of thumb is to place three single crochets for each tile you encounter. At every corner, work three single crochets to gracefully pivot your work.
For a more pronounced edge, consider adding another round of single or even double crochets. Continue in the same manner, placing one stitch into each of the previous round’s single crochets. Remember to include three stitches in the corner stitches to maintain the neat, crisp edges that help define the shape of your blanket.
Enhanced Corner-to-Corner Crochet (C2C) Guidelines
Maximize your corner-to-corner crochet skills with these refined tips. They’re designed to help you navigate common pitfalls and elevate the quality of your C2C creations.
- Pattern Visualization
- Print your C2C pattern chart to reference as you crochet.
- Employ highlighters or pens to mark the row you’re on, enhancing visibility of your current position. Alternatively, cross off completed rows for clear progress tracking.
- Color Management
- Arrange your multiple yarn colors on bobbins or clips for seamless organization and to prevent tangling.
- Avoid cutting the yarn with each color transition. If your pattern includes sizable color blocks, simply leave the yarn attached and resume using it as you progress.
- When encountering a color change, reintroduce the previous shade by employing the classic color-change method as you approach the relevant section.
- Yarn Carrying Technique
- Strategically carry your yarn to the next required section, minimizing the need for frequent color changes.
- This technique is best when shifting the yarn across one or two squares and when the yarn being carried is identical in color to the adjacent square.
Implement these strategies to refine your C2C crochet projects, leading to more efficient and visually appealing outcomes.
FAQs About Corner-to-Corner Crochet (C2C)
Get answers to frequently asked questions about corner-to-corner crochet (C2C). Learn the ins and outs of this popular crochet technique in this informative guide.
What is C2C crochet good for?
C2C crochet is excellent for creating pixelated designs such as graphghans, using variegated yarns to show off color changes, and for projects like blankets, scarves, and dishcloths.
Is C2C crochet suitable for beginners?
Yes, C2C crochet is suitable for beginners who are familiar with basic stitches like chain, double crochet, and slip stitch. It’s a bit different from traditional crochet, but it’s a fun technique to learn.
What kind of yarn is best for C2C crochet?
You can use any yarn for C2C crochet, but for practicing, a smooth, light-colored DK or worsted weight yarn is recommended. It makes it easier to see your stitches.
Do I need to use a specific crochet hook size for C2C?
Use a hook that matches your yarn’s recommended size. For worsted weight yarn, a size H-8 (5.0 mm) crochet hook is commonly used.
How do I start a C2C crochet project?
Begin with chaining six and double crocheting in the fourth chain from the hook and the next two chains. This creates your first tile.
How do I increase and decrease in C2C crochet?
Increase by starting each new row with chaining six and making a new tile. Decrease by slip stitching across the last tile of the previous row before starting the next.
Can I create a rectangular C2C project?
Yes, by increasing on both sides until you reach your project’s desired width and then increasing on only one side, you can create a rectangle.
How do I change colors in C2C crochet?
Change colors by completing the last double crochet of a tile until two loops are on the hook, then pull through with the new color and continue with the pattern.
How can I keep my yarn from tangling with multiple colors?
Use small bobbins to manage your yarn, or create a DIY bobbin holder. This will keep the yarn organized and prevent tangling.
What do I do with the yarn ends when I finish a C2C project?
Weave in the ends with a tapestry needle, making sure to secure them without creating bulk. Cut the yarn close to the work after weaving.
By keeping these FAQs and tips in mind, you’ll be well on your way to mastering C2C crochet. Remember, practice makes perfect, so don’t be afraid to start with a small swatch to get the hang of the technique before moving on to larger projects.
Free C2C Crochet Patterns
As you learn the C2C Crochet, now explore these 20 free C2C crochet patterns to inspire your next project. Get creative and bring your crochet skills to the next level with these amazing patterns.
1. Free Crochet Pattern for a C2C Blanket
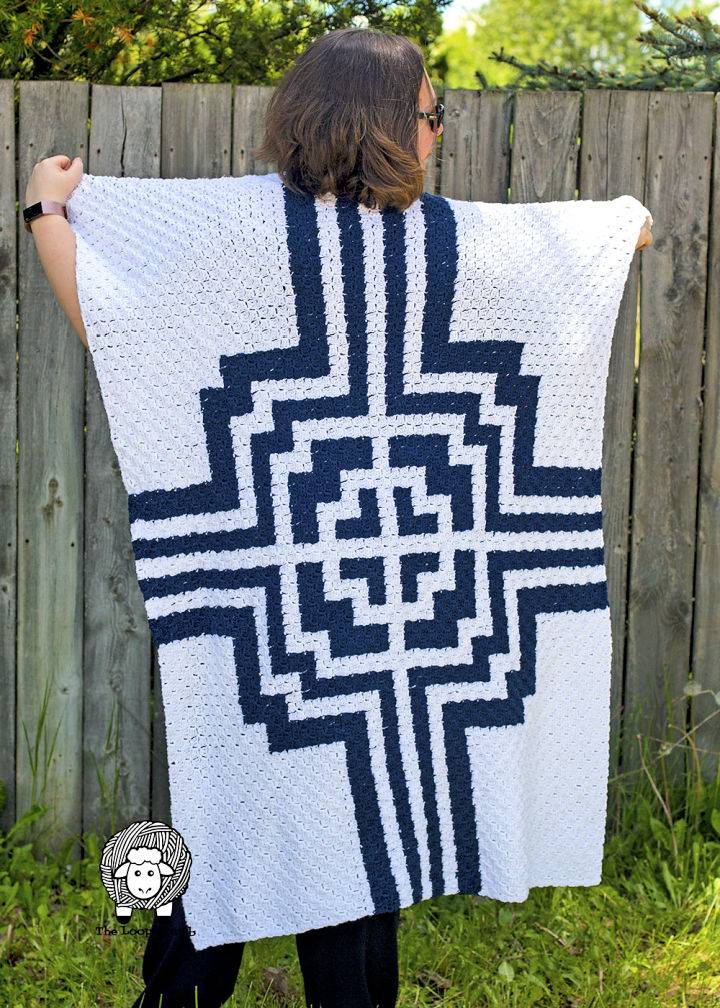
Unwind with a crochet project that’s as relaxing as it is impressive. The Loopy Lamb‘s free C2C blanket pattern guides you through creating a stunning throw that features a Greek-inspired design, making it a standout piece in any room. This pattern is suitable for those already familiar with double crochet and slip stitch techniques, as it offers a step-by-step approach to mastering the corner-to-corner crochet method. Dive into this pattern with helpful video tutorials, a color chart, and tips for managing color changes. Craft a beautiful, cozy blanket while enhancing your crochet skills with this engaging and rewarding project.
2. Corner to Corner Crochet Barn Quilt Blanket Pattern
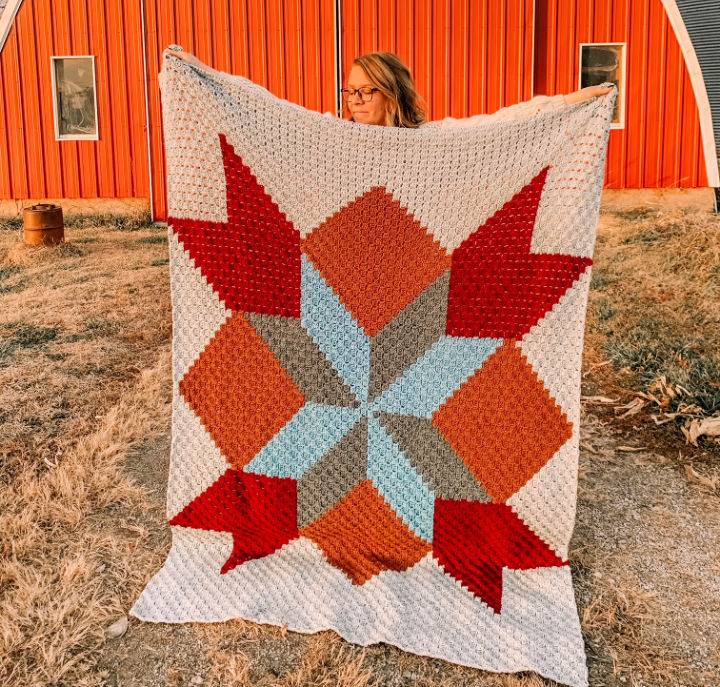
Discover the cozy charm of the Barn Quilt Blanket, a free C2C crochet pattern inspired by the picturesque barn quilts of the Midwest at Hooked Hazel. Ideal for those who enjoy crafting blankets, this pattern brings a blend of rustic appeal and modern design into your crafting experience. The tutorial is thoughtfully designed, guiding you through the corner-to-corner crochet technique with clear and engaging instructions.
With detailed steps and a graph for visual aid, crocheters can create a treasured heirloom that encapsulates memories and comfort. This pattern utilizes the durability and vibrancy of WeCrochet Brava Worsted yarn, offering a project that is as sturdy as it is beautiful. Perfect for adding warmth to your home or giving as a heartfelt gift, this blanket pattern is sure to provide a fulfilling creative journey.
3. Fastest C2C Crochet Blanket Pattern
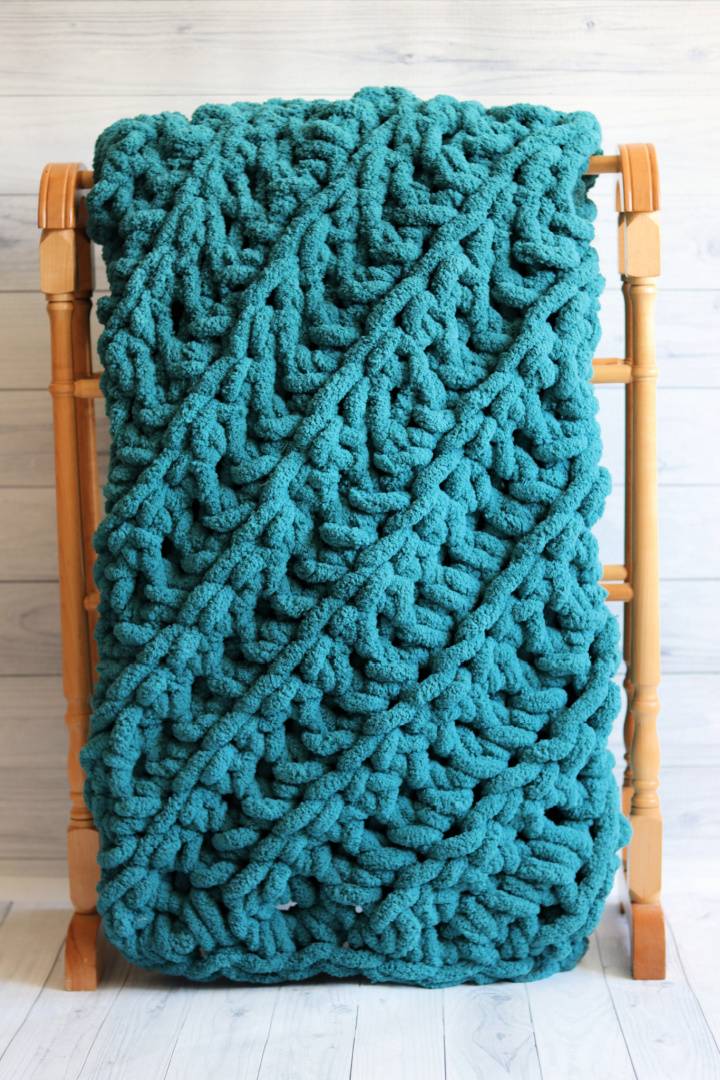
For crafting enthusiasts eager to dive into their next project, the Rich Textures Crochet site offers an easy-to-follow C2C crochet blanket pattern. This cozy design promises to be one of the quickest blankets you will create with its corner-to-corner technique. Using the super plush Bernat Blanket Big yarn and a jumbo hook, the pattern is perfect for those who love the warmth and comfort of chunky textures.
The tutorial includes a step-by-step video, and there’s an option to acquire a PDF version for uninterrupted crafting. With clear instructions, this pattern is ideal for anyone looking to make a substantial yet simple blanket, and the maintenance is a breeze thanks to the machine-washable polyester yarn. Get your hooks ready and enjoy a new addition to your home’s comfort in just a couple of hours.
4. Modern C2C Crochet Blanket – Free Pattern
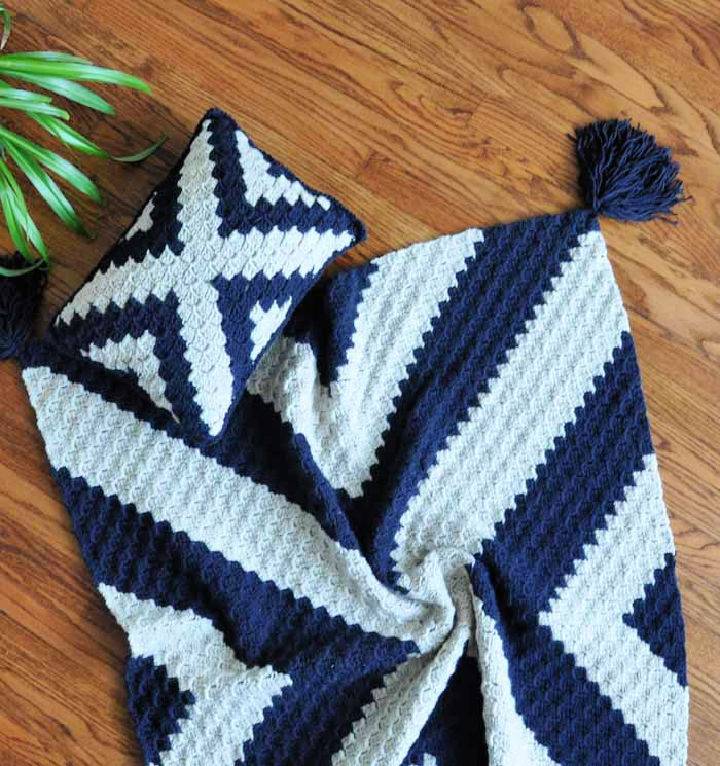
Delve into the cozy craft of corner-to-corner crochet with the free modern C2C crochet blanket pattern featured on Make & Do Crew. Ideal for those who appreciate minimalist design, this pattern is a wonderful project for adding a touch of geometric flair to your home decor. With clear instructions and a downloadable graph, the Muddy Pines blanket pattern guides you through each step of creating a stylish and chunky throw.
It’s suitable for crafters who enjoy a straightforward approach with minimal color changes, making it a quick and satisfying make. When not in use, the blanket can be neatly folded into a matching pillow cover for convenient storage. Access this engaging and helpful tutorial to elevate your crafting repertoire and add a handmade touch to your living space.
5. C2C Crochet Bobble Blanket Pattern
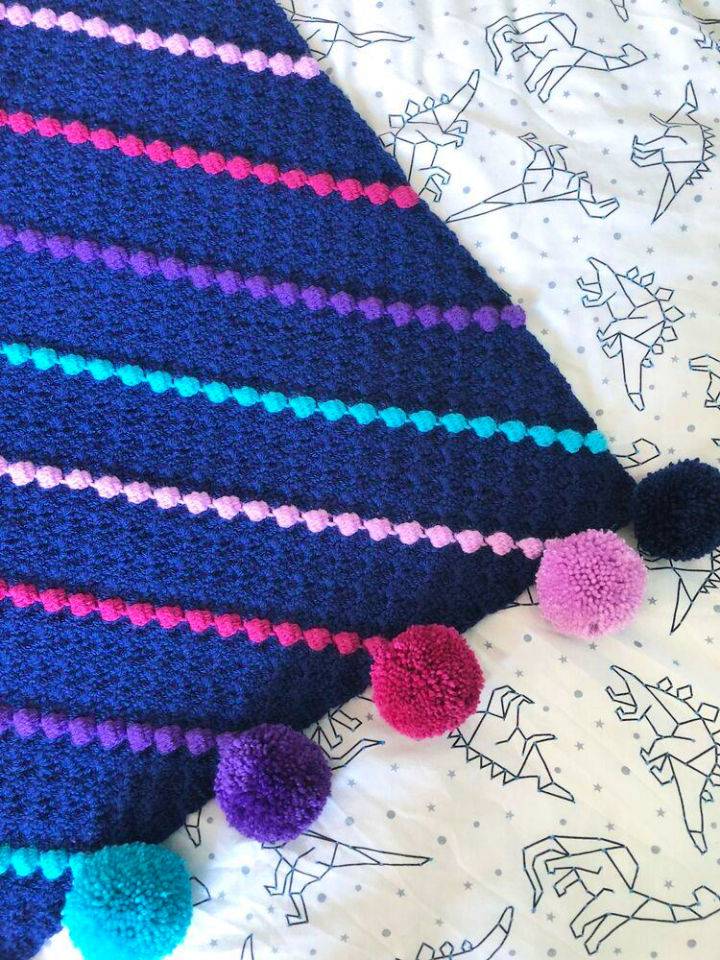
The Bobble C2C Blanket pattern on Bella Coco Crochet, designed by Hayley from Hello Moon Crochet, is a stunning project that adds a whimsical touch to any home decor. This cozy creation combines the traditional corner-to-corner technique with playful bobble stitches and cheerful pompoms, perfect for adding texture and color to your space. The pattern includes detailed instructions and uses Paintbox Yarns Simply DK for a soft and durable finish.
Crafters will need a 4mm hook, scissors, and a pom-pom maker to complete this blanket, which measures approximately 30×38 inches when finished. Ideal for gifting or personal use, this pattern guides you through each step, making it a joyful crochet experience. With its unique design, the Bobble C2C Blanket is sure to be a cherished addition to your collection of handmade items. Combine different crochet techniques to come with lots of design variations in your finally completed crochet patterns!
6. C2C Crochet Concentric Squares Throw Blanket Pattern
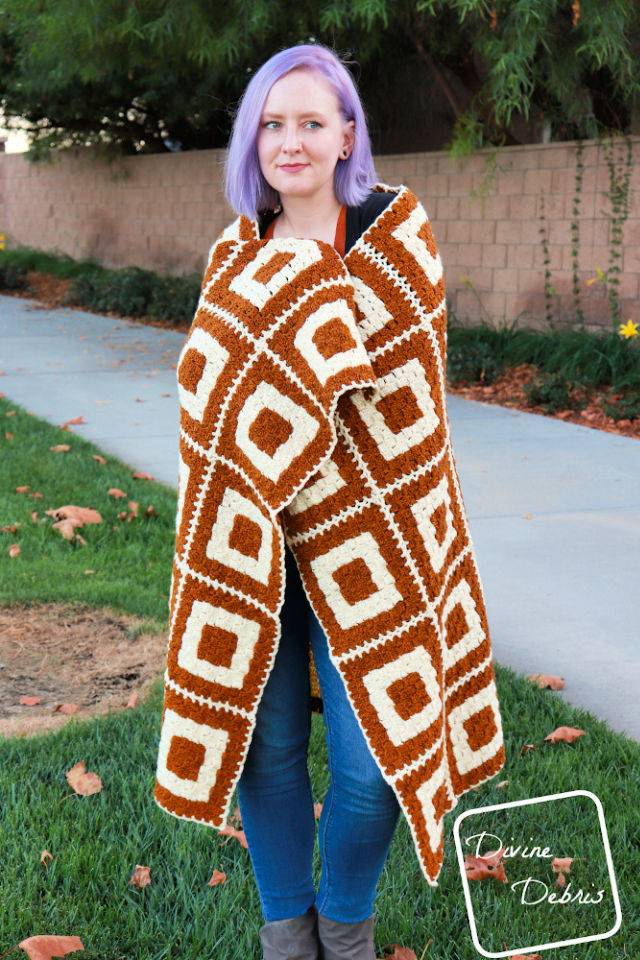
For crafters eager to explore new projects, the Concentric Squares Throw Blanket offers a vibrant and engaging pattern to add to your collection. Featuring a C2C (corner-to-corner) crochet technique, this free pattern from Divine Debris is perfect for those who enjoy quilt-inspired designs.
With clear instructions and a helpful graph included, you can customize the throw using your choice of colors or make use of yarn remnants for a unique stash-busting creation. The pattern is suitable for those with intermediate crochet skills, as it requires familiarity with C2C and color changes. Once completed, the blanket measures approximately 40″ x 56″, making it a cozy addition to your home or a thoughtful handmade gift.
7. C2C Crochet Summer Meadows Baby Blanket Pattern
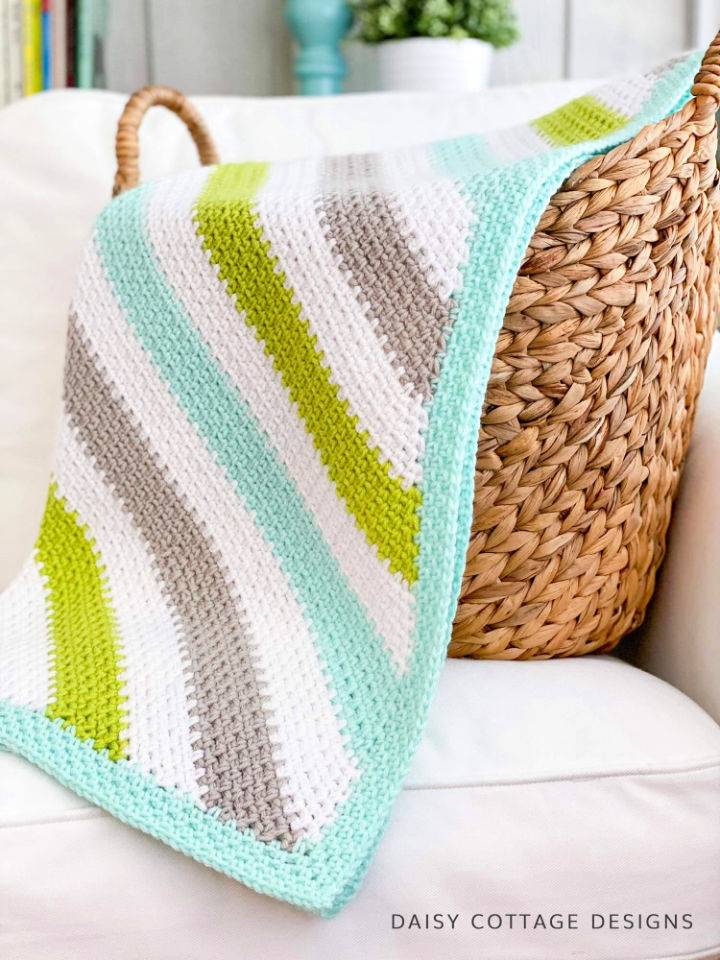
Discover how to create a cozy C2C Moss Stitch Crochet Blanket with the help of Daisy Cottage Designs‘ comprehensive tutorial. Perfect for adding a touch of homemade warmth to any room, this guide offers an instructive, engaging walkthrough of the moss stitch technique, ideal for crafting blankets that are as beautiful as they are functional.
Step-by-step instructions, accompanied by a helpful video, make the process clear and easy to follow, even if you’re new to crochet. With a list of materials, pattern notes, and detailed pattern sections, you’ll have all the information needed to begin your project. Plus, the guide includes tips for adjusting the blanket’s size to suit your needs. By the end, you’ll be able to craft a lovely blanket with a delicate drape and a vibrant, summer meadows-inspired color palette.
8. Corner To Corner Crochet Scrappy Blanket Pattern
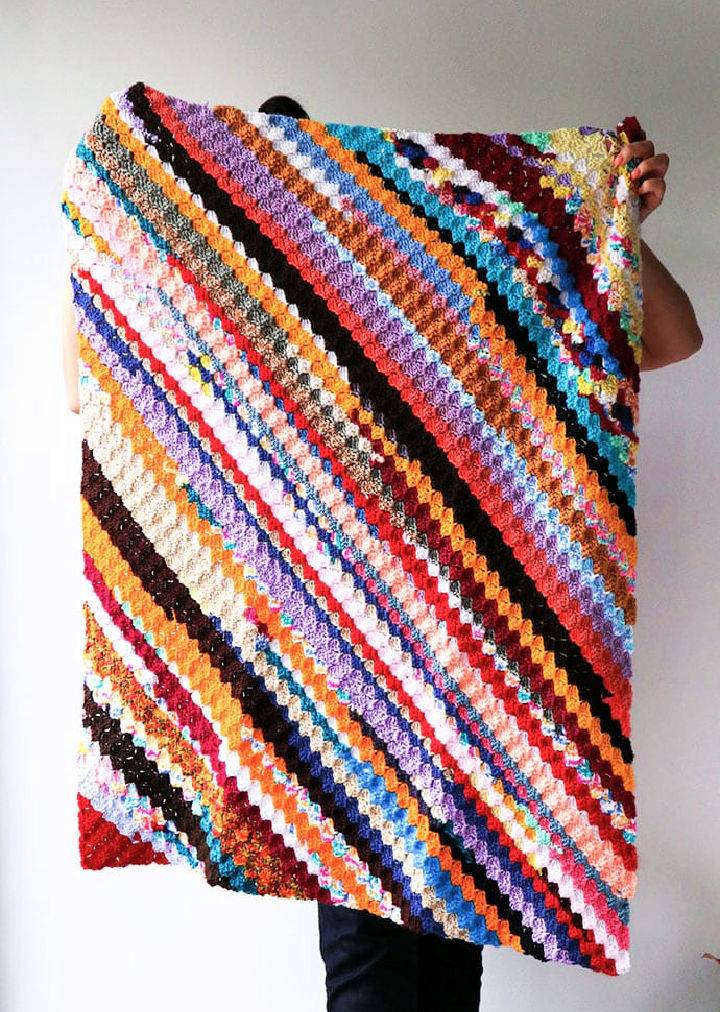
Craft a cozy, scrappy corner-to-corner crochet blanket with My Poppet Makes‘ straightforward and engaging guide. Ideal for upcycling yarn scraps, this pattern creates a playful and colorful baby blanket that is as fun to make as it is practical. With clear instructions, this pattern is perfect for anyone who enjoys crochet and aims to minimize yarn waste.
The unique stripes resulting from the random color changes of the magic yarn ball give the finished product a distinctive look, making each blanket a one-of-a-kind creation. Simplify your crochet projects and create a charming blanket that will be treasured for years to come.
9. Corner to Corner Crochet Afghan Pattern
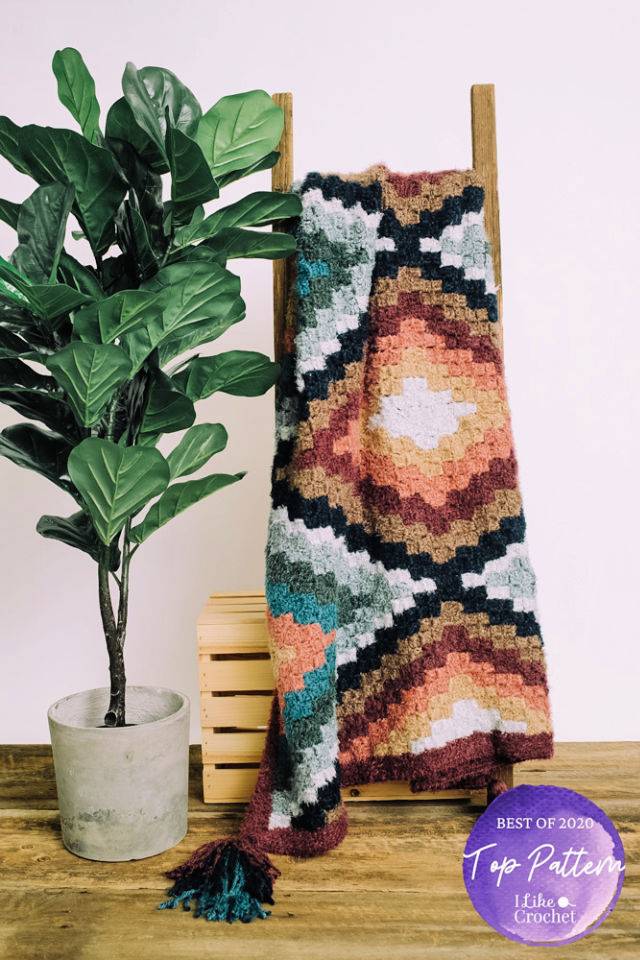
Create a warm, inviting atmosphere in your home with the Runa C2C Blanket pattern featured on I Like Crochet. This intermediate-level project draws inspiration from the rich heritage of American southwest weavings and the timeless beauty of vintage Turkish rugs. You’ll craft a 45” wide x 66” tall blanket composed of six smaller rectangles, using a 9-color palette that brings a bohemian charm to any room.
Each piece is worked in corner-to-corner block stitch and later joined using yarn tails, which adds to the handcrafted appeal. The design is finished with a simple crochet border and eye-catching triple-layered tassels. Grab your hook and Red Heart Hygge yarn to create this statement piece that’s as stylish as it is cozy.
10. C2C Crochet Sunflower Blanket Pattern
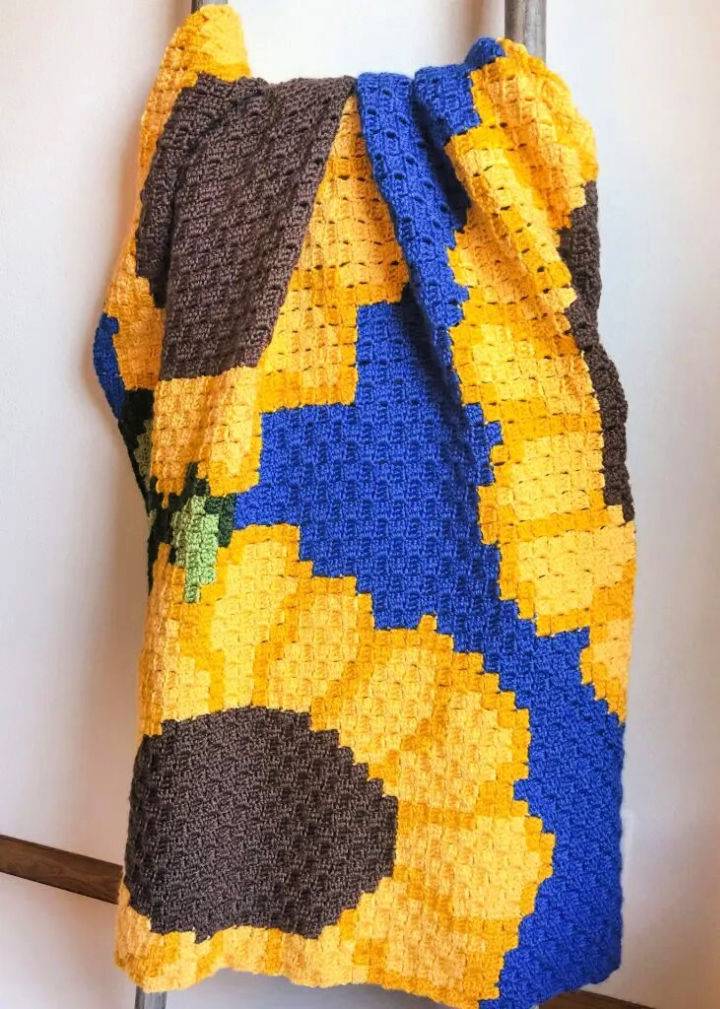
Brighten up your living space with the Sunflower Crochet Blanket, a free C2C (corner-to-corner) crochet pattern available on Nana’s Crafty Home. This pattern captures the joyful essence of sunflowers against a backdrop of darkening sky. The contrast of golden yellow petals against the royal blue mimics the natural beauty of these cheerful blooms basking in the sunset.
Ideal for those with intermediate to advanced C2C crochet skills, the blanket measures 40 1/2 inches wide by 46 inches tall upon completion. Crafted using Caron Simply Soft yarn, known for its softness and subtle sheen, the blanket is not only a visual delight but also a pleasure to touch. While the recommended yarn ensures the best outcome, you have the flexibility to choose alternative medium-weight worsted yarns.
11. C2C Crochet Celebration Blanket Pattern
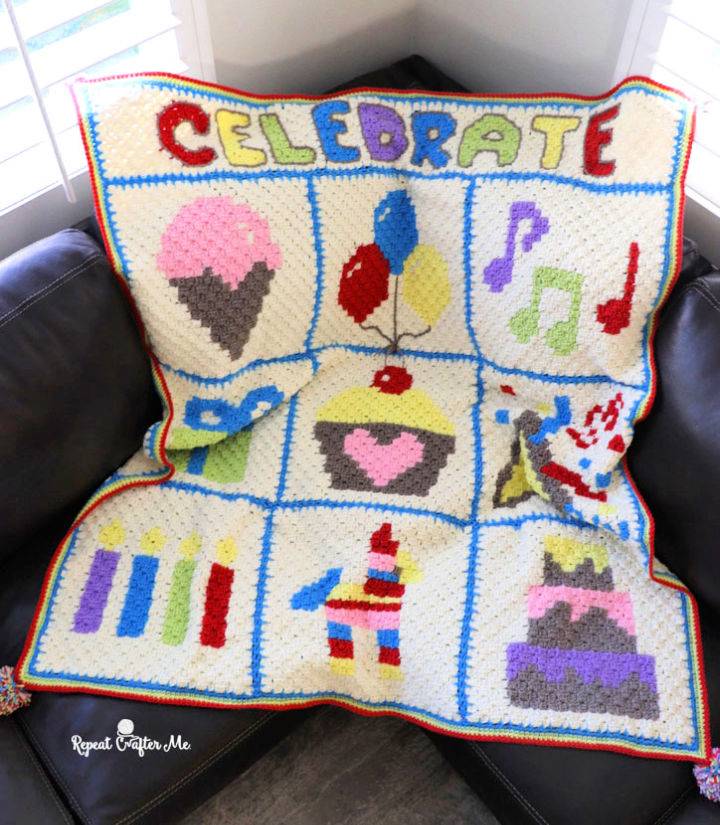
Create a festive atmosphere at home with the Celebration C2C Crochet Blanket from Repeat Crafter Me. This cheerful project is perfect for adding a splash of color and joy to any celebration, especially as many turn to at-home festivities. The blanket features nine vibrant corner-to-corner crochet blocks that can be customized with an optional crochet banner, such as “Celebrate” or “Happy Birthday.”
Crafted with Bernat Super Value yarn, the final creation measures approximately 58×62 inches, making it a substantial addition to your home décor. The site offers individual patterns for each block, along with a handy video tutorial for joining them together. So, grab your crochet hook and add a personal touch to your next celebration with this cozy, handmade creation.
12. Corner to Corner Crochet Fluffy Granny Blanket Pattern
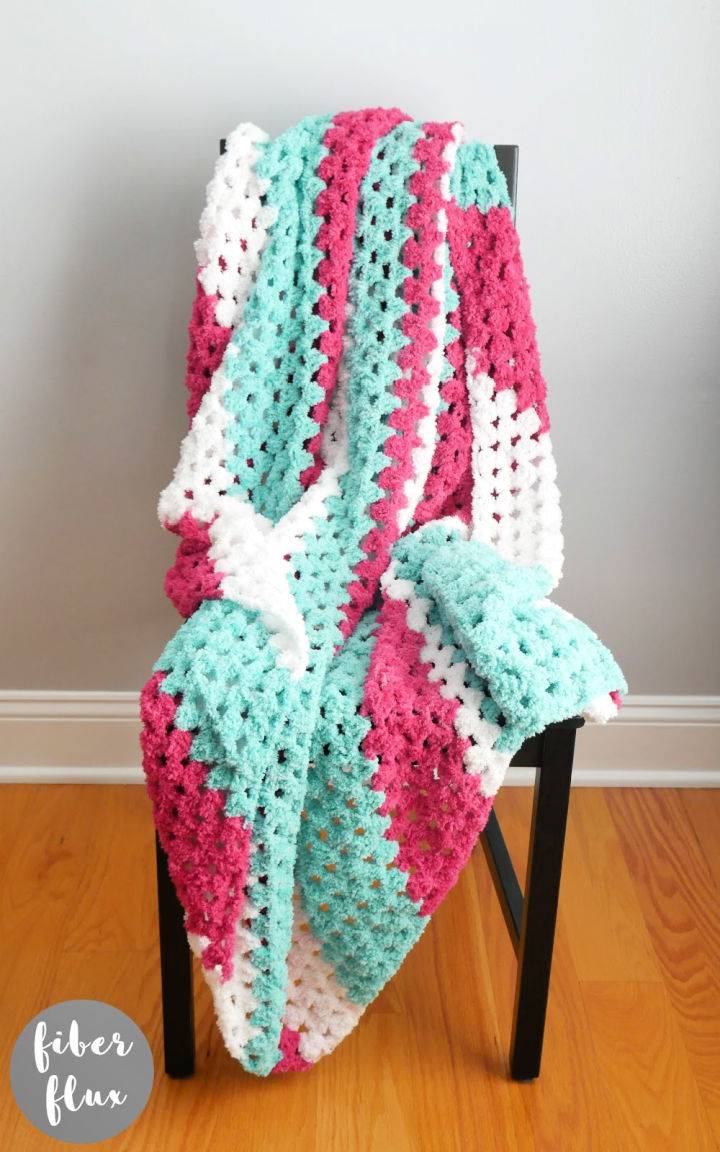
Create a cozy atmosphere on chilly evenings with the Fluffy Granny C2C Blanket, a crochet pattern featured on FiberFluxBlog.com. Crafted using lightweight yarn, this corner-to-corner design employs the timeless granny stitch for an enjoyable and straightforward crocheting experience. The pattern is available in an ad-free PDF format for purchase in the shop, and a comprehensive video tutorial is provided to guide you through each step.
Necessary materials include a 5.5 mm crochet hook, four cakes of Fleece Hugs yarn by Red Heart, a tapestry needle, scissors, and a tape measure. This blanket measures 60 inches on each side, offering ample warmth and comfort. Follow the instructions carefully for both the increase and decrease portions to achieve the perfect size and finish your blanket with finesse. Get ready to snuggle up with your handcrafted creation!
13. C2C Moss Stitch Crochet Blanket Pattern
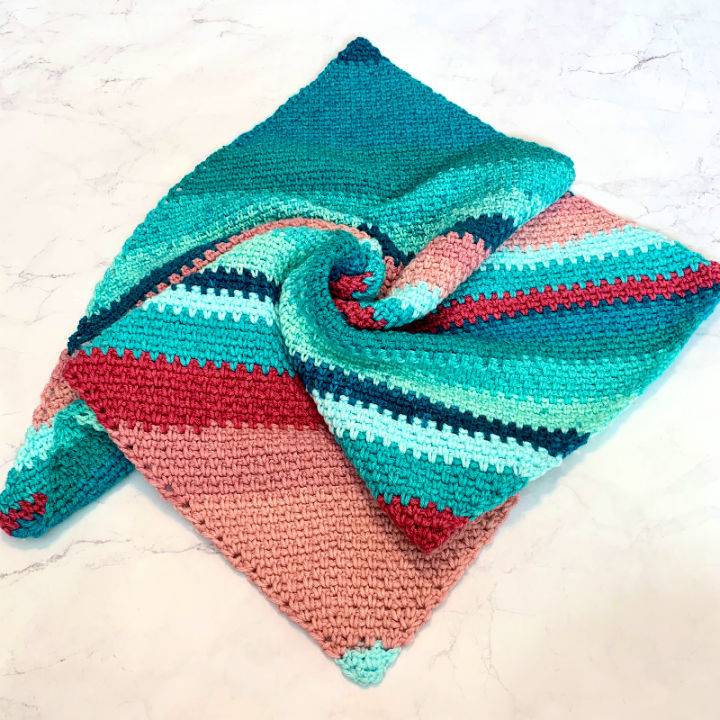
Dive into the cozy realm of crochet with OkieGirlBling’n’Things’ free C2C Moss Stitch Blanket pattern. Ideal for crafters who enjoy relaxing projects, this pattern marries the simplicity of the Moss Stitch with the elegance of Corner to Corner crochet. The instructions guide you through each step, ensuring a pleasurable experience as you create a stunning blanket featuring a harmonious blend of blue and blush tones.
With a clear list of materials, including the recommended Lion Brand ‘Just My Stripe’ yarn, and concise abbreviations, even those new to the craft can confidently undertake this project. Crafting a 28” x 28” blanket has never been so accessible, with an easy-to-follow pattern that’s perfect for times when you want a project that doesn’t require intense focus. So grab your crochet hook and enjoy the creation of a beautiful, handmade addition to your home or a thoughtful gift for a loved one.
14. C2C Crochet Three Mandala Thrill Baby Blanket Pattern
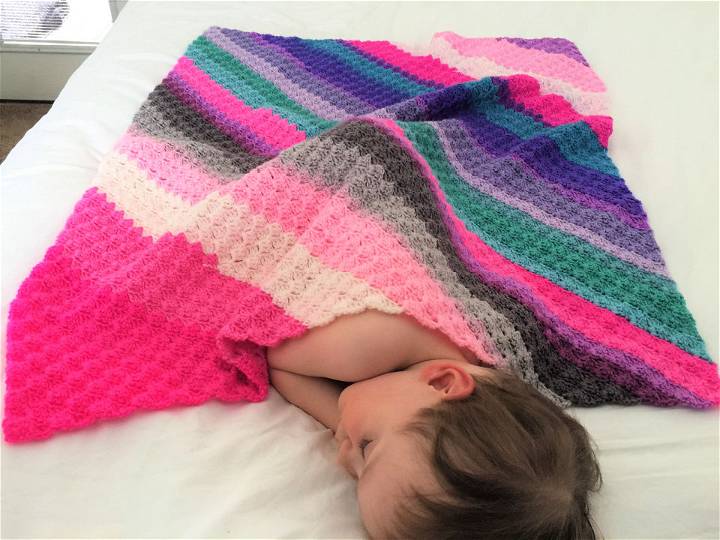
For craft enthusiasts eager to create a colorful blanket with ease, the Three Mandala Thrill pattern by Susan E. Kennedy offers an inviting challenge. This pattern, available for free on Ravelry, is perfect for crafting a cozy blanket over a relaxing weekend. With just three cakes of dk weight color-changing yarn like Lion Brand Mandala or Mandala Baby, you can produce a vibrant, flowing design without the need to cut yarn.
Ideal for those who enjoy crocheting while watching TV or when in need of a quick gift, the pattern features straightforward techniques, including chain, slip stitch, and double crochet. The instructions are user-friendly, written in US terms, and supplemented with color photos to guide you through the corner-to-corner stitch and crafting a rectangular shape. Additional support is provided with a Russian join tutorial and links to video tutorials suitable for different learning styles.
Upon completion, the blanket measures approximately 33 by 42 inches, making it a cozy addition for babies or toddlers. Dive into your next crafting adventure with confidence and creativity, using the Three Mandala Thrill blanket pattern as your guide to a handmade treasure.
15. C2C Crochet Chevron Baby Blanket Pattern
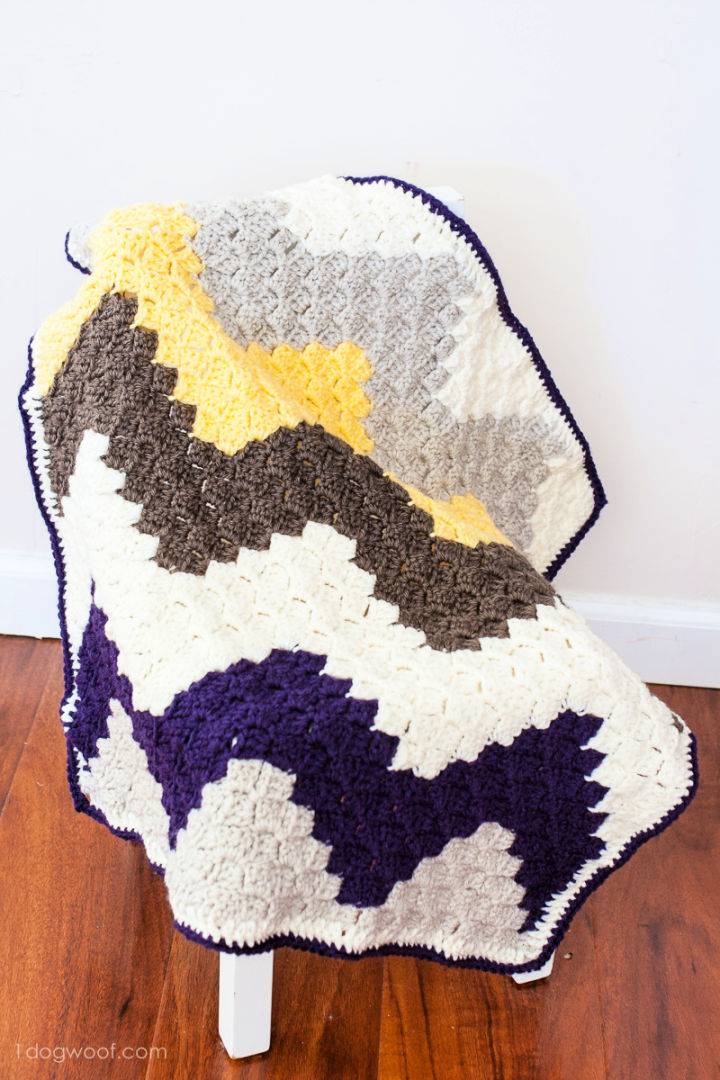
Explore the charming craft of c2c (corner to corner) crochet with the C2C Chevron Baby Blanket tutorial on One Dog Woof. Ideal for crafting a unique gift, this pattern guides you through creating a chevron design that’s both visually striking and deeply personal.
Perfect for those who appreciate geometric patterns and soft, textured fabrics, the c2c technique allows for a delightful play of colors without the fuss of intricate character motifs. With clear instructions, this blanket can become a cherished keepsake for any little one, offering a handmade touch of warmth and comfort. Dive into your yarn stash, select your palette, and start your next cherished project today!
16. Moss Stitch C2C Crochet Blanket Pattern
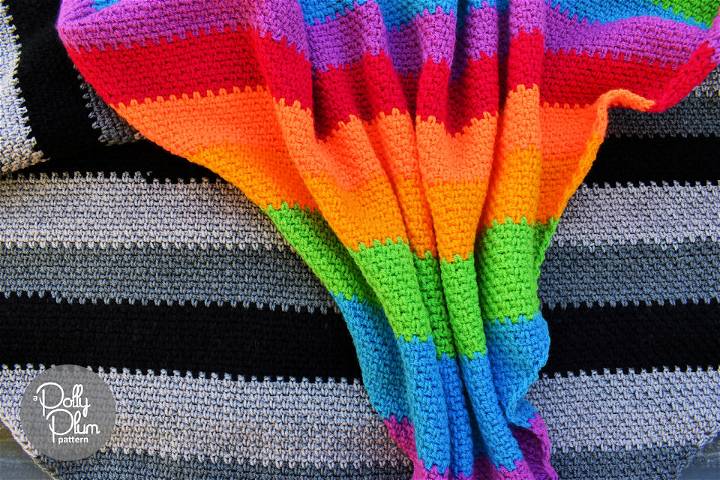
Discover the charming technique of the C2C Moss Stitch with Every Trick on the Hook’s comprehensive guide. Ideal for creating stretchy, beautifully draped crochet projects, this pattern shines with variegated and gradient yarns. Crafters can customize their creations to any size, whether a cozy blanket or a chic scarf.
The site offers step-by-step instructions, making it easy to master this versatile stitch. For added convenience, a printable version is available, ensuring you can take your crafting anywhere. With clear abbreviations, video tutorials, and helpful hints, your journey to a stunning, handmade item is just a pattern away.
17. Modern C2C Crochet Blanket Pattern
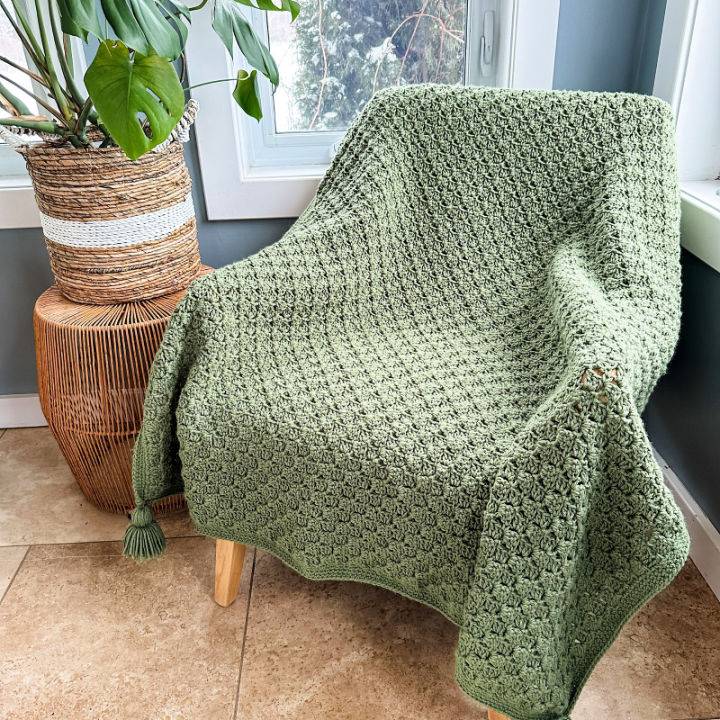
For crafters who enjoy the timeless beauty of handmade blankets, the Modern C2C Blanket Free Crochet pattern from MJ’s off the Hook Designs is an ideal project. The pattern’s adaptability shines with options for bulky and worsted weight yarns, making it a versatile choice for creating cozy throws or lightweight blankets.
The corner-to-corner technique, emphasized with clear written instructions and a helpful video tutorial, is easy to follow and great for expanding your crochet skills. Dive into this project and treat yourself to the satisfaction of crafting a chic and modern blanket that’s as enjoyable to make as it is to use.
18. Caspian C2C Crochet Baby Blanket Pattern
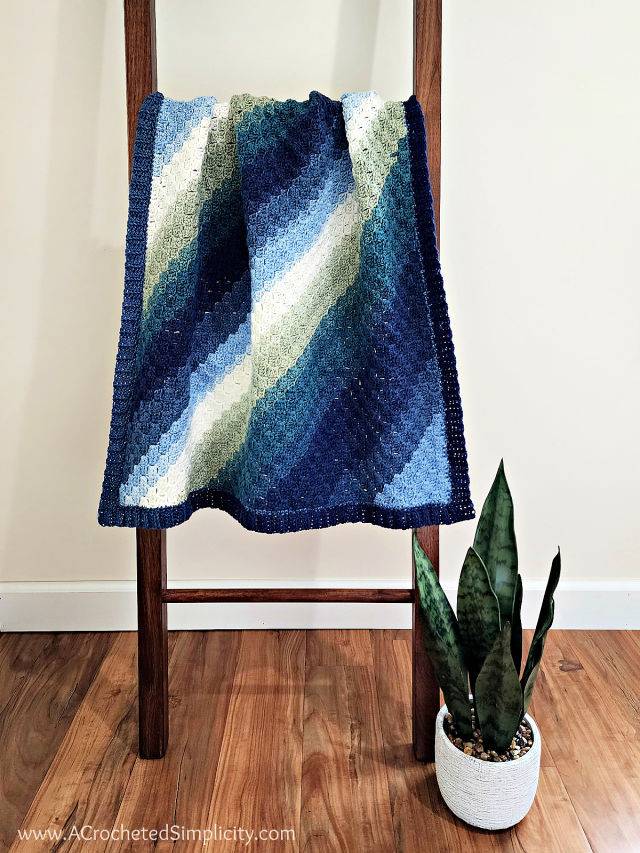
For crafters eager to explore the cozy charm of homemade blankets, A Crocheted Simplicity offers an instructive guide to creating a crochet C2C (corner-to-corner) blanket. Ideal for those picking up the hook for the first time, the Caspian Crochet Blanket tutorial provides a clear, step-by-step approach to mastering the C2C technique.
With easy-to-follow instructions and accompanying photos, users can confidently navigate through each stage of the blanket-making process. The versatility of the pattern allows for customization in size and yarn choice, ensuring that each creation is as unique as its maker. Dive into the rewarding experience of crochet and transform strands of yarn into a beautiful, handcrafted blanket with A Crocheted Simplicity’s detailed and helpful tutorial.
19. C2C Crochet Peacock Blanket Pattern
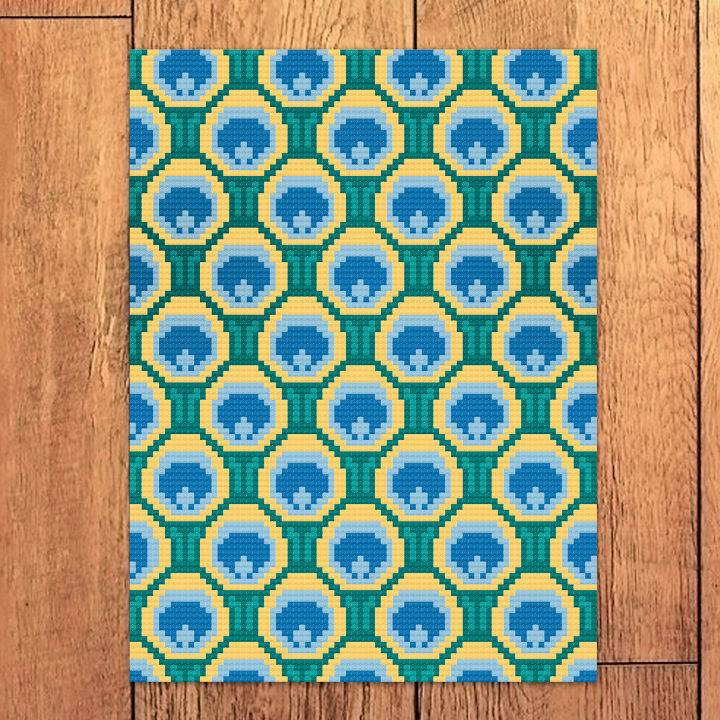
Discover a stunning C2C crochet pattern on Avrora CS that inspires you to create a “Peacock” blanket with your hands. With detailed instructions and a downloadable PDF file containing color block images, this free pattern is perfect for anyone who enjoys the art of crochet. Crafted to be instructive and engaging, the pattern offers clear guidance to help you achieve a beautiful result.
The gauge is provided to ensure that your blanket turns out to be the intended size, and the suggested 8 wpi yarn with a 6 mm hook will make your project come to life with rich texture. Whether crafting for yourself or as a thoughtful gift, this peacock-inspired blanket is sure to become a cherished piece in any collection. Enjoy the rewarding process of watching your creation take shape with each block and row you complete.
20. Candy Stripes C2C Crochet Blanket Pattern
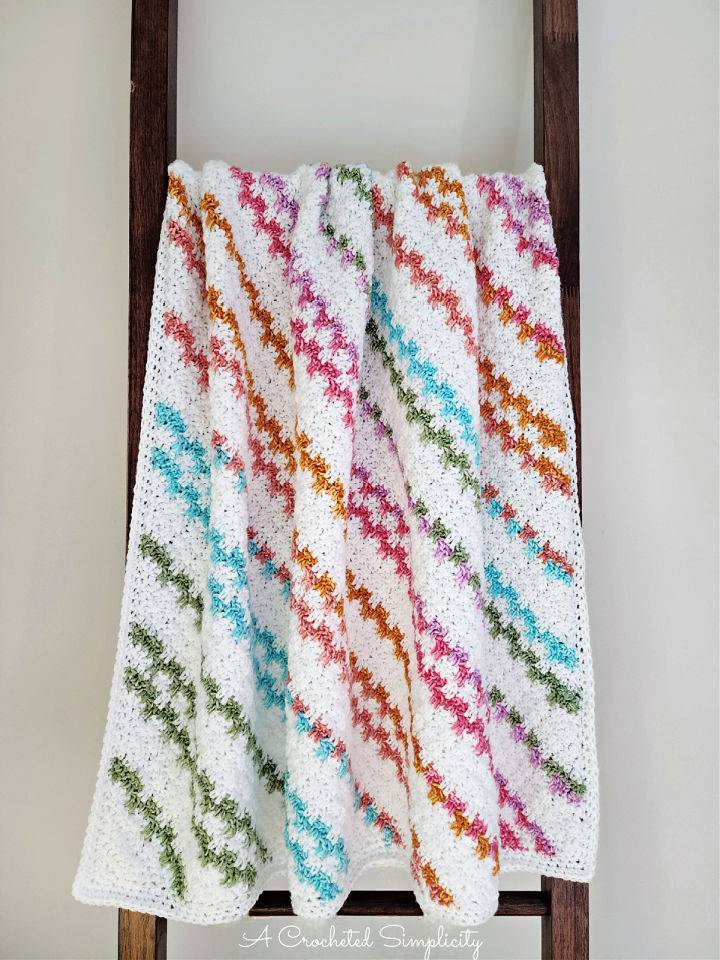
Discover the Candy Stripes Crochet C2C Blanket pattern on A Crocheted Simplicity, a perfect project for those who enjoy creating cozy lapghans with a pop of color. This engaging pattern introduces crafters to the Extended “Double” Moss Stitch, worked on the bias to create a unique texture and visual appeal.
Utilize self-striping yarn for effortless color transitions, making the process enjoyable and the outcome striking. The instructions are detailed and easy to follow, ensuring a smooth crafting experience as you crochet this eye-catching blanket. Whether adjusting size or mastering a new stitch, this pattern is a rewarding endeavor for anyone with a passion for crochet.
Conclusion:
In wrapping up our exploration of the free C2C crochet pattern, it’s clear that the corner-to-corner crochet technique offers a unique and engaging crafting experience. With the ability to create vibrant, textured projects through simple increases and decreases, C2C crochet opens up a world of creative possibilities. Perfect for personalized gifts, home decor, and cozy blankets, mastering this method can transform your crafting skills. So grab your hook, select your yarn, and start your next crochet adventure with a free C2C crochet pattern today!


