Are you interested in making your own epoxy resin table but not sure where to start? In this guide, we will explore everything you need to know about working with epoxy resin, from understanding the material science to troubleshooting common issues.
Discover the fascinating world of epoxy resin and unleash your creativity with 25 DIY epoxy resin table ideas that range from epoxy river tables to glow-in-the-dark creations. Stay tuned to learn about safety precautions, design inspiration, cost analysis, maintenance tips, and frequently asked questions in the exciting world of epoxy resin tables.
Ready to dive in and explore the endless possibilities of working with epoxy resin? Let’s get started on your DIY epoxy resin table project!

How to Make an Epoxy Resin Table
Make your own epoxy ocean table with ease. Step-by-step guide for a smooth crafting experience.
Materials You Will Need:
- Beaverboard
- Tape
- Cutting board
- Hot glue
- Epoxy resin and hardener
- White dye
- Sand
- Stones
- Amber
- Shells
- Artificial moss
- Turquoise dye
- Gas burner (to remove air bubbles)
- Hair dryer
- Transparent resin (for coating)
- Universal table legs
Step by Step Instructions
Step 1: Preparing the Mold
- Start by preparing your mold using a beaverboard, cutting it to the size you want your table to be.
- Secure the edges with tape to prevent the resin from leaking.
- Seal any gaps with hot glue for an airtight seal.
Step 2: Mix and Pour the First Layer of Resin
- Mix your epoxy resin with a hardener, following the instructions on the product for the correct ratios.
- Add white dye to the mixture and stir until well combined.
- Pour this mixture into the mold, ensuring it’s evenly spread across the base.
- Use a gas burner carefully to remove any air bubbles that form.
Step 3: Adding the First Set of “Ocean” Features
- Once the first layer has slightly hardened, sprinkle sand across for the “ocean floor.”
- Arrange stones, amber, shells, and artificial moss to create your underwater scene.
- Gently pour another layer of mixed resin over these elements to secure them in place.
Step 4: Creating Waves and Depth
- Mix another batch of resin, this time adding turquoise dye.
- Pour this mixture over the previous layer, using a hair dryer to spread and blend the dye, creating wave-like patterns.
- Add streaks of white dye to mimic the foam of the waves. Again, use the hair dryer to blend subtly.
- If desired, repeat these layers to build depth and richness to your ocean scene.
Step 5: Final Layer and Finishing Touches
- Once satisfied with your ocean layers, mix and pour a final layer of transparent resin over the entire project to secure everything in place.
- Use a gas burner again to remove any air bubbles.
- Allow the table to cure and harden according to the resin’s instructions—this can take several days depending on the product.
Step 6: Unmold and Polish
- Carefully remove the tape and mold from around your cured table.
- Sand the edges and surface as needed to smooth out any imperfections.
- Polish the table to achieve a glossy, glass-like finish.
Step 7: Attaching the Legs
- Once your table top is fully prepared and polished, attach universal table legs according to the manufacturer’s instructions.
- Ensure they are securely fastened to support the weight of the resin table.
Video Tutorial
For a visual step-by-step tutorial, watch the Epoxy Ocean Table / resin art video on YouTube.
It pairs well with this written guide, offering a complementary perspective on the crafting process that enhances understanding and execution.
Understanding the Material Science of Epoxy Resin
Epoxy resin is a versatile material widely used in DIY projects, including epoxy resin tables. Its unique properties make it ideal for making durable and aesthetically pleasing surfaces. Let’s delve into the science behind epoxy resin to help you choose the right type for your project.
What is Epoxy Resin?
Epoxy resin is a thermosetting polymer known for its strong adhesive qualities and chemical resistance. When mixed with a hardener, it undergoes a chemical reaction that transforms it into a solid, durable substance. This process is called curing.
Key Properties of Epoxy Resin
- Strength: Epoxy resin has a high tensile strength, making it capable of withstanding heavy loads.
- Adhesion: It bonds well with various materials, including wood, metal, and plastic.
- Durability: Once cured, epoxy is resistant to water, heat, and chemicals.
- Electrical Insulation: It’s an effective insulator, which is why it’s often used in electronic applications.
Choosing the Right Epoxy Resin
When selecting epoxy resin for your table, consider the following factors:
- Curing Time: Different resins have varying curing times. Choose one that fits your project timeline.
- Viscosity: Thicker resins are better for filling gaps, while thinner ones are ideal for coating surfaces.
- Color: Clear resins are great for showcasing embedded objects, while colored resins can add a unique touch to your design.
Safety Precautions
Working with epoxy resin requires caution. Always work in a well-ventilated area and wear protective gear, such as gloves and safety glasses.
By knowing epoxy resin science, you can choose better for DIY and make a durable table. Knowledge = good results.
Design Inspiration for Your DIY Epoxy Resin Table
Making a DIY epoxy resin table is not just about functionality; it’s about unleashing your creativity and making a statement piece that reflects your personal style. Here are some inspiring ideas to help you design a table that’s both beautiful and unique.
Epoxy River Tables
The epoxy river table is a popular design that captures the mesmerizing flow of a river. By placing a strip of clear or tinted epoxy between two slabs of wood, you make the illusion of water flowing through your table. Consider using wood with natural edges for an organic look, or add stones, shells, or leaves into the epoxy for a more textured appearance.
Glow-in-the-Dark Tables
For a table that truly stands out, incorporate glow-in-the-dark pigments into your epoxy. This design not only serves as a functional piece during the day but transforms into a luminous spectacle at night. It’s perfect for adding a magical touch to any room.
Embedded Objects
Personalize your table by embedding objects that hold special meaning to you. From photographs to coins, or even memorabilia, encasing these items in epoxy will preserve them and make a conversation piece for your home.
Colorful Creations
Don’t shy away from color! Epoxy resin can be mixed with various pigments to achieve stunning effects. Make vibrant patterns, subtle swirls, or even abstract art by experimenting with different hues.
Themed Tables
Design your table around a theme that resonates with you. Whether it’s a nautical theme with embedded seashells and a blue epoxy ‘sea,’ or a nature-inspired table with leaves and a green-tinted ‘forest’ river, let your interests guide your design.
The key to a successful DIY project is having fun and letting your creativity shine. Your epoxy resin table is a reflection of your imagination and craftsmanship.
Safety Precautions for Crafting with Epoxy Resin
When working with epoxy resin, safety should always be your top priority. Here are some essential safety tips to ensure a safe and enjoyable crafting experience:
Personal Protective Equipment (PPE)
- Gloves: Wear nitrile gloves to protect your skin from exposure.
- Respirator Mask: Use a mask to avoid inhaling fumes, especially in poorly ventilated areas.
- Safety Glasses: Protect your eyes from splashes with safety goggles.
Ventilation
- Work Area: Ensure your crafting area is well-ventilated. Open windows or use a fan to circulate air.
Safe Handling
- Read Labels: Always read the safety data sheets for the specific resin and hardener you’re using.
- Mixing: Follow the manufacturer’s instructions for the correct resin-to-hardener ratio.
Cleanliness
- Workspace: Keep your workspace tidy to prevent accidents.
- Spills: Clean up any spills immediately to avoid slips and skin contact.
Troubleshooting Common Epoxy Resin Issues
Sometimes, things don’t go as planned. Here’s a guide to help you troubleshoot common issues with epoxy resin:
Tackiness
If your resin is sticky after curing, it may be due to incorrect mixing or low temperatures. Ensure accurate measurements and a warm enough environment.
Bubbles
Bubbles can form if the resin is mixed too quickly. Mix slowly and consider using a heat gun to pop surface bubbles.
Uneven Finish
An uneven finish can occur if the resin isn’t leveled properly. Use a level to ensure your working surface is flat.
By following safety precautions and troubleshooting tips, you’ll make beautiful and safe epoxy resin projects.
Cost Analysis for DIY Epoxy Resin Tables
Making a DIY epoxy resin table is an exciting project, but it’s important to understand the costs involved to plan your budget effectively. Here’s a breakdown of what you can expect:
Factors Influencing Cost
- Size and Design: The size and complexity of your table will greatly affect the price. Larger tables with intricate designs will require more materials and labor.
- Type of Wood: The wood you choose plays a significant role in the overall cost. Hardwoods tend to be more expensive than softwoods.
- Quality of Epoxy: Higher quality epoxy offers better durability and finish but comes at a higher price.
- Tools and Equipment: Don’t forget to account for the cost of tools and equipment you may need to purchase or rent.
Budgeting Tips
- Shop Around: Compare prices from different suppliers to get the best deals on materials.
- DIY vs. Professional Help: Consider the cost of professional help if you’re not doing everything yourself.
- Extra Materials: It’s wise to purchase a bit more material than needed to account for any mistakes or design changes.
Maintenance Tips for Epoxy Resin Tables
Maintaining your epoxy resin table is key to ensuring its longevity and beauty. Here are some tips to keep your table looking its best:
Routine Cleaning
- Soft Cloth: Use a soft cloth or sponge for regular cleaning.
- Mild Soap: A mild soap solution is sufficient for most cleaning needs.
Protecting the Surface
- Heat: Always use coasters or trivets to protect the surface from hot items.
- Sunlight: Prolonged exposure to sunlight can cause the epoxy to yellow over time. Use shades or keep the table away from direct sunlight.
Minor Repairs
- Scratches: Small scratches can often be buffed out with a soft cloth.
- Stains: For stubborn stains, a paste of baking soda and water can be gently applied and then rinsed off.
By understanding costs and maintenance, you can enjoy your DIY epoxy resin table for years. Care preserves beauty.
FAQs About DIY Epoxy Resin Tables
When embarking on the journey of making a DIY epoxy resin table, many questions can arise. Here are answers to some of the most frequently asked questions to guide you through your project.
What materials do I need to make an epoxy resin table?
To make an epoxy resin table, you’ll need a wooden slab or board, epoxy resin and hardener, pigments or dyes for color, a mold or form, tools like a drill and sander, and safety equipment such as gloves and goggles.
How do I choose the right type of wood for my table?
Select wood based on your aesthetic preference and budget. Hardwoods like walnut or cherry are durable and visually appealing, while softwoods like pine are more affordable.
Can I add color to my epoxy resin?
Yes, you can add pigments or dyes to the epoxy resin to achieve the desired color. There are various types of pigments available, including liquid, powder, and metallic.
What safety precautions should I take when working with epoxy resin?
Always work in a well-ventilated area, wear protective gear like gloves, goggles, and a respirator mask, and read the safety data sheets for the products you’re using.
How do I prevent bubbles in my epoxy resin?
Mix the resin slowly to avoid introducing air, and pour it gradually. You can also use a heat gun or blowtorch to pop any surface bubbles after pouring.
What is the curing time for epoxy resin?
Curing time can vary depending on the product, but it generally ranges from 24 to 72 hours. Always check the manufacturer’s instructions for accurate curing times.
How do I achieve a smooth finish on my epoxy table?
After curing, sand the surface starting with a lower grit sandpaper and gradually moving to a higher grit. Finish by polishing the table for a smooth, glossy surface.
Can I embed objects into the epoxy resin?
Yes, you can embed various objects like stones, shells, or pictures into the resin before it cures to personalize your table.
How do I maintain my epoxy resin table?
Clean the table with a soft cloth and mild soap, protect it from heat and direct sunlight, and buff out any minor scratches to maintain its appearance.
What should I do if my resin is sticky after curing?
Sticky resin may be due to an incorrect resin-to-hardener ratio or low curing temperature. Check the ratio and ensure the environment is warm enough for proper curing.
By keeping these FAQs in mind, you’ll be better prepared to make a stunning and durable epoxy resin table that’s both a functional piece of furniture and a work of art.
25 DIY Epoxy Resin Table Ideas
Discover 25 stunning DIY epoxy resin table ideas to elevate your home decor. From vibrant colors to unique designs, get inspired today!
1. DIY Epoxy Resin River Table
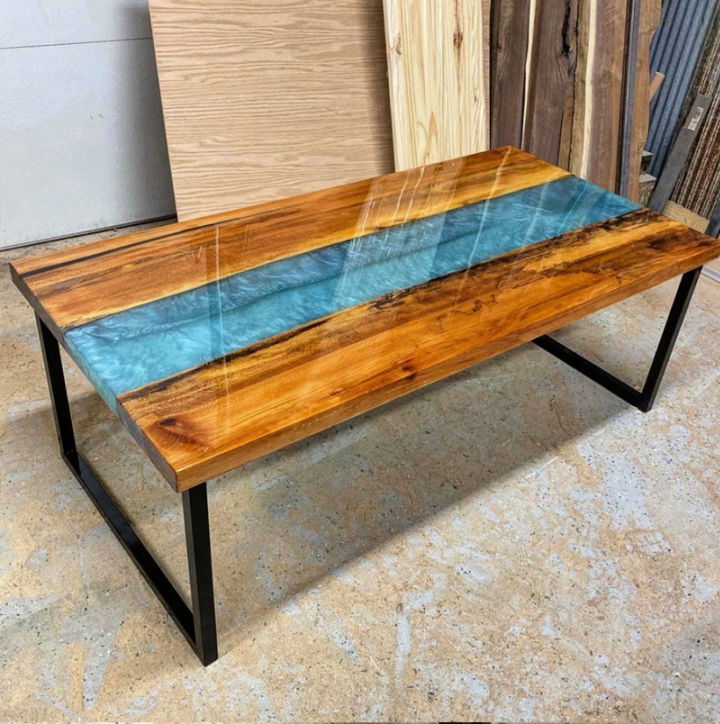
Immerse yourself in the enchanting world of DIY crafting with this comprehensive guide to making an epoxy river table. Made from recycled wooden planks and epoxy resin, this exquisite piece is a captivating blend of art and functionality. Remaking the flow of a river with its vibrant, shiny surface, you’ll be able to add natural beauty to your space.
Detailed instructions are provided, covering the selection of materials, the making process, safety precautions, and even adding a splash of color.
Enjoy the satisfaction of crafting your one-of-a-kind table, imbued with your personal touch and creative flair. Build not just a piece of furniture but a conversation starter that will surely pique the interest of every visitor. creativejewishmom
2. How Do You Make an Epoxy Resin River Table
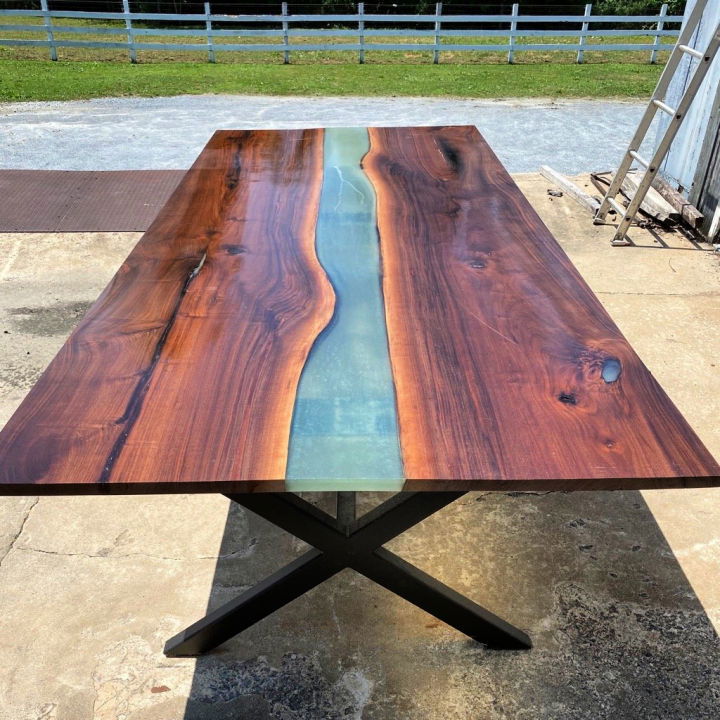
Craft a beautiful, trendy dining room table with a DIY epoxy resin river table project. This unique piece of furniture blends natural elements with a distinct, glossy finish, making a stunning visual centerpiece for any room. Using two pieces of live edge slab and epoxy resin, this guide takes you through the intricate process of making your river table.
You’ll select your slab, cut and flatten it, make a mold, mix and pour epoxy, and ultimately mount your finished table top onto a base.
Using epoxy resin gives a dramatic ‘river’ effect, adding character and charm to your creation. With careful preparation and patience, you’ll have a bespoke piece that stands out in any setting. Your river table is not just a piece of furniture but a conversation piece that showcases your creativity and craftsmanship. lancasterliveedge
3. Handmade Epoxy Poured Resin River Table
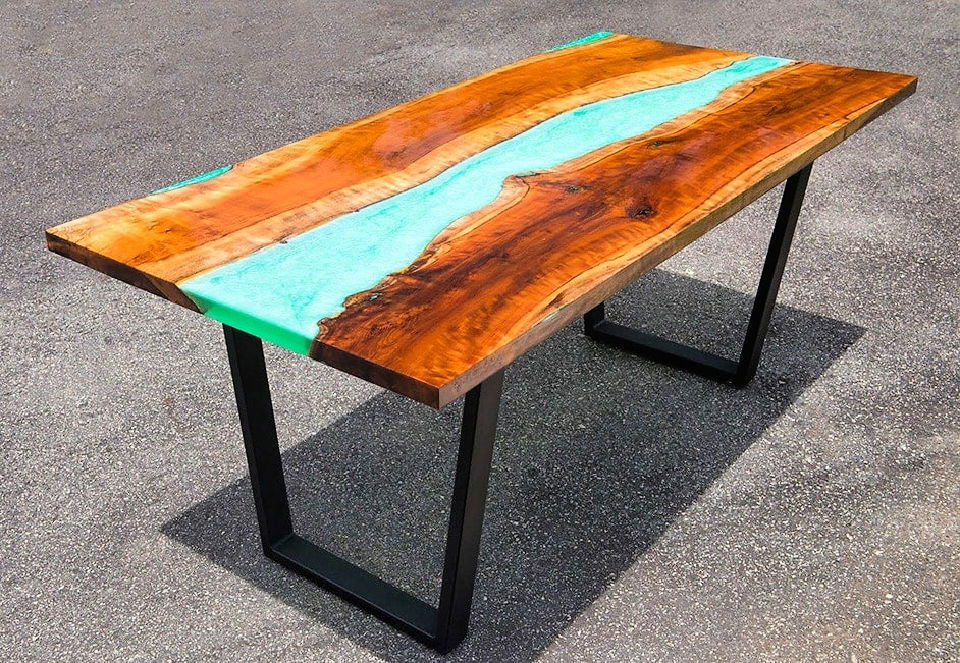
Dive into the art of crafting your own DIY epoxy resin table, a truly stunning masterpiece to grace your living space. This detailed guide will empower you to make an exclusive river table from wood, meticulously demonstrating each step with valuable professional tips.
A variety of tools and materials are required, including casting and laminating resin, liquid color pigments, large mixing cups, silicone caulking, a caulking gun, silicone spray, duck tape, an MDF board, screws, F-Clamps, a soft mallet, wood chisel.
With the right techniques, crafting a well-done table is within reach. Quality is paramount in this process; the chosen resin, a sensitive material during curing, should be of premium quality for a flawless finish. Discover the joy of constructing your epoxy river table today! acrylgiessen
4. DIY Dark Epoxy Resin River Table – Step-by-Step Instructions
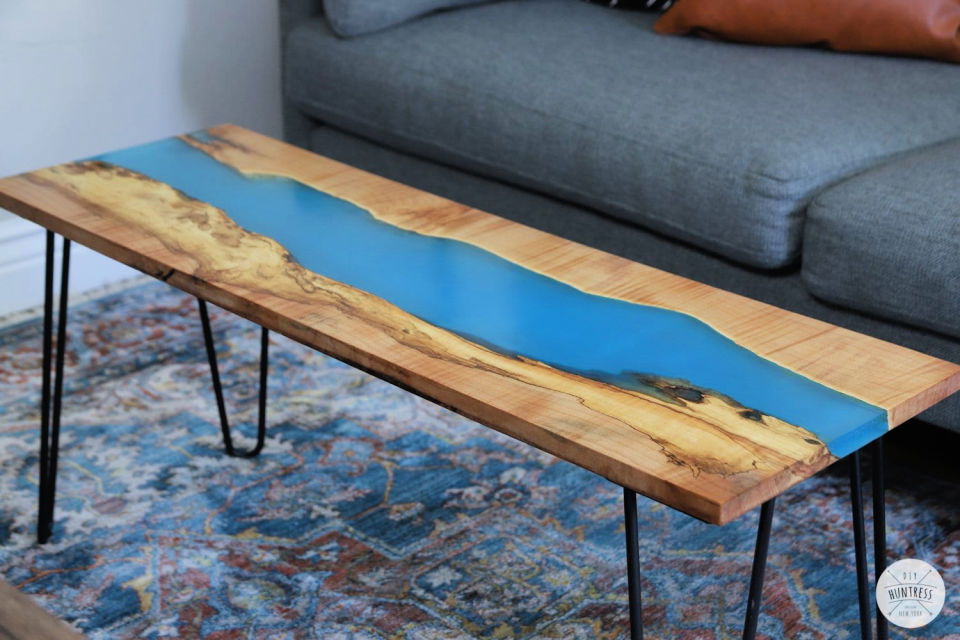
Light up your living room with this mesmerizing, glow-in-the-dark DIY resin table. Perfect for modern home decor, this table isn’t your ordinary centerpiece. Utilizing a live-edge slab, deep-pour epoxy, and a luminous pigment powder, you can craft a table that illuminates the room even after the sun has set.
The trick lies in mixing your resin with a glow-in-the-dark pigment powder, making a luminous ‘river’ that courses through the table, providing a stunning visual effect once the lights are dimmed. A bit of silicone secures the slab within the reusable resin mold, ensuring a perfect pour.
Once the resin has cured, finishing touches like sanding, filling any remaining voids, and applying a wood finish brings the table to its glowing glory. So why wait? Step into the dark with this glow-in-the-dark resin table project and bring a new light to your home! diyhuntress
5. How to Make an Epoxy River Table
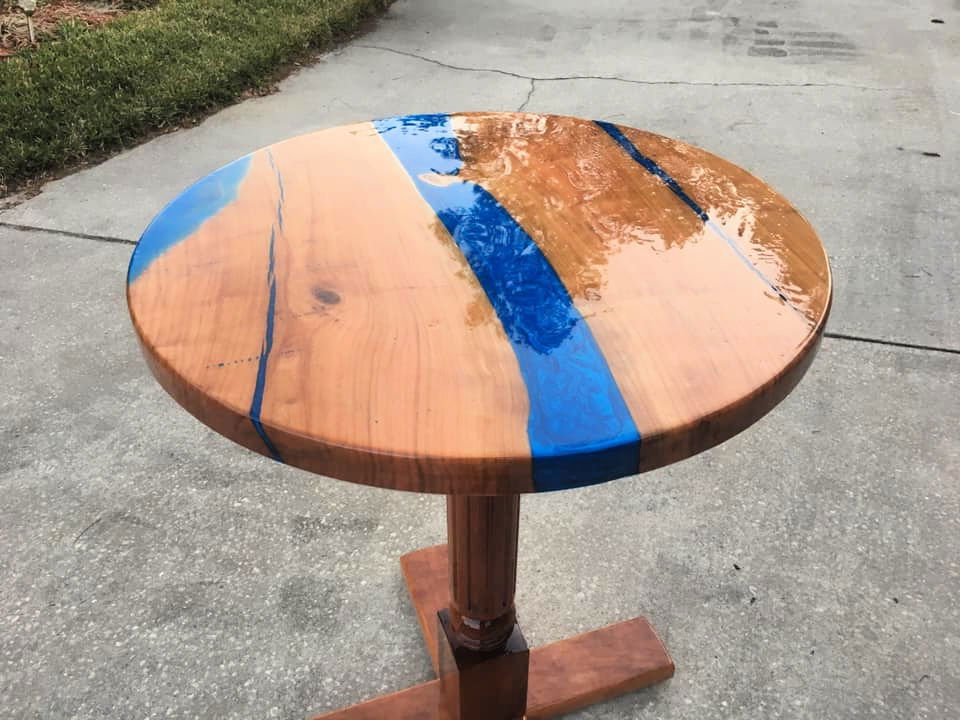
Unleash your creative side with this stunning DIY epoxy river table. Using a 70-inch-long, 2-inch-thick cherry live edge slab from Eco Relics, employ a rockler circle router jig, miter saw, and table saw to shape the slab, crafting a piece that speaks to the natural beauty of the wood.
Your craftsmanship will shine through as you fill in the cracks, level the pieces, and carefully pours the epoxy in layers, ultimately producing a mesmerizing, blue-hued river design. This guide emphasizes the importance of understanding your materials, particularly the chemical reactions involved in working with epoxy.
The finished table features a turned-leg base coated with epoxy for a seamless blend with the tabletop. Woodworking not only creates functional pieces but also uncovers and highlights the inherent aesthetics of the material itself. If you’re captivated by the interplay of wood and epoxy, this cherry wood epoxy river table will surely inspire your next project. ecorelics
6. DIY Epoxy Resin River Wooden Table
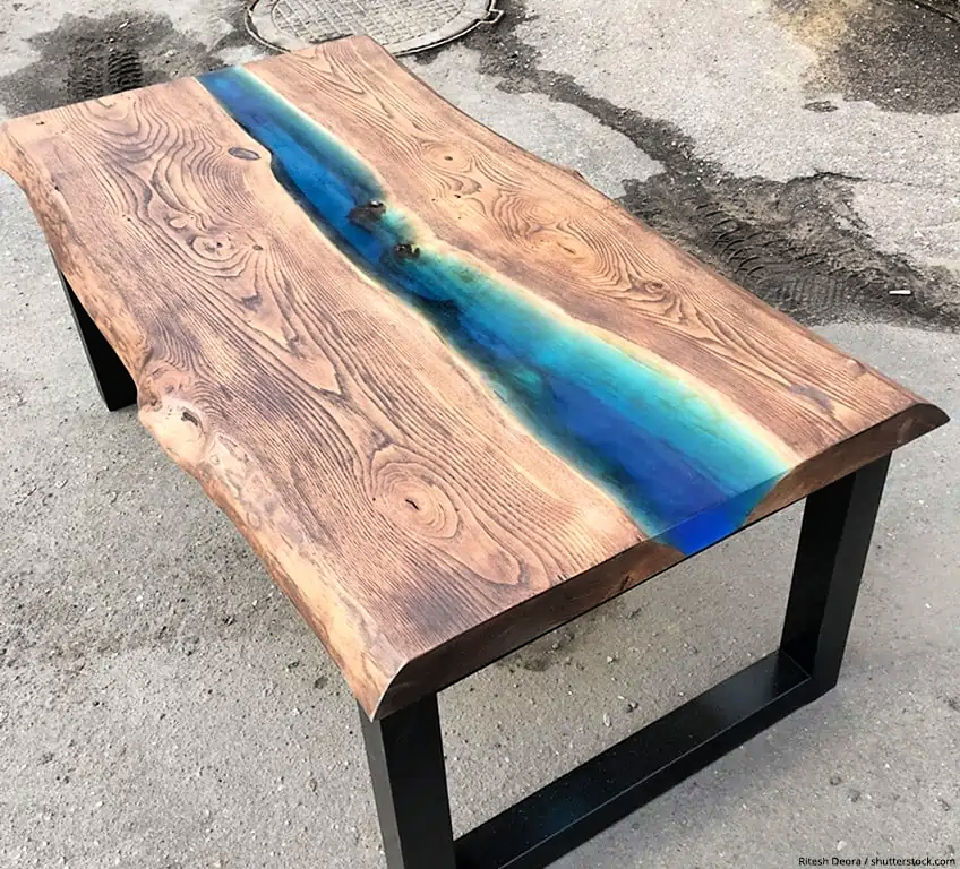
Embark on crafting your DIY epoxy resin river table with this comprehensive guide. Shattering the myth that you require professional assistance, this tutorial equips you with the necessary tricks and pointers, transforming you into a seasoned artisan in no time.
Harnessing the global trend of these artistic tables, learn how to build a piece that resonates with your unique aesthetic sense and complements your living space. The tutorial emphasizes the importance of selecting high-quality, natural wood for longevity and appearance.
This comprehensive guide includes a material selection to finishing touches, ensuring your epoxy resin river table is a shining beacon of your creativity and finesse. Enjoy crafting your own customized conversation piece! resin expert
7. DIY Live Edge Epoxy Resin Reverse River Table
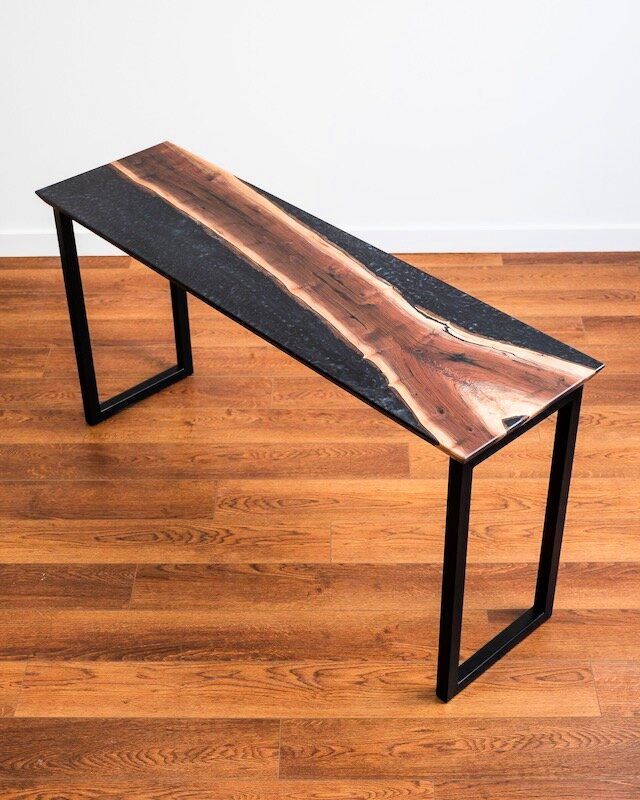
Explore crafting a unique, DIY live-edge epoxy resin ” reverse river ” table, exquisitely cast in black metallic epoxy resin with a walnut slab and a Maple base. This project employs many materials, including Totalboat thickset casting epoxy resin, rockler zip driver screws, black epoxy pigment, walnut slab, and enduro black poly.
Starting with flattening the slab on a jointer, the process evolves through preparing the slab for the epoxy pour, making a casting form to hold epoxy, and casting the walnut slab in epoxy. The steps continue with constructing the wooden table base, comprehensive sanding, finish preparation, and assembly. The final steps include:
- Spraying a black polyurethane finish.
- Cleaning the epoxy resin.
- Beveling the edge of epoxy casting.
- Concluding with assembling the epoxy cast table top and the wooden table base.
This masterpiece adds aesthetic value to any space and presents an opportunity for making handcrafted furniture with a unique twist! craftedworkshop
8. DIY Live Edge Epoxy Resin River Coffee Table
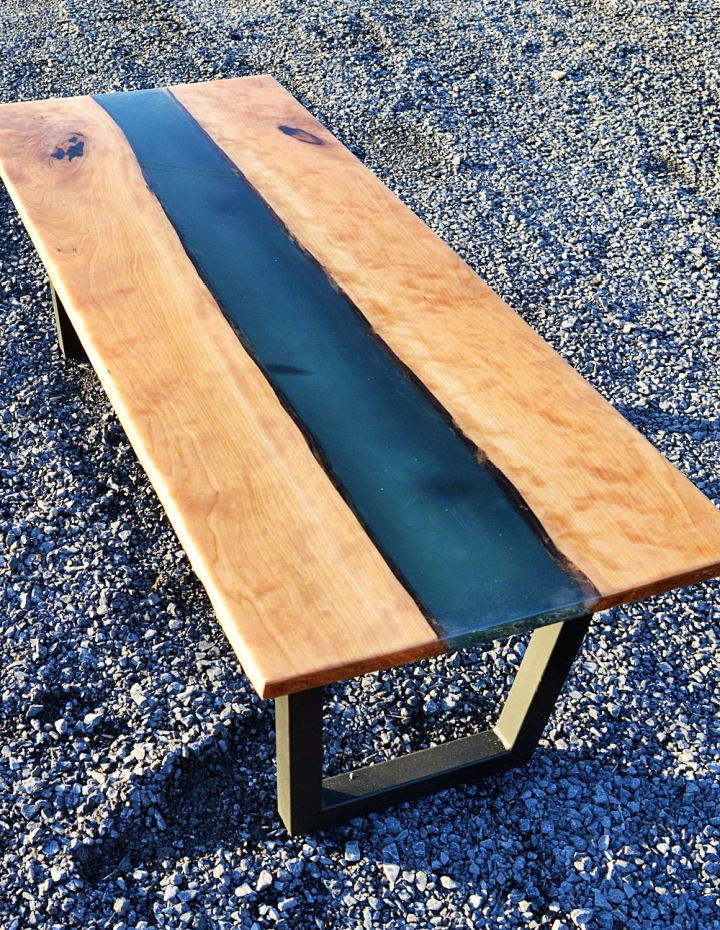
Conquer the art of building a live edge epoxy river coffee table with our informative and engaging guide. Despite initial assumptions, crafting this exquisite piece of furniture may present challenges. Don’t worry; this tutorial has got you covered!
By sharing lessons learned from our trials and errors, we aim to help you avoid potential pitfalls. From selecting the right wood to choosing the appropriate resin, your journey toward making a stunning coffee table is meticulously outlined.
Don’t rush; always ensure a proper cure time for the resin for an impeccable, glossy finish. Installing the table legs, the final step is as crucial as the rest. With attention to detail and a bit of patience, you’re set to craft a masterpiece that effortlessly blends natural charm and elegant design. vanderveenhouse
9. Make Your Own Epoxy River Glow Table
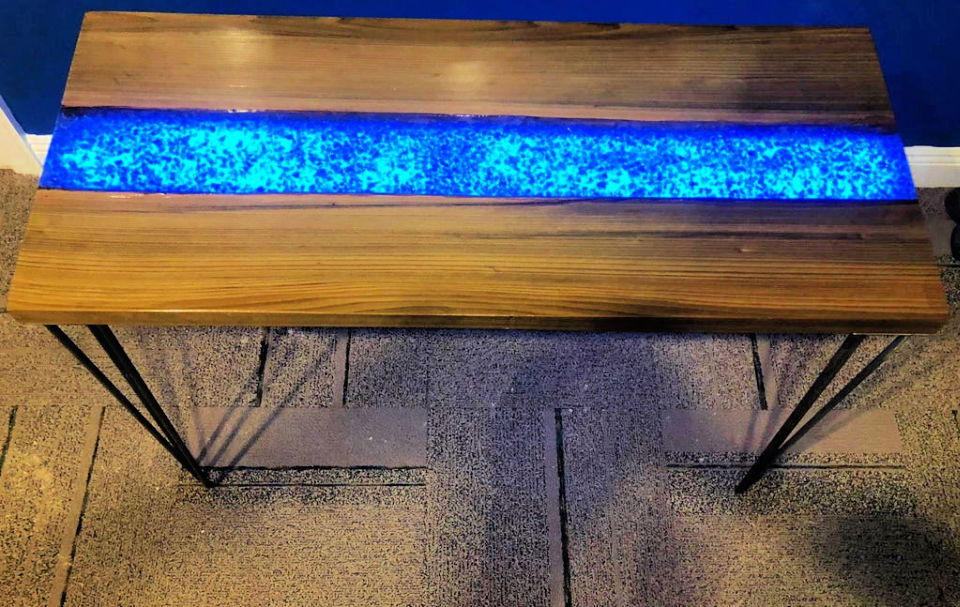
Swoop into the world of DIY craftsmanship with this unique epoxy resin river table that glows in the dark without any need for lights. A fascinating blend of woodworking and chemical artistry, this table uses live edge sinker cypress wood embedded with blue fire glass and glow-in-the-dark powder. Start by preparing the wood, removing bark, and ensuring a flat surface.
Next, make an epoxy mold and pour in the epoxy resin mixed with glow powder, taking care to remove bubbles. Layer in fire glass or acrylic rocks then finishes with a final clear epoxy pour. Once the table is out of the mold and the ends are trimmed, you can enhance the glowing effect with a UV LED light strip if desired.
After sanding and finishing, attach hairpin legs to complete your glowing masterpiece. This guide will take you through each step, turning a seemingly complex process into an achievable task. This table doesn’t only serve a practical function but also adds an element of captivating, ethereal beauty to your space. instructables
10. Easy DIY Epoxy River Pub Table
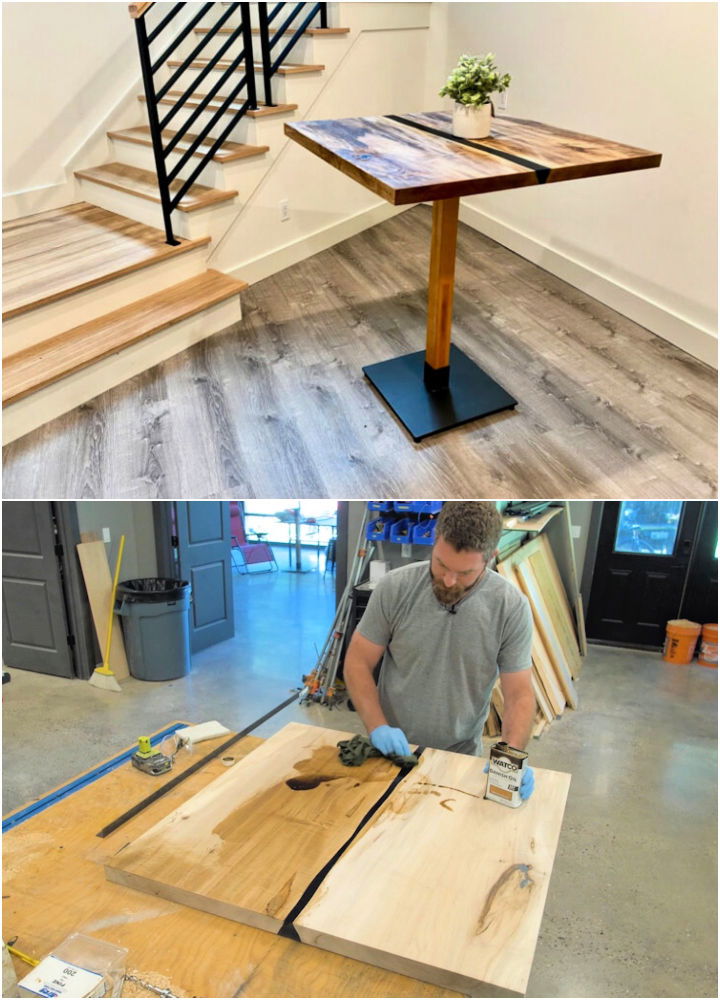
Release your creative potential with a unique DIY project: a square pub table featuring a stunning blue metallic epoxy river. This hands-on guide uses Rustoleum’s new Watco Super Glaze Pre-Tinted Epoxy to breathe life into an ordinary slab, making it a striking centerpiece for any space.
The project involves crafting the epoxy river and entails detailed table assembly, sanding, and finishing steps. This allows for a comprehensive learning experience in woodworking, blending practical skills with artistry. With meticulous preparation and care, this project will lead to a gorgeous final product, setting your crafting journey apart. rogueengineer
11. Faux Live Edge Epoxy River Table for Under $100
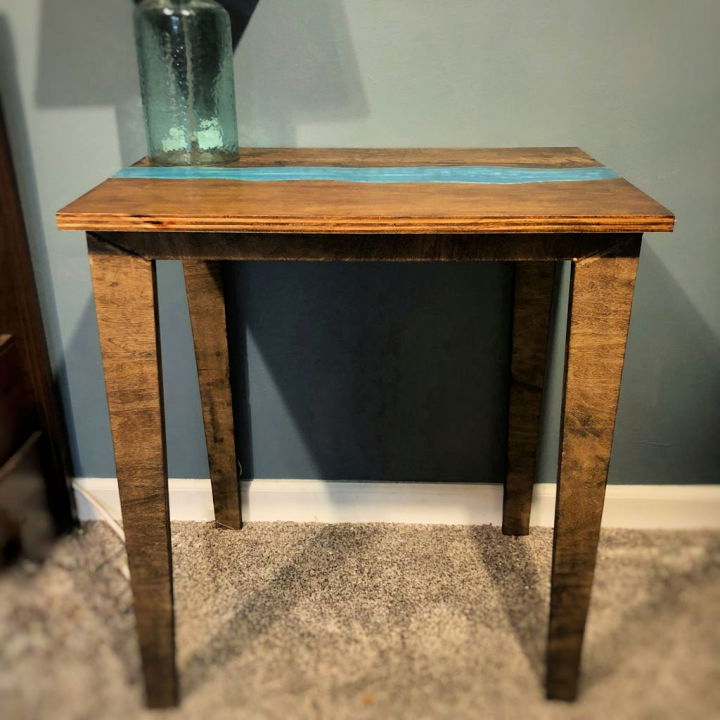
Explore the artistry of making your own DIY faux live edge epoxy river table for under $100! Crafted using maple plywood and rustoleum epoxy super glaze, this project delivers an authentic look of a “live edge” table without the high cost.
Perfect as a bedside table, its distinctive river table design adds a touch of nature to your space. Equipped with basic tools like a table saw, jigsaw, drill, epoxy resin, Tyvek tape, and color pigment, you can bring this project to life. The process involves:
- Cutting and staining the wood.
- Making a faux live edge effect.
- Making a mold.
- Pouring the epoxy.
There’s also room for error correction, ensuring a perfect finish. Get ready to immerse yourself in this project and enjoy the satisfaction of building your unique furniture piece! instructables
12. Free Epoxy Resin River Coffee Table Plans
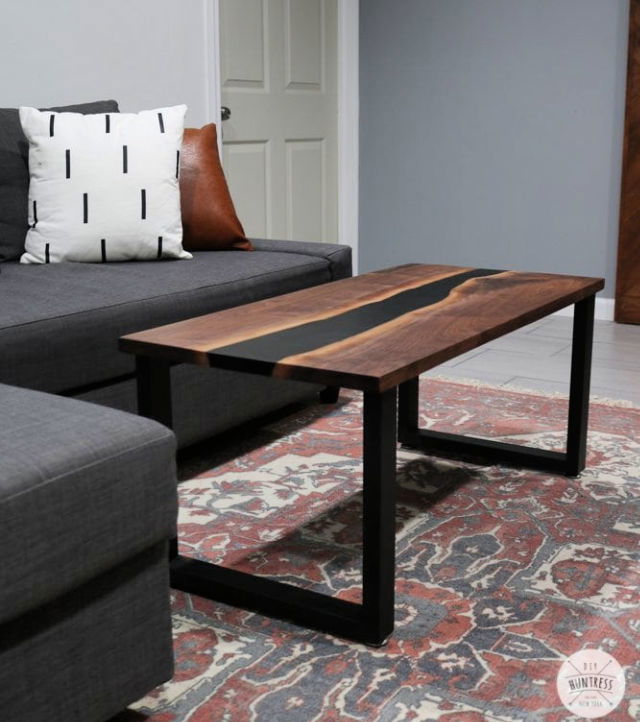
Express your creativity by handcrafting a unique DIY river resin coffee table. With simple handheld power tools and accessible accessories from your local home improvement store, this project challenges you to bring a beautiful piece of nature into your living room. The process involves:
- Cutting slabs.
- Constructing a form for the pour.
- Working with tabletop resin for a smooth, bubble-free surface.
To finish off, pigment is added to the resin to give a stunning ‘river’ effect, adding charm to your coffee table. Finally, sanding the table and adding legs gives it a complete, polished look.
This project is not just about making a table; it’s about making a piece of art that brings beauty, function, and a talking point into your home. Use your imagination and make this coffee table your next endeavor! bernzomatic
13. How to Build River Table Using Epoxy
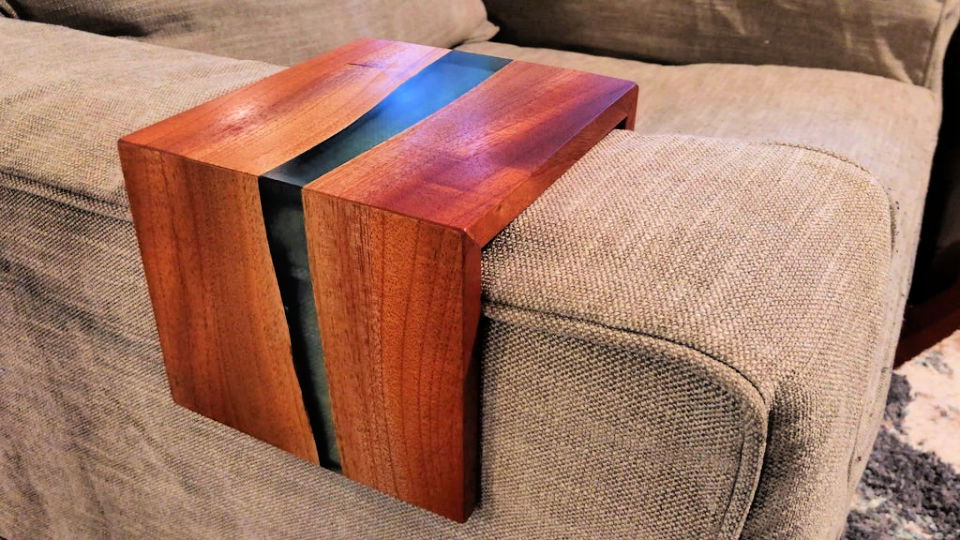
Embrace the challenge of building your own DIY epoxy river table, even when things don’t go as planned! This innovative yet unconventional approach to building a river table focuses on using Australian Red Cedar and epoxy resin to deliver stunning results.
Each step is a testament to resilience and creativity, from milling the wood and finalizing the river banks to fixing issues with the epoxy river. The tutorial also delves into making a waterfall effect with miters and the importance of meticulous surface prep and finish.
Unforeseen problems can lead to an even more spectacular outcome, and this guide helps you navigate through the process, transforming initial failures into ultimate success. Boost your DIY spirit today with this non-traditional river table project! instructables
14. Luxurious DIY Epoxy River Table
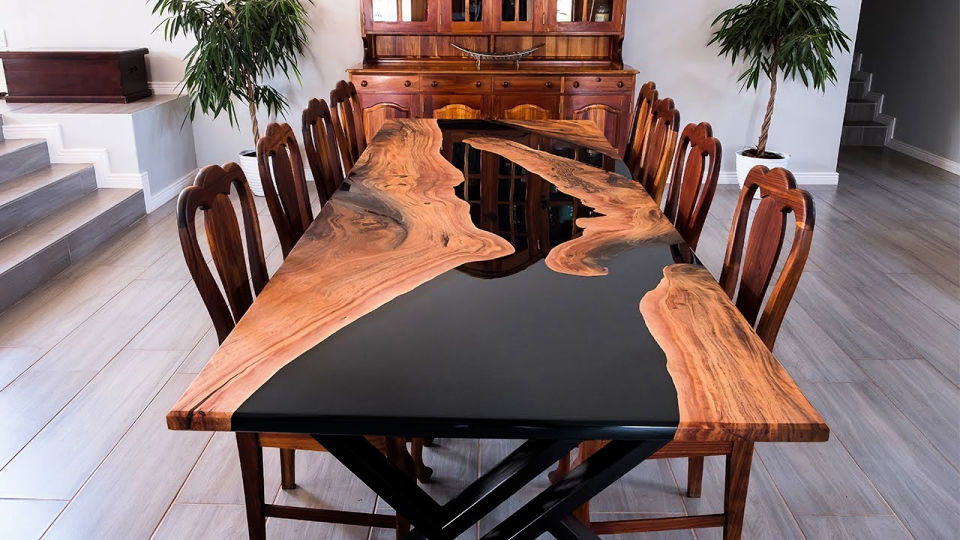
Get inspired to transform your living space with this innovative DIY luxurious epoxy river table! Learn how to apply fresh, creative designs to your home or office with easy-to-follow instructions. Be it a simple decor item or a major home overhaul, you’ll find it all here. Using common household tools and materials, you’ll save bucks and add a personal flair to your environment. The beauty lies in the uniqueness of each project; there’s no limit to what you can create. Join the journey of turning your house into a home with DIY tips and renovation techniques!
15. Epoxy Resin River Table Design
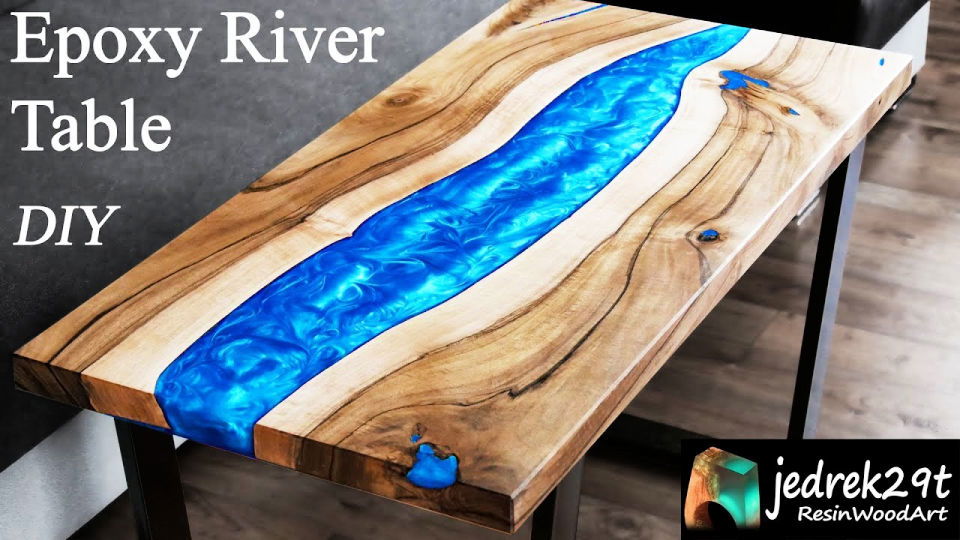
Step into the world of woodworking and resin artistry with this inspiring step-by-step DIY video tutorial that will guide you on making a breathtaking epoxy river table. Master incorporating natural wood elements with luminous resin, making a unique table resembling a flowing river. You can bring this project to life in your workspace with the proper tools, equipment, and high-quality resin.
This guide ensures you understand the process, from the preparation to the final steps of securing the legs. Besides its aesthetic appeal, the table’s practicality is a major benefit, serving as a conversation-starter piece of furniture in your home or office.
Fusing natural elements with man-made materials creates a unique balance that captures the eye and sparks creativity. Embrace the opportunity to make an epoxy river table, a testament to the blend of nature and creativity.
16. Build an Epoxy Resin River Table
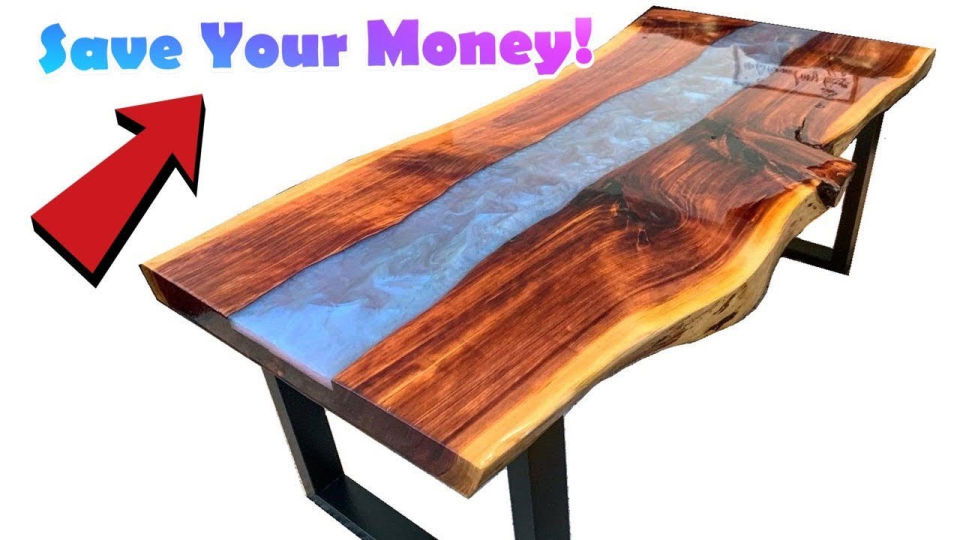
Encounter the transformative power of building a DIY epoxy resin river table with this cost-effective method that can save significant money! Learn how to craft this stunning piece of furniture without a melamine mold, saving $30, no caulk for an extra $10 off, and just one epoxy kit and slab instead of multiple, to save an additional $400.
This budget-friendly process lets you have the beauty of a river table at a fraction of the cost for those keen to own such a table or to source deep-pour epoxy for personal projects. Enjoy the process, save costs, and build a stunning epoxy resin river table today!
17. Creative Epoxy Resin River Table With Mold
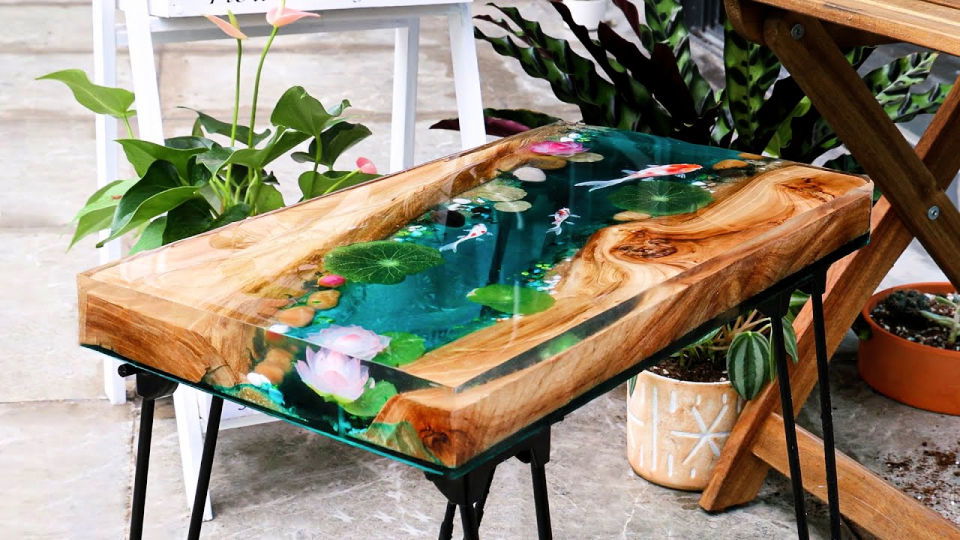
Infuse an artistic touch to your indoor décor with a DIY epoxy resin river table featuring charming koi fish details. This project blends wood’s natural appeal with epoxy resin’s versatile beauty. In addition to a uniquely designed resin table mold, you’ll need wood, epoxy resin, and a sense of creativity.
Embarking on this project means you’ll experience the joy of making a stunningly unique centerpiece for your home. The eye-catching koi fish detail also contributes to the overall aesthetic and symbolizes prosperity and good fortune in many cultures. Gear up to make your mesmerizing river table and transform your living space with a captivating fusion of artistry and functionality!
18. How to Make an Epoxy River Table
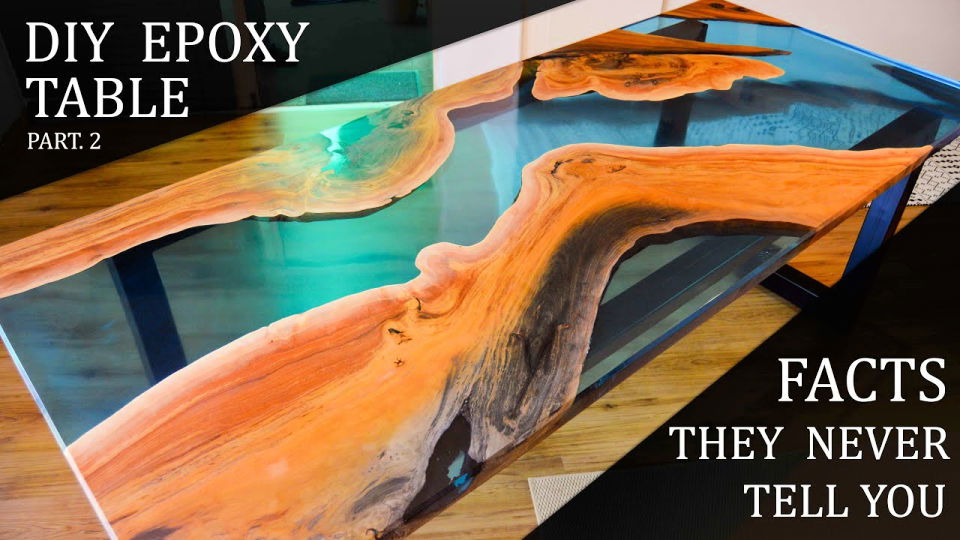
Venture into DIY craftsmanship with this step-by-step guide to building an epoxy table. Learn the art of fusing functionality and aesthetics as you follow the simple instructions. This journey involves assembling necessary equipment such as epoxy, a table frame, and hand tools, along with adopting safety measures for a secure building experience.
This guide caters to your creative flair and serves practicality by fashioning a unique piece of furniture. This guide’s prime ingredient is epoxy, allowing you to generate a stunning masterpiece from a common material. Embark on your DIY journey today, and delight in the satisfaction of crafting an exclusive epoxy table from scratch. Let’s bring your vision to life!
19. Building a Huge Epoxy River Dining Table
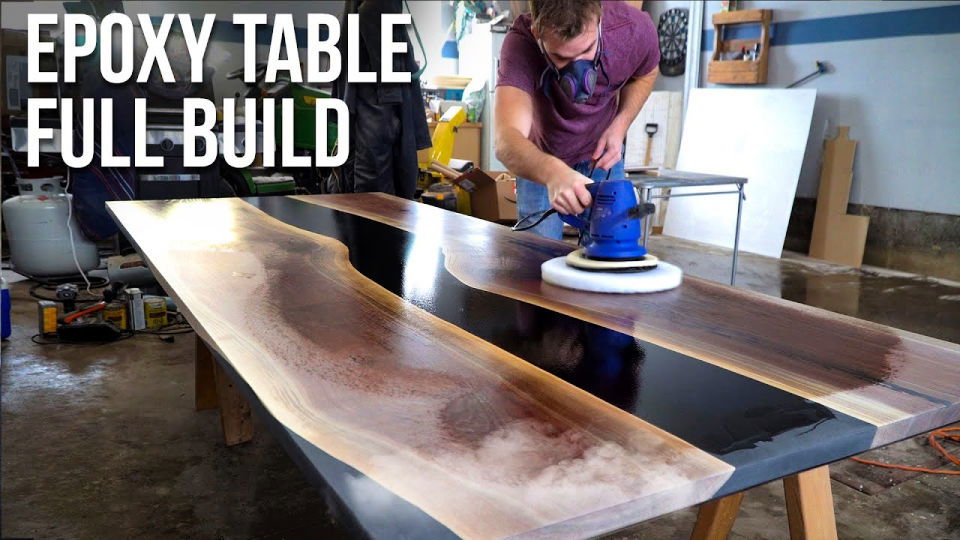
Looking to add a tinge of luxury to your dining room? With careful guidance, learn how to handcraft a stunning black walnut and black DIY epoxy dining table. This project is ideal for those seeking a sense of accomplishment while making a one-of-a-kind piece of furniture.
Starting with black walnut slabs and using slow-q casting epoxy, you’ll learn the entire process, including every detailed step of this river table creation. This project will enhance your woodworking skills, and the finished result, a beautiful epoxy river table, will undoubtedly impress your guests.
Materials needed include a 5″ Makita Sander, casting epoxy, buffing pads, Osmo PolyX 3043, and steel legs from Fractal Designs. Build your elegant dining table today and take pride in your craftsmanship.
20. How to Build an Epoxy River Table for Beginners
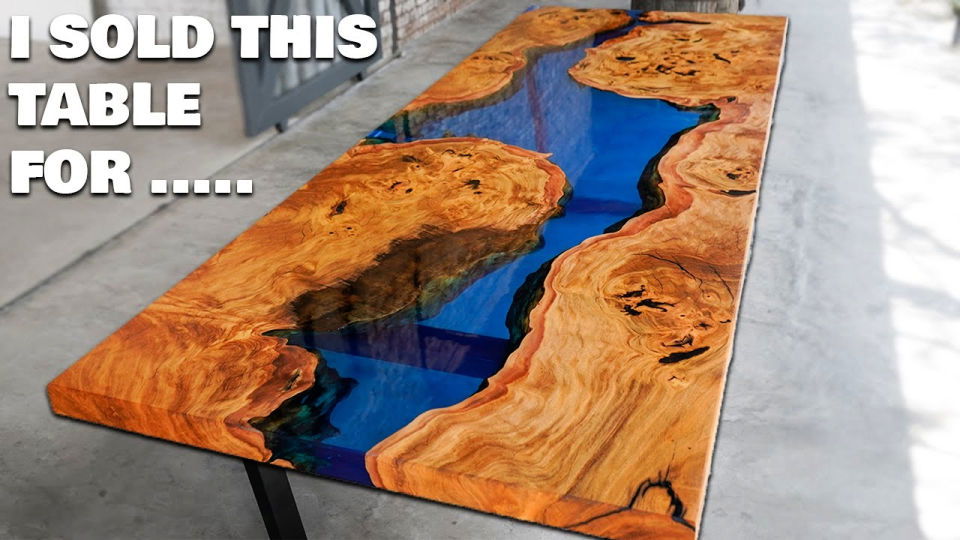
Uncover the secret of building the luxurious epoxy table from the comfort of your home with this easy-to-follow guide, perfect for all DIY enthusiasts. This guide will instruct you throughout the process, from gathering essential tools and materials to polishing and sealing your finished product.
Key supplies include hardwood planks, epoxy resin, pigments for coloring, and standard woodworking equipment. These are combined meticulously, following clear step-by-step instructions to ensure an outstanding result.
Building an epoxy table provides a valuable, aesthetically pleasing addition to your space and offers immense personal satisfaction from making something unique. With the aid of this guide, making your own luxurious epoxy table has never been simpler.
21. How to Make Your Own Island Epoxy River Table
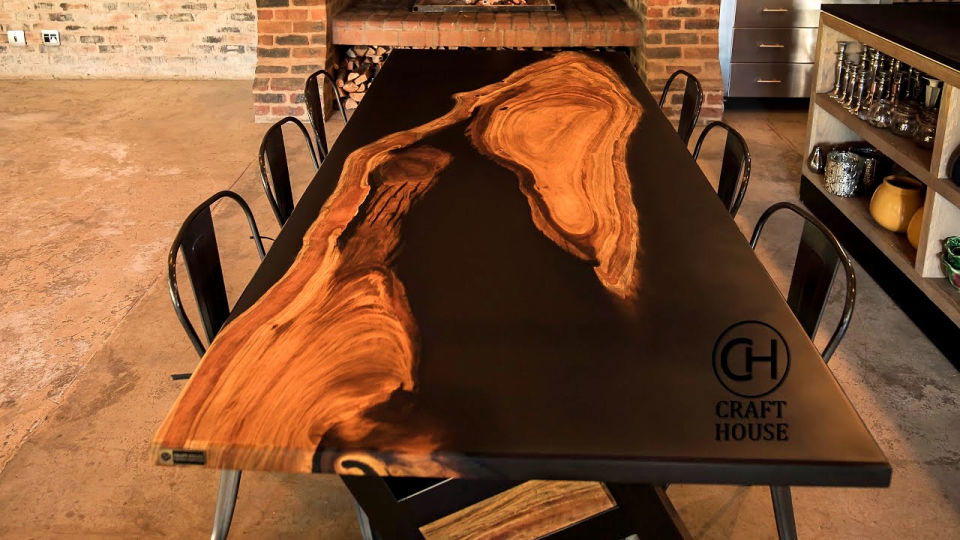
Take on a captivating DIY adventure with the construction of a magnificent Island epoxy table. This project embodies artistic creativity and offers functional utility for your living or workspace. Materials needed include a substantial slab of wood, epoxy resin, and essential woodworking tools.
Guided by clear-cut instructions, you can embark on this journey, transforming raw supplies into a spectacular epoxy table. The project’s uniqueness lies in the main ingredient – epoxy resin, which results in an intriguing and unique design when combined with the wood slab.
Apart from its aesthetic appeal, this project serves multiple purposes, making it an ideal addition to any space. Get ready to craft your masterpiece today with this engaging and informative guide!
22. Cool DIY Epoxy River Table
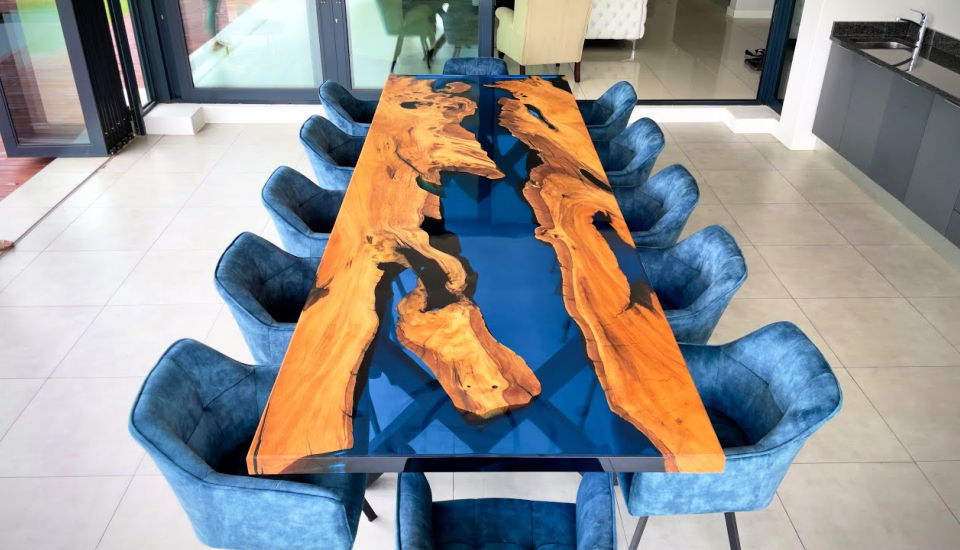
A feast for the eyes, this cool DIY epoxy river table will mesmerize you! Build your stunning table and bring a touch of nature to your living space. This project, worth around $40,000, offers a fun and engaging task for your creative pursuits. Harnessing tools such as the geared eccentric sander, router, and circular saw, you can shape and perfect your table to your liking.
The polishing agents ensure a high-gloss finish for a sophisticated look. The masterpiece you’ll make with the amalgamation of epoxy resin and wooden slab will become a conversation piece in your home.
This project allows you to add a custom, artistic piece to your space and serves as a testament to your crafting abilities. Delve into this mesmerizing process and construct a beautiful river table today!
23. Homemade Colored Epoxy Resin River Table
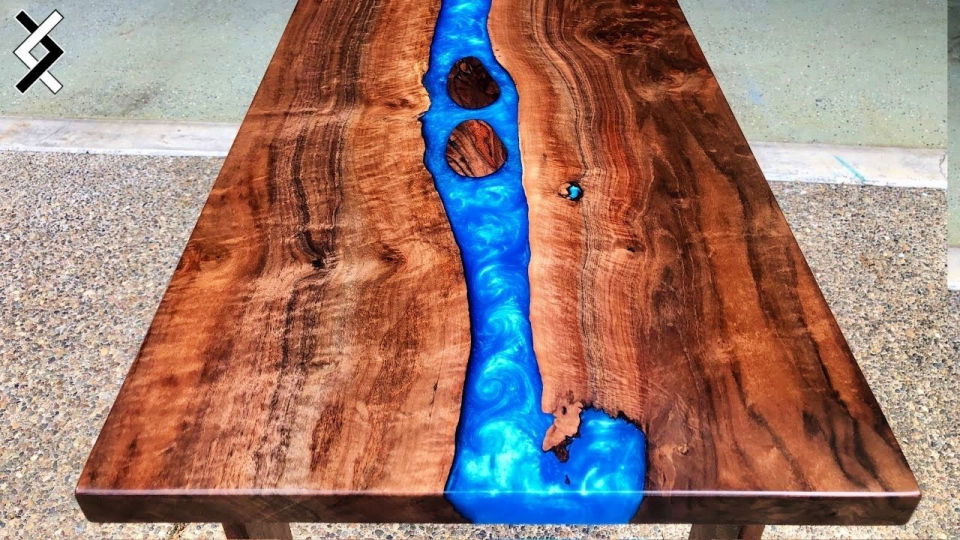
The curves of the river meander through this handmade table, shimmering and glimmering with every hue imaginable. Craft a stunning centerpiece for your home with this guide on building a DIY colored epoxy resin table.
Using rich walnut and vibrant blue epoxy resin, this project can add a unique touch to your decor. The process involves crafting a tabletop with an aesthetically appealing blend of walnut and blue epoxy and coupling it with sturdy walnut legs featuring dovetail joints.
This project cultivates your woodworking skills and helps express your artistic side. The final product is a functional yet artistic piece, perfect for elevating your living space. Discover the joy of crafting your epoxy resin table today!
24. Making Your Own Floating Epoxy Waterfall River Table

Plunge yourself in the world of woodworking and craft a stunning centerpiece for your home with a DIY floating epoxy waterfall river table. This unique project lets you experience the thrill of working with live edge cherry slabs and Ecopoxy resin. With this venture, you’ll get your first taste of making a waterfall table, welding, and pouring epoxy resin – all exciting crafts that can expand your DIY skill set.
Enjoy the satisfaction of constructing a piece that marries natural elements with a contemporary aesthetic. With the right tools, equipment, and a willingness to learn, you’re well on your way to making this appealing and functional piece of furniture.
The process might be challenging, but the final result is worth the effort, offering a unique piece that will surely catch anyone’s eye. So, roll up your sleeves, put on your safety goggles, and prepare to embark on an unforgettable woodworking adventure with this live-edge epoxy river table.
25. Simple DIY Epoxy River Table
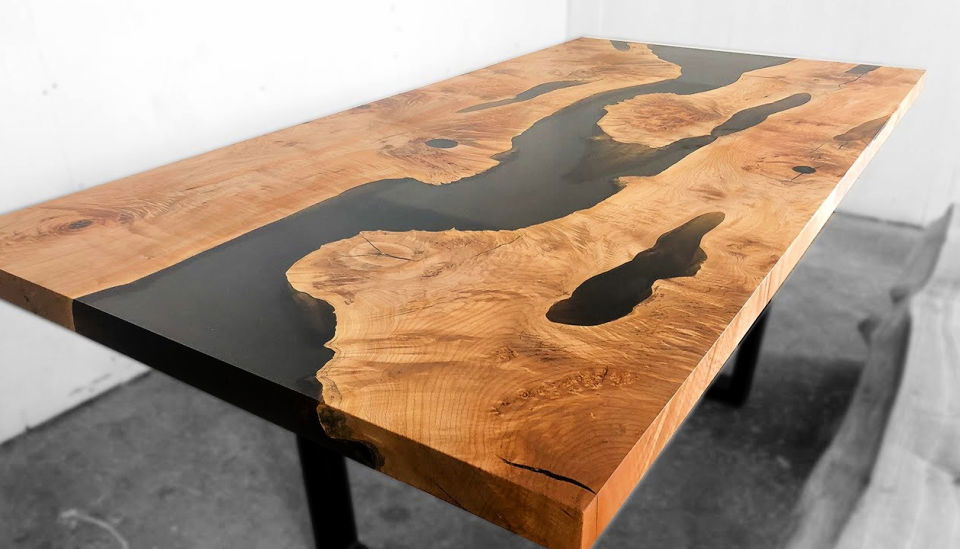
Traverse the art of crafting with this comprehensive guide to building a beautiful DIY live edge wood and epoxy dining table. Embrace your inner artisan and delve into the mesmerizing world of epoxy tables.
This guide provides clear instructions on melding the rustic charm of live edge wood with the sleek modernity of epoxy to make a unique dining centerpiece. Using materials such as epoxy resin, wood, and essential crafting tools, this guide ensures an engaging and productive crafting experience.
Revel in the distinctiveness and creativity that comes with a personalized touch, perfecting your dining space with a blend of nature and modern artistry. Harness your creativity and transform simple supplies into stunning, handcrafted dining tables.
Conclusion:
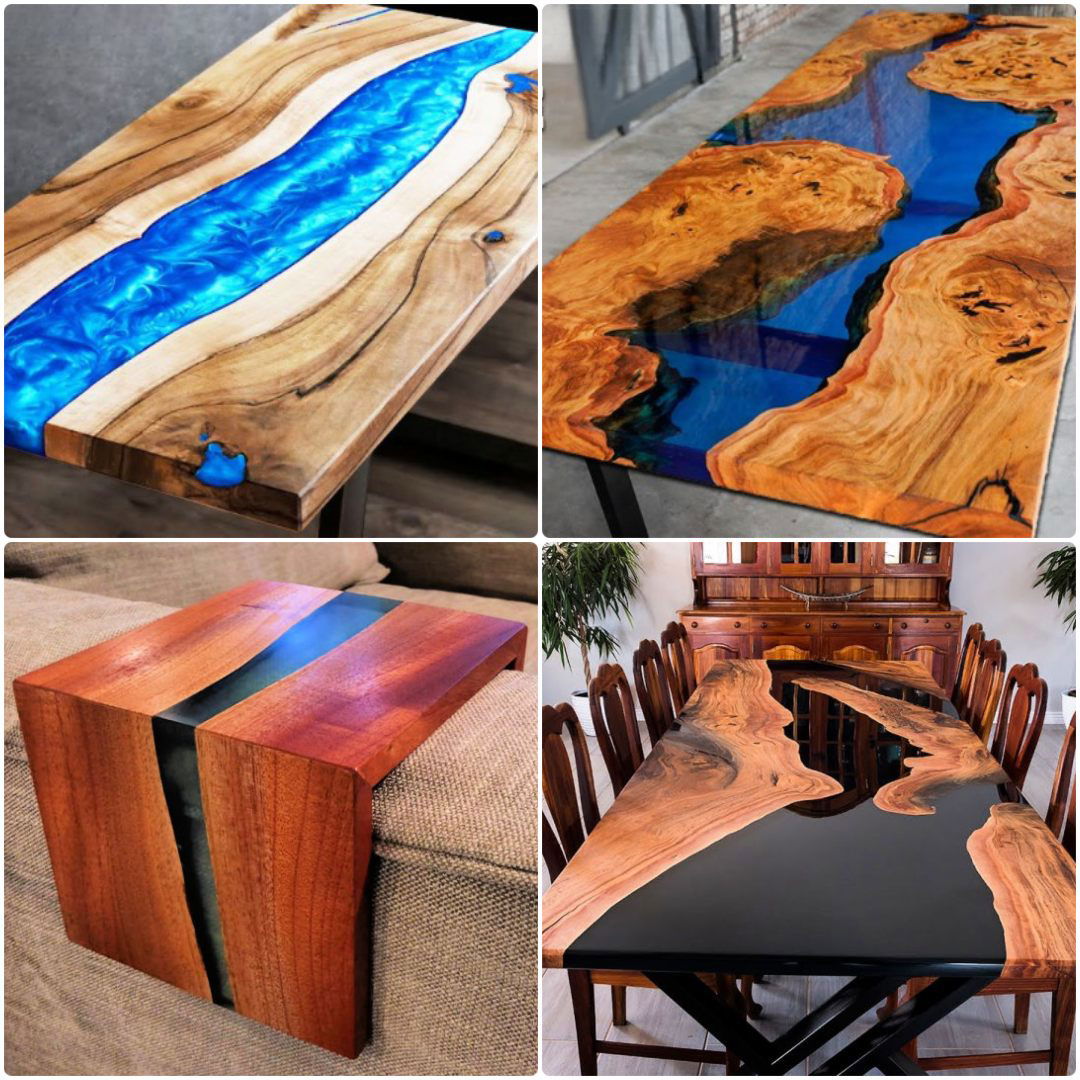
In conclusion, 25 DIY epoxy resin table ideas provide a fantastic opportunity to unleash your creativity and craft a unique piece of furniture. By following the step-by-step instructions, understanding the material science of epoxy resin, and exploring design inspiration, you can create a stunning table that complements your space. Remember to prioritize safety precautions, troubleshoot common issues, and maintain your table for long-lasting beauty.


